
Installation Guide

Installation for all Proles Except T
Best of Class Freatures
Maintenance and Cleaning Guide
Trim Master
products are designed for years of maintenance free service
and do not require any special maintenance. Clean them regularly using
common household cleaning agents. Do not use cleaning agents with
hydrochloric and hydrouoric acid. Abrasive cleaners should not be used
on anodized aluminum as they may scratch the surface. Remove any grout,
mortar or thin set from the surface immediately after installation.
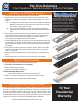
• More metal where it counts the face of the product
• Up to 40% more aluminum vs competitor
• Helps reduce dings and dents
• Improves vertical wall installations
“Patented Straight Edge Grout”
• Perfect spacing every time without using spacers!
• Easier to cut without vibrations for safety and a cleaner edge
• Less damage during transportation saves Pro $$
1. Choose shape and prole according to tile thickness.
2. Apply thin set mortar according to manufacturer’s directions to the
area where prole is to be placed, using the appropriate size U notch
trowel.
2a. For edging and outside wall corners using L-Shape or R-Round
Bullnose, nish tiling one wall rst, then trowel thin set mortar
over corner areas of second wall.
2b. For the U-Shape Reducer, ll the hollow space beneath the
sloped section of prole with thin set mortar before setting the
trim.
3. Press the perforated anchoring leg of the prole into the mortar until
mortar lls the circle cutouts. Then align trim with tile edge making
sure the tile is ush against lower edge of trim face to ensure a
uniform grout joint space between trim and tile.
4. Trowel additional thin set mortar evenly over the perforated anchoring
leg completely covering the circle cutouts to ensure full coverage and
support of the tile edges. The anchor leg should be partially buried in
the sealant.
5. Ensure the tile is ush with top of prole or slightly lower. The prole
should not be higher than the tiled surface, but rather up to approx.
1/32” (1 mm) lower.
6. After the tiles and prole have set, ll the grout joint completely with
grout.
7. Gently wipe o any excess grout or thin set mortar immediately.
Tile Trim Solutions
Floor Transitions • Walls & Counters • Protects Tile Edges
www.ColumbiaAluminumProductsLLC.com
10 Year
Residential
Warranty
C
O
L
U
M
B
I
A
A
L
U
M
I
N
U
M
P
R
O
D
U
C
T
S
FLOOR TRIMS
Exposed edges of ceramic and stone
tiles can chip or crack if left unprotected.
Professional prole trims are designed for
oors, walls and countertops. They protect
thresholds, oor transitions and other
edges while providing an attractive and
decorative accent to any project. The trims
feature patent pending protected designs
including new “Straight Edge Grout Line” for
a professional nished look.