RAVAS-310 OWNERS MANUAL 1
OPERATORS MANUAL RAVAS-310 INDEX PAGE 1. Safety Instructions 3 2. System Setup 4 3. Operation Manual 6 3.1 Using the Weighing Hand Pallet Truck 3.2 Touch Panel Indicator 3.3 Indicator Functions 3.4 Printer (Option) 4. Trouble Shooting 18 5. Spare Parts 21 6. Calibration 23 7. Parameter Settings 25 Contact Us: RAVAS USA, LLC 975Deerfield Parkway Buffalo Grove, IL 60089 (224) 676-2238 phone (224) 676-2136 fax www.ravasusa.com info.usa@ravas.
1 SAFETY INSTRUCTIONS 1. NEVER lift a heavy load with just the points of the forks. This could damage the electronic weighing elements permanently. 2. NEVER weigh without a pallet. This could affect the accuracy of the weighing result. 3. The unit may be loaded with weights up to 5000 lb. However we advise you not to move any weights above 1650 lb. (750 kg) with the unit. RAVAS is not responsible for injury that may result when moving heavy loads. 4.
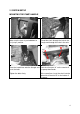
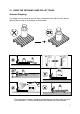
2 SYSTEM SETUP MOUNTING THE PUMP HANDLE Make sure the lever is pushed down to the “pump” position. Thread the chain through the hole in the triangle and through the hole in the axle. A B Place the handle bar onto the triangle and Push the silver part “A” on the outside of insert the bolts. the pump downwards. Tighten the bolts firmly. At the same time; insert the chain into the open side of the slot “B” on the inside of the pump.
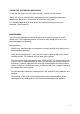
THE BATTERY The power supply to the system takes place through an exchangeable battery pack. A completely charged battery should operate for a total weighing time of about 35 hours (on a system without a printer). When the voltage level of the battery is running low, the display will show “LO-BA”. When the battery is completely empty, the weighing system shuts off. It is necessary to charge the battery for at least 6 hours before the first use. Recharge battery when the LO-BA indicator comes on.
3 OPERATION MANUAL INDEX PAGE 3.1 Using the Weighing Hand Pallet Truck 7 Accurate Weighing Taking the System into Operation Maintenance 3.2 Touch Panel Indicator 9 The Display The Touch Panel Error Messages 3.3 Indicator Functions 12 Graduation Before Weighing: Check Zero Point Gross Weighing Net Weighing: Automatic Tare Net Weighing: Pre-set Tare Piece Count: Sampling Piece Count: Enter a Piece Weight Summing Change Units 3.
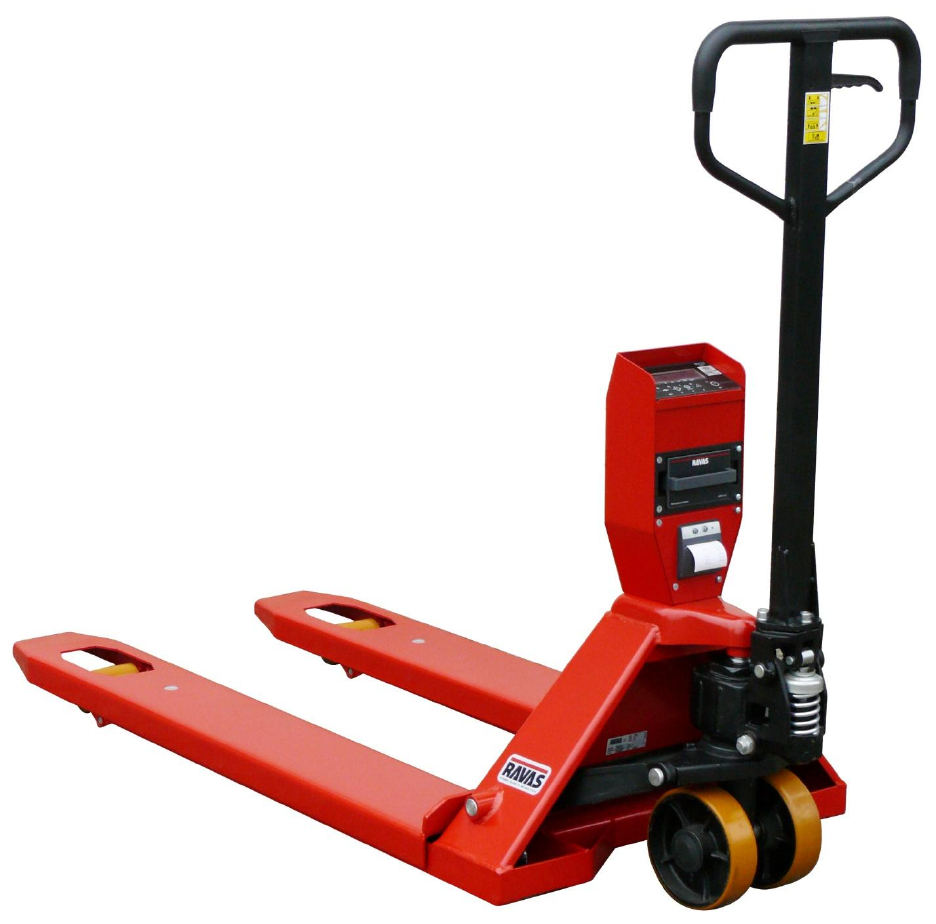
3.1 USING THE WEIGHING HAND PALLET TRUCK Accurate Weighing The weight must be centered over the forks of the pallet truck and lift freely: without touching the housing of the indicator or other pallets -2 Fast temperature changes should be avoided because condensation may form in the electronics. During acclimatization the indicator must be turned off.
TAKING THE SYSTEM INTO OPERATION To activate the scale turn it on using the on/off () button on the terminal. After 3 to 5 minutes the electronics and load cells have reached the operational temperature. Before this, inaccuracies of up to 0.3% may occur. It is recommended not to lift loads before the zero-point correction has been executed. (See Chapter 5) MAINTENANCE The maintenance guidelines for normal pallet trucks apply to the chassis of the mobile scale.
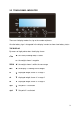
3.2 TOUCH PANEL INDICATOR Indicator Front There are 3 display-modes: lbs, kg or the number of pieces. Also the battery sign is integrated in the display in order to show a low battery status.
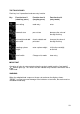
THE TOUCH PANEL Each key has 2 operational and one entry function Key Function level 1 (short key press) Function level 2 (long key press) Function level 3 (entry mode) zero setting code entry enter automatic tare pre-set tare decrease the value of the digit flashing print weight and add to the total check subtotal and print total increase the value of the digit flashing sampling a piece weight enter a piece weight shift to the next digit on the left on/off switch Change units mode clear e
ERROR MESSAGES Displayed error Meaning Err01 Load cell signal is unstable Err02 Overload on full scale Out of error mode Automatic Automatic after removing weight Automatic Press any key Press any key Automatic after correcting input Automatic after correcting input Automatic Automatic Automatic Err03 Err04 Err05 Err06 Gross negative.
3.3 INDICATOR FUNCTIONS GRADUATION From 0 to 5000 lbs the weight is shown in 2 lb increments. BEFORE WEIGHING: CHECK ZERO POINT Before each weighing it is necessary to check whether the system is unloaded and free. The indicator is fitted with an automatic zero correction. This means that small deviations of the zero point will be corrected automatically. If the indicator does not determine the zero point automatically, it must be done manually by pressing the >0< key.
Press the PT key until the display changes and the last digit is blinking (approx 3 seconds). The display shows the current tare value. The right digit is blinking. Press the key to go up a value or press the key to go down a value until the required value is reached for that place. Press to change to the next digit. Repeat this procedure until the required tare value is displayed. Press ENTER () to activate the tare weight. The tare weight is activated.
Or Change the piece weight value by using the or and keys. The display shows the new piece weight. To accept the new value press ENTER (). The display shows the number of pieces currently on the scale. To return to the normal weigh mode press the key. SUMMING The indicator offers the possibility to add weighings and show the total weight. When a tare weight is active, the net weight is added automatically. Load the system with the weight that should be added.
3.4 PRINTER (Option) The RAVAS 310 comes equipped with a thermal printer. Obtained and entered weighing data can be printed. THE PRINT OUT In the printout a gross weight is indicated with the letters “B/G” and a net weight with the letter “N”. A manually entered tare weight will also be printed and is indicated with the letters “PT”. The total weight is shown with the letters “TOT”. Standard print-out without code Standard print-out with code B/G 1234.5 lb. T 34.5 lb. N 1200.0 lb. CODE 12345 B/G 1234.
CHANGING THE THERMAL PAPER ROLL Open the printer cover by pressing down Remove the existing paper roll. Position the 2 levers and pulling the cover towards the new paper roll, making sure it unrolls you. in the correct direction, as shown above. Unroll the paper slightly. Re-close the cover, holding the edge of the paper. The printer is now ready for use.
CHANGING THE TIME AND DATE ON THE PRINT-OUT The date and time can be printed together with the weight information. Press the key for 6 seconds. The display will show “ho_00” or the previous hour time setting, with the right digit flashing. To accept the old value press ENTER (). Or Press the key to go up a value or press the key to go down a value until the required value is reached.
4 TROUBLE SHOOTING No power Accuracy Change batteries 12Vdc on the board Replace battery pack Use a fully charged battery pack. (see page 5) Check the board for burned components Picture of component most likely to blow when batteries have been entered the wrong way. No repeatability Check if there is a mechanical problem. Load left and right fork with for example body weight and see if weight changes when you are in different positions on the scale.
Not linear Instability The potentiometers with which we calibrate the output of the load cells, are mechanical parts therefore, higher risk components Check if it is load cells or indicator Move the board and but pressure with fingers on the potentiometers while looking at the display to see if it reacts. Do not touch the contact itself. Check cable Very rarely the cause. Maybe in a lift truck. With no load it Check for humidity is most of the time humidity, bad connection Check the indicator.
Not summing HELP HELP 2 messages Help 3 or 7 Operator error . Load is not stable. Scale needs to be unloaded before accepting new print. System will not print weights that are smaller than the graduation. Scale is overloaded Take load from scale. If there is no load do the same checks as you do with HELP 3 and 7. Load cell signal too high or too low. Check cables for damage. Move the cable while looking at display to see if indicator reacts. Measure load cells to see if they are fine.
5 SPARE PARTS 21
SPARE PARTS LIST Weighing Hand Pallet Truck RAVAS 310 Nr 1 2 3 4 5 6 7 8 9 10 11 12 13 30 31 32 33 34 35 36 37 38 39 40 41 42 43 44 45 46 47 48 49 50 51 52 Article Number 899193001.3 895200708 891112256 or 891112255 899172200 894141903 894141922 894142331 895201705 895200780 895201799 895201701 895201702 894141664 892131291 892142545.2 892142545 892203003 892203001.1 892203002 894142400 899193027.
6 CALIBRATION CALIBRATION INSTRUCTIONS INDICATOR 310 The calibration mode can only be reached from the standard weighing mode. You cannot get into the calibration mode when you are in piece count mode. DEFINING ZERO Unload the system. Switch the system on. To enter the zero calibration mode press the >0< key for 10 seconds. After 3 seconds the display will show the last entered code. After 7 seconds the display will go into the zero calibration mode and start adjusting.
MULTI-POINT CALIBRATION Push the T key for about 10 seconds. After 3 seconds the display will show the last entered pre-set tare value. After 7 seconds the display will go into the calibration mode. The display will show the first calibration point with the pointer “e1” flashing. Using the and keys you can see the three earlier programmed values on the display. The pointer will move through e1-3.
7 PARAMETER SETTINGS ATTENTION: Before entering the setup mode make sure that the battery supply is sufficient. A low battery may cause the micro-processor to block. If this happens remove the empty battery and replace it with a fully charged battery. You should be able to start the indicator in the normal way. To enter the setup mode, turn on the indicator and keep the key pressed for 20 seconds.
PARAMETERS: 01 02 Start-up unit (and print units) Smallest graduation step for multi-range 1=kg / 2=lb 0.1/0.2/0.5…………10/20/50 Default US 2 0.5 03 Largest graduation step for multi-range 0.1/0.2/0.5 ………..
25 Dataprotocol comport 1 26 27-29 30 31 32 33 34 35 Number of linefeeds comport 1 Not used Baudrate comport 2 Databits comport 2 Parity comport 2 Stopbits comport 2 Not used Dataprotocol comport 2 36 37 Number of linefeeds comport 2 Printout form 38 Printout format time/date 39 40 41 42 43-49 50 51 Not used Level switch Delay trigger time level switch Not used Not used Battery used Low Bat switch off time 52 Auto shut off time if not used 53 54 55 56-89 90 Not used Peak hold time threshold val
91 Reset to default parameter settings including calibration parameters 92-99 Not used If parameter 01 was on 1 it will default to the EU settings. If P_01 =2 the US settings will be defaulted. New delivered boards will have EU settings. RAVAS USA, LLC 975 Deerfield Parkway Buffalo Grove, IL, USA 60089 (224) 676-2238 www.ravasusa.com Rev. 05.10.