
User Manual


9
Mounting
WARNING!MountyourInverter/ChargerBEFOREDCbatteryandACpower
connection. Failure to follow these instructions may lead to personal injury and/or damage to the Inverter/
Charger and connected systems.
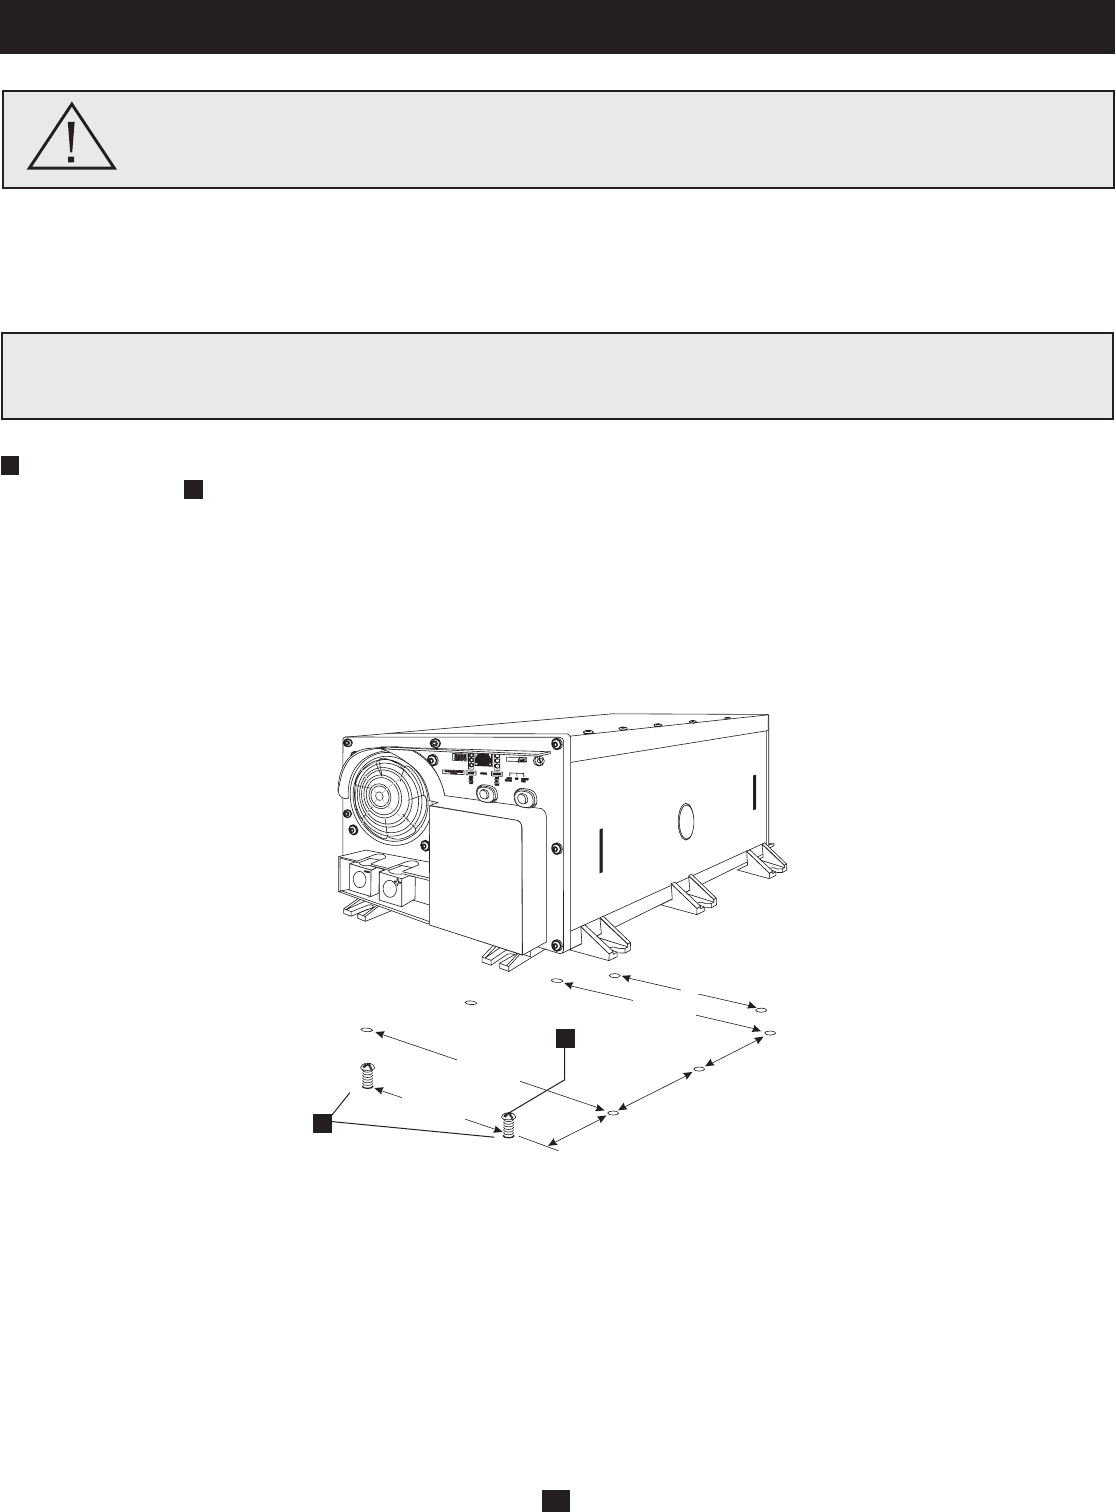
TrippLiterecommendspermanentmountingofyourInverter/Chargerasillustratedbelow.Usermustsupplymountinghardwareandis
responsible for determining if the hardware and mounting surface are suitable to support the weight of the Inverter/Charger. Contact Tripp
Lite if you require further assistance in mounting your Inverter/Charger.
Usingthemeasurementsfromthediagram,installtwouser-supplied¼"(6mm)fastenersintoarigidhorizontalsurface,leavingthe
heads slightly raised. Slide the Inverter/Charger forward over the fasteners to engage the mounting feet molded on the front of the
Inverter/Chargercabinet.Installandtightenadditionaluser-supplied¼"(6mm)fastenersintothemountingfeetmoldedontherearand
sidesoftheInverter/Chargercabinet*.Therearfeetextendbeyondtheunit’scabinettoprovideforadequateventilationspacebehindthe
coolingfan(s);theyshouldnotberemoved.
The polycarbonate cabinet and mounting feet of your Inverter/Charger are durable enough to allow for vertical mounting as well, if your
vehiclecompartmentrequiresthisconfiguration.Forverticalmounting,thecontrolpaneloftheInverter/Chargershouldfaceeitherside.
Allow 2" minimum front and rear clearance for adequate ventilation.
A
B
5.87 in.
(14.91 cm.)
1.64 in.
(4.15 cm.)
5.87 in.
(14.91 cm.)
5.57 in.
(14.16 cm.)
5.57 in.
(14.16 cm.)
9.59 in.
(24.35 cm.)
9.59 in.
(24.35 cm.)
A
B
Install your Inverter/Charger in a location where it will be shielded from outside weather conditions. Do not mount unit with its
front or rear panel facing down (at any angle). Mounting in this manner will seriously inhibit the unit's internal cooling,
eventually causing product damage not covered under warranty.