Owner’s Manual USB 3.0 Dual Head Display Adapter Model: U344-001-HDDVI Table of Contents 1. Introduction 1.1 Features 1.2 Package Contents 1.3 System Requirements 2. Installation 3. Using the Adapter 3.1 Display Properties 3.2 Extending Video to the Add-On Display 3.3 Mirroring Video on the Add-On Display 3.4 Making the Add-On Display the Primary Display 4. Troubleshooting 5. Specifications 6.
1. Introduction 1.1 Features • Add an HDMI and DVI monitor to your computer or laptop through a single USB 3.0 port • DVI-I port allows for the connection of a VGA monitor using a DVI to VGA adapter • Supports video resolutions up to 2048 x 1152 • Supports video streaming up to 1080p • Up to 3 adapters can be connected to a single computer, allowing for the addition of up to 6 displays • Display video in either mirror or extended modes • Bus powered, no external power supply required • USB 3.
1. Introduction 1.3 System Requirements • Windows® XP (32-bit), Vista (32- and 64-bit), 7 (32- and 64-bit) and 8 (32- and 64-bit) • USB 2.0 or 3.0 port; USB 3.0 port required for USB 3.0 speeds • VGA, DisplayPort, DVI or HDMI monitor Minimum computer requirements when using 1 – 2 monitors: • 1.2GHz Single Core CPU • 512MB of RAM Minimum computer requirements when using 3 monitors: • 1.6GHz Single Core CPU • 1GB of RAM Minimum computer requirements when using 4 – 6 monitors: • 1.
2. Installation Note: Install the driver on your computer before connecting the display adapter(s). 1. Insert the driver CD into your computer’s CD-ROM drive. The setup program should run automatically. If the setup program fails to start on its own, open the CD and double-click on the appropriate driver file. Note: • If you encounter a User Account Control popup, choose to allow the installation to proceed. This may require an administrator’s password.
2. Installation Using Multiple Display Adapters When using multiple display adapters, it is only necessary to install the driver software once. After connecting the first display adapter to the computer, simply move on to connecting the next display adapter. Note: When using Windows Vista XDDM mode only one display adapter will be able to be configured to use Extended mode, and the remaining display adapters will be forced to use Mirror mode.
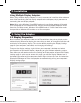
3. Using the Adapter Below are additional settings that are available via the display adapter right-click menu. Note: The settings available in this right-click menu may vary depending on your operating system. Option Description DisplayLink Manager Shows the DisplayLink Manager version number. Check for Updates Connects to the internet and checks for newer versions of the DisplayLink software, and downloads them if available. USB 3.0 Adapter This option provides a list of settings when selected.
3. Using the Adapter In addition to the display adapter right-click menu, Windows Vista and 7 users can press the [Windows Key] and the [P] key at the same time to pull up the menu below, which allows display settings to be switched quickly. Note: Only Mirror mode is supported under Windows Vista Display Driver Model (WDDM) mode. In addition, the Aero Experience (Flip 3D effect) will be disabled under Windows Vista Display Driver Model (WDDM) mode as long as the display adapter is connected. 3.
3. Using the Adapter 3.3 Mirroring Video on the Add-On Display To display the same thing on both the primary and add-on display, follow the steps below: 1. Open your computer’s Display Settings page. 2. Select the monitor icon that represents the add-on display you wish to change, or choose the add-on display from the drop-down menu. The primary display is always icon 1. 3.
4. Troubleshooting Q: Why is the display on the add-on monitor blank? A: If the monitor power LED is Green, wait a moment for the monitor to display the video, as it may take some time for the video to be displayed on the add-on monitor. If after a few minutes the video does not display, restart your computer. Also, make sure the computer is not in standby or hibernation mode, which will cause the add-on monitor to be blank. If the monitor power LED is Red, check if the connection is properly made.
4. Troubleshooting Q: In Extended mode, why does the add-on monitor have a black border around the desktop? A: This happens when the resolution used by the add-on monitor is larger than the resolution used by the primary monitor. To solve this problem, configure the addon monitor to use the same resolution as the primary monitor. Q: In Extended mode, why does the cursor disappear? A: If you’re in extended mode but have not yet connected the add-on monitor, the desktop will still pan to the add-on monitor.
5. Specifications Feature Specification Source Connector Display Connector Maximum Number of Display Adapters RAM Power USB A Male (via the included USB cable) HDMI Female, DVI-I Female 3 (6 displays) 1 GB DDR2 SDRAM Bus-powered (460 mA operating power) Windows® XP (32-bit), Vista (32- and 64-bit), 7 (32- and 64-bit), Supported Operating Systems 8 (32- and 64-bit) and 8.
6. Warranty and Product Registration 1-Year Limited Warranty Tripp Lite warrants its products to be free from defects in materials and workmanship for a 1-year period from the date of retail purchase by end user. Tripp Lite’s obligation under this warranty is limited to repairing or replacing (at its sole option) any such defective products.To obtain service under this warranty you must obtain a Returned Material Authorization (RMA) number from Tripp Lite or an authorized Tripp Lite service center.