
Installation guide


LIGHTED LOWTOPPER - FIELD INSTALLATION GUIDE
4
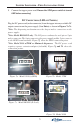
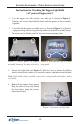
8. Insert the included snap bushing into the hole, as shown in Figure 6.
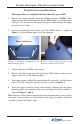
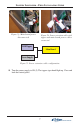
Figure 3. Place topper on cabinet.
Slide topper back until it stops.
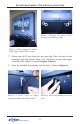
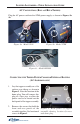
Figure 4. Topper on cabinet. Note
location of mounting studs.
Figure 6. Place snap bushing in access
hole.
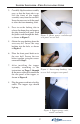
Figure 5. Place nuts on topper
mounting studs and tighten down.
7. Obtain four #8-32 nuts from the accessory bag. Place the nuts on the
mounting studs and tighten using a 3/8" nut driver to secure the topper
assembly to the cabinet, as shown in Figure 5 (below).