
Operation Manual


3-18 Connecting and Printing
Uninstalling Software (Windows PC)
The software can be uninstalled (removed) using the CD-ROM (Product
Library) supplied with the printer.
1 Exit all active software applications.
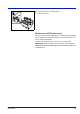
2 Insert the enclosed CD-ROM (Product Library) into the CD-ROM
drive. In Windows 7, Windows Server 2008 and Windows Vista, the
user account control window may appear. Click Allow.
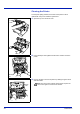
3 Following the procedure used to install the printer driver, click
Remove Software. The TA Uninstaller wizard appears.
4 Select the software package to remove.
5 Click Uninstall.
The uninstaller starts.
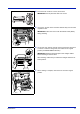
6 When Uninstall complete screen appears, click Finish.
7 If Restart Your System screen appears, select whether you restart
your computer or not, and click Finish.
Start the uninstaller by clicking start > All Programs >
TA > Uninstall TA Product Library, and uninst
all
the software.
IMPORTANT On Macintosh computers, because the printer settings
are specified using a PPD (PostScript Printer Description) file, the
software cannot be uninstalled using the CD-ROM (Product Library).
Note When Print Monitor is installed, separate uninstallers
are launched for this application. Proceed with the
uninstallation steps for this application as directed by the on-
screen instructions.
Note The software can be uninstalled from the Program
menu.