0 ® i i / '_" m BRIGGS& STRATTONPOWERPRODUCTSGROUP,LLC JEFFERSON,WiSCONSiN,U.S.A.
Thankyou for purchasing this quality-built Troy-Bilt pressure washer. We are pleasedthat you've placed your confidence in the Troy-Bilt brand. When operated and maintained according to the instructions in this manual, your Troy-Bilt pressure washer will provide many years of dependable service. This manual centainssafety information to make you aware of the hazards and risks associated with pressure washers and how to avoid them.
Tableof Contents Operator Safety ................................. Equipment Description......................................... Safety Rules................................................. Assembly ..................................... Unpack Pressure Washer....................................... Attach Handleand Accessory Tray ............................... Add Engine Oil and Fuel........................................ Connect Hose and Water Supply to Pump..........................
OperatorSafety SafetyRules EquipmentDescription ,_ a_ _Read this manual carefully and become familiar ....... with your pressurewasher. Knowits applications, its limitations, and any hazardsinvolved. This pressure washer operates at a max of 2,500 PSI and a flow rate of up to 2.3 gallons per minute.
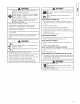
WARNING WARNING iRunningenginegivesoffcarbon monoxide,an lodorless, colorless, poisongas. _ {'D _Fuel and its vapors are extremely flammable and iBreathing carbon monoxide can cause headache, explosive. fatigue, dizziness, confusion, seizures, Inausea, fainting orvomiting, death. death. Fire or explosion can cause severe burns or Some chemicals or detergents may be harmful if inhaled or ingested, causing severe nausea, ifainting, or poisoning. . Operate pressure washer ONLY outdoors.
WARNING WARNING a_ Starter cord kickback (rapid retraction) can result The high pressure stream of water that this equipment produces can cut through skin and its fin bodily injury. Kickback will pull hand and arm ,_ ioward engine faster than you can let go. Broken bones, fractures, bruises, or sprains ;ould result. • NEVERpull starter cord without first relieving spray gun pressure. _ )ossible amputation.
WARNING hands, clothing, or accessories• Starter hair, and other rotating parts can entangle . NEVERoperate pressure washer without protective housing or covers. . DO NOTwear loose clothing, jewelry or anything that may be caught in the starter or other rotating parts• . Tie up long hair and remove jewelry• WARNING Risk of eye injury. • _ [Spray can splash back or propel objects• Always wear safety goggles when using this equipment or in vicinity of where equipment is in use.
Assembly _Read entire operator's manual before you attempt to assemble or operateyour new pressurewasher. Attach Handle and AccessoryTray 1. Place handle (A) onto handle supports (B) connectedto main unit. Make sure holes (C) in handle align with holes (C) on handle supports. Your pressure washer requires some assembly and is ready for use after it has been properly serviced with the recommended oil and fuel.
Add En{jineOil and Fuel • Place pressure washer on a level surface• NOTE:Verify provided oil bottle is the correct viscosity for current ambient temperature• • Refer to engine operator's manual and follow oil and fuel recommendations and instructions• NOTICE 3. Run water through your garden hose for 30 seconds to clean out any debris• IMPORTANT:DO NOTsiphon standing water for the water supply• Use ONLYcold water (less than I O0°F). 4. Before connecting garden hose to water inlet, inspect inlet screen (A).
Featuresand Controls _Read this Operator'sManual and safety rules beforeoperating your pressurewasher. Compare the illustrations with your pressure washer, to familiarize yourself with the locations of various controls and adjustments. Savethis manualfor future reference. o o A - Spray Gun-- Controls the application of water onto cleaning surface with trigger device, includes trigger lock. B - Nozzle Extension with Quick Connect-- Allows you to switch between three different spray tips.
Operation WARNING If you haveany problems operating your pressure washer, please call the pressure washer helpline at (888) 611-6708. Pressure Washer Location Clearances and Air Movement WARNING ff_j_ structures Exhaust heat/gases canignite or damage fuel tankcombustibles, causing a fire. Running engine gives off carbon monoxide, an :_ Breathing carbon monoxide can cause headache, odorless, colorless, poison gas. fatigue, dizziness,vomiting, confusion, seizures, nausea,fainting or death.
Howto Start YourPressureWasher To start your pressure washer for the first time, follow these instructions step-by-step. This starting information also applies if you have let the pressure washer sit idle for at least a day. 8. When starting engine, position yourself as recommended and start engine according to instructions given in engine operator's manual. Also see operating instructions tag located on the pressure washer. 1.
WARNING The highpressure streamofwaterthat this equipmentproducescancutthroughskinandits possible amputation. nderlying tissues, leading to serious injury and Spray gun traps high water pressure, even when engine is stopped and water is disconnected, which can cause injury. _ . DONOTallowCHILDREN to operatepressurewasher. • Keephigh pressurehoseconnectedto pumpand spraygun whilesystemis pressurized. • NEVERaimspraygun at people,animals,or plants. DONOTsecurespraygun in openposition.
2. Place spray gun through hole on accessory tray on right side of unit. NOTE:You may also usethe spray gun holder wireform attached to the handle to store your spray gun and nozzle extension, as shown in Featuresand Controls section. 3. Insert multi-colored spray tips in spaces provided in accessory tray. 4. Hang high pressure hose on hook attachedto accessory tray on front of tray, as shown. 3. Select desired spray tip: • For gentle rinse, select green 25° spray tip.
5. Make sure garden hose is connected to water inlet. Checkthat high pressure hose is connected to spray gun and pump. Turn on water. NOTICE You must attach all hoses before you start the engine. Startingtheenginewithoutall the hosesconnectedandwithout the waterturnedONwill damagethepump. Damageto equipmentresultingfrom failureto follow this instructionwill voidwarranty. 6. Engagetrigger lock on spray gun and start engine following instructions How to Start Your Pressure Washer. 7.
Maintenance General Recommendations Regular maintenancewill improve the performance and extend the life of the pressure washer. Seeany qualified dealer for service. The pressure washer's warranty does not cover items that have been subjected to operator abuse or negligence. To receivefull value from the warranty, the operator must maintain the pressure washer as instructed in this manual and in the engine manual, including proper storage as detailed in Winter Storageand Long Term Storage.
Check Spay Gun and Nozzle Extension 5. Remove nozzle extension from spray gun. Examinethe hose connection to the spray gun and make sure it is secure. Test the trigger by pressing it and making sure it "springs back" into place when you releaseit. Put the trigger lock in the ON position and test the trigger. You should not be able to press the trigger. 6. Using a garden hose, remove additional debris by back flushing water through nozzle extension. Back flush between 30 to 60 seconds.
EngineMaintenance See the engine operator's manual for instructions on how to properly maintain the engine. CAUTION Avoid prolonged or repeatedskin contact with used motor oil. Usedmotor oil hasbeenshownto causeskin cancerin certain laboratoryanimals. Thoroughlywashexposedareaswith soapandwater. KEEPOUT OFREACHOFCHILDREN.DON'T POLLUTE.CONSERVERESOURCES.RETURN USEDOIL TO COLLECTIONCENTERS. 2. Disconnect hose from spray gun and high pressure outlet on pump.
Winter Storage Storing the Engine NOTICE See the engine operator's manual for instructions on how to properly prepare the engine for storage. You must protect your unit from freezing temperatures. Failureto do so will permanentlydamageyour pumpand render your unit inoperable. Freezedamageis not coveredunderwarranty. To protectthe unit from freezing temperatures: Protecting the Pump To protect the pump from damagecaused by mineral deposits or freezing, use PumpSaver, Model 6039, to treat pump.
Troubleshooting Problem Cause 1. Low pressure spray tip installed. , Pump has following problems:failure to producepressure, erratic pressure, chattering, loss of pressure, low water volume. Water inlet is blocked. 4. Inlet hose is kinked or leaking. 5. Clogged inlet hose screen. 6. Water supply is over 100°F. 7. High pressure hose is blocked or leaks. 4. Straighten inlet hose, patch leak. 8. Spray gun leaks. 8. Replacespray gun. 20 7. Clearblocks in outlet hose. 9. Cleanspray tip. 10.
Effective December 1, 2006 replaces all undated Warranties and all Warranties dated before December 1,2006 LIMITED WARRANTY Troy-Bilt® is a registered trademark of MTD Products Inc. and is used under license to Briggs & Stratton Power Products. Briggs & Stratton Power Products Group, LLC will repair or replace, free of charge, any part(s) of the pressure washer that is defective in material or workmanship or both.
0 V® PrssSIJr8 81' Product Specifications Max Outbt Pressure ............ 2,500 PSi (172.3 BARS) Max Flow Rate ................ 2.3 GPM (8.7 liters/min) Water Supply Temperature ........... Shipping Weight ..................... I O0°F(38°0) MAX 73 Ibs. (33.1 kg) CommonService Parts PumpSaver .................................. 6039 O-Ring Maintenance Kit ........................ 6048 Water Inlet Screen ......................... B2384GS Engine Oil Bottle ............................
I® Limpiadoraa Presi6n e BRIGGS& STRATTONPOWERPRODUCTSGROUP,LLC JEFFERSON,WiSCONSiN,U.S.A.
Gracias per comprar esta limpiadora a presi6n de calidad Troy-Bilt. Nos complace que haya depositado su confianza en la marca Troy-Bilt. Si se utiliza y mantiene de acuerdo con las instrucciones de este manual, su limpiadora a presi6n Troy-Bilt le proporcionarA muchos a_os de funcionamiento fiable. Este manual cuntiene informaci6n de seguridad para que usted conozca los peligros y riesgos propios de las limpiadoras a presi6n y c6mo evitarlos.
Tablade Contenido ==,. Seguridad de 0perario ............................ Derscripci6n del Equipo........................................ Reglas de seguridad .......................................... lVlontaje ...................................... Desembalela limpiadoraa presi6n ............................... Conecteel manubrio y bandeja accesoria .......................... Agregar aceite y combustible al motor ............................ Conecte la manguera y el suministro de agua a la bomba ........
t_ Seguridad de Operario Reglasde seguridad Derscdpcidndel Equipo ,& Lea este manual cuidadosay familiaricese conde sumanera limpiadora a presibn. Conozca sus uses, sus limitaciones y cualquier peligro relacionadocon el mismo. Este manual contiene informacidnsobre una limpiadoraa presi6n que funciona a 2.500 PSi con un caudal de 8,7 litros per minute (2.3 GPM).
ADVERTENCIA AI motor funcionar, se produce mon6xido de carbono, un gas inodoro y venenoso. ADVERTENCIA == _jLa Respirar mon6xido de carbono puede provocar dolor de cabeza,fatiga, mareos, v6mitos, confusi6n, ataques, nAuseas,desmayos o incluso la muerte. Algunas sustancias quimicas o los detergentes pueden ser perjudiciales si inhalados o ingeridos, causando la nauseasevera, desmayando o para envenenar. . Opereel limpiadora a presi6n SOLAMENTEal aire libre.
ADVERTENCIA t_ _ ADVERTENCIA El retroceso (repliegue rApido) del cable del arrancador puede producir lesiones. El retroceso impedir_ que el usuario suelte el cable a tiempo y irarA de su mano y brazo hacia el motor. Como resultado, podrian producirse fracturas, contusiones o esguinces. • NUNCAtire del cabledelarrancadorsin eliminarpreviamente la presi6ndela pistolarociadora. • Cuandoarranqueel motor,tire lentamentedelcablehastasentir una resistenciay, a continuaci6n,tire r_.
AViSO ADVERTENCIA _o El rociado de alta presi6n puede da_ar elementos frfigiles, incluyendo el vidrio. l arrancador y otrasel piezas rotan pueden enredar las manos, pelo, laque ropa, o los ,_ accesorios. NO dirija la pistola rociadora hacia un cristal cuando utilice la punta de rocio de roja de 0°. NUNCAapunte la pistola a plantas. • NUNCAutilice la limpiadora a presi6n sin sus carcasas o tapas de protecci6n.
iViofltaje _Lea tetalmente el manual antes intenteensambiar u eperardel sueperario limpiadera a que presi6n. Su limpiadora a presi6n requiere de ciertos procedimientos de montaje y solo estarA listo para ser utilizado despu6s de haberle suministrado servicio con el combustible y aceite recomendados. Conecteel rnanubrioy bandeja accesoria 1. Coloque el manubrio (A) sobre los soportes del mismo (B) que ya estAnadheridos a la unidad principal.
3. Haga correr el agua a trav6s de la manguera de su jardin por 30 segundos para limpiar cualquier escombro que se encuentre en ella. Corte el agua. Agregar aceite y combustibleal motor • Coloque la limpiadora a presi6n en una superficie plana y nivelada. NOTA:Compruebe que la botella de aceite suministrada tiene la viscosidad adecuada para la temperatura ambiente actual. • Consulte el manual del operario del motor para a_adir al motor el aceite y el combustible recomendado.
Caracteristicas y rnafldos _] ea el Manual del Operatic lasm&quinalimpiadora reglas de seguridada antes depara porteren marchacon su m_quina limpiadera a presi6n. Compare las ilustraciones cony su presi6n familiarizarse las ubicaciones de los diferentes controles y ajustes. Guardeeste manual para referenciasfuturas. 6@ t_ A - PistoladeRociado-- Controlala aplicaci6nde aguasobrela superficiede limpiezacon el gatillo. Incluyecerrojode seguridad.
Operando ADVERTENCIA Si tiene problemas operando su mfiquina limpiadora a presi6n, per favor Namea la linea de ayuda para mfiquinas limpiadora a presi6n al (888) 611-6708. AI motor funcionar, se produce mon6xido de carbono, un gas inodoro y venenoso. _ Ubicaci6ndel lirnpiadora a presi6n Espa¢iolibre alrededer del limpiadera a presi6n espirar mon6xido de carbono provocar dolor de cabeza,fatiga, mareos,puede v6mitos, confusi6n, ataques, nfiuseas, desmayos o incluso la muerte.
C6mo dale arranquea su rn quina lirnpiadoraa presi6n Paradarle arranquea su m_quina limpiadoraa presi6n movida a motor por primera vez,siga estas instruccionespaso a paso. Estainformaci6nacerca del arranqueinicial tambi6n se aplica cuandovaya a dade arranque al motor despu6sde haber dejado de la m_quinalimpiadoraa presi6nfuera de uso por al menos un dia. 8. Cuandoarranque el motor, col6quese en la posici6n recomendaday siga las instrucciones del manual del operario del motor.
3. SIEMPREfusil de punto en una direcci6n segura y el disparador del fusil del rocio del estruj6n para liberar la presi6n retenida de la pleamar. ADVERTENCIA El chorro de agua a alta presi6n que este equipo produce, puede atravesar la piel y los tejidos subcut_neos, provocando lesiones de gravedad ADVERTENCIA El chorro de agua a alta presi6n que este equipo produce, puede atravesar la piel y los tejidos subcut_neos, provocando lesiones de gravedad miembro.
2. Coloque la pistola rociadora en el orificio situado a la derecha de la bandeja de accesorios. NOTA:Tambi6n puede usar el gancho de alambre de soporte de la pistola montado en el asa para guardar la pistola y el prolongador regulable de la boquilla, come se muestra en la secci6n Caracterfsticasy mandos. 3. Inserte las puntas de rociado multicolores en el orificio de la bandeja de accesorios come se muestra. 4.
5. Aseg[irese de que la manguera del jardin estfi conectada a la entrada de agua. Compruebe que la manguera de alta presi6n estfi conectadaa la pistola rociadora y a la bomba. Abra la alimentaci6n de agua. 5. Aplique un rociado de alta presi6n en un firea peque_a, despu6s revise si la superficie presenta da_os. Si no encuentra da_os, puede continuar con el trabajo de limpieza. ArISe 6.
iVlantenirniento Recemenda¢ienes generales El mantenimiento peri6dico mejorar_ el rendimiento y prolongar_ la vida [itil del limpiadora a presi6n. Si necesita asistencia, consulte con un distribuidor de Briggs & Stratton o con otro distribuidor cualificado. Lagarantia de la m_quinalimpiadoraa presi6n NOcubre los elementosque ban side sujetosa abuse o negligenciaper parte del operador.
Revise la pistela y la extensi6n para bequillas 5. Retire la extensi6n para boquillas de la pistola. Examinela conexi6n de la mangueraa la pistola y cerciorese de que est6 en buen estado. Pruebe el gatillo oprimi6ndolo y asegurfindose de que se devuelve a su sitio cuando Io suelte. Coloque el cerrojo de seguridad y pruebe el gatillo. Usted no debe ser capaz de oprimir el gatillo. Remplace la pistola inmediatamente si falla cualquiera de estas pruebas. 6.
lVlantenimiento del motor Consulte el manual del operario del motor para las instrucciones de c6mo mantener adecuadamenteel motor. AViSO Evite el contacto prolongado o repetido de piel con aceite usado de motor. El aceiteusadodel motor ha sidomostradoal cancerde la piel de la causaen ciertosanimalesdel laboratorio. Completamente lavadoexpusoAreascon el jab6ny el agua. IVlANTENERFUERADELALCANCEDELOS NINOS. NO CONTAIVlINE. CONSERVELOS RECURSOS.DEPOSITEEL ACEITEUSADOEN UN PUNTODE RECOGIDA.
Almacenande el meier AIrnacenarnientopara invierno AVISO Usted deberfi proteger su unidad de las temperaturas de congelamiento. Si no Io hace,da_arfipermanentemente la bombay la unidadno pedrO, funcionar. La garantiano cubreel da_ode la unidadocasionadoper congelamiento. Para protegerla unidad de las temperaturas de cengelamiente: Consulte el manual del operario del motor para las instrucciones de c6mo preparar adecuadamenteel motor para su almacenamiento.
Resoiuci6nde probiernas Problema Caosa La bombapresentalos siguientesprobJemas: no producepresi6no produceuna presi6nerrada,traqueteo, p_rdidade presi6n,hajo volumende agua. 1. Est_ usando la puntas de rocio de baja presi6n (negra). 1. Cambie la puntas de rocio a una de las dos puntas de rocio de alta presi6n. 2. La entrada de agua est,. bloqueada. 2. Limpie la entrada. 3. Suministro de agua inadecuado. 3. Proporcione flujo de agua adecuado. 4. La manguera de entrada est,. doblada o presenta fugas.
Fecha de entrada en vigor:l de diciembre de 2006. Sustituye a todas las garantias sin fecha y a las de fecha anterior al 1 diciembre de 2006 GARANTfA LIMITADA Troy-Bilt® es una marca registrada de MTD Products Inc. bajo licencia de Briggs & Stratton Power Products. Briggs & Stratton Power Products Group, LLC reparar_ o sustituir_ sin cargo alguno cualquier componente de la lavadora a presiOn que presente defectos de materiales y/o mano de obra.
I® Limp ora a Presi6n Especificaciones del producto Presi6n de salida m_xima ....... 172,3 BARS (2,500 PSI) Caudalm_ximo ............... 8,7 liters/rain (2,3 GPM) Temperatura del suministro de agua .......................... 38°C (100%) MAX Peso que Embarca ................... 33,1 kg (73 Ibs.) Servicio com_ndespide PumpSaver .................................. Juego de mantenimiento de anillo 'o' . ............. Colador de la entrada .......................