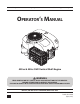
Safe Operation Practices • Set-Up • Operation • Maintenance • Troubleshooting • Warranty Operator’s Manual 420 cc & 452cc OHV Vertical Shaft Engine WARNING READ AND FOLLOW ALL SAFETY RULES AND INSTRUCTIONS IN THIS MANUAL BEFORE ATTEMPTING TO OPERATE THIS ENGINE. FAILURE TO COMPLY WITH THESE INSTRUCTIONS MAY RESULT IN PERSONAL INJURY. MTD LLC, P.O. BOX 361131 CLEVELAND, OHIO 44136-0019 Form No.
1 To The Owner Thank You This Operator’s Manual is an important part of your new engine. It will help you prepare and maintain the engine for the best performance. Please read and understand the contents before operating the engine. Table of Contents Important Safe Operation Practices...................... 3 Safety Labels............................................................ 5 Set-Up........................................................................ 6 Controls & Features........................
2 Important Safe Operation Practices WARNING! This symbol points out important safety instructions which, if not followed, could endanger the personal safety and/or property of yourself and others. Read and follow all instructions in this manual before attempting to operate the equipment. Failure to comply with these instructions may result in personal injury. When you see this symbol.
7. 4 Do not overfill fuel tank. Fill tank to full as indicated by the fuel level indicator installed inside of the fuel tank or marked on the tank. Do not over-fill to allow space for fuel expansion. On some models, a fuel level indicator may NOT be present, in this instance, fill the tank no more than 1/2 inch below the bottom of the filler neck to allow space for fuel expansion. 8. Replace fuel cap and tighten until the cap ratchets. 9.
Safety Symbols This page depicts and describes safety symbols that may appear on this product. Read, understand, and follow all instructions on the machine before attempting to assemble and operate. Symbol Description READ THE OPERATOR’S MANUAL(S) Read, understand, and follow all instructions in the manual(s) before attempting to assemble and operate. WARNING—GASOLINE IS FLAMMABLE Allow the engine to cool at least two minutes before refueling.
3 Set-Up Gas & Oil Checking Oil Level NOTE: The engine is shipped without gasoline and with motor oil in the engine. However, you MUST check the oil level before operating. Be careful not to overfill. Running the engine with insufficient oil can cause serious engine damage and void the engine warranty. NOTE: Be sure to check the oil while on a level surface with the engine stopped. 1. Remove the oil filler cap/dipstick and wipe the dipstick clean. 2. Insert the dipstick into the oil filler neck.
Fuel Requirements Adding Fuel WARNING! An adult should fuel this engine. NEVER allow children to refuel the engine. Gasoline (fuel) vapors are highly flammable and can explode. Fuel vapors can spread and be ignited by a spark or flame many feet away from engine.
4 Controls and Features Air Cleaner Finger Guard† Oil Fill Cap Electric Starter Spark Plug Oil Drain Muffler Fuel Filter Carburetor Oil Filter †If Equipped Figure 4-1 Throttle/Choke Control Oil Fill Cap The throttle/choke control is located on the mower and is used to aid in starting/stopping the engine and adjusting engine speeds. Refer to the Controls and Features section of the mower manual for more information regarding this control. Remove the oil fill cap to check the oil level and add oil.
5 Operation Pre-Operation Check Run Position The engine is shipped without gasoline and with oil in the engine. See the Set-Up Section of this manual for instructions on adding gasoline and checking oil. Stop Position Starting the Engine 1. Release all controls on the mower. 2. Move the gear shift lever into the neutral (N) position. 3. If starting a cold engine, place the throttle/choke control all the way forward, into the CHOKE position.
6 Engine Maintenance WARNING: Shut off the engine before performing any maintenance. To prevent accidental start-up, disconnect the spark plug boot. IMPORTANT: If engine must be tipped to transport equipment or to inspect or remove grass, keep spark plug side of engine up. Transporting or tipping engine spark plug down may cause smoking, hard starting, spark plug fouling, or oil saturation of air cleaner.
Oil Service • Check oil level regularly. • Be sure correct oil level is maintained. Check every five to ten hours before starting engine. See oil checking procedure in the Set-Up section. Oil Drain IMPORTANT: Be sure to check engine on a level surface with the engine stopped. Drain the oil while the engine is still warm to assure rapid and complete draining. 1. Remove all fuel from tank by running engine until it stops from lack of fuel. 2.
Add Oil 1. IMPORTANT: Be sure to check engine on a level surface with the engine stopped. 1. Unscrew the thumb screws and remove the air filter cover. See Figure 6-4. Wipe around dipstick cap and tube with a clean cloth to remove any debris. See Figure 6-3. Air Filter Cover Thumb Screw Figure 6-4 Figure 6-3 2. Remove dipstick and wipe clean with a cloth. 3. Pour oil into the dipstick tube. Do not over fill. With an oil filter change the high level amount of oil for this engine is 1700 ml (57.
2. Remove the foam pre-filter from around the paper air filter. See Figure 6-6. Replace paper element when dirty or damaged. Clean foam element or replace when damaged. 5. Attach the air filter cover, making sure to align thumb screws and plastic rib features on the shroud to the plastic features on the air filter cover. See Figure 6-8. Turn thumb screws clockwise until snug. Check for any misalignment. Air Filter Cover Plastic Feature Air Filter Pre-Filter Shroud Plastic Rib Feature Figure 6-6 3.
WARNING: If the engine has been running, the muffler will be very hot. Be careful not to touch the muffler. 2. 3. Visually inspect the spark plug. Discard the spark plug if there is apparent wear, or if the insulator is cracked or chipped. Clean the spark plug with a wire brush if it is to be reused. Fuel Filter Service The fuel filter cannot be cleaned and should be replaced every 100 operating hours; more often if run with old gasoline. 1.
Clean Engine If the engine has been running, allow it to cool for at least half an hour before cleaning. Periodically remove dirt build-up from engine. Clean cooling fins every 25 hours. Clean with a brush or compressed air. IMPORTANT: Do not spray engine with water to clean because water could contaminate fuel. Using a garden hose or pressure washing equipment can also force water into the air cleaner or muffler opening.
7 Troubleshooting Problem Engine Fails to start Remedy 1. Choke not activated. 1. Place throttle/choke control in CHOKE position. 2. Spark plug boot disconnected. 2. Connect wire to spark boot. 3. Fuel tank empty or stale fuel. 3. Fill tank with clean, fresh gasoline. 4. Faulty spark plug. 4. Clean, adjust gap, or replace. 5. Reduced fuel flow/Blocked fuel filter. 5. Replace fuel filter as instructed in the Maintenance section. 6. Engine flooded. 6. Crank engine with throttle in FAST position.
8 Replacement Parts Component Part Number and Description 951-10292 Spark Plug 937-05122 Air Filter Assembly (Includes Pre-Filter) 951-3013 Fuel Filter 951-12690 Oil Filter Phone (800) 800-7310 or (330) 220-4683 to order replacement parts or a complete Parts Manual (have your full model number and serial number ready). Parts Manual downloads are also available free of charge at www.mtdproducts.com.
Notes 18 9
FEDERAL and/or CALIFORNIA EMISSION CONTROL WARRANTY STATEMENT YOUR WARRANTY RIGHTS AND OBLIGATIONS MTD Consumer Group Inc, the United States Environmental Protection Agency (EPA), and for those products certified for sale in the state of California, the California Air Resources Board (CARB) are pleased to explain the emission control system (ECS) warranty on your 20172018 small off-road spark-ignited engine and equipment (outdoor equipment).
8. Throughout the off-road engine and equipment warranty period stated above, MTD Consumer Group Inc will maintain a supply of warranted parts sufficient to meet the expected demand for such parts. 9. Any replacement part may be used in the performance of any warranty maintenance or repairs and must be provided without charge to the owner. Such use will not reduce the warranty obligations of MTD Consumer Group Inc. 10.
Medidas importantes de seguridad • Configuración • Funcionamiento • Mantenimiento • Solución de problemas • Garantía Manual del Operador Motor de 420cc & 452cc con eje vertical y válvulas en cabeza ADVERTENCIA LEA Y RESPETE TODAS LAS NORMAS DE SEGURIDAD E INSTRUCCIONES INCLUIDAS EN ESTE MANUAL ANTES DE PONER EN FUNCIONAMIENTO ESTA MOTOR. SI NO RESPETA ESTAS INSTRUCCIONES PUEDE PROVOCAR LESIONES PERSONALES. MTD LLC.
Al propietario 1 Gracias Este Manual del Operador es una parte importante de su nuevo motor. Le ayudará a preparar y mantener la unidad para obtener los mejores resultados. Antes de operar el motor lea cuidadosamente y comprenda todo el manual. Índice Medidas importantes de seguridad....................... 3 Mantenimiento y Ajustes........................................11 Configuración........................................................... 6 Solución de problemas....................................
2 Medidas importantes de seguridad ¡ADVERTENCIA! La presencia de este símbolo indica que se trata de instrucciones de seguridad importantes que debe respetar para evitar poner en riesgo su seguridad personal y/o material y la de los demás. Lea y siga todas las instrucciones de este manual antes de poner en funcionamiento este equipo. Si no respeta estas instrucciones puede provocar lesiones personales. Cuando vea este símbolo. TENGA EN CUENTA LA ADVERTENCIA.
7. No llene demasiado el tanque de combustible. Llene el tanque completo indicado por el indicador de nivel de combustible instalado en el interior del depósito de combustible o marcado en el depósito. No más de relleno para dejar espacio para la expansión del combustible.
Símbolos De Seguridad Esta página representa y describe la seguridad los símbolos que pueden parecer en este producto. Lea, comprenda, y siga todas instrucciones en la máquina antes procurar para reunir y operar. Símbolo Descripción LEA EL MANUAL(S) DEL OPERADOR Lea, comprenda, y siga todas instrucciones en el manual (manuales) antes procurar para reunir y operar. ADVERTENCIA— GASOLINA ES INFLAMABLE Allow the engine to cool at least two minutes before refueling.
3 Configuración Gasolina y aceite NOTA: El motor se envía sin gasolina y con aceite en el motor. Sin embargo, usted debe comprobar el nivel de aceite antes de operar. Tenga cuidado de no llenar en exceso. Hacer funcionar el motor sin suficiente aceite puede causarle graves daños y anula la garantía del motor. ¡ADVERTENCIA! Siempre mantenga las manos y los pies alejados de las piezas móviles del equipo. No utilice fluidos comprimidos para arrancar. Los vapores son inflamables.
Requisitos sobre el combustible Carga de combustible ADVERTENCIA! Un adulto debe de combustible de este motor. NUNCA permita que los niños para abastecerse de combustible del motor tis. La gasolina (combustible) vapores son altamente inflamables y pueden explotar. Los vapores del combustible puede extenderse y ser encendida por una chispa o llama muchos metros de distancia del motor.
4 Controles y Características Depurador de aire Dedo de la Guardia† Tapa del aceite Arranque eléctrico Bujía de encendido Tubo de drenaje Silenciador Filtro de combustible Carburador Filtro de aceite †De Ser equipado Figura 4-1 Control del acelerador y cebador Tapa del aceite Control del acelerador / cebador se encuentra en la cortadora de césped y se utiliza para ayudar a arrancar / parar el motor y el ajuste de las velocidades del motor.
5 Funcionamiento Control previo al funcionamiento Posición de funcionamiento El motor se envía sin gasolina y con aceite en el motor. Consulte la Sección Configuración incluida en este manual para ver las instrucciones para la carga de gasolina y comprobación del aceite. Posición de detención Posición de encendido Encendido del motor 1. 2. 3. Suelte todos los controles de la cortadora. Mueva la palanca de cambios a la posición neutral (N).
6 Mantenimiento y Adjustes ADVERTENCIA: Apague el motor antes de realizar el mantenimiento. Para evitar una puesta en marcha accidental, desconecte la funda de la bujía. IMPORTANTE: Si el motor debe inclinarse para transportar equipo o para inspeccionar o extraer pasto, mantenga el lado de la bujía del motor hacia arriba. Si la bujía del motor se transporta o se inclina hacia abajo puede causar humo, un arranque difícil, contaminación de la bujía o saturación con aceite del depurador de aire.
Mantenimiento del aceite • Inspeccione el nivel de aceite regularmente. • Asegúrese de que se mantenga el nivel de aceite correcto. Inspeccione cada cinco a diez horas antes de poner en marcha el motor. Vea el procedimiento de verificación del nivel de aceite en la sección Configuración. De drenaje de aceite IMPORTANTE: Asegúrese de inspeccionar el motor sobre una superficie nivelada y con el motor apagado. Drene el aceite mientras el motor esté caliente para asegurar un drenaje rápido y completo. 1.
Añadir aceite 1. IMPORTANTE: Asegúrese de revisar el motor en una superficie plana con el motor parado. 1. Retire los pernos de mariposa y la cubierta del depurador de aire. Vea la Figura 6-4. Limpie alrededor del tapón de la varilla y el tubo con un paño limpio para eliminar los residuos. Véa la Figura 6-3. Cubierta del depurador de aire Perno de mariposa Figura 6-4 Figura 6-3 2. Retire la varilla y limpie con un paño. 3. Vierta el aceite en el tubo de la varilla. No llene en exceso.
2. Quitar la espuma pre-filtro de aire de todo el papel de filtro. Vea la Figura 6-6. Sustituya el elemento de papel cuando sucio o dañado. Limpia el elemento de espuma o sustituya cuando dañado. 5. Coloque la tapa del filtro de aire y asegúrese de alinear tornillos de mariposa y las características de plástico costilla en la cubierta de las características de plástico en la tapa del filtro de aire. Vea la Figura 6-8. Gire tornillos en sentido horario hasta que quede ajustado.
ADVERTENCIA: Si el motor ha estado funcionando, el silenciador estará muy caliente. Tenga cuidado de no tocar el silenciador. 2. 3. Inspeccione visualmente la bujía. Elimine la bujía si presenta mucho desgaste, o si el aislante está agrietado o astillado. Limpie la bujía con un cepillo de alambre si se va a reutilizar. Mida la separación de bujía con un calibrador. Corrija de ser necesario torciendo el electrodo lateral. Vea la Figura 6-10. La separación debe establecerse en 0,024-0,031 pulg.
Limpie el Motor Si el motor ha estado funcionando, déjelo enfriar durante por lo menos media hora antes de limpiarlo. De manera regular, extraiga el pasto y la acumulación de suciedad del motor. Limpie las aletas de refrigeración de 25 horas. Limpie con un cepillo o aire comprimido. IMPORTANTE: No rocíe el motor con agua para limpiarlo porque el agua podría contaminar el combustible.
7 Solución de Problemas Problema El motor no arranca Solución 1. No se ha activado el cebador. 1. Coloque el control del regulador/cebador en la posición CHOKE (cebador). 2. Alambre de bujía desconectado. 2. Unir el alambre a la bujía. 3. Depósito de combustible combustible vacío o añejo. 3. Llenar el tanque de la gasolina limpia, fresca. 4. Bujía defectuosa. 4. Limpio, ajuste el hueco, o sustituir. 5. Reducción del flujo de combustible y filtro de combustible bloqueados. 5.
Notas 8 17
18 Sección 8— Notas
DECLARACIÓN FEDERAL y/o DE CALIFORNIA SOBRE GARANTÍAS EN EL CONTROL DE EMISIONES SUS DERECHOS Y OBLIGACIONES EN CUANTO A LA GARANTÍA MTD Consumer Group Inc, la Agencia de Protección Medioambiental de los Estados Unidos (EPA), y para aquellos productos certificados para su venta en el estado de California, el Departamento de los Recursos del Aire de California (CARB) se complacen en explicar la garantía que cubre al sistema de control (ECS) de emisiones de su equipo y motor (equipos de exteriores) de encendi
7. MTD Consumer Group Inc es responsable por daños causados a otros componentes de motores o equipos derivados de la falla bajo garantía de cualquier pieza garantizada. 8. Durante la totalidad del período de garantía del motor y equipo para todo terreno arriba mencionado, MTD Consumer Group Inc mantendrá un suministro de piezas bajo garantía suficiente para satisfacer la demanda esperada de tales piezas. 9.