Owner’s Manual / Manual del Propietario Pressure Washer / Lavadora de Presión Model / Modelo 020207 IMPORTANT: READ SAFETY RULES AND INSTRUCTIONS CAREFULLY IMPORTANTE: LEYO LA SEGURIDAD LAS ORDENES Y LAS INSTRUCCIONES DETENIDAMENTE Questions? Preguntas? Helpline - 1-888-611-6708 M-F 8-5 CT Troy-Bilt® is a registered trademark of Troy-Bilt, LLC and is used under license to Briggs & Stratton Power Products.
Section Safety Rules 1 TABLE OF CONTENTS SAFETY RULES Safety Rules. . . . . . . . . . . . . . . . . . . . . . . . . . . . . . . . . . . . 2-4 Know Your Pressure Washer. . . . . . . . . . . . . . . . . . . . . . . . 5 Assembly. . . . . . . . . . . . . . . . . . . . . . . . . . . . . . . . . . . . . . 6-8 Operation . . . . . . . . . . . . . . . . . . . . . . . . . . . . . . . . . . . . 9-11 Maintenance . . . . . . . . . . . . . . . . . . . . . . . . . . . . . . . . . 12-14 Storage . . . . . . . . . . . .
Section 1: Safety Rules DANGER WARNING Running engine gives off carbon monoxide, an odorless, colorless, poison gas. Some chemicals or detergents may be harmful if inhaled or ingested, causing severe nausea, fainting or poisoning. Breathing carbon monoxide will cause nausea, fainting or death. Fuel and its vapors are extremely flammable an explosive. Fire or explosion can cause severe burns or death. WHEN ADDING FUEL • Turn pressure washer OFF and let it cool at least 2 minutes before removing gas cap.
Section 1: Safety Rules WARNING CAUTION Excessively high or low operating speeds increase risk of injury and damage to pressure washer. Running engines produce heat and hot exhaust gases.Temperature of muffler and nearby areas can reach or exceed 150°F (65°C). Fire or severe burns can occur. • DO NOT tamper with governed speed. • DO NOT operate pressure washer above rated pressure. • DO NOT touch hot surfaces. • Stay clear of exhaust gases. • Allow equipment to cool before touching.
Features and Controls Section 2 KNOW YOUR PRESSURE WASHER Read this owner’s manual and safety rules before operating your pressure washer. Compare the illustrations with your pressure washer to familiarize yourself with the locations of various controls and adjustments. Save this manual for future reference.
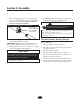
Section 3 Assembly Required Assembly Tools • 7/16” Wrench • Pliers ASSEMBLY To prepare your pressure washer for operation, you will need to perform these tasks: 1. Fill out and send in registration card. 2. Attach handle to main unit. 3. Add oil to engine crankcase. IMPORTANT: Read entire owner’s manual before you attempt to assemble or operate your new pressure washer. Remove Pressure Washer from Carton • Remove the parts bag, accessories, and insert included with pressure washer.
Section 3: Assembly Connect Hose and Water Supply to Pump Figure 3 — Attach “L” Hooks to Handle IMPORTANT: To avoid pump damage, you must assemble the nozzle extension to the spray gun and attach all hoses before you start the engine. Spray Gun Hook 1. Attach one end of high pressure hose to high pressure outlet on pump (Figure 4).Tighten by hand.
Section 3: Assembly 3. Before connecting garden hose to water inlet, inspect inlet screen (Figure 6). Clean screen if it contains debris, replace it if it is damaged. DO NOT RUN PRESSURE WASHER IF SCREEN IS DAMAGED. 6. WARNING Figure 6 — Connect Garden Hose to Water Inlet High pressure spray can cause paint chips or other particles to become airborne. Inspect inlet screen. DO NOT use if damaged; clean if dirty. 4.
Operation Section 4 HOW TO USE PRESSURE WASHER 6. Attach nozzle extension to spray gun (Figure 7). Tighten by hand. Figure 7 — Connect Nozzle Extension to Spray Gun If you have any problems operating your pressure washer, please call the pressure washer helpline at 1-888-611-6708. To Start Pressure Washer To start your pressure washer for the first time, follow these instructions step-by-step.This starting information also applies if you have let the pressure washer sit idle for at least a day. 1.
Section 4: Operation How to Stop Pressure Washer 2. • Turn engine off according to instructions given in engine owner’s manual. • Squeeze trigger on spray gun to relieve pressure in hose. NOTE: A small amount of water will squirt out when you release the pressure. Point nozzle down towards a firm surface and press trigger to test spray pattern (Figure 10). Figure 10 — Test the Spray Pattern How to Use Adjustable Nozzle You should now know how to START and STOP your pressure washer.
Section 4: Operation Applying Detergent with the Adjustable Nozzle Pressure Washer Rinsing For Rinsing: 1. Slide nozzle backward to high pressure, press trigger and wait for detergent to clear. IMPORTANT: Use soaps designed specifically for pressure washers. Household detergents could damage the pump. NOTE: You can also stop detergent from flowing by simply removing chemical injection hose from bottle. CAUTION You must attach all hoses before you start the engine. 2.
Section Maintenance 5 GENERAL MAINTENANCE RECOMMENDATIONS WARNING The high pressure stream of water that this equipment produces can pierce skin and its underlying tissues, leading to serious injury and possible amputation. The pressure washer warranty does not cover items that have been subjected to operator abuse or negligence.To receive full value from the warranty, the operator must maintain the pressure washer as instructed in this manual. • NEVER repair high pressure hose. Replace it.
Section 5: Maintenance 1. 2. 3. 4. Detach spray gun and nozzle extension from high pressure hose. Detach nozzle extension from spray gun and remove o-ring and screen from nozzle extension. Flush the screen, spray gun, and adjustable nozzle extension with clean water to clear debris. Place in-line filter screen into threaded end of nozzle extension. Direction does not matter. Push screen in with eraser end of pencil until it rests flat at bottom of opening.Take care to not bend screen.
Section 5: Maintenance ENGINE MAINTENANCE O–Ring Maintenance Purchase an O–Ring/Maintenance Kit, part number 191922GS by contacting the nearest authorized service center. It is not included with the pressure washer.This kit includes replacement o-rings, rubber washer and water inlet filter. Refer to the instruction sheet provided in the kit to service your unit’s o-rings. See the engine owner’s manual for instructions on how to properly maintain the engine.
Storage Section 6 PREPARING THE UNIT FOR STORAGE NOTE: PumpSaver, model number 01559, is available as an optional accessory. It is not included with the pressure washer. Contact the nearest authorized service center to purchase PumpSaver. Water should not remain in the unit for long periods of time. Sediments or minerals can deposit on pump parts and “freeze” pump action. If you do not plan to use the pressure washer for more than 30 days, follow this procedure: 1.
Section Troubleshooting 7 TROUBLESHOOTING Problem Pump has following problems: failure to produce pressure, erratic pressure, chattering, loss of pressure, low water volume. Cause Correction 1. Nozzle in low pressure mode. 1. Pull nozzle backward for high pressure mode. 2. Water inlet is blocked. 2. Clear inlet. 3. Inadequate water supply. 3. Provide adequate water flow. 4. Inlet hose is kinked or leaking. 4. Straighten inlet hose, patch leak. 5. Clogged inlet hose strainer. 5.
Notes NOTES 17
Section Exploded Views and Parts Lists 8 EXPLODED VIEW AND PARTS LIST — UNIT Item 1 2 3 4 5 6 7 8 9 Part # 192422GS B191874GS 194613GS 190249GS 192645GS 192128GS 192309GS 194298GS 192050GS Description BASE HANDLE ASSY, Billboard HOSE KIT, Pump Mounting Hardware KIT, Hook KIT, Hook VALVE,Thermal Relief KIT, E-Ring Item 10 11 12 13 14 15 16 17 900 Items Not Illustrated Part # Description 194620GS MANUAL, Owner’s MS6847 MANUAL, Engine 194256GS KIT,Warning Tag BB3061BGS OIL, Engine 18 Part # 188792HGS
Section 8: Exploded Views and Parts Lists EXPLODED VIEW AND PARTS LIST — PUMP Item 19 28 45 62 76 77 A B C D Part # 190571GS 190627GS 190578GS 190581GS 194298GS 190586GS 190594GS 190632GS 190634GS 193808GS Description CAP, Oil MANIFOLD PIN CAP THERMAL RELIEF OIL BOTTLE (not shown) KIT, UNLOADER STEM KIT,WATER INLET, ALUM KIT, OUTLET, ALUM KIT, HEAD BRASS Item E F G H J K L Part # 193806GS 190592GS 190593GS 193807GS 189971GS 193971GS 193972GS Description KIT, CHECK VALVES KIT, INLET CHECK KIT, CHEMICA
Sección Reglas de Seguridad 1 TABLA DE CONTENIDOS REGLAS DE SEGURIDAD Reglas De Seguridad . . . . . . . . . . . . . . . . . . . . . . . . . . . . . . . . 20-22 Conozca Su Maquina Lavadora De Presion. . . . . . . . . . . . . . . . . 23 Ensamblaje . . . . . . . . . . . . . . . . . . . . . . . . . . . . . . . . . . . . . . . . 24-26 Funcionamiento . . . . . . . . . . . . . . . . . . . . . . . . . . . . . . . . . . . . 27-29 Mantenimiento. . . . . . . . . . . . . . . . . . . . . . . . . . . . . . . . . . .
Sección 1: Reglas de Seguridad ADVERTENCIA PELIGRO Al motor funcionar, se produce monóxido de carbono, un gas inodoro y venenoso. El respirar el monóxido de carbono, producirá náusea, desmayo o la muerte. La gasolina y sus vapores son extremadamente inflamables y explosivos. El fuego o una explosión pueden causar quemaduras severas e inclusive la muerte. • Opere el lavadora de presión SOLAMENTE al aire libre. • Utilice un respirador o máscara siempre que exista la posibilidad de inhalar vapores.
Sección 1: Reglas de Seguridad ADVERTENCIA PRECAUCIÓN El lavadora de presión produce un rocío alto de la presión cuál riesgo de aumentos de la herida y dañe a la unidad. Los motores en funcionamiento producen calor y gases de escape a altas temperaturas. La temperatura del silenciador y de las zonas cercanas puede alcanzar o superar los 65 ºC (150 ºF) Se pueden producir incendios o quemaduras graves. • NO asegure la pistola de rociado en la posición (open = abierto).
Características y Controles Sección 2 CONOZCA SU MAQUINA LAVADORA DE PRESION Lea el manual del propietario y las reglas de seguridad antes de poner en marcha su máquina lavadora a presión. Compare las ilustraciones con su máquina lavadora a presión para familiarizarse con las ubicaciones de los diferentes controles y ajustes.
Sección 3 Montaje • • Herramientas Requeridas de la Asamblea Llave del 7/16" Alicates MONTAJE A prepara su arandela de la presión para la operación, usted necesitará a realiza estas tareas: IMPORTANTE: Lea totalmente el manual del propietario antes que intente ensamblar u operar su lavador a presión. 1. Llene y mande en tarjeta de matrícula. 2. Conecte manubrio a unidad principal. Remueva el Lavador a Presión del Empaque 3. Añada aceite al motor. 4. Añada gasolina al tanque de combustible.
Sección 3: Montaje 3. Conecte la Manguera y el Suministro de Agua a la Bomba Inserte el "L" gancho del agujero apenas bajo la cartelera en el derecho de la manija (visto desde la parte posterior de la unidad). Sostenga el gancho en lugar con los alicates y asocie la tuerca de fijación con una llave del 7/16" (Figura 19). IMPORTANTE: Usted deberá armar la extensión para boquillas y conectar todas las mangueras antes de darle arranque al motor.
Sección 3: Montaje 3. Antes de que conecte la manguera de jardín a la entrada de agua, inspeccione el colador de la entrada (Figura 22). Limpie el colador si tiene residuos o solicite su remplazo si está dañado. NO HAGA FUNCIONAR LA MÁQUINA LAVADORA A PRESIÓN SI EL COLADOR DE LA ENTRADA ESTÁ DAÑADO. 6. ABRA el suministro del agua (abra la válvula de suministro completamente).
Operación Sección 4 CÓMO USAR SU MÁQUINA LAVADORA A PRESIÓN 7. Apriete el gatillo en la pistola rociadora (asegúrese de que la lanza se encuentra en el modo de baja presión) para deshacerse de la presión del aire causada al prender el agua. El agua se descargara de la pistola del spray en un chorro muy Delgado. Aguante el gatillo hasta que un chorro continuo de agua aparece. Esto hará que el comienzo del motor se haga fácilmente. Suelte el gatillo. 8.
Sección 4: Operación 3. Cómo Usar la Boquilla Ajustable Usted ya debe saber como darle ARRANQUE a su máquina lavadora a presión y como DETENERLA. La información de esta sección le dirá como ajustar el patrón de rociado y como aplicar detergente u otros químicos de limpieza. El patrón de rociado se ajusta de un patrón angosto a un patrón en abanico girando la boquilla (Figura 27).
Sección 4: Operación PRECAUCIÓN Evite que el tubo de inyección de químicos entre en contacto con el silenciador caliente. 2. Mantenga la pistola de rociado a una distancia segura del área que planea rociar. 3. Aplique un rociado de alta presión en un área pequeña, después revise si la superficie presenta daños. Si no encuentra daños, puede continuar con el trabajo de limpieza.
Sección Mantenimiento 5 RECOMENDACIONES GENERALES Chequee el Tubo de Sifón del Detergente La garantía de la máquina lavadora a presión no cubre los elementos que han sido sujetos a abuso o negligencia por parte del operador. Para hacer válida la cobertura total de la garantía, el operador deberá mantener la lavadora de presión tal y como se indica en el manual. • Algunos ajustes tendrán que hacerse periódicamente para mantener adecuadamente su máquina lavadora a presión.
Sección 5: Mantenimiento 3. Coloque el anillo 'o' en la ranura respectiva. Empuje el anillo 'o' hasta que quede ajustado contra el colador del filtro en línea. 4. Conecte la extensión para boquillas a la pistola de rociado de la manera descrita anteriormente en este manual. Figura 29 - Remover y Limpiar la Boquilla Elimine el Aire y los Contaminantes de la Bomba Boquilla Para retirar el aire de la bomba, siga los siguientes pasos: 1.
Sección 5: Mantenimiento Mantenimiento de la Bomba MANTENIMIENTO DEL MOTOR Cambio del aceite de la bomba Consulte el manual del propietario del motor para las instrucciones de cómo mantener adecuadamente el motor. Cambie el aceite cada 50 horas o una vez al año, lo que suceda antes. PRECAUCIÓN NOTA: Debe adquirir una botella de aceite para la bomba previamente medido, Nº de pieza 190586GS, avisando el más cercano servicio autorizado central.
Almacenamiento Sección 6 PREPARANDO LA UNIDAD PARA SU ALMACENAMIENTO PRECAUCIÓN Usted deberá proteger su unidad de las temperaturas de congelamiento. El agua no debe permanecer en la unidad por un largo periodo de tiempo. Los sedimentos o minerales se pueden depositar en las piezas de la bomba y "congelar" la acción de la bomba. Si usted no piensa usar el lavador a presión por mas de 30 días, siga este procedimiento: 1.
Sección Diagnosticos de Averías 7 DIAGNOSTICOS DE AVERÍAS Problema La bomba presenta los siguientes problemas: no produce presión, produce una presión errada, traqueteo, pérdida de presión, bajo volumen de agua. El detergente no se mezcla con el rociado. El motor funciona bien cuando no tiene cargas, pero funciona "mal" cuando se conecta una carga. El motor se apaga durante la operación. Causa Solución 1. La boquilla está en el modo de baja presión. 1.
POLÍTICA PARA EL PROPIETARIO DE EQUIPOS TROY-BILT® Efectiva desde el 12 ro de Noviembre, 2003 GARANTÍA LIMITADA "Troy-Bilt® es una marca registrada de Troy-Bilt, LLC bajo licencia de Briggs & Stratton Power Products. Briggs & Stratton Power Products reparará o sustituirá sin cargo alguno cualquier componente del equipo** que presente defectos de materiales y/o mano de obra.
TROY-BILT® OWNER WARRANTY POLICY Effective November 12, 2003 LIMITED WARRANTY “Troy-Bilt® is a registered trademark of Troy-Bilt, LLC and is used under license to Briggs & Stratton Power Products. Briggs & Stratton Power Products will repair or replace, free of charge, any part, or parts of the equipment** that are defective in material or workmanship or both.Transportation charges on parts submitted for repair or replacement under this warranty must be borne by purchaser.