Operator’s Manual / Manual del Operario Pressure Washer / Lavadora de Presión Model / Modelo 020240 WARNING ADVERTENCIA Before using this product, read this manual and follow all Safety Rules and Operating Instructions. Antes de utilizar el producto, lea este manual y siga todas las Reglas de Seguridad e Instrucciones de Uso. Questions? Preguntas? Helpline - 1-888-611-6708 M-F 8-5 CT Troy-Bilt® is a registered trademark of MTD and is used under license to Briggs & Stratton Power Products.
Section 1 Safety Rules SAVE THESE INSTRUCTIONS TABLE OF CONTENTS SAFETY RULES Section 1 - Safety Rules . . . . . . . . . . . . . . . . . . . . . . . . . . 2-5 Section 2 - Features and Controls . . . . . . . . . . . . . . . . . . . 6 Section 3 - Assembly . . . . . . . . . . . . . . . . . . . . . . . . . . . . 7-9 Section 4 - Operation . . . . . . . . . . . . . . . . . . . . . . . . . 10-14 Section 5 - Product Specifications. . . . . . . . . . . . . . . . . . . 15 Section 5 - Maintenance. . . . . . . .
Section 1: Safety Rules WARNING WARNING Running engine gives off carbon monoxide, an odorless, colorless, poison gas. Breathing carbon monoxide can cause nausea, fainting or death. Some chemicals or detergents may be harmful if inhaled or ingested, causing severe nausea, fainting or poisoning. Fuel and its vapors are extremely flammable and explosive. Fire or explosion can cause severe burns or death. WHEN ADDING FUEL • Turn pressure washer OFF and let it cool at least 2 minutes before removing gas cap.
Section 1: Safety Rules WARNING WARNING Rapid retraction of starter cord (kickback) will pull hand and arm toward engine faster than you can let go. Broken bones, fractures, bruises or sprains could result. The high pressure stream of water that this equipment produces can pierce skin and its underlying tissues, leading to serious injury and possible amputation. Spray gun traps high water pressure, even when engine is stopped and water is disconnected, which can cause injury.
Section 1: Safety Rules CAUTION CAUTION Excessively high or low operating speeds increase risk of injury and damage to pressure washer. Improper treatment of pressure washer can damage it and shorten its life. • If you have questions about intended use, ask dealer or contact Briggs & Stratton Power Products. • NEVER operate units with broken or missing parts, or without protective housing or covers. • DO NOT by–pass any safety device on this machine.
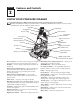
Section Features and Controls 2 KNOW YOUR PRESSURE WASHER Read this Operator’s Manual and safety rules before operating your pressure washer. Compare the illustrations with your pressure washer to familiarize yourself with the locations of various controls and adjustments. Save this manual for future reference.
Assembly Section 3 ASSEMBLY PREPARING PRESSURE WASHER FOR USE IMPORTANT: Read entire Operator’s Manual before you attempt to assemble or operate your new pressure washer. If you have any problems with the assembly of your pressure washer or if parts are missing or damaged, call the pressure washer helpline at 1-888-611-6708. If calling for assistance, please have the model, revision, and serial number from the data tag available. Remove Pressure Washer From Carton 1.
Section 3: Assembly 2. Insert carriage bolts through holes from outside of unit and attach a plastic knob from inside of unit (Figure 2). Tighten by hand. 4. Figure 2 — Secure Handle Insert “L” bolt through hole just above billboard on left side of handle (viewing from front of unit). Hold bolt in place and attach a plastic knob from inside of unit (Figure 4).Tighten by hand. Figure 4 — Attach “L” Bolt to Handle Spray Gun Hook 5. 3.
Section 3: Assembly Connect Hose and Water Supply to Pump 4. IMPORTANT: DO NOT siphon standing water for the water supply. Use ONLY cold water (less than 100°F). IMPORTANT: To avoid pump damage, you must assemble the nozzle extension to the spray gun and attach all hoses before you start the engine. 5. NOTE: Remove and discard the shipping caps from the pumps high pressure outlet and water inlet before attaching hoses. 1. Run water through your garden hose for 30 seconds to clean out any debris.
Section Operation 4 HOW TO USE YOUR PRESSURE WASHER How to Start Your Pressure Washer To start your pressure washer for the first time, follow these instructions step-by-step.This starting information also applies if you have let the pressure washer sit idle for at least a day. 1. Place pressure washer near an outside water source capable of supplying water at a flow rate greater than 3.3 gallons per minute and no less than 20 PSI at pressure washer end of garden hose.
Section 4: Operation 8. When starting engine, position yourself as recommended in Figure 12 and start engine according to instructions given in engine operator’s manual.Also see operating instructions tag located on the pressure washer. WARNING Running engines produce heat.Temperature of muffler and nearby areas can reach or exceed 150°F (65°C). Severe burns can occur on contact. Exhaust heat/gases can ignite combustibles, structures or damage fuel tank causing a fire.
Section 4: Operation How to Use Accessory Tray Figure 14 — Nozzle Spray Patterns The unit is equipped with an accessory tray with places to store your rotating brush, utility brush, turbo nozzle, and ProjectPro™ nozzles.There is also a hook at the front of the accessory tray to hold your high pressure hose. 1. Store your gun and nozzle extension on the hooks attached to the base and handle, as shown in Figure 13.
Section 4: Operation • For general rinsing (medium pressure and medium flow), ideal for most all purpose cleaning such as home siding, brick patios, wood decks, driveways and sidewalks, garage floors, etc., select orange General ProjectPro™ nozzle (Figure 16). 4. Pull back on collar, insert selected ProjectPro™ nozzle and release collar.Tug on ProjectPro™ nozzle to make sure it is securely in place. 5. For most effective cleaning, keep ProjectPro™ nozzle from 8 to 24 inches away from cleaning surface.
Section 4: Operation Pressure Washer Rinsing Figure 20 - Attaching Utility Brush to Spray Gun For Rinsing: 1. Apply trigger lock to spray gun. 2. Remove black cleaning detergent nozzle from nozzle extension. 3. Select and install desired high pressure nozzle following instructions “How to Use ProjectPro™ Nozzle System”. 4. Keep spray gun a safe distance from the area you plan to spray. Cleaning and Applying Detergent IMPORTANT: Use detergents designed specifically for pressure washers.
Maintenance Section 5 SPECIFICATIONS PRESSURE WASHER MAINTENANCE Max Outlet Pressure . . . . . . . . . . . . . . . . . . . . . 2550 psi Max Flow Rate . . . . . . . . . . 2.3 gallons per minute (gpm) Detergent Use detergent approved for pressure washers Water Supply . . . . . . . . . . . . . . . . Not to Exceed 100°F Temperature Automatic Cool . . . . . . . . . . . . . Will cycle when water Down System reaches 125°-155°F Shipping Weight . . . . . . . . . . . . . . . . . . . . . . . . . . .75 lbs.
Section 5: Maintenance 1. Detach spray gun and nozzle extension from high pressure hose. Detach nozzle extension from spray gun and remove o-ring and screen from nozzle extension. Flush screen, spray gun, and nozzle extension with clean water to clear debris. 5. Using a garden hose, remove additional debris by back flushing water through nozzle extension (Figure 23). Back flush between 30 to 60 seconds. Figure 23 — Backflushing the Nozzle Extension 2.
Section 5: Maintenance Pump Maintenance ENGINE MAINTENANCE Changing Pump Oil Change oil every 50 hours or once yearly, whichever occurs first. See the engine operator’s manual for instructions on how to properly maintain the engine. CAUTION NOTE: Purchase a premeasured bottle of pump oil, item number 190586GS, by contacting the nearest authorized service center. Avoid prolonged or repeated skin contact with used motor oil.
Section Storage 6 PREPARING THE UNIT FOR STORAGE CAUTION You must protect your unit from freezing temperatures. • Failure to do so will permanently damage your pump and render your unit inoperable. • Freeze damage is not covered under warranty. Water should not remain in the unit for long periods of time. Sediments or minerals can deposit on pump parts and “freeze” pump action. If you do not plan to use the pressure washer for more than 30 days, follow this procedure: 1.
Troubleshooting Section 7 TROUBLESHOOTING Problem Cause Correction 1. Low pressure nozzle installed. 1. Replace nozzle with high pressure nozzle. 2. Water inlet is blocked. 2. Clear inlet. 3. Inadequate water supply. 3. Provide adequate water flow. Inlet hose is kinked or leaking. 4. Straighten inlet hose, patch leak. Clogged inlet hose strainer. 5. Check and clean inlet hose strainer. Water supply is over 100°F. 6. Provide cooler water supply.
Notes 20
TROY-BILT® OWNER WARRANTY POLICY Effective November 1, 2004 LIMITED WARRANTY “Troy-Bilt® is a registered trademark of MTD and is used under license to Briggs & Stratton Power Products. Briggs & Stratton Power Products will repair or replace, free of charge, any part, or parts of the equipment** that are defective in material or workmanship or both.Transportation charges on parts submitted for repair or replacement under this warranty must be borne by purchaser.
Sección 1 Reglas de Seguridad CONSERVE ESTAS INSTRUCCIONES TABLA DE CONTENIDOS REGLAS DE SEGURIDAD Sección 1 - Reglas De Seguridad . . . . . . . . . . . . . . . . . . . . . . 22-25 Sección 2 - Características y Controles . . . . . . . . . . . . . . . . . . . 26 Sección 3 - Ensamblaje . . . . . . . . . . . . . . . . . . . . . . . . . . . . . . 27-29 Sección 4 - Funcionamiento . . . . . . . . . . . . . . . . . . . . . . . . . . 30-34 Sección 5 - Especificaciones Del Producto . . . . . . . . . . . . . . .
Sección 1: Reglas de Seguridad ADVERTENCIA ADVERTENCIA Al motor funcionar, se produce monóxido de carbono, un gas inodoro y venenoso. El respirar el monóxido de carbono, producirá náusea, desmayo o la muerte. Algunas sustancias químicas o los detergentes pueden ser perjudiciales si inhalados o ingeridos, causando la náusea severa, desmayando o para envenenar. La gasolina y sus vapores son extremadamente inflamables y explosivos.
Sección 1: Reglas de Seguridad ADVERTENCIA ADVERTENCIA El rápido repliegue del cable del arrancador (retroceso) impedirá que el usuario suelte el cable a tiempo y tirará de su mano y brazo hacia el motor. Como resultado, podrían producirse fracturas, contusiones o esguinces. La corriente de agua de alta presión que produce este equipo pueden perforar la piel y sus tejidos profundos, ocasionando lesiones serias y posible amputación.
Sección 1: Reglas de Seguridad PRECAUCIÓN PRECAUCIÓN Hacer funcionar el motor a velocidades excesivas aumenta el riesgo de lesiones personales. El tratamiento inadecuado del lavadora de presión puede dañarlo y acortar su vida productiva. • NO juegue con partes que puedan aumentar o disminuir la velocidad de mando. • NO opere la máquina lavadora a presión con un valor de presión superior a su clasificación de presión.
Sección Características y Controles 2 CONOZCA SU MAQUINA LAVADORA DE PRESION Lea el manual del operario y las reglas de seguridad antes de poner en marcha su máquina lavadora a presión. Compare las ilustraciones con su máquina lavadora a presión para familiarizarse con las ubicaciones de los diferentes controles y ajustes. Guarde este manual para referencias futuras.
Montaje Sección 3 MONTAJE PREPARANDO EL LAVADORA ALTA PRESIÓN PARA SU USO IMPORTANTE: Lea totalmente el Manual del Operario antes que intente ensamblar u operar su lavador a alta presión. Si usted tiene un problema al ensamblar la unidad o si hacen falta algunas piezas o se encuentran dañadas, llame a la línea directa del lavador a alta presión, al 1-888-611-6708. Si llamar para la ayuda, tiene por favor el modelo, la revisión, y el número de serie de la etiqueta de datos disponible.
Sección 3: Montaje 2. Inserte el perno del soporte a través de los orificios desde fuera de la unidad y sujete una perilla de plástico desde el interior de la misma unidad.Apriete manualmente (Figura 27). 4. Figura 27 - Sujetar el Manubrio Inserte un gancho en "L" a través del orificio situado justo encima del panel, en el lado izquierdo del manubrio (vista desde la parte delantera de la unidad). Sujete el gancho en su posición y coloque el pomo de plástico desde el interior de la unidad. (Figura 29).
Sección 3: Montaje 4. Conecte la Manguera y el Suministro de Agua a la Bomba IMPORTANTE: Usted deberá armar la extensión para boquillas y conectar todas las mangueras antes de darle arranque al motor. La bomba resultará dañada si arranca el motor sin tener todas las mangueras conectadas y el suministro agua abierto. Haga correr el agua a través de la manguera de su jardín por 30 segundos para limpiar cualquier escombro que se encuentre en ella. Corte el agua.
Sección Operación 4 CÓMO USAR SU MÁQUINA LAVADORA A PRESIÓN Cómo Darle Arranque a su Máquina Lavadora a Presión Si tiene problemas operando su máquina lavadora a presión, por favor llame a la línea de ayuda para máquinas lavadoras a presión al 1-888-611-6708. Para darle arranque a su máquina lavadora a presión movida a motor por primera vez, siga estas instrucciones paso a paso.
Sección 4: Operación 8. Cuando arranque el motor, colóquese en la posición recomendada en la Figura 37 y siga las instrucciones del manual del operario del motor. Consulte también la etiqueta de instrucciones situada en la limpiadora a presión. ADVERTENCIA Los motores al funcionar producen calor. La temperatura del silenciador y de las áreas cercanas puede alcanzar o pasar los 150ºF (65ºC). Quemaduras severas pueden ocurrir al hacer contacto.
Sección 4: Operación Utilización de la Bandeja de Accesorios 2. La unidad está equipada con una bandeja de accesorios con habitáculos para guardar la cepillo giratorios, la cepillo utilidad, la boquilla turbo y las boquillas ProjectPro™. La parte delantera de la bandeja también incluye un gancho para sujetar la manguera de alta presión. 3. 1. Desplace hacia atrás el anillo del conector rápido y tire de las boquillas ProjectPro™.
Sección 4: Operación Figura 41 — Boquilla General 4. Desplace hacia atrás el anillo, inserte la boquilla ProjectPro™ elegida y suelte el anillo.Tire de la boquilla ProjectPro™ para comprobar que está bien montada. 5. Para una limpieza más efectiva, mantenga la boquilla de rociado de 8 a 24 pulgadas de la superficie de limpieza. Si coloca la boquilla muy cerca, podría dañar la superficie que está limpiando. 6. NO coloque la boquilla a menos de 6 pulgadas cuando esté limpiando llantas.
Sección 4: Operación Enjuage de la Máquina Lavadora a Presión Figura 45 - Conecte el Cepillo Utilidad a la Pistola de Rociado Para Enjuage: 1. Coloque el cerrojo de seguridad a la pistola de rociado. 2. Retire la boquilla de detergente negra del prolongador de la boquilla. Limpieza y Aplicación del Detergente IMPORTANTE: Utilice detergentes diseñados específicamente para máquinas lavadoras a presión. Los detergentes caseros podrían dañar la bomba. 3.
Mantenimiento Sección 5 ESPECIFICACIONES MANTENIMIENTO DE LA MAQUINA LAVADORA A PRESION Presión de Salida Máxima . . . . . . . . . . . . . . . . . . . . . 2550 PSI Caudal Máximo . . . . . . . . . . . . . . 2.3 galones por minuto (gpm) Detergente Use el detergente adecuado para lavadores a presión Temperatura del Suministro de Agua . . . . . . . . . . . . . . . . . . . . . . . . . . .Que no pase de 100ºF Revise y Limpie el Colador de Entrada Examine el colador de entrada de la manguera de jardín.
Sección 5: Mantenimiento 4. Revise el Filtro en Línea Consulte la Figura 46 y suministre servicio al filtro en línea si se tapa siguiendo estos pasos: Use el pequeño sujeta papeles para liberar cualquier material extraño que esté tapando la boquilla (Figura 47). Figura 47 - Mantenimiento de la Boquilla Figura 46 - Limpieza del Filtro Filtro en Línea Use el alambre aquí para eliminar los residuos. Extensión de la Boquilla Anillo ‘O’ 1. 2. 5.
Sección 5: Mantenimiento Mantenimiento de la Bomba MANTENIMIENTO DEL MOTOR Cambio del aceite de la bomba Consulte el manual del operario del motor para las instrucciones de cómo mantener adecuadamente el motor. Cambie el aceite cada 50 horas o una vez al año, lo que suceda antes. PRECAUCIÓN NOTA: Debe adquirir una botella de aceite para la bomba previamente medido, Nº de pieza 190586GS, avisando el más cercano servicio autorizado central.
Sección Sección 6: Almacenamiento 6 Al uso el PumpSaver, cerciórese la arandela de la presión se apaga y desconecta del agua del suministro. Lea y siga todas instrucciones y las advertencias dadas en el contenedor de PumpSaver. PREPARANDO LA UNIDAD PARA SU ALMACENAMIENTO El agua no debe permanecer en la unidad por un largo periodo de tiempo. Los sedimentos o minerales se pueden depositar en las piezas de la bomba y "congelar" la acción de la bomba.
Diagnosticos de Averías Sección 7 REPARACION DE AVERIAS Problema La bomba presenta los siguientes problemas: no produce presión, produce una presión errada, traqueteo, pérdida de presión, bajo volumen de agua. El detergente no se mezcla con el rociado. Causa Solución 1. Está usando la boquilla de baja presión 1. (negra). Cambie la boquilla a una de las tres boquilla de alta presión. 2. La entrada de agua está bloqueada. 2. Limpie la entrada. 3. Suministro de agua inadecuado. 3.
POLÍTICA PARA EL PROPIETARIO DE EQUIPOS TROY-BILT® Efectiva desde el 1 ro de Noviembre, 2004 GARANTÍA LIMITADA "Troy-Bilt® es una marca registrada de MTD bajo licencia de Briggs & Stratton Power Products. Briggs & Stratton Power Products reparará o sustituirá sin cargo alguno cualquier componente del equipo** que presente defectos de materiales y/o mano de obra. Los gastos de transporte de las piezas enviadas para reparar o sustituir conforme a los términos de esta garantía correrán a cargo del comprador.