Bedienungsanleitung RGB-LED-Steuergerät „MS-35“ Best.-Nr. 1564992 Seite 2 - 20 Operating Instructions RGB-LED controller “MS-35” Item No. 1564992 Page 21 - 39 Notice d’emploi Unité de commande pour DEL RGB « MS-35 » N° de commande 1564992 Page 40 - 58 Gebruiksaanwijzing RGB-LED controller „MS-35“ Bestelnr.
Inhaltsverzeichnis Seite 1. Einführung............................................................................................................................3 2. Symbol-Erklärung.................................................................................................................3 3. Bestimmungsgemäße Verwendung.....................................................................................4 4. Lieferumfang.................................................................................
1. Einführung Sehr geehrte Kundin, sehr geehrter Kunde, wir bedanken uns für den Kauf dieses Produkts. Dieses Produkt entspricht den gesetzlichen, nationalen und europäischen Anforderungen. Um diesen Zustand zu erhalten und einen gefahrlosen Betrieb sicherzustellen, müssen Sie als Anwender diese Bedienungsanleitung beachten! Diese Bedienungsanleitung gehört zu diesem Produkt. Sie enthält wichtige Hinweise zur Inbetriebnahme und Handhabung.
3. Bestimmungsgemäße Verwendung Das Produkt dient als als programmierbares Steuergerät für dazu geeignete RGB-LED-Leuchtstreifen Mittels einer PC-Software können bestimmte Lichtprogramme (Farb- und Helligkeitsabläufe) erstellt werden. Diese können über einen USB-Programmieradapter (Conrad Best.-Nr. 197339) vom PC an das Steuergerät übertragen werden. Anschließend führt das Steuergerät diese Farb- und Helligkeitsabläufe eigenständig durch. Die Auswahl der Lichtprogramme bzw.
. Sicherheitshinweise Bei Schäden, die durch Nichtbeachten dieser Bedienungsanleitung verursacht werden, erlischt die Gewährleistung/Garantie. Für Folgeschäden übernehmen wir keine Haftung! Bei Sach- oder Personenschäden, die durch unsachgemäße Handhabung oder Nichtbeachten der Sicherheitshinweise verursacht werden, übernehmen wir keine Haftung.
• In gewerblichen Einrichtungen sind die Unfallverhütungsvorschriften des Verbandes der gewerblichen Berufsgenossenschaft für elektrische Anlagen und Betriebsmittel zu beachten. • In Schulen, Ausbildungseinrichtungen, Hobby- und Selbsthilfewerkstätten ist das Betreiben des Produkts durch geschultes Personal verantwortlich zu überwachen. • Gehen Sie vorsichtig mit dem Produkt um, durch Stöße, Schläge oder dem Fall aus bereits geringer Höhe wird es beschädigt.
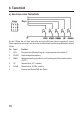
6. Anschlussdiagramm A IR-Empfänger B Externes Tastenfeld C LED-Streifen D Externes Netzteil bzw.
7. Startprogramm wählen Nehmen Sie zuerst die Kunststoffabdeckung nach oben ab. Drücken Sie dazu die einzelne Haltenase am Gehäuserand ein kleines Stück nach innen, so dass sich die Abdeckung vom Unterteil löst. Auf der Platine finden Sie die vier Steckbrücken J1, J2, J3 und J4, siehe nebenstehendes Bild, oben rechts. Mit diesen Steckbrücken kann eines der vorprogrammierten Lichtprogramme ausgewählt werden, das nach dem Zuschalten der Betriebsspannung automatisch gestartet wird.
Beschreibung der Lichtprogramme: Farbwechsel (standard): Verschiedene Farben im Wechsel. Farben werden 5 Sekunden gehalten, Überblenden dauert ca. 0,5 Sekunden Farbwechsel (langsam): Wie zuvor, nur Haltezeit gleich Überblendzeit (3 Sekunden) Farbwechsel (ständig): Ständiger Farbwechsel ohne Haltezeit Gewitter: Gewittersimulation mit Lichtblitzen und „Wetterleuchten“ Kaminfeuer: Simulation eines Feuers Farbblitze: 3x Aufblitzen verschiedener Farben, Pause, usw.
8. Tastenfeld a) Anschluss eines Tastenfelds An den 6 Stiften, die mit „Keys“ beschriftet sind (siehe Bild oben) können insgesamt 5 externe Taster angeschlossen werden, mit denen die Grundfunktionen des Steuergeräts bedient werden können.
b) Bedienung mit Tastenfeld Programm auswählen Drücken Sie kurz die Taste „PRG“. Anschließend lässt sich eines der Lichtprogramme (siehe Kapitel 7) mit den Tasten „UP“ bzw. „DOWN“ auswählen. Geschwindigkeit einstellen Drücken Sie kurz die Taste „SPEED“. Anschließend wird durch mehrfaches kurzes Drücken der Taste „UP“ bzw. „DOWN“ die Geschwindigkeit jeweils erhöht bzw. verlangsamt. Helligkeit einstellen Drücken Sie kurz die Taste „DIMM“.
9. IR-Fernbedienung Das RGB-LED-Steuergerät lässt sich auch mit einer dazu geeigneten IR-Fernbedienung steuern. Im Lieferumfang ist keine IR-Fernbedienung enthalten, diese ist separat bestellbar. Beachten Sie dazu das auf www.conrad.com angebotene Zubehör zum RGB-LED-Steuergerät auf der Webseite zum Produkt. Um die Anzahl der kompatiblen Fernbedienungen zu erhöhen, unterstützt das RGB-LED-Steuergerät ab Version 1.3 weitere Gerätecodes.
1: ON/OFF Steuergerät einschalten. Es wird das mittels Steckbrücken gesetzte Programm gestartet. Dieses wird mit der per Potentiometer vorgewählten Geschwindigkeit und in voller Helligkeit ausgeführt. Ein erneutes Betätigen schaltet das Gerät wieder aus. 2: Programmwahltasten „1“ bis „9“ Auswahl und Start der jeweiligen Farbsequenz; Start mit Grundgeschwindigkeit und voller Helligkeit 3: Tasten „AV“ und „-/--“ Relevant für das Setzen eigener Farben.
10. Anschluss und Inbetriebnahme Der Anschluss bzw. der Aufbau des Steuergeräts darf nur dann erfolgen, wenn das Steuergerät von der Stromversorgung getrennt ist. • Je nach Montageort sind die LED-Streifen und das Steuergerät zu befestigen und anschließend zu verkabeln. Montieren Sie die LED-Streifen so, dass kein Kurzschluss entstehen kann und dass die LED-Streifen fest fixiert sind.
• Falls gewünscht, verbinden Sie den IR-Empfänger mit dem Anschluss „IR“ auf der Platine. Über diesen und in Verbindung mit der IR-Fernbedienung ist später eine Steuerung der Lichtprogramme möglich, siehe Kapitel 9. • Kontrollieren Sie nochmals die richtige Verbindung aller Komponenten. • Verbinden Sie zuletzt die Stromversorgung polungsrichtig mit den beiden Anschlüssen „+“ und „-“ des Steuergeräts. Die Betriebsspannung muss zwischen 12 und 24 V/DC liegen (Gleichspannung).
12. Anschluss an den Computer Bevor Sie das Steuergerät mit dem Computer verbinden, installieren Sie zuerst die Treibersoftware für den USB-Programmieradapter (Conrad Best.-Nr. 197339) und danach die Software für das Steuergerät. • Nehmen Sie die Kunststoffabdeckung des Steuergeräts nach oben ab. Drücken Sie dazu die einzelne Haltenase am Gehäuserand ein kleines Stück nach innen, so dass sich die Abdeckung vom Unterteil löst.
13. Bedienung der Software Installieren Sie zuerst die Treiber und die Software, wie in Kapitel 11 beschrieben. Anschließend verbinden Sie das Steuergerät mit einem freien USB-Port des Computers, siehe Kapitel 12. Starten Sie die Software, es erscheint folgendes Fenster (bei neueren Versionen der Software ist ein ggf. anderes Aussehen möglich): Wählen Sie wie oben zu sehen den richtigen COM-Port für den USB-Programmer aus (siehe auch Kapitel 12).
Starten Sie eines der vorprogrammierten Lichtprogramme, indem Sie es mit der Maus anklicken. Mit den rechten Symbolfeldern können Sie: • Helligkeit verändern • Geschwindigkeit verändern • Lichtprogramm anhalten/fortsetzen • Steuergerät ein-/ausschalten Um ein Lichtprogramm selbst zu programmieren, wählen Sie „User-sequence 1“ bzw. „Usersequence 2“ aus. Stellen Sie links oben im Fenster die gewünschte Anzahl an Farbwechseln ein (im Bild oben sind 5 Farbwechsel ausgewählt).
Wenn Sie auf die Schaltfläche „Edit“ unterhalb der Einstellfelder klicken, können Sie die Einstellungen bequem über Schieberegler vornehmen, siehe folgende Abbildung. Die Einstellung „0“ für die Helligkeit deaktiviert die LEDs, die Einstellung „255“ ergibt volle Helligkeit. Die Grundgeschwindigkeit „1“ entspricht ca. 0,13 Sekunden, d.h. „255“ entspricht ca. 32 Sekunden.
14. Entsorgung Elektronische Geräte sind Wertstoffe und gehören nicht in den Hausmüll. Entsorgen Sie das Produkt am Ende seiner Lebensdauer gemäß den geltenden gesetzlichen Bestimmungen. 15. Technische Daten Betriebsspannung ���������������������������������12 - 24 V/DC (entsprechend den LED-Streifen) Stromaufnahme ohne Leuchtmittel ������typ. 25 mA Zuleitung zum LED-Streifen: Strom pro Farbkanal �����������������������������max. 5 A Empfohlener Kabelquerschnitt �������������min.
Table of Contents Page 1. Introduction.........................................................................................................................22 2. Symbol Explanation............................................................................................................22 3. Intended Use......................................................................................................................23 4. Contents.......................................................................
1. Introduction Dear customer, Thank you for purchasing this product. This product complies with the statutory national and European requirements. For safety reasons, always follow the instructions in this manual. These operating instructions are part of this product. They contain important information on setting up and using the product. Also consider this if you pass on the product to any third party.
3. Intended Use This product is a programmable controller for suitable RGB LED light strips. You can create your own specific lighting programs (colour and brightness series) using PC software. These can be transferred from the PC to the controller using a USB programming adapter (Conrad item no. 197339). The controller will then carry out the colour and brightness series/program independently.
5. Safety Instructions The guarantee/warranty will be void if damage is incurred resulting from noncompliance with the operating instructions. We will not assume any responsibility for consequential damage! Nor do we assume liability for damage to property or personal injury caused by improper use or failure to observe the safety instructions.
• In industrial facilities, the regulations for the prevention of accidents laid down by the professional trade associations for electrical equipment and facilities must be adhered to. • In schools, training centres, computer and self-help workshops, use of the product must be supervised by trained personnel in a responsible manner. • Handle the product carefully and do not drop it. Knocks, blows or even a fall from a low height can damage it.
6. Connection Diagram A IR receiver B External keypad C LED strip D External mains power supply plug for the controller and the light strip (the mains power unit must be able to supply sufficient power for three colour channels!).
7. Selecting Start Program First remove the plastic cover by lifting it upwards. To do so, press the individual attachment notches on the edge of the housing slightly inwards so that the cover comes away from the base of the unit. There are 4 jumper bridges on the circuitboard J1, J2, J3 und J4, as shown on the upper right of the adjacent figure. These jumper bridges allow you to select one of the lighting programmes which will be activated automatically when the power supply is attached.
Description of the lighting programs: Colour change (standard): Different colours alternating. Colours are held for 5 seconds, fade time approx. 0.5 seconds. Colour change (slow fading): As before but hold time is the same as fade time (3 seconds). Colour change (no hold time): Constant colour change with no hold time. Tempest: Simulation of a storm and "sheet lightning". Fireplace: Simulates a fire Colour flashes: 3x flashes of different colours, pause, etc.
8. Keypad a) Keypad connection The 6 pins labelled "Keys" (see figure above) allow the attachment of up to 5 external keys which can be used to control the basic functions of the controller.
b) Keypad operation Select program Briefly press the "PRG" button. Then you can use the "UP" or "DOWN" buttons to select the lighting programme (see chapter 7). Setting speed Briefly press the "SPEED" button. Then you can repeatedly press the "UP" or "DOWN" button to either increase or decrease speed. Setting the brightness Briefly press the "DIMM" button. Then you can use the "UP" or "DOWN" buttons to select the desired brightness.
9. IR Remote Control The RGB-LED controller can also be controlled with a suitable IR remote control. The delivery does not include any IR remote control; it can be ordered separately. Observe the accessories offered on www.conrad.com for the RGB-LED controller on the product website. To increase the number of compatible remote controls, the RGB-LED controller supports additional device codes as of version 1.3. We recommend the following IR remote controls for operation: „OneForAll URC 2981“, item no.
1: ON/OFF Switch on the control device. The programme set with the jumpers is started. It is executed with the speed pre-selected by potentiometer and at full brightness. Repeated operation switches off the device again. 2: Programme selection buttons „1“ to „9“ Selection and start of the respective colour sequence; start with basic speed and full brightness 3: Buttons „AV“ and „-/--“ Relevant for setting own colours.
10. Connection and Startup Connection and installation of the controller may only be carried out if the controller is separated from the power supply. • Depending on the site of installation, the LED strip and the controller will need to be attached and then connected by cables. Mount the LED strip such that no short circuits can occur and that the LED strip is firmly attached.
• Check all component connections are correct once again. • Finally, connect the power supply observing the correct polarity with the "+" and "-" terminals on the controller. The operating voltage must lie between 12 and 24 V/DC. Depending on the number of LED strips connected, a current supply of up to 15 A is required (the power required for the three colours R, G, B is additive).
12. Connection to a Computer Before you connect the controller and computer install the driver software for the USB programming adapter (Conrad item no. 197339) and then the controller software. • First remove the controller‘s plastic cover by lifting it upwards. To do so, press the individual attachment notches on the edge of the housing slightly inwards so that the cover comes away from the base of the unit.
13. Operating the Software First install the driver and the software as described in chapter 11. Then connect the controller with a free USB port on your computer, see chapter 12. Start the software, the following appears (newer versions may appear slightly different): Select the correct COM port for the USB programmer as shown above (see also chapter 12). Depending on how many COM ports you have in your computer or which name Windows assigns to the COM port, the correct COM ports is COM3 for example.
Start one of the pre-programmed lighting programs by clicking it with the mouse. With the symbols in the area on the right you can: • Changing the brightness • Change speed • Stop/start a light program • Switch the controller on/off To programme a lighting program yourself, select "User-sequence 1" or "User-sequence 2". In the upper left of the window you can set the desired number of colour changes (in the figure above 5 colour changes are selected).
If you click the "Edit" button below the settings area, you can simply changes the settings using slide switches, see the following figure. The "0" setting for brightness deactivates the LEDs, the setting "255" results in maximum brightness. The speed setting "1" corresponds to approx. 0.13 seconds, "255" corresponds to approx. 32 seconds.
14. Disposal Electronic devices are recyclable waste and must not be placed in household waste. Always dispose of the product according to the relevant statutory regulations. 15. Technical Data Supply voltage ��������������������������������������12 - 24 V/DC (depending on the LED strip) Current consumption without lights �����typ. 25 mA Supply to LED strip: Current per colour channel �������������������max.
Table des matières Page 1. Introduction.........................................................................................................................41 2. Explication des symboles...................................................................................................41 3. Utilisation conforme............................................................................................................42 4. Contenu de la livraison............................................................
1. Introduction Chère cliente, cher client, Nous vous remercions de l‘achat du présent produit. Le produit est conforme aux exigences des normes européennes et nationales en vigueur. Afin de maintenir le produit dans son état actuel et d‘assurer un fonctionnement sans risques, l‘utilisateur est tenu de suivre les instructions contenues dans le présent mode d‘emploi! Le présent mode d‘emploi fait partie intégrante du produit.
3. Utilisation conforme Le produit sert de commande programmable pour piloter les bandes lumineuses des DEL RVB appropriées. Il est possible de créer certains programmes lumineux (scènes de couleur et de luminosité) à l´aide d‘un logiciel d‘ordinateur Ces programmes peuvent être transférés de l´ordinateur vers l’unité de commande via un adaptateur de programmation USB (n° de commande Conrad 197339). Puis la commande exécute elle-même ces scènes de couleur et de luminosité.
5. Consignes de sécurité Tout dommage résultant d‘un non-respect du présent mode d’emploi a pour effet d‘annuler la garantie. Nous déclinons toute responsabilité pour les dommages consécutifs ! De même, le constructeur n‘assume aucune responsabilité en cas de dommages matériels ou corporels résultant d‘une utilisation non conforme de l‘appareil ou du non-respect des présentes consignes de sécurité. De tels cas entraîne l’annulation de la garantie.
• Attention! Ce produit est un équipement de la classe A. Cet équipement peut causer des perturbations radioélectriques dans les zones résidentielles; dans ce cas, il peut être exigé de l’exploitant de prendre des mesures appropriées. • Dans les installations industrielles, il convient d‘observer les consignes de prévention des accidents relatives aux installations et moyens d‘exploitation électriques, édictées par les syndicats professionnels.
6.
7. Sélection du programme de démarrage Retirez d´abord le cache en plastique vers le haut. Enfoncez pour cela légèrement l’ergot individuel sur le bord du boîtier vers l’intérieur de manière à ce que le cache se détache de la partie inférieure. Vous trouverez sur le circuit imprimé quatre cavaliers J1, J2, J3 et J4, voir figure ci-contre, en haut à droite. Ces cavaliers permettent de sélectionner un des programmes lumineux pré-programmés qui démarre automatique-ment en activant la tension de service.
Description des programmes lumineux : Changement de couleur (standard) : Différentes couleurs en alternance. Les couleurs sont activées pendant 5 secondes, le fondu enchaîné dure env.
8. Clavier a) Raccordement d’un jeu de touches Il est possible de raccorder en tout 5 touches externes permettant d‘utiliser les fonctions principales de l‘unité de commande aux 6 broches intitulées « Keys » (voir figure ci-dessus).
b) Commande avec jeu de touches Sélectionner le programme Appuyez brièvement sur la touche « PRG ». Puis sélectionnez un des programmes lumineux (voir chapitre 7) avec les touches «UP» et « DOWN ». Régler la vitesse Appuyez brièvement sur la touche « SPEED ». Une brève pression répétée sur la touche « UP » ou « DOWN » permet ensuite d’augmenter ou de diminuer la vitesse. Régler la luminosité Appuyez brièvement sur la touche « DIMM ».
9. Télécommandes infrarouge L’unité de commande RGB pour DEL peut également être utilisée à l’aide d’une télécommande infrarouge compatible. La télécommande infrarouge n’est pas fournie avec l’appareil et doit être commandée séparément. Consultez les accessoires disponibles sur la page de l’unité de commande RGB pour DEL sur le site web www.conrad.com. Afin d’augmenter le nombre de télécommandes compatibles, l’unité de commande RGB pour DEL prend en charge, à partir de la version 1.
1 : ON/OFF Mise en marche de l’unité de commande. Le programme défini à l’aide des cavaliers est lancé. Ce programme est exécuté à la vitesse présélectionnée sur le potentiomètre avec la luminosité maximale. Une nouvelle pression sur cette touche éteint l’appareil.
10. Raccordement et mise en service Le raccordement ou le montage de l’unité de commande ne peut être réalisé que si la commande est débranchée de l´alimentation électrique. • Selon l’emplacement de montage, la bande de DEL et la commande doivent être fixées puis câblées. Montez la bande de DEL de manière à éviter tout court-circuit et à bien fixer la bande de DEL. Pour le montage de l´unité de commande, veillez à monter celle-ci à un endroit bien aéré (ne pas enrober dans un isolant, risque d’incendie !).
• Si vous le désirez, reliez le récepteur IR à la prise « IR » sur le circuit imprimé. Celui-ci et en liaison avec la télécommande infrarouge permet de commande ultérieurement les programmes lumineux, voir chapitre 9. • Contrôlez encore une fois la connexion de tous composants. • Branchez en dernier l´alimentation électrique en respectant la polarité aux deux contacts «+» et «-» de la commande. La tension de service doit être comprise entre 12 et 24 V (tension continue).
12. Raccordement à l‘ordinateur Avant de connecter l´unité de commande avec l´ordinateur, installez d´abord le logiciel de pilote de l´adaptateur de programmation USB (n° de commande Conrad 197339) puis celui de l’unité de commande. • Retirez le cache en plastique de l´unité de commande vers le haut. Enfoncez pour cela légèrement l’ergot individuel sur le bord du boîtier vers l’intérieur de manière à ce que le cache se détache de la partie inférieure.
13. Utilisation du logiciel Installez d´abord les pilotes et le logiciel comme décrit au chapitre 11. Reliez ensuite l´unité de commande à un port USB libre de votre ordinateur, voir chapitre 12. Lancez le logiciel, la fenêtre suivante apparaît (pour les versions de logiciel plus récentes, il est possible que la fenêtre soit différente) : Sélectionnez comme illustré ci-dessus le bon port COM pour le programmateur USB (voir aussi chapitre 12).
Démarrez l´un des programmes lumineux préprogrammés en cliquant dessus avec la souris. Les champs d’icônes droits permettent : • de modifier la luminosité, • de modifier la vitesse, • d’arrêter/de poursuivre le programme lumineux, • d’activer/de désactiver l’unité de commande. Pour programmer vous-même un programme lumineux, sélectionnez « User-sequence 1 » ou « User-sequence 2 ».
Quand vous cliquez sur l’instruction « Edit » sous les fenêtres de réglage, vous pouvez procédez aisément aux réglages via les curseur, voir figure suivante. Le réglage « 0 » de la luminosité désactive les DEL, le réglage « 255 » donne la luminosité maximale. La vitesse de base « 1 » correspond à env. 0,13 secondes, « 255 » à env. 32 secondes.
14. Elimination Les appareils électroniques sont des matériaux recyclables et ne doivent pas être éliminés avec les ordures ménagères. En fin de vie, éliminez l‘appareil conformément aux dispositions légales en vigueur. 15. Caractéristiques techniques Tension de service �����������������������������������������12 - 24 V/DC (correspondant à la bande de DEL) Consommation de courant sans ampoule ����typ. 25 mA Câble pour la bande de DEL : Courant par canal de couleur ������������������������max.
Inhoudsopgave Pagina 1. Inleiding..............................................................................................................................60 2. Verklaring van symbolen....................................................................................................60 3. Voorgeschreven gebruik.....................................................................................................61 4. Leveringsomvang..........................................................................
1. Inleiding Zeer geachte klant, Wij danken u voor de aankoop van dit product. Het product voldoet aan alle wettelijke, nationale en Europese normen. Om dit zo te houden en een veilig gebruik te garanderen, dient u als gebruiker deze gebruiksaanwijzing in acht te nemen! Deze gebruiksaanwijzing behoort bij dit product. Er staan belangrijke aanwijzingen in over ingebruikname en gebruik. Houd hier rekening mee als u dit product doorgeeft aan derden.
3. Voorgeschreven gebruik Het product is een programmeerbare besturingseenheid (controller) voor RGB-LED-strips. Met behulp van PC-software kunnen bepaalde lichtprogramma‘s (kleur- en lichtreeksen) worden vastgelegd. Deze kunnen via een USB-programmeerkabel (Conrad bestelnr. 197339) van de pc naar de controller worden overgedragen. Vervolgens voert de controller deze kleur- en lichtreeksen zelfstandig uit.
5.
• Waarschuwing! Het betreft hier een klasse A apparaat. Dit apparaat kan in een woonomgeving radiostoringen veroorzaken; in dat geval kan van de gebruiker ervan worden geëist, passende maatregelen te treffen om het apparaat te ontstoren. • In industriële omgevingen dienen de Arbo-voorschriften ter voorkoming van ongevallen met betrekking tot elektrische installaties en bedrijfsmiddelen in acht te worden genomen.
6. Aansluitschema A IR-ontvanger B Extern toetsenbord C LED-strip D Externe voedingseenheid resp.
7. Startprogramma kiezen Neem eerst de kunststof afdekplaat van de bovenzijde. Druk hiervoor de pinnetjes aan de rand van de behuizing naar binnen zodat de afdekplaat loskomt van het onderste gedeelte. Op de printplaat vindt u vier steekbruggen J1, J2, J3 en J4, zie afbeelding hiernaast, rechtsboven. Met deze steekbruggen kan een van de voorgeprogrammeerde lichtprogramma‘s worden geselecteerd dat na het inschakelen van de voedingsspanning automatisch wordt gestart.
Beschrijving van de lichtprogramma‘s: Kleurwisseling (standaard): Verschillende kleuren in een afwisselende reeks. Kleuren worden 5 seconden vastgehouden, faden duurt ongeveer 0,5 seconde.
8. Toetsenbord a) Aansluiting van een toetsenbord Op de 6 pinnen die met „Keys“ zijn aangeduid (zie bovenstaande afbeelding) kunnen in totaal 5 externe toetsen worden aangesloten waarmee de basisfuncties van de controller kunnen worden bediend. Pin Toets Functie 1 PRG Programmaselectie (beschrijving van de lichtprogramma‘s, zie hfdst.
b) Bediening met toetsenbord Programma selecteren Druk kort op de toets „PRG“. Vervolgens kunt u een van de lichtprogramma‘s (zie hfdst. 7) selecteren met de toetsen „UP“ resp. „DOWN“. Snelheid instellen Druk kort op de toets „SPEED“. Vervolgens wordt door meerdere keren kort drukken op de toets „UP“ resp. „DOWN“ de snelheid steeds verhoogd of verlaagd. Helderheid instellen Druk kort op de toets „DIMM“. Vervolgens kunt u de gewenste lichtsterkte instellen met de toetsen „UP“ resp. „DOWN“.
9. IR-afstandsbediening Het RGB-LED-stuurapparaat kan ook aan de hand van een daarvoor geschikte IR-afstandsbediening worden bestuurd. Er is geen IR-afstandsbediening inbegrepen, deze dient afzonderlijk te worden besteld. Ga naar www.conrad.com en let op de aangeboden toebehoren bij het RGBLED-stuurapparaat op de website van het product. Om het aantal compatibele afstandsbedieningen te verhogen, ondersteunt het RGB-LED-stuurapparaat vanaf versie 1.3 meer apparaatcodes.
1: ON/OFF Stuurapparaat inschakelen. Het met behulp van steekbruggen ingestelde programma wordt gestart. Dit wordt met de via de potentiometer voorgekozen snelheid en in volle helderheid uitgevoerd. Door de toets opnieuw in te drukken wordt het apparaat weer uitgeschakeld. 2: Programmakeuzetoetsen „1“ tot „9“ Keuze en start van de betreffende kleurenreeks; start met basissnelheid en volledige lichtsterkte 3: Toetsen „AV“ en „-/--“ Relevant voor het instellen van eigen kleuren.
10. Aansluiting en ingebruikneming De aansluiting resp. opbouw van de controller mag alleen worden uitgevoerd wanneer de verbinding met de stroomvoorziening is verbroken. • De controller en LED-strip dienen afhankelijk van de montageplaats te worden bevestigd en bekabeld. Monteer de LED-strips zodat geen kortsluiting kan ontstaan en zorg dat de LEDstrips stevig gefixeerd zijn.
• Controleer nogmaals of alle componenten goed zijn aangesloten. • Verbind tenslotte de stroomvoorziening volgens de juiste polariteit met de beide aansluitingen „+“ en „-“ van de controller. De voedingsspanning moet tussen 12 en 24 V = liggen (gelijkspanning). Afhankelijk van het aantal aangesloten LED-strips is een stroom van max. 15 A nodig (de stroom van de drie kleuren R, G, B worden opgeteld).
12. Aansluiting op de computer Voordat u de controller met de computer verbindt, dient u eerst het stuurprogramma voor de USB-programmeeradapter te installeren (Conrad bestelnr. 197339) en daarna de software voor de controller. • Neem eerst de kunststof afdekplaat van de bovenzijde. Druk hiervoor de pinnetjes aan de rand van de behuizing naar binnen zodat de afdekplaat loskomt van het onderste gedeelte. • Verbind de bus PROG van de controller (zie afb.
13. Bediening van de software Installeer eerst de stuurprogramma‘s en de software zoals beschreven in hoofdstuk 11. Vervolgens sluit u de controller aan op een vrije USB-poort van uw computer, zie hoofdstuk 12. Start de software. Het volgende venster verschijnt (bij nieuwere versies van de software kan dit afwijken): Selecteer zoals u hierboven kunt zien de juiste COM-poort voor de USB-programmeeradapter (zie ook hoofdstuk 12).
Start een van de voorgeprogrammeerde lichtprogramma‘s door er met de muis op te klikken. Met de symboolvelden rechts kunt u: • De helderheid aanpassen • Snelheid wijzigen • Lichtprogramma stoppen/voortzetten • Controller in-/uitschakelen Om een lichtprogramma zelf te programmeren, kiest u „User-sequence 1“ resp. „Usersequence 2“. Stel linksboven in het venster het gewenste aantal kleurwisselingen in (in bovenstaande afbeelding zijn 5 kleurwisselingen geselecteerd).
Wanneer u op de knop „Edit“ onder de invoervelden klikt, kunt u de instellingen heel gemakkelijk met behulp van de schuifregelaars uitvoeren, zie volgende afbeelding. De instelling „0“ voor de lichtsterkte deactiveert de LEDs, de instelling „255“ geeft de volledige lichtsterkte. De standaardsnelheid „1“ komt overeen met ongeveer 0,13 seconden, dus „255“ is ca. 32 seconden.
14. Afvalverwijdering Elektronische apparaten worden beschouwd als waardevolle stoffen en horen niet bij het huisvuil. Gooi het product aan het einde van zijn gebruiksduur weg volgens de geldende wettelijke bepalingen. 15. Technische gegevens Voedingsspanning ��������������������������������12 - 24 V/DC (overeenkomstig LED-strips) Stroomverbruik zonder lichtbron ����������typ. 25 mA Toevoerleiding naar LED-strips: Stroom per kleurkanaal ������������������������max.
Dies ist eine Publikation der Conrad Electronic SE, Klaus-Conrad-Str. 1, D-92240 Hirschau (www.conrad.com). Alle Rechte einschließlich Übersetzung vorbehalten. Reproduktionen jeder Art, z.B. Fotokopie, Mikroverfilmung, oder die Erfassung in elektronischen Datenverarbeitungsanlagen, bedürfen der schriftlichen Genehmigung des Herausgebers. Nachdruck, auch auszugsweise, verboten. Die Publikation entspricht dem technischen Stand bei Drucklegung. Copyright 2017 by Conrad Electronic SE.