TuneUp Utilities User Manual
Microsoft, Windows, Windows XP, Windows Vista, Windows 7, Office, Outlook, Windows Logo, MSN, Windows Messenger and Internet Explorer are products, registered trademarks or protected names of Microsoft Corporation in the USA and/or in other countries. Firefox is a product and registered trademark of the Mozilla Foundation in the USA and/or other countries. Safari is a product and registered trademark of Apple Inc. in the USA and/or other countries. Opera is a product and a trademark of Opera Software ASA.
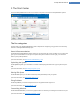
Table of Contents 1. Welcome to TuneUp Utilities 2012! 5 New features in TuneUp Utilities 2012 6 System Requirements 7 Help & Support 7 2. The Start Center 8 Changing TuneUp Utilities Settings 11 Turbo Mode 16 Economy Mode 22 The Optimization Status 27 3. Status & Recommendations 29 1-Click Maintenance and Automatic Maintenance 31 Increasing Performance 34 Fixing Problems - Details 37 Undoing Changes 38 4.
Checking the Hard Disk for Errors 92 Managing Running Processes 95 Restoring Deleted Files 98 Showing System Information 7. Customizing Windows 102 104 Personalizing Options and Behaviors 105 Personalizing the Appearance of Windows 126 8. Overview of All Functions 143 Editing the Registry 147 Checking for Updates 149 Displaying the TuneUp Optimization Report 151 9. Rating Function for Programs 152 10. The TuneUp Utilities Gadget 154 11.
TuneUp Utilities Manual 1. Welcome to TuneUp Utilities 2012! Congratulations on choosing TuneUp Utilities! You have just acquired a comprehensive collection of over 30 different tools to optimize your PC. Use this software to revitalize PCs, notebooks or netbooks with a minimum of effort! With TuneUp Utilities, you can restore the full performance capabilities of your operating system, games and programs.
TuneUp Utilities Manual New features in TuneUp Utilities 2012 With TuneUp Utilities, you can make sure your PC, notebook or netbook is in the best of health - all without any expensive upgrades! Below is an overview of the most important new features in this version: TuneUp Economy Mode Does your laptop battery go flat just before the end of a film? Is your desktop PC pushing up your electricity bill? TuneUp Utilities is putting a stop to all greedy energy-guzzlers! The brand new TuneUp Economy Mode impro
TuneUp Utilities Manual System Requirements To be able to install and run TuneUp Utilities, your computer must meet the following requirements. These requirements aren't high - most computers used today have these features: l l l l l l l Windows XP (Service Pack 2 or higher), Windows Vista or Windows 7 (all 32-bit or 64-bit versions) Min.
TuneUp Utilities Manual 2. The Start Center The new TuneUp Utilities Start Center is the central access point for all functions and optimization options. The five categories The main area in the TuneUp Utilities Start Center comprises five categories, giving you fast access to the key features of TuneUp Utilities sorted by topic.
TuneUp Utilities Manual Overview of All Functions To the right of the categories, you will see the Overview of all functions. This lists all the functions that are available in TuneUp Utilities - clearly sorted by application area. The three PC optimization modes In the PC optimization mode area, you can decide which mode should be turned on for your Windows operating system. There are three switches here: one for Economy Mode, one for Standard Mode and one for Turbo Mode.
TuneUp Utilities Manual The Menu Bar In the menu bar, you have access to the central settings dialog of TuneUp Utilities and to information about the program and individual modules. The "Settings" Menu Clicking on Settings takes you to the central configuration dialog of TuneUp Utilities.
TuneUp Utilities Manual Changing TuneUp Utilities Settings The following chapters explain how you can adapt important settings and TuneUp Utilities modules to suit your needs. Introduction The central settings dialog of TuneUp Utilities contains a convenient list of the most important settings and modules of TuneUp Utilities and their associated configuration options.
TuneUp Utilities Manual How to Configure your TuneUp Utilities There is a menu bar at the top right of the Start Center. Clicking on Settings opens the central TuneUp Utilities settings dialog, which contains a list of the key settings for TuneUp Utilities and their configuration options conveniently sorted by area. Alternatively, you can open the settings dialog by going to Overview of all functions in the Start Center and selecting the Settings entry under TuneUp Utilities.
TuneUp Utilities Manual Password protection Here you can specify whether password protection should be enabled for TuneUp Utilities to protect your TuneUp Utilities from being used by unauthorized users. You need to set your personal password for this. You also have the option of setting a password hint.
TuneUp Utilities Manual How to Configure TuneUp Utilities Modules In this area of the central settings dialog, you can change the settings for the various modules of TuneUp Utilities. Click on a module name on the left of the navigation bar to open the page for the module concerned. You can configure the following TuneUp Utilities modules here: Live Optimization In this area, you can change the settings for Live Optimization. For more information about this, see How to Configure Live Optimization, p.
TuneUp Utilities Manual Program Deactivator Here you can make various settings for TuneUp Program Deactivator™. Specify whether programs that have been re-enabled by starting them manually should be automatically disabled again after they are closed. You can also specify for programs that are scheduled to be disabled the time at which this should happen. For more information about TuneUp Program Deactivator™, see Disabling Programs, p.
TuneUp Utilities Manual Turbo Mode In the following chapters, you will find out when it can be useful to do so and what exactly happens when you turn on the TuneUp Turbo Mode. On top of that, you will receive instructions on how to switch on and configure TuneUp Turbo Mode. Introduction TuneUp Turbo Mode provides an immediate performance boost whenever you need it.
TuneUp Utilities Manual How to Put the Computer into Turbo Mode On the bottom left, in the TuneUp Utilities Start Center, you will see the Turbo Mode switch. Once you click this switch, the computer is put into Turbo Mode. The TuneUp icon then appears in the notification area of the taskbar, notifying you that Turbo Mode is on. Alternatively, you can access the switch for Turbo Mode directly via the TuneUp Utilities icon in the notification area of the taskbar. Left-click on the icon.
TuneUp Utilities Manual How to Switch to Turbo Mode At the bottom left of the TuneUp Utilities Start Center, in the PC optimization mode area, there is a Turbo Mode switch. Clicking on this switches your computer to Turbo Mode. Alternatively, you can start Turbo Mode by going to Overview of all functions in the Start Center and selecting the Turn on Turbo Mode entry under Windows. Another alternative for switching on Turbo Mode can be found in the Turbo Mode switch in the TuneUp Utilities Gadget.
TuneUp Utilities Manual How to Configure Your Own TuneUp Turbo Mode Start the wizard for configuring the TuneUp Turbo Mode by clicking on Settings in the menu bar of the Start Center and selecting the Turbo Mode area. Alternatively, open the window for configuring TuneUp Turbo Mode by going to the TuneUp Utilities Start Center and clicking on the small wrench icon at the bottom left in the PC optimization mode area.
TuneUp Utilities Manual More about Your Settings Options Step 1: Postpone automatic maintenance tasks until later Maintenance measures that start automatically in the background are important for the maintenance of your computer, but are not usually urgent. They can be carried out at a later date to free up the resources needed for your programs.
TuneUp Utilities Manual Step 4: Configure computer resources for optimum performance Your computer's resources are in demand. A clever sharing solution for the resources will help increase your computer's performance enormously. Tip: Since this does not limit any functions, this setting is also highly recommended for the long term. Ensure optimum performance regardless of energy use: This setting uses the "high performance" Windows energy-saving plan when Turbo Mode is on.
TuneUp Utilities Manual Economy Mode In the following chapters, you will find out what exactly happens when you switch to TuneUp Economy Mode and when it can be useful to do so. You will also receive instructions on how to turn on and configure TuneUp Economy Mode. Introduction TuneUp Economy Mode provides immediate energy saving whenever you need it.
TuneUp Utilities Manual An alternative way of switching to Economy Mode is the Economy Mode switch in the TuneUp Utilities Gadget. How to Find Out if Economy Mode is On If Economy Mode is on, a TuneUp Utilities icon appears in the taskbar notification area (in the bottom righthand corner beside the time), which tells you that Economy Mode is on. You can also recognize this from the switch in the Start Center.
TuneUp Utilities Manual How to Configure Your Own TuneUp Economy Mode Open the window for configuring TuneUp Economy Mode by going to the TuneUp Utilities Start Center and clicking on the small wrench icon at the bottom left in the PC optimization mode area. Alternatively, you can configure Economy Mode by going to Overview of all functions in the Start Center and selecting the Configure Economy Mode entry under TuneUp Utilities.
TuneUp Utilities Manual More about Your Settings Options General Settings Here you can specify whether configuration functions should also be offered that reduce the performance of the system and turn off visual effects. You can also decide whether Economy Mode should remain turned on when the computer is restarted. Screen Your computer's screen may use more energy even than hardware components such as the hard disk or the processor, for example.
TuneUp Utilities Manual Services The operating system performs many more tasks than most users are aware of. Many programs and services run permanently in the background, although they are not strictly necessary and use energy needlessly. If you never use some of these functions you can disable them and permanently reduce your computer's energy consumption.
TuneUp Utilities Manual The Optimization Status The Optimization Status uses a graph and associated notifications to show you how extensively you are already using the options of TuneUp Utilities to increase performance and maintain the system and what potential for optimization still remains. You can find the TuneUp Optimization Status on the TuneUp Utilities Start Center next to the PC optimization mode area. The Optimization Status is your personal indicator of optimization progress, i.e.
TuneUp Utilities Manual What is Used to Calculate the Optimization Status? TuneUp Utilities performs an analysis to see which optimizations it can perform on your system. This potential is displayed in a graph showing you how close your system is to having 100% optimization. You will achieve 100% – the perfect Optimization Status and therefore a fully filled out graph – when you implement the recommended optimization potential for your system as much as possible. The graph is made of different sections.
TuneUp Utilities Manual 3. Status & Recommendations The Status & recommendations category displays the current status for the three most important function areas provided to you by TuneUp Utilities. In the event of warnings or recommendations, you can use the Show details link to immediately address the problem behind the warning or view the recommendations. In the fourth area, you can see whether the TuneUp Utilities Rescue Center protection is enabled, so that you can undo any changes at any time.
TuneUp Utilities Manual If there are recommendations, you can view these by clicking Show details or the link to the recommendations. Each recommendation has a detailed description and you can apply most recommendations with just a click of the mouse. You can also hide individual recommendations. Once all recommendations have been applied or hidden, the status for this area reverts to green.
TuneUp Utilities Manual 1-Click Maintenance and Automatic Maintenance In the following chapters, you will find out how 1-Click Maintenance or Automatic Maintenance can help you to maintain an optimized system performance and a clean computer. All modifications to your system will be monitored by TuneUp Rescue Center and can be undone if necessary. Maintenance Tasks 1-Click Maintenance and Automatic Maintenance make sure that your computer is always kept clean, so that the system runs quickly and reliably.
TuneUp Utilities Manual 1-Click Maintenance ... ... cleans your registry Over time, the central Windows registry becomes filled with hundreds of superfluous entries. These include references to non-existent files, backlogs of programs deleted long ago and faulty entries. Your registry is cleaned, making your Windows system fast and problem-free. For more information about this, see Cleaning the Registry, p. 56. ...
TuneUp Utilities Manual How to Change Maintenance Settings In the Start Center, click on the Change maintenance settings link in the Maintain system area of the Status & recommendations category. The central TuneUp Utilities configuration dialog opens, with an area for Automatic Maintenance and one for 1-Click Maintenance. Configure your settings here.
TuneUp Utilities Manual Increasing Performance In the following chapters, you will find out why it is important to do so and how you can use Increase performance to increase the performance of your system, by turning off unnecessary tasks and services. All modifications to your system will be monitored by TuneUp Rescue Center and can be undone if necessary.
TuneUp Utilities Manual How to Increase the Performance of Your Computer In the Start Center under the Status & recommendations category, you can see whether you have any recommendations in the status field of the Increase performance category. If you have hidden some recommendations, these do not impact the status any more. Open the details window by clicking on the Show details link.
TuneUp Utilities Manual Increasing Performance - Profile The first time you use TuneUp Utilities, you are prompted to complete a profile, so that it can provide you with tailored recommendations for increasing performance.
TuneUp Utilities Manual Fixing Problems - Details In the following chapter, you will find out how to use the Fix problems – Details feature to fix problems that affect the health of your system and why it is important to do so. All modifications to your system will be monitored by TuneUp Rescue Center and can be undone if necessary.
TuneUp Utilities Manual Undoing Changes The following chapters explain how to use the TuneUp Rescue Center module to undo changes that you made with TuneUp Utilities. You can also use TuneUp Rescue Center to perform system recoveries, i.e. undo changes that you did not make with TuneUp Utilities. Introduction Since you can make comprehensive changes and edits to your system with TuneUp Utilities, it can often happen that you want to undo a change at a later time.
TuneUp Utilities Manual Undoing Changes In the right column, TuneUp Rescue Center shows you a list of all saved backups arranged by module or date and specifies for each entry the number of modified settings, time of change and the disk space freed up by the changes. Showing details The Details button takes you to an exact log of the changes carried out. However you can only view this log. You cannot undo only selected changes.
TuneUp Utilities Manual Changing Settings You can change some of the settings of the TuneUp Rescue Center. In the TuneUp Rescue Center click on the Settings button. Alternatively, you can enter these settings from the Start Center. In the Settings menu, select the Generalentry and open the Rescue Center tab. Rescue Center Protection Every TuneUp Utilities module is protected by TuneUp Rescue Center as standard. You can disable this support for individual modules by clearing the relevant checkboxes.
TuneUp Utilities Manual 4. Optimizing the System Your computer does not always work quite how you would like it to. Often it seems to take an eternity to call up individual programs or to save files and you start to doubt the performance capabilities of your computer. But in many cases this has nothing to do with the hardware.
TuneUp Utilities Manual Disabling Programs In the following chapters, you will find out how you can use the TuneUp Program Deactivator™ module to disable programs that place a load on your system at various times (at system startup, during operation and at shutdown) and why it is useful to do so. All modifications to your system will be monitored by TuneUp Rescue Center and can be undone if necessary.
TuneUp Utilities Manual Details In the Details area, you can see the name of the selected program, its current status and the load on the system from that program. You can use the switch to enable or disable the program. If no program is selected, you will see an overview here showing how many programs are enabled/disabled or relevant to the system. If several programs are selected, the details area shows the number of programs with the various statuses.
TuneUp Utilities Manual Cannot be disabled This is a program that Program Deactivator has classified as relevant for the security or proper operation of your system and the disabling of which could have serious consequences. Therefore, it is not possible to disable it. Does not cause system load The program cannot be disabled because it does not have a negative impact on the system load.
TuneUp Utilities Manual How to Disable Programs Launch the TuneUp Program Deactivator™ module by going to the Optimize System category in the Start Center and selecting Disable programs under Reduce system load. Alternatively, you can start the module by going to Overview of all functions in the Start Center and selecting the Disable entry under Installed programs. The TuneUp Program Deactivator™ module uses TuneUp Programs-on-Demand Technology™, p.
TuneUp Utilities Manual Disabling Startup Programs In the following chapters, you will find out how you can use the TuneUp StartUp Manager module to speed up the startup and working speed of your computer and why it is important to do so. All modifications to your system will be monitored by TuneUp Rescue Center and can be undone if necessary. Introduction Many programs start automatically in the background when you turn on your computer.
TuneUp Utilities Manual How to Configure Your System Startup Launch the TuneUp StartUp Manager module by going to the Optimize system category in the Start Center and selecting Disable startup programs in the Reduce system load area. Alternatively, you can start the module by going to Overview of all functions in the Start Center and selecting the Disable startup programs entry under Installed programs. Before the program starts, the startup screen may appear for the Rating function for programs.
TuneUp Utilities Manual Enabling Automatic Program Startup This starts the program automatically in the background when you next start the system. Afterwards, you can disable automatic startup at any time again. 1. Select a startup program from the list. 2. Enable it using the switch or the button in the toolbar. Adding a startup program To have the system automatically run additional programs on system startup, simply add them to the list. 1. On the toolbar select the Add button.
TuneUp Utilities Manual Description If you select a startup program in the list, the database will supply a description of the program to make the decision easier for you. In the case of very unusual programs, TuneUp StartUp Manager might not recognize a program. If so, you can obtain information on this program by searching online via a link.
TuneUp Utilities Manual Displaying and Uninstalling Programs In the following chapters, you will find out how you can use TuneUp Uninstall Manager to display the programs installed on your computer, why you might want to uninstall them and how to do so. Introduction Over time, you accumulate a large number of programs on your computer, many of which you probably do not even use. So that your Windows system can run quickly and smoothly, you should regularly remove unused or unnecessary programs.
TuneUp Utilities Manual How to Uninstall Programs 1. Launch the TuneUp Uninstall Manager module by going to the Optimize System category of the Start Center and selecting Uninstall programs from the Reduce system load area. Alternatively, you can start the module by going to Overview of all functions in the Start Center and selecting the Uninstall entry under Installed programs. Before the program starts, the startup screen may appear for the Rating function for programs.
TuneUp Utilities Manual 3. Click Uninstall to remove a program. To remove a program correctly from your computer, highlight the entry and click Uninstall in the toolbar. You can also double-click on the entry. The uninstall routine that is now called up varies from program to program. None of these programs merely deletes the files from the hard disk - they also remove all desktop icons, the entries in the Start Menu and the entries in the registry.
TuneUp Utilities Manual Configuring Live Optimization In the following chapters, you will find out how and why you can increase the performance of your computer by turning on TuneUp Live Optimization. Introduction TuneUp Live Optimization consists of two intelligent optimization methods that monitor the load your computer is under in real time and can thereby intervene if necessary to avoid sudden drops in performance.
TuneUp Utilities Manual How to Configure Live Optimization Start the TuneUp Live Optimization module by going to the Start Center and clicking on the Configure Live Optimization entry on the right-hand side of the Status & recommendations category. Alternatively, you can open the module by going to Overview of all functions in the Start Center and selecting the Configure Live Optimization entry under TuneUp Utilities. Or click on Settings in the Start Center menu bar and select the Live Optimization area.
TuneUp Utilities Manual Speed up the startup of my programs This optimization method intervenes if you start up a program manually when the computer is already under heavy load. For a short period immediately after the program has started, processing power is temporarily redistributed, giving the program in question a separate performance boost. This boost is achieved by temporarily prioritizing the program in question.
TuneUp Utilities Manual Cleaning the Registry In the following chapters, you will find out how you can use the TuneUp Registry Cleaner module to clean the registry and why it is important to do so. All modifications to your system will be monitored by TuneUp Rescue Center and can be undone if necessary. Introduction The registry is the heart of a Windows system. It is where Windows continuously stores entries (values and keys).
TuneUp Utilities Manual How to Clean the Registry 1. Launch the TuneUp Registry Cleaner module by going to the Optimize System category in the Start Center and selecting Clean registry from the Manually run maintenance tasks area. Alternatively, you can start the module by going to Overview of all functions in the Start Center and selecting the Clean entry under Registry. 2. First, your registry must be checked for problems.
TuneUp Utilities Manual Fix Problems Immediately Select Fix problems immediately and click Next to fix all detected problems immediately. Your registry is now free from all unnecessary ballast and your system is more stable. If after the cleanup has finished, the Check again button appears, find out more information here: Check Again Sometimes, the Check again button appears and the wizard recommends that you check your system again.
TuneUp Utilities Manual What is Checked? The following table shows you what areas of the registry TuneUp Registry Cleaner checks during the full scan. You can select from these during the user-defined scan. Area Description For certain system or program events such as error messages, sound files are played. These are Audible Sigplayed by accessing the corresponding entries in the registry; however these entries are invalid nals once the sound files no longer exist.
TuneUp Utilities Manual It should be clear therefore that deleted files can leave behind a lot of "ghosts" in the registry. TuneUp Registry Cleaner finds all of these orphaned entries and can delete them in a targeted fashion. We therefore recommend that you perform the full scan.
TuneUp Utilities Manual Additional Functions in TuneUp Registry Cleaner Main Menu Displaying Details and Excluding Problems from the Cleanup If you click through the various areas in the left column, you will see a detailed Explanation in the top part of the window, describing how problems can occur in the area in question. If problems are found in an area, a list of the individual problems also appears with further information.
TuneUp Utilities Manual Check Again Sometimes, the Check again button appears and the wizard recommends that you check your system again. This always happens if new entries in the registry have been made invalid by the cleanup. This is not an error in the module, but a chain reaction that can occur primarily in the Program components and File types areas. Example: In the registry, entry A points to entry B, which in turn points to the missing file X.
TuneUp Utilities Manual Defragmenting the Registry In the following chapters, you will find out how you can use the TuneUp Registry Defrag module to reduce the size of the registry by defragmenting it and why it is important to do so. Introduction The registry is the heart of a Windows system. It is where Windows continuously stores entries (values and keys). In addition, each newly installed program and every newly connected hardware is entered in the registry where it records keys and values.
TuneUp Utilities Manual How to Defragment the Registry 1. Start the TuneUp Registry Defrag module by going to the Optimize system category in the Start Center and selecting Defragment registry in the Manually run maintenance tasks area. Alternatively, you can start the module by going to Overview of all functions in the Start Center and selecting the Defragment entry under Registry. An introductory screen is displayed. 2. Click Next to start the analysis.
TuneUp Utilities Manual TuneUp Registry Defrag cannot rewrite the registry when it is running, but only immediately after Windows has started up. Now choose whether you would like to restart the computer now or whether you would prefer to allow the optimization to run automatically next time Windows starts up. Please note that optimization can take several minutes.
TuneUp Utilities Manual Remove Broken Shortcuts In the following chapters, you will find out why it is important to do so and how you can clean up your system with the TuneUp Shortcut Cleaner module by removing invalid references and shortcuts. All modifications to your system will be monitored by TuneUp Rescue Center and can be undone if necessary. Introduction The TuneUp Shortcut Cleaner module helps you quickly and easily to "restore order" to your computer.
TuneUp Utilities Manual How to Remove Broken Shortcuts 1. Start the TuneUp Shortcut Cleaner module by going to the Optimize system category in the Start Center and selecting Remove broken shortcuts from the Manually run maintenance tasks area. Alternatively, you can start the module by going to Overview of all functions in the Start Center and selecting the Remove broken shortcuts entry under Windows.
TuneUp Utilities Manual Optimizing System Startup and Shutdown In the following chapters, you will find out how to optimize the startup and shutdown of your computer in next to no time.. All modifications to your system will be monitored by TuneUp Rescue Center and can be undone if necessary. Introduction Here you receive recommendations for disabling unnecessary startup programs. These recommendations help to optimize system startup and shutdown.
TuneUp Utilities Manual How to Optimize System Startup and Shutdown Launch the TuneUp StartUp Optimizer tool by going to the Optimize system category in the Start Center and selecting Optimize system startup and shutdown from the Run maintenance tasks manually area. The TuneUp StartUp Optimizer window is displayed. Alternatively, you can start the module by going to Overview of all functions in the Start Center and selecting the Optimize system startup and shutdown entry under Recommendations.
TuneUp Utilities Manual Details Click on a recommendation or on the Details link to see detailed descriptions of the individual recommendations. Alternatively, switch to the Details tab. Here you can apply all recommendations by clicking once on Optimize all. Click on a recommendation in the "Optimization recommendations" column. A description of the program and the recommendation are displayed in the right-hand area of the window.
TuneUp Utilities Manual Defragmenting the Hard Disk In the following chapters, you will find out why it is important to do so and how you can use the TuneUp Drive Defrag module to defragment your hard disks. Introduction There are many reasons why a computer may become noticeably slower over time. One of them is the gradual fragmentation of the hard disk. This can be described as follows: New files are first saved as a block to an empty hard disk one after the other.
TuneUp Utilities Manual How to Defragment Your Hard Disk 1. Launch the TuneUp Drive Defrag module by going to the Optimize system category in the Start Center and selecting Defragment hard disk under Manually run maintenance tasks. Alternatively, you can start the module by going to Overview of all functions in the Start Center and selecting the Defragment entry under Hard disk. 2. Solid-state drives (SSD) are detected by TuneUp Utilities.
TuneUp Utilities Manual Automatically thorough You optimize your hard disk performance down to the last detail, even if this lasts a bit longer - regardless of the analysis result. Automatically fast You would like to save time and defragment each hard disk particularly quickly, regardless of the degree of fragmentation. If you have selected the Wait for result and then decide option, you will see a dialog where you can select how each hard disk should be defragmented.
TuneUp Utilities Manual Tip: NTFS Compared with FAT Hard disks can either use the NTFS file system, as set in current Windows versions as preference, or the old FAT system as supported by the first Windows versions. Analysis of drives before defragmentation is substantially faster on NTFS drives. For FAT systems, users must wait considerably longer and can take the popular coffee break. This is just one of several reasons why the old FAT system should be converted to the modern NTFS system.
TuneUp Utilities Manual 5. Gaining Disk Space In the same way as your home can get cluttered, your computer can also get clogged up with unnecessary ballast, which uses up valuable disk space. We recommend that you carry out some spring cleaning from time to time and delete unnecessary files from your system. The "Clean Hard Disk" Area In the Clean hard disk section, you can select the drives that you want to clean.
TuneUp Utilities Manual Cleaning the Hard Disk In the following chapters, you will find out how you can free up valuable space on your hard disks under Clean hard disk and why it is useful to do so. Under Clean hard disk, you can see old backups, unnecessary files and unnecessary Windows functions that can be safely removed from the hard disk without any negative impact on your system.
TuneUp Utilities Manual How to Gain Disk Space Select the Gain disk space category from the Start Center. Under Clean hard disk, select the drive on which you wish to free up disk space. A bar chart shows you how much free disk space you have on the selected drive. You can also see how much disk space you could free up by deleting the individual data types. You can now remove unnecessary files and old backups and also remove or disable Windows functions. Removing Unnecessary Files or Old Backups 1.
TuneUp Utilities Manual Disabling or Removing Windows Functions Click Windows functions to view the status of the individual functions. For every function, you receive a description that helps you decide how to proceed. The system shows you how much disk space is taken up by an activated function. You can disable or remove the following optional Windows functions: Hibernation File Hibernation mode is when your computer is shut down without needing to close any open windows, programs or documents first.
TuneUp Utilities Manual What Types of File are Recommended for Deletion? TuneUp Utilities searches for the following types of file which can normally be deleted from your hard disk without causing problems. Type Description Saved lost clusters Repair programs like CHKDSK search your hard disk for lost clusters and save them. These backups are usually never used by users. Google Earth™ Cache Files Google Earth™ uses this cache to save image data.
TuneUp Utilities Manual Finding and Deleting Large Amounts of Data In the following chapters, you will find out how you can use the TuneUp Disk Space Explorer module to obtain a rapid overview of the space taken up on your hard disks, in order to clean them up quickly and efficiently. Introduction The capacity of modern hard disks and memory cards has increased tremendously over the last several years.
TuneUp Utilities Manual How to Run an Analysis 1. Launch the TuneUp Disk Space Explorer module by going to the Gain disk space category in the Start Center and selecting Find and delete large amounts of data from the Analyze storage usage and delete data area. Alternatively, you can start the module by going to Overview of all functions in the Start Center and selecting the Find and delete large amounts of data entry under Disk space. 2. Choose what to analyze.
TuneUp Utilities Manual Analysis Results Folder Structure After the analysis, the TuneUp Disk Space Explorer main window opens. This is divided into two areas. In the left-hand area of the window, there is a tree view of your drives and folders, the same as in Windows Explorer. The data for the location selected in the tree view is displayed in the right-hand area of the window. By default, the most recently analyzed drive is displayed first.
TuneUp Utilities Manual Overview The default view Overview is an ideal first step when cleaning up your drives. The most important information from all of the other views is combined to give you a general overview. You can always find information about the selected element in the folder tree at the top of the window, in the upper area with a colorful background. The size and percentage of space used is displayed for each drive.
TuneUp Utilities Manual File Types Overview and file types By default, a practical overview of your file types opens, showing you at a glance which ones take up the most disk space. The top edge of the window displays buttons for Images, Documents, Compressed files, Music files, Video files and Other. Click on one of these buttons or on the respective entry in the overview to display all files of the respective file type.
TuneUp Utilities Manual Deletion method The Deletion method section lets you decide which method TuneUp Disk Space Explorer should use as the default when deleting files and folders. The standard deletion method Move to Recycle Bin is particularly recommended for beginners, as accidentally deleted files can be restored. However, please note that the Windows Recycle Bin can only hold a limited amount of data.
TuneUp Utilities Manual How to Archive Files Archiving Files with TuneUp Disk Space Explorer If, when browsing through your computer, you find some files that you don't actually need any more but still don't want to delete, TuneUp Disk Space Explorer has a great solution to this problem: Thanks to the smooth cooperation with Windows Explorer you can copy these files to a USB stick or external hard disk before deletion, for example. 1.
TuneUp Utilities Manual Securely Deleting Data In the following chapters, you will find out how you can use the TuneUp Shredder module to permanently delete files, folders and the Recycle Bin and why it is important to do so. Securely Deleting Data Afterwards If you have deleted a sensitive file in a "normal" way, you cannot subsequently delete it with TuneUp Shredder.
TuneUp Utilities Manual What would you like to delete? Files 1. Select Files. This option lets you search for files on your computer to select them for deletion. 2. Click Add to add a file to be deleted to the list. The Explorer opens. Double-click on a file to be deleted to add it to the list. Alternatively, you can drag and drop a file from your opened Explorer or from the Desktop to the list. Select a file with the mouse and drag it into the list.
TuneUp Utilities Manual Recycle Bin 1. Select Recycle Bin. This option shows you the Recycle Bin, so that you can empty it. You receive information on the number of files it contains and the amount of disk space taken up by the Recycle Bin. You can also display the content before deleting it. 2. Click Show contents. You receive information on the size of the Recycle Bin and the number of files it contains.
TuneUp Utilities Manual 6. Fixing Problems Unfortunately, things sometimes don't go quite as you expected when you are working with a computer. With Fix problems, TuneUp Utilities offers you various functions for discovering and rectifying any problems that occur. In addition, the program helps you to recover accidentally deleted files. Under Frequently used solution wizards, you will find the troubleshooting functions that you use most often, which can be opened by clicking on them.
TuneUp Utilities Manual How to Fix Common Problems 1. Launch the TuneUp Repair Wizard module by going to the Fix problems category in the Start Center and selecting the Fix common problems entry from the Check system and fix problems area. Alternatively, you can start the module by going to Overview of all functions in the Start Center and selecting the Fix common problems entry under Windows. 2. Select the problems you have for repair.
TuneUp Utilities Manual Checking the Hard Disk for Errors In the following chapters, you will find out how you can analyze your drives using the TuneUp Disk Doctor module and why it is important to do so. Introduction When working with your computer, files are constantly being read and written – regardless of whether you are editing a text document, looking at pictures or simply starting an application.
TuneUp Utilities Manual How to Check your Hard Disk 1. Launch the TuneUp Disk Doctor module by going to the Fix problems category in the Start Center and selecting the Check hard disk for errors entry from the Check system and fix problems area. Alternatively, you can start the module by going to Overview of all functions in the Start Center and selecting the Check for errors entry under Hard disk. 2. Select the drive to be checked by TuneUp Disk Doctor and click Next. 3.
TuneUp Utilities Manual Normal vs. Thorough analysis Normal Analysis Normal analysis takes approx. 1-2 minutes and is generally sufficient. Normal analysis is carried out in several phases. The table below shows explanations of all possible steps (only the first three lines are performed during the normal analysis). Thorough Analysis Thorough analysis covers all of the steps of the Normal analysis. In addition, your drives will be checked for physical defects.
TuneUp Utilities Manual Managing Running Processes In the following chapters, you will find out how you can use the TuneUp Process Manager module to monitor and manage running processes, system capacity and open files and why it is important to do so. Introduction TuneUp Process Manager gives you constant control over the programs and processes that are running on your system and allows you to monitor your system activity.
TuneUp Utilities Manual How to Manage Running Processes Launch the TuneUp Process Manager module by going to the Fix problems category in the Start Center and selecting Display and close running processes from the Manage processes and show system information area. Alternatively, you can start the module by going to Overview of all functions in the Start Center and selecting the Display and close running processes entry under Windows.
TuneUp Utilities Manual Open Files In the Open Files tab, you have an overview of the files and folders open at this time. The table will show you what the file type is, where the file or folder is and which process has opened it at that time. You should not be surprised if some files are shown in the list more than once. Files and folders can be opened by more than one process at the same time. It is also normal if files that are obviously "open" cannot be found in the list.
TuneUp Utilities Manual Restoring Deleted Files In the following chapters, you will find out how you can use the TuneUp Undelete module to restore accidentally deleted files. Introduction Have you accidentally deleted an important file and want to restore it? Perhaps you already looked in the Recycle Bin but it wasn't there? Then you will be pleased with the functions offered by TuneUp Undelete.
TuneUp Utilities Manual How to Search for Deleted Files 1. Launch the TuneUp Undelete module by going to the Fix problems category in the Start Center and selecting the Restore deleted files entry from the Check system and fix problems area. Alternatively, you can start the module by going to Overview of all functions in the Start Center and selecting the Restore files entry under Hard disk. 2. Select the drives you want to scan for deleted files.
TuneUp Utilities Manual Examples for the use of wildcards l l l l A search using photo* will find all files whose name starts with photo, and of all file types i.e. photo_01.jpg, photo.bmp, photo_paris.tif, etc. A search for photo.* or for photo (no wildcard) will find all files called photo and of all file types, i.e. photo.jpg, photo.doc, photo.tif, etc. A search for *.doc will find all files with the extension .doc.
TuneUp Utilities Manual You can also exit the dialog at any time by pressing Cancel. Was the recovery successful? As soon as restoration has finished, you can try to open the file. If this works, the file was successfully restored. If this doesn't work, the file had probably already been overwritten by another file.
TuneUp Utilities Manual Showing System Information In the following chapters, you will find out how you can use the TuneUp System Information module to display system information. Introduction TuneUp System Information looks into your computer and collects all sorts of facts and information about your hardware and software and your computer's performance. This information is important if you wish to upgrade your computer or if an engineer asks you whether certain components are installed on your computer.
TuneUp Utilities Manual Display All important information, including the supported display modes and the abilities of your monitor and graphics card, can be found here. Memory Here you see current memory usage and also how much memory is being used by each of the applications that are currently loaded. Performance Shown here are all facts on processor usage, physical memory and the size of the page file. This information is displayed in three real-time graphs.
TuneUp Utilities Manual 7. Customizing Windows Using the Customize Windows category, you can specifically configure how your Windows should look and function, thereby personalizing your computer. Under Frequently used settings, you will find the elements and areas of Windows that you often personalize and you can open these with a simple click.
TuneUp Utilities Manual Personalizing Options and Behaviors In the following chapters, you will find out how to modify your Windows system settings with the TuneUp System Control module. All modifications to your system will be monitored by TuneUp Rescue Center and can be undone if necessary. Introduction TuneUp System Control is a type of control center that allows you to quickly and easily adapt your Windows system to your own requirements.
TuneUp Utilities Manual How to Personalize Options and Behaviors Start the TuneUp System Control module by going to the Customize Windows category in the Start Center and clicking on the Personalize options and behaviors entry in the Modify Windows settings area. Alternatively, you can start the module by going to Overview of all functions in the Start Center and selecting the Modify Windows settings entry under Windows.
TuneUp Utilities Manual Administration Category Here you can set many internal system settings for Windows. For example, you can adapt the startup process and user logon, configure automatic CD playing, system paths and user data, and adapt the default settings of the command prompt. Wizards Category Here you will find the Copy Settings wizard. It copies your settings to other user accounts and to the Windows logon screen.
TuneUp Utilities Manual Font Smoothing To improve the legibility of text on your computer, here you can select your preferred font smoothing method. The font smoothing type ClearType merits special attention: it is particularly suitable for flat-screen monitors (TFT and LCD) and makes use of their so-called subpixels to effectively smooth the edges of even small fonts. Select ClearType and click on ClearType Settings to obtain the optimum adjustment of ClearType smoothing to your screen.
TuneUp Utilities Manual Folder Options View Here you can determine how folder windows and the elements they contain are to be displayed. Windows XP: Under Window, you specify whether the tree view of directories in a folder window is always to be visible, whether the folder window last opened on logon is to be restored, whether compressed ZIP files are to be displayed as folders, and whether a details bar is to be displayed.
TuneUp Utilities Manual Advanced Windows XP: Here you can set what elements are to be displayed on the Desktop and under My Computer. You can easily hide entire drives and specify how the address bar in Explorer, Internet Explorer and the Run dialog should behave. Windows Vista and Windows 7: Here you can set what elements are to be displayed on the Desktop and under Computer. You can easily hide entire drives and specify how the address bar in Explorer, Internet Explorer and the Run dialog should behave.
TuneUp Utilities Manual Keyboard Under Flashing cursor, you can set how the cursor flashes at the point at which data is to be input (e.g. in a word processing program). Tip: Look in the small preview to the right of your current settings and the changes made. Use the slide control to specify the frequency of flashing. If desired, you can also set the cursor width to your liking and enter a value in pixels. Modern keyboards are made with a special Windows key with the Windows logo printed on it.
TuneUp Utilities Manual Start Menu General Under Menu speed, you specify whether the submenus should open automatically as soon as the mouse points to the menu entry in question or whether a click is also necessary. There are great differences here between the various operating systems, about which we would like to go into further detail. Windows XP: If you opt for Display when pointed to, you can set for how long the mouse pointer is to be positioned over the item before the menu opens.
TuneUp Utilities Manual Recently Used Use the Default settings button to restore the Windows default settings. Windows XP: Under Recently used files you can set whether recently used files are to appear under Documents in the Start Menu. You can also define the exact number of documents to be displayed. When logging off, you can also automatically clear the list. Windows Vista and Windows 7: Under Recently used files you can set whether recently used files appear in the Start menu under Recently used.
TuneUp Utilities Manual Minimized Windows Sometimes, after the windows of a program have been minimized, only the title bar remains which is then automatically positioned at the bottom of the screen. Under Position and alignment you determine the exact target position of these bars. The default setting is bottom left, where several bars are displayed side by side. Under Spacing, you can specify how many pixels there should be between the individual title bars.
TuneUp Utilities Manual Internet Here you can determine how an existing dial-up connection should be handled when a user logs off, and you can deactivate the integrated Windows Firewall. Windows XP only: By clicking on the Settings button you can also set various advanced options for your Internet connection. Internet Explorer Explorer Bars Here you can set how the toolbars in Internet Explorer should behave.
TuneUp Utilities Manual Mozilla Firefox General This is where you can make the following general settings for Mozilla Firefox Internet browser. Under Text animation, you can turn off annoying text effects, e.g. constant flashing or horizontally scrolling text (marquees). If these effects are a nuisance to you, you can disable them by selecting the options Disable blinking text and Disable scrolling text (marquees).
TuneUp Utilities Manual Performance Here you can enable the pipelining feature of Mozilla Firefox. Pipelining is an experimental function through which the web browser sends multiple download requests to a web server over a single connection. This is not supported by all web servers. Opera Title Bar Here you can configure the settings for displaying the Opera title and logo. Under Window title, enter in the Title field the text you want to appear in Opera's title bar.
TuneUp Utilities Manual Search Here you can set which search engine Opera should use in general and for speed dial and how the speed dial should be displayed. Under Default search engine you can specify which search engine Opera uses. This is automatically selected in the search field, in the address bar, when "Search" is selected in the context menu of selected text and when entering several words in the address bar.
TuneUp Utilities Manual Privacy General Here you can configure settings for your privacy and security when working with your computer. Under Automatic Windows Updates you can specify whether Windows should automatically establish a connection with Microsoft or not. If Enable automatic Windows Updates is activated, Windows may then establish automatic contact with the Microsoft server as soon as there is an Internet connection, in order to check if there are any updates for your system.
TuneUp Utilities Manual Advanced Here you can make additional privacy settings. Under Page file you can click Go to "Memory management" to specify that the Windows page file should be deleted automatically when the system shuts down. Under Internet time you can disable the automatic synchronization of the Windows system clock with an Internet reference clock. Under Error reporting you can specify whether Windows should send an error report with your system configuration to Microsoft following a crash.
TuneUp Utilities Manual Tour Windows XP: First-time users can be invited to go on a tour of Windows XP following system startup. During this tour, the user is shown all important Windows XP modules. Deselect the option Show Windows Tour after logon if you do not want the tour to be activated after the system starts up. Under Scope, you can specify whether this option only applies to the current user or to all users.
TuneUp Utilities Manual Memory and Cache Memory Management This includes settings for managing the physical and virtual memory. Under Virtual memory, you can specify that drivers and the Windows system core can be replaced if necessary or are always kept in the RAM. Under Page file, you can specify that TuneUp Utilities always overwrites the content of the Windows page file with zeros, thereby deleting it when the system is shut down.
TuneUp Utilities Manual Desktop and Taskbar Here you can make settings regarding the stability of the desktop and taskbar. Under Desktop and taskbar in a separate process, you can enable the Execute desktop and taskbar in a separate process option to increase the stability of the system if Explorer crashes. This increases stability, but requires an additional 8 MB of disk space.
TuneUp Utilities Manual Search Windows XP: Here you can define the appearance and the behavior of the search dialog. The Disable indexing service option prevents the system from automatically indexing the contents of your files when the computer is idle. The Use classic search in Explorer option replaces the modern style search dialog with the classic style. Under Searched file types , you can click File types to specify which text file types can be searched for specific content.
TuneUp Utilities Manual Security Center (Windows Vista) / Maintenance Center (Windows 7) The Security Center or Maintenance Center, as it is called in Windows 7, regularly runs in the background to check the security status of your computer and displays warnings if a possible security problem is determined. If these warnings are displayed on your computer in error or you do not want to be shown warnings from the Security/Maintenance Center, you can switch the warnings off here.
TuneUp Utilities Manual Personalizing the Appearance of Windows The following chapters explain how you can personalize the appearance of Windows with the TuneUp Styler module. Please note that the "Boot screen" and "Startup logo" categories can only be used on Windows Vista. Introduction Windows would not be very useful without its graphical user interface.
TuneUp Utilities Manual How to Change the Appearance of Windows 1. Start the TuneUp Styler module by going to the Customize Windows category in the Start Center and clicking on the Personalize the appearance of Windows entry in the Change Windows appearance area. Alternatively, you can start the module by going to Overview of all functions in the Start Center and selecting the Change Windows appearance entry under Windows.
TuneUp Utilities Manual Boot Screen Category Please note that this function is not available in Windows 7, as Windows 7 does not use a boot screen. Introduction When you boot up Windows, a black screen is displayed as standard. TuneUp Styler lets you switch this boot screen for a different one with just a few clicks. Or let your imagination run wild and create your own boot screen with your favorite vacation photo, for example. This is how it works: 1.
TuneUp Utilities Manual Adding Boot Screens from a File 1. In the top left, click Add under Boot screens. 2. Select Load boot screen from a file. An Explorer window opens and you can select any given file on your computer. The following formats are supported: Type File extensions Description TuneUp boot screen .TBS The individual format of TuneUp Styler Stardock Bootskin .BOOTKSKIN The format of many boot screens on websites such as www.wincustomize.com Images .BMP; .
TuneUp Utilities Manual Restoring the default If you no longer like your new boot screen, you can restore the default Windows screen at any time. 1. Click on the Restore Defaults button. The default boot screen is then automatically selected from the list and a preview opens. 2. Click Apply to apply it. Steps 4 and 5 do not apply. 4. Select the visual style you want from the list to preview it. 5. Click Apply. TuneUp Styler accepts the new boot screen.
TuneUp Utilities Manual Startup Logo Category Please note that this function is only available on Windows Vista because neither Windows XP nor Windows 7 use the startup logo. Introduction Just before logon, a small, animated Windows logo appears. With TuneUp Styler you can replace this startup logo without making risky interventions in the system. This is how it works: 1.
TuneUp Utilities Manual Creating your Own Startup Logo 1. Under Startup logos click Create new. An Explorer window opens and you select an image on your computer or an external storage medium. 2. Save the new startup logo to the TuneUp Styler list under a name of your choosing. You can also enter the name of an author. The startup logo you added now appears in the list. Restoring the default If you no longer want to use your new startup logo, you can of course restore the Windows default at any time. 1.
TuneUp Utilities Manual Logon Screen Category Introduction If you share your computer with other users, or if you use a password to protect your account, you will be familiar with the Windows logon screen. TuneUp Styler lets you change the logon screen to suit your personal taste. This logon screen shows a list of all user accounts. Users must select their account from this list, enter their password (if one is set) and are then logged on to the system. This is how it works: 1.
TuneUp Utilities Manual Creating your Own Logon Screen 1. Please note that this feature is not available in Windows XP. Under Logon screens, click Create new. A wizard appears with which you can search for and adapt an image. You can select an image on your computer or on an external storage device. You also have the option of first transferring an image from a camera or scanner or starting a Google™ image search directly from TuneUp Styler.
TuneUp Utilities Manual System Elements Category Introduction In this category you can swap typical Windows icons for new ones. Here's how it works: 1. Start the TuneUp Styler module by going to the Customize Windows category in the Start Center and clicking on the Personalize the appearance of Windows entry in the Change Windows appearance area. 2. In the navigation bar in the left window area, click under Icons on System elements.
TuneUp Utilities Manual When you click on either link, a dialog appears where you can choose whether you want to reset all elements to the Windows default or whether you only wish to discard any unsaved changes for these elements. The second option is only available if there are changes that have not yet been applied.
TuneUp Utilities Manual Managing Icon Packages Introduction It is of course a very laborious task to change every Windows icon individually. TuneUp Styler therefore allows you to swap all old-fashioned Windows icons for new ones in one fell swoop. Adding an Icon Package 1. In the TuneUp Styler the left area of the window under Icons, click System elements. Then click Icon packages at the bottom. A new window opens that shows all the available icon packages.
TuneUp Utilities Manual File System Category Introduction Windows assigns a default icon to every drive, every folder, every Start menu folder and every entry in Favorites. This is how it works: 1. Start the TuneUp Styler module by going to the Customize Windows category in the Start Center and clicking on the Personalize the appearance of Windows entry in the Modify Windows appearance area. 2. In the navigation bar in the left-hand window area, click under Icons on File system.
TuneUp Utilities Manual Appearance of icons Category Introduction Here you can change the appearance of icons on the desktop. Here's how it works: 1. Start the TuneUp Styler module by going to the Customize Windows category in the Start Center and clicking on the Personalize the appearance of Windows entry in the Change Windows appearance area. 2. In TuneUp Styler in the left area of the window under Icons, click Appearance of icons.
TuneUp Utilities Manual Repair Category Introduction It can be fun to change the Windows icons and to make a few personal settings here and there. However, it is possible that the desired icons are suddenly not displayed correctly or are even swapped. TuneUp Styler has two repair functions. This is how it works: 1.
TuneUp Utilities Manual Visual Style Category Introduction Here you can change what is known as the visual style. This defines the appearance of windows and Windows buttons. Here's how it works: 1. Start the TuneUp Styler module by going to the Customize Windows category in the Start Center and clicking on the Personalize the appearance of Windows entry in the Change Windows appearance area. 2. In TuneUp Styler in the left-hand window area under Interface, click Visual Style.
TuneUp Utilities Manual Adding Visual Styles From a File 1. In the top left under Visual Styles click Add. 2. Select Load visual styles from a file... An Explorer window opens and you can select a visual style on your computer or an external storage media, if you have already saved one. TuneUp Styler recognizes and supports almost every common format: Type File extenDescription sions TuneUp Vis.
TuneUp Utilities Manual 8. Overview of All Functions On the far right of the Start Center, you will see the Overview of all functions menu. Opening this menu gives you a list of all functions that TuneUp Utilities offers - clearly sorted according to application area. Clicking on the wrench icon next to an entry opens the settings for that entry, which you can adapt to your personal requirements.
TuneUp Utilities Manual Check for errors Checks the surface of your hard disk and your file system structure for errors and fixes them to prevent data loss. (See also How to Check your Hard Disk, p. 93.) Securely delete data Gives you three options for deleting your files or folders so that they cannot be restored, even by professionals. (See also How to Securely Delete Data, p. 87.) Restore deleted files Searches your hard disk and mobile data carriers for deleted files and restores them.
TuneUp Utilities Manual Turn on Standard Mode Puts all tuning services and features at your disposal, without restriction. Turn on Turbo Mode Allows you to temporarily turn off unnecessary background programs or maintenance processes to give your computer a performance boost. (See also How to Switch to Turbo Mode, p. 18.) Start 1-Click Maintenance Checks your system for optimization options and then allows you to implement these optimizations directly. (See also How to Change Maintenance Settings, p. 33.
TuneUp Utilities Manual Modify Windows settings Allows you to modify visual effects, browser options, the desktop, the user logon and much more to your personal requirements. (See also How to Personalize Options and Behaviors, p. 106.) Modify Windows appearance Allows you to change the Windows user interface to your personal wishes and requirements. (See also How to Change the Appearance of Windows, p. 127.
TuneUp Utilities Manual Editing the Registry In the following chapters, you will find out how you can edit the registry using the TuneUp Registry Editor module. Please note that this feature is only intended to be used by experienced users. Introduction The Windows registry is in effect a huge central database. Every new item of hardware or software you install is "registered" here. Over time, the registry gets larger and larger, making it increasingly difficult to keep a handle on things.
TuneUp Utilities Manual Editing a Key In the context menu of a key, select the different editing functions. You can delete keys, rename them, and copy them to the clipboard. You can also edit the values of a key. In the context menu of a folder, select New to create a new key. Browsing the Registry From the Context menu of a folder in the tree structure, select Search to begin searching within the registry. TuneUp Registry Editor offers you comprehensive search options here.
TuneUp Utilities Manual Checking for Updates In the following chapters, you will find out how you can use the TuneUp Update Wizard module to keep your TuneUp Utilities up to date and why it is important to do so. Introduction TuneUp Utilities is constantly being developed: individual features are expanded or adapted to suit the latest technology and any errors are fixed. When a new version is available it will be made available to you on the Internet.
TuneUp Utilities Manual If Updates Exist You receive a list of the available updates with a short description of the new or modified functions. Click Next to install the updates. If No Updates Exist If there are no updates, your TuneUp Utilities is already up to date and you can close the wizard by clicking Finish.
TuneUp Utilities Manual Displaying the TuneUp Optimization Report In the following chapters, you will find out how you can use the TuneUp Optimization Report to keep a constant overview of the extent to which you have optimized your computer to date with TuneUp Utilities. Introduction The TuneUp optimization report summarizes all of the optimization steps already performed by TuneUp Utilities.
TuneUp Utilities Manual 9. Rating Function for Programs You can turn on the useful Rating function for programs in the TuneUp Program Deactivator™, TuneUp StartUp Manager and TuneUp Uninstall Manager modules. It shows you how useful other users of TuneUp Utilities found the programs that you have installed. You can use the rating function to help you decide which programs you really need in your day-to-day work.
TuneUp Utilities Manual How to Submit a Rating 1. Move the mouse cursor over the Usefulness column. When you rate a program, you must give it at least one star. A maximum of 5 stars can be awarded. 2. Click on the number of stars that you wish to award the program. So, if you wish to give three stars, click on the third star. 3. Your rating is automatically saved and transferred to the TuneUp Utilities server.
TuneUp Utilities Manual 10. The TuneUp Utilities Gadget Another function of TuneUp Utilities is the gadget. This is not supported by Windows XP and is therefore only available to you with Windows Vista and Windows 7. The practical gadget can be displayed on the desktop. It keeps you constantly informed of the status of your computer. You no longer need to start TuneUp Utilities to find out whether optimization potential has been identified in the Status & Recommendations category.
TuneUp Utilities Manual 11. TuneUp Utilities in Taskbar Notification Area The notification area is the area on the right-hand side of the Windows taskbar. This displays, for example, the time, status icons or program shortcuts. TuneUp Utilities has a notification area icon that shows you the current status of your system and provides an entry point to TuneUp Utilities. When you double-click on the notification area icon, TuneUp Utilities starts up.
TuneUp Utilities Manual Explorer Bars 12.
TuneUp Utilities Manual Load points 45 Logon Screen 133 Maintenance 31 Maintenance Center 125 157 Processes 96 Processor usage 95 Profile 36 Program Components 59 Maintenance Tasks 31, 33 Program Extensions 59 Managing running programs 95-96 Program Paths 59 Program Settings 59 42 Manually Running Maintenance Tasks 41 Memory Management 122 Programs-on-Demand-Technology Memory Usage 122 Rating function for programs 152 Menu Appearance 107 Recently Used Files 113 Menu
TuneUp Utilities Manual Tips for Boot Screens TuneUp 1-Click Maintenance TuneUp Disk Doctor TuneUp Disk Space Explorer TuneUp Drive Defrag 130 Windows Functions 76 31 Windows Messenger 78 92-93 75, 80-82, 86 71-72, 74 TuneUp Economy Mode 6, 22 TuneUp Live Optimization 53 TuneUp Optimization Report 151 TuneUp Process Manager 95-96 TuneUp Program Deactivator™ 42, 45 TuneUp Programs-on-Demand Technology™ TuneUp Registry Cleaner TuneUp Registry Defrag TuneUp Registry Editor 42, 45 56-57, 59