TurningPoint AnyWhere for Mac User Guide Version 3.
© 2013 Turning Technologies, LLC. Portions Responsive Innovations, LLC, Microsoft Corporation No part of this document may be reproduced or transmitted in any form or by any means, electronic or mechanical, for any purpose, without the express written permission of Turning Technologies, LLC. All rights reserved. Turning Technologies, LLC, 255 West Federal Street, Youngstown, OH 44503 USA. TurningPoint® is a registered trademark of Turning Technologies, LLC.
1 About TurningPoint AnyWhere . . . . . . . . . . . . . . . . . . . . . . . . . . .6 Technical Requirements. . . . . . . . . . . . . . . . . . . . . . . . . . . . . . . . . . . . . . . . . . . 7 Introduction to TurningPoint AnyWhere. . . . . . . . . . . . . . . . . . . . . . . . . . . . . . . . . . . . . . . . . . . 8 Downloading TurningPoint AnyWhere. . . . . . . . . . . . . . . . . . . . . . . . . . 8 Installing TurningPoint AnyWhere . . . . . . . . . . . . . . . . . . . . . . . . . . . . . .
5 Running a Poll . . . . . . . . . . . . . . . . . . . . . . . . . . . . . . . . . . 37 Polling. . . . . . . . . . . . . . . . . . . . . . . . . . . . . . . . . . . . . . . . . . . . . . . . . . . . . . . . . . . 38 Running a Quick Poll with TurningPoint AnyWhere. . . . . . . . . . . . . 38 Polling with a Question List. . . . . . . . . . . . . . . . . . . . . . . . . . . . . . . . . . . . 39 Adding a Question On-the-Fly . . . . . . . . . . . . . . . . . . . . . . . . . . . . . . . . .
9 Integrations . . . . . . . . . . . . . . . . . . . . . . . . . . . . . . . . . . . . 61 TurningPoint Anywhere and Learning Management Systems (LMS) . . . . . . . . . . . . . . . . . . . . . . . . . . . . 62 Logging into an LMS . . . . . . . . . . . . . . . . . . . . . . . . . . . . . . . . . . . . . . . . . . 62 Importing a Participant List. . . . . . . . . . . . . . . . . . . . . . . . . . . . . . . . . . . . . . . 63 Exporting Grades/E-mailing Student Grades . . . . . . . . . . . . . . . . . . . . . .
1 About TurningPoint AnyWhere Poll in any application with the power of TurningPoint AnyWhere. Expand the interactive capabilities of your presentation beyond PowerPoint and conduct polling using content in your preferred format - web browsers, PDFs, Word documents and more. Use existing presentations or materials for easy, instant polling.
Technical Requirements Technical Requirements The following are required for TurningPoint AnyWhere to properly function. • Mac OS X 10.4 or higher • G3 processor or better / Intel processors fully supported (Universal Binary) • 256 MB RAM (512 MB recommended) • 20 MB hard disk space • Available USB 1.1 or USB 2.0 port • Ethernet or 802.
Introduction to TurningPoint AnyWhere Introduction to TurningPoint AnyWhere TurningPoint AnyWhere's floating toolbar allows polling from content in whiteboard software, web browsers, PDFs, Word documents and more. No additional preparation is necessary. Assessment and tracking for groups or individuals is also easily accomplished with a powerful reporting feature.
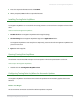
Introduction to TurningPoint AnyWhere 5 Enter the required information and click Submit. 6 When prompted, save the file to a specified location. Installing TurningPoint AnyWhere TurningPoint AnyWhere is a no-install file. This simply means it can be ran from a computer or from a flash drive. How to install TurningPoint AnyWhere... 1 Double-click the TurningPoint AnyWhere Disk Image file (dmg). 2 Click and drag the TurningPoint AnyWhere logo to the Applications folder.
Introduction to TurningPoint AnyWhere How to configure TurningPoint AnyWhere for automatic updates... 1 Open TurningPoint AnyWhere. 2 Click Preferences on the Launchpad. 3 Select Application from the left navigation pane. 4 Change the value for Automatically Check for Updates from False to True.
TurningPoint AnyWhere Launchpad TurningPoint AnyWhere Launchpad The Launchpad provides quick access to commonly used features. TurningPoint AnyWhere Launchpad Poll Poll is the main function of TurningPoint AnyWhere. • Poll allows for immediate access to the showbar and quick polling. • Click anywhere in the Poll area to launch the showbar and begin polling. Polling Assistant The Polling Assistant allows for a question list or a participant list to be set up for the polling session prior to polling.
TurningPoint AnyWhere Launchpad Create and Manage From Create and Manage, participant lists and question lists can be created or edited, sessions can be continued or viewed, results can be exported and reports can be generated. • Participants • Create a Participant List - Creating a Participant List on page 20. • Edit a Participant List - Editing a Participant List on page 21. • Import an LMS Participant List - Importing a Participant List on page 63.
The TurningPoint AnyWhere Showbar The TurningPoint AnyWhere Showbar The showbar provides access to all features that are needed while polling the audience. Features include: TurningPoint AnyWhere Showbar Button Action The Start button opens polling. The Stop button stops polling and is only displayed when polling is open. The Poll Menu button is Create on-the-fly questions including 2-10 Answer, Fill in the Blank, Numeric Response, Essay, Team Assignment and Custom.
The TurningPoint AnyWhere Showbar Button Action The Chart button starts/stops live charting. The Presentation button shows/hides the presentation window. The Response Grid button shows/hides the response Grid. The Non-response Grid button shows/hides the non-response grid. The Countdown Timer button shows, starts, stops and hides the countdown timer. The Connection Information button shows/hides receiver and/or ResponseWare connection information.
2 Response Device Configuration The following Turning Technologies’ response devices are compatible with TurningPoint AnyWhere: • ResponseCard IR or RF • ResponseCard XR • ResponseCard NXT • ResponseWare • PresenterCard This chapter covers: • Configuring IR or RF Receivers • Configuring ResponseWare • Configuring a PresenterCard • Testing the Response Devices TurningPoint AnyWhere User Guide 15
Configuring IR or RF Receivers Configuring IR or RF Receivers Prior to polling, it is recommended to verify the channel of the receiver. For the receiver to communicate with the ResponseCards, both the receiver and ResponseCards must be on the same frequency (channel). How to configure IR or RF receivers... 1 Connect the device receiver to the USB port of the presentation computer. 2 Click Preferences on the Launchpad. 3 Select Response Devices from the left panel.
Configuring a PresenterCard 5 If a Reserved Session ID was created through www.rwpoll.com, enter it in the Reserved ID box. Note Reserved Session IDs are custom IDs that allow presenters to keep the same Session ID. 6 Click Login. • At the first login, a window appears with the license agreement. The agreement must be accepted to continue. Next Steps Use the polling test to verify the devices have been properly configured. See Testing the Response Devices on page 18 for more information.
Testing the Response Devices 6 Press a button on the PresenterCard other than the Channel button. The Detected Device ID appears in the window. 7 Click Pair. Note Changing the channel on the device receiver, the PresenterCard will need to be paired again. 8 Optionally, the programmable buttons can be customized by selecting the desired function from the drop-down menus provided for each button. 9 Click Done to close the Settings Window.
3 Participants Participant lists identify the members of the audience - students, trainees, survey respondents - who will use a response device during a presentation. The participants’ names and required information are stored along with Device IDs.
Creating a Participant List Creating a Participant List A participant list stores audience members’ names, Device IDs and any other information relevant to the session including User ID, e-mail address, etc. How to create a participant list... 1 Click Participant List and select Create Participant List... from the TurningPoint AnyWhere menu bar. The TurningPoint AnyWhere Participant List Assistant window opens. 2 3 Select a Participant List Template.
Editing a Participant List 6 Name the participant list. • Click the number of fields or click Back to return to the field selection window. 7 Click Finish. The Participant Information window is displayed. Note A Device ID column is automatically placed as the first column in the participant list. This is a required field for each participant. 8 Select a field and enter the participant information. 9 Press Enter on the keyboard to go to the next row.
Loading a Participant List • Rename a Field - Select the field and click the Action Menu, select Rename Field, enter the new name in the box provided then click Change. • Remove a Field - Select the field to be removed. Click the Action Menu and select Delete Field. • Rearrange Column Order - Select the column to be moved and drag and drop the column to the new location. 4 Save the participant list. • To save the list with a different name. Click the Action Menu and select Save As.
Verifying Participants and Device IDs • If the desired participant list is not displayed, select Choose Other... from the menu bar to select a participant list from another location. Tip To have a participant list automatically created based on responding participants, select Auto from the Participant List drop-down menu. (This is the default option in TurningPoint AnyWhere). Select Anonymous if tracking participant information is undesired.
Printing a Participant List 3 Click Play to open registration to participants. 4 Each participant must locate their name and press the number on their response device that corresponds with the number to the left of their name. The Device ID for the participant will now appear in the Device ID column. If more than 10 participants are in the participant list, use the forward and back buttons to scroll page by page to see the remaining participants.
Deleting a Participant List 7 Click Close. Deleting a Participant List A participant list may be deleted if it is no longer needed. How to delete a participant list... 1 Click Participant List and select Delete Participant List... from the menu bar. 2 Select the participant list to be deleted. 3 Click Delete. Caution This action cannot be undone within TurningPoint AnyWhere. The participant list must be recovered from the Trash.
4 Polling with a Question List Question lists allow questions to be defined and correct answers to be set prior to polling. The question and answer choices are displayed in a window independent of the showbar. Available Question Types: • Multiple Choice • Fill in the Blank - Available for XR and NXT ResponseCard users, fill in the blank answers have a limit of 16 characters. Multiple correct answers must be separated by a semi-colon.
Question Lists Question Lists Creating a Question List A question list may be created via the launchpad or the showbar. The steps below describe creating a question list via the showbar. How to create a question list... 1 Click Question List and select New Question List. • The Question Editor opens. Questions are listed in the left panel. Selecting a question in the left panel displays the question and answers in the middle panel. Question and Presentation Properties can be set in the right panel.
Question Lists • Assign a correct answer by selecting Correct from the drop-down menu to the right of answer choice. All other answer choices will automatically be designated as Incorrect. • More than one correct answer can be assigned by selecting Correct from the drop-down menu to the right of another answer choice. • To apply a correct answer indicator, check the box labeled Display Correct Answer in the right panel under Presentation Properties.
Question Lists 5 Add another question to the list by clicking the ( + ) button at the bottom of the left panel and selecting the desired question type. Note Questions can also be added to a question list by parsing them from another source. For more information see Importing Questions on page 30. 6 Click the Action button on the bottom left of the screen and select Save As to save the question list. Opening a Question List Prior to polling, the question list must be opened. How to open a question list.
Importing Questions Importing Questions Questions can be imported from: • Other Question Lists • Session Files • QuestionPoint • QTI Documents For complete instructions on how to use QuestionPoint, please refer to the QuestionPoint 2.1.1User Guide, available at http://www.turningtechnologies.com/user-guides. Parsing Content into a Question List Parsing content into TurningPoint AnyWhere is a quick and easy way to generate question lists. How to parse content into a question list...
Formatting XML Files • XML Files have an .xml extension. Note If importing incompatible question types, a warning dialogue box will display omitted questions. The questions are added to the Question List and appear in the left-hand pane in the Question Editor.
Formatting XML Files slide Each slide element contains the question and answer information for a single slide. Attribute Description id An optional attribute that contains a unique identifier for the slide. type Defines what type of slide to create using a single-letter code.
Formatting XML Files Attribute Description filename An optional attribute that contains a filename for a picture that can be included with the question. imageposition An optional attribute that sets the question picture position. The following are acceptable values: • L = Left • R = Right • F = Full topic The topic element contains the question topic. Attribute Description id An optional attribute that contains a unique identifier for the topic.
Standards Standards TurningPoint AnyWhere’s Standards Tool allows the use of built-in standards (per state or country, type, subject and grade level) to create custom lists of standards on which participants can be evaluated. Whether training, teaching, or testing, standards helps organize the material in a presentation into subject areas, competencies, or other standards which the participants should meet. Participants’ results can be viewed by standards Reports.
Standards 9 10 Select a standard from the list and drag it to the panel on the right. Repeat these steps beginning with step 4 to add standards to additional questions. Assign multiple standards or use multiple Standards Lists. 11 When finished assigning standards, click Save to save the changes to the question list or Save and Load to load the question list for polling.
Standards 6 Select the question in the left panel of the Question Editor. 7 Select a standard from the list. 8 Drag the standard to the right under Question Standards. 9 Repeat these steps beginning with step 8 to add standards to additional questions. Assign multiple standards or use multiple Standards Lists. 10 When finished assigning standards, click Close Standards to return to the question list, then click the Action button and select Save.
5 Running a Poll This chapter covers: • Polling • About the Chart Window TurningPoint AnyWhere User Guide 37
Polling Polling This section covers: • Running a Quick Poll with TurningPoint AnyWhere • Polling with a Question List • Adding a Question On-the-Fly • Adding a Countdown Timer • Adding a Response/Non-response Grid • Changing the Display Format of the Percentages • Setting a Correct Answer • Comparing Results Running a Quick Poll with TurningPoint AnyWhere Quick polling is considered polling without a question list or a participant list. It is generally used to peak the audience’s interest/involvement.
Polling • Clicking the Chart button on the TurningPoint AnyWhere showbar brings up a dynamic chart that will display the responses received. The chart will remain on screen until the chart button is clicked again. • Display a countdown timer by clicking the Countdown Timer button on the showbar.. • Show the response or non-response grid by clicking the Response or Non-response Grid button on the showbar. 2 Click the Stop button to close the poll and display the results of the participants.
Polling information see Presentation on page 52. Note Click the Show/Hide Presentation button on the TurningPoint AnyWhere showbar to hide the question. Click again to display the question. • Click the Minimize/Maximize button on the bottom left of the question screen to reduce the window. This will allow the question screen to be moved. Click the Minimize/Maximize button again to restore the window to full screen mode. 4 Click Stop Polling to display the results.
Polling • Team Assignment - A question type that requires the participants to select a team. Note An anonymous question can be inserted where participant information is not captured even if a participant list has been selected. Click the Action Menu button on the showbar and select Anonymous Question. 3 After the participants have responded, click the Stop button. Polling closes and the chart is displayed. Adding a Countdown Timer A countdown timer may be added to any question while polling is open.
About the Chart Window About the Chart Window This section explains: • Changing the Display Format of the Percentages • Setting a Correct Answer • Comparing Results Changing the Display Format of the Percentages The chart percentages may be displayed in several ways. Follow the steps below to change the decimal placement. How to change the display format of the percentages... 1 Click the Action button on the bottom left corner of the chart window.
About the Chart Window Comparing Results The Compare with Question feature allows users to compare the results of two questions side-by-side. How to compare results... 1 Click the Compare with Question drop-down menu on the bottom right corner of the chart window and select the question to be compared with the current question. The chart window displays the results side by side. Current results are displayed in red, selected question results are displayed in blue.
6 Collecting Data This chapter discusses: • Sessions • TurningPoint AnyWhere Session Viewer TurningPoint AnyWhere User Guide 44
Sessions Sessions This section covers: • Saving a Session • Resetting a Session • Continuing a Prior Session • Displaying Connection Information • Sending Feedback to ResponseWare Participants This section also explains the functionality of the Session Viewer. Saving a Session In order to view results data, a session must be saved. Sessions can be saved in any location, such as a flash drive or the desktop, however it is recommended to save sessions in the TurningPoint AnyWhere default location.
Sessions Continuing a Prior Session TurningPoint AnyWhere can resume a saved session. New session data will be appended to the opened session file, allowing results to be saved in one file. How to continue a prior session... 1 Click File and select Continue Prior Session.... 2 Select the desired session and click Open. Displaying Connection Information Users often find it helpful to display the receiver and/or ResponseWare connection information to participants.
Sessions How to send feedback... 1 Click Window and select Messaging and Feedback. • The message history appears in the top panel. 2 Enter a response to a message in the bottom panel. 3 From the Send Message To drop-down menu choose to send the response to All Devices or a Specific Device • If a response is sent to a specific device, the Device ID must be entered in the text box to the right of the drop-down menu. 4 Click Send Message. • Optionally, click Clear History to delete all messages.
TurningPoint AnyWhere Session Viewer TurningPoint AnyWhere Session Viewer The Session Viewer is a real-time session editor. Through the Session Viewer, question and answer text can be added to polled questions, and real-time edits can be made to the loaded participant list. To open the Session Viewer, click on the TurningPoint AnyWhere menu bar, click Window and select Session Viewer.
TurningPoint AnyWhere Session Viewer • More than one correct answer can be assigned by selecting Correct from the drop-down menu next to another answer choice. 4 Click ( + ) at the bottom of the right panel to add another answer choice. 5 Click the ( X ) next to the answer choice to remove it from the list. Answer choices that a participant has responded to, nor can a answer choice from the middle of the list be removed.
7 Preferences From the TurningPoint AnyWhere menu bar, click TurningPoint AnyWhere and select Preferences...
TurningPoint AnyWhere Preferences TurningPoint AnyWhere Preferences The Preferences window consists of two panels. The left panel lists each settings category. The right panel lists each available option within the settings category. Click a settings category to display all available options. Application Preferences Application Preferences Setting Description File Location Sets the default save location for Participant Lists and session. Network resources can be specified as default save locations.
TurningPoint AnyWhere Preferences Shortcut Keys Setting Description Start/Stop Polling Set a keyboard shortcut to start/stop polling. Show/Hide Countdown Timer Set a keyboard shortcut to display or hide the countdown timer. Play/Pause Countdown Timer Seta a keyboard shortcut to start or pause the countdown timer. Show/Hide Response Grid Set a keyboard shortcut to show or hide the response grid. Show/Hide Nonresponse Grid Set a keyboard shortcut to show or hide the non-response grid.
TurningPoint AnyWhere Preferences Competition Setting Description Include NonResponders Determines whether non-responders will be included in team scoring. The default is set to False, which does not include non-responders. Teams In Leaderboard Determines the number of teams displayed in the leader board. The acceptable range is 1-20 Teams. The default is set at 5. Participants in Leaderboard Determines the number of participants to include in the participant leader board.
TurningPoint AnyWhere Preferences Fill in the Blank Slides Setting Description Number of Results Sets how many unique values will be displayed in the answer table. Include Other Results Sets if the answer table will display results other than what has been defined in the keywords. Table Font Sets the font used for the text on Fill in the Blank slides. Response/Non-response Grid Setting Description Cell Window Type Sets the window type as transparent or opaque.
TurningPoint AnyWhere Preferences Setting Description Enforce Participant List When set to True, the software excludes the responses from participants who are not in the loaded Participant List. If set to False, all participants’ responses will be accepted and appended to the end of the list. Invalid Response Notification When set to True, allows the ResponseCard to blip red a few times to indicate an invalid response was chosen or green to indicate a valid response was chosen.
8 Reports TurningPoint AnyWhere provides two different reporting options: • Basic Reports • Screenshots TurningPoint AnyWhere User Guide 56
Basic Reports Basic Reports Reports provide information about a session. If a participant list was used with a session, users can determine how participants answered and scored. Generating a Report A session must contain at least one question for a report to be generated. How to generate a report... 1 Click Window and select Reports. • TurningPoint AnyWhere displays a list of the saved session files and the current session file in the left panel.
Basic Reports Report Description Difficulty and Discrimination Indexes Displays the difficulty index and the discrimination index for each individual question item during a single session or assessment.
Basic Reports Saving a Report Reports can be saved as HTML or CSV. How to save a report... 1 Follow steps 1- 4 of Generating a Report on page 57. 2 Click Save As.... 3 Select Web Page (HTML), CSV (Comma Delimited) or PDF. • The HTML file will open in the default web browser. • The CSV file will open in Microsoft Excel. A CSV is a text only file. • The PDF will open with Preview. 4 Specify the save location and name the file. 5 Click Save.
Screenshots Screenshots Screenshots can be extracted in TurningPoint AnyWhere. By default, the software captures the entire desktop. Extracting Screenshots To extract screenshots, Include screenshots must be set to True in the General category of Preferences. How to extract screenshots... 1 Click Window and select Extract Screenshots from the TurningPoint AnyWhere menu bar. A list of session files located in Documents/TurningPoint AnyWhere/Sessions is displayed.
9 Integrations TurningPoint AnyWhere integrates with the following Learning Management Systems: • Blackboard • Moodle • Performance Matters • Sakai • Turning Technologies Web Registration Utility • WebCT 6/Vista Editions TurningPoint AnyWhere User Guide 61
TurningPoint Anywhere and Learning Management Systems (LMS) TurningPoint Anywhere and Learning Management Systems (LMS) Logging into an LMS Prior to logging into an LMS, please verify with your IT Department that the LMS is installed and working properly. For technical issues regarding TurningPoint AnyWhere and LMS, contact Turning Technologies’ Customer Support team. How to login to an LMS... 1 Click Window and select LMS Integrations.
Importing a Participant List Importing a Participant List Prior to importing a participant list, the steps in Logging into an LMS on page 62 must be completed. How to import a participant list... 1 Select Import Participant List and click Continue. 2 Select the course and click Finish. 3 Name the participant list, specify the save location click Save. 4 A confirmation that the list was successfully imported will be displayed. 5 Click Done.
Exporting Session Data • Optionally, check the box to e-mail individual results to students through WebCT/Blackboard and enter your e-mail address. Additionally, there is the option to include a Common Message. 5 Click Continue. Exporting Session Data TurningPoint Anywhere session files can be exported into a text file. The text file can be used to import the data into a variety of other applications.
Exporting Session Data 8 Close the Export Window. Create or Edit Export Schemes... 1 Click File and select Export Session Data... 2 Mouse over Tools and select Export Wizard. The Export Wizard opens, displaying a list of session files in the Session Folder in the bottom half of the window. 3 Select the radio button labeled Create or Edit Export Schemes. 4 Choose a session file. • Select the Current Session to use the session currently open. • Select a session file from the list of files.
Exporting Session Data Any of the information defined in the Participant List can be included. 9 Select the Responses tab. The Export Data window displays the Responses tab. 10 To include the responses, choose whether to Show Responses Horizontally or Show Responses Vertically on the Responses tab by selecting the option from the drop-down menu in the bottom right corner of the window. Show Responses Horizontally will group the response data by question in the exported file.
Exporting Session Data There is an example export at the bottom of the window showing a sample based on the settings specified. Observe this example the format settings are changed in the next few steps to ensure it matches your expectations. 14 Specify the order of the fields in the exported file by moving the fields up and down the list, by selecting the field and dragging it to the desired location. Additionally, two fields can be joined together or include blank fields in the exported file.
Exporting Session Data A window opens for a location and filename to be entered for the exported file. 19 Specify a name and location for the exported file. 20 Click Save. Optionally, click Save Scheme to create an export schemes can be reused to save the data from other session files in the same format. Specify a location and filename for the export scheme in the same way. 21 Click OK on the confirmation window. 22 Click Finish to exit the Export Assistant.
10 Contact Us If you have questions or concerns, additional resources are available online or by calling a Turning Technologies representative. Online Assistance Turning Technologies offers online assistance through its website at www.turningtechnologies.com. Go to the Support page of the website to find more information, such as support guides and manuals, online tutorials and product training.
Customer Support Turning Technologies’ Customer Service Department offers first class technical support second to none. Technical Support is available Monday - Friday, 7:00 a.m. - 9:00 p.m. EST. For your convenience we offer several methods of communication for technical support. From within the contiguous United States, you can reach Customer Service toll-free by calling 1.866.746.3015. If calling from outside the United States please call +1.330.746.3015.