
Installation Instructions


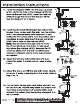

Table Of Contents
- 页 1
- 书签A5CA267D FREE FALL
- 书签B54F4A39 One Handle Lavatory Faucet
- 书签EB1D5B88 TUSCANY
- 书签06D7E273 Your new faucet is designed for years of trouble-free performance. Keep it looking new by cleaning it periodically with a soft damp cloth. Avoid abrasive cleaners, steel wool, and harsh cleaners as these will dull the finish and void the warranty. Vinegar is suggested as an alternative cleaner and is safe for all finishes.
- 书签7A738073 If soldering during the installation of this faucet, remove the seats, cartridges, and washers before adding any heat. The warranty will be voided on these parts if not removed before soldering.
- 书签17C0D3CF Safety glasses should always be worn when cutting or soldering.
- 书签1484897D Always cover your drain before installation to prevent losing parts.
- 书签750C609A For Models : 673-6170, 673-6171 673-6172
- 书签0EC4D860 Before installation turn off the cold and hot water shut offs. Turn the faucet handle\(s\) on to release the pressure in the system. Before installing the water supply lines to the new faucet, turn on both water supply valves and bleed the water supply lines into a bucket for one minute to remove any debris that could clog the faucet. Wrap ALL threaded connections with Teflon tape in a clockwise direction. When installing the new faucet, turn the connectors finger tight, then use an adjustable wrench to tighten the connectors. Connections that are too tight will reduce the integrity of your system.
- 书签B27743C3 Flashlight
- 书签DFEF0375 Safety Glasses
- 页 2
- 书签952A52DD Socket Wrench
- 书签6A1C7CA8 39
- 书签F7C9C194 39
- 书签154A8B4E Allen Wrench
- 书签22EAD395 29
- 书签F033D21B 30
- 书签8771E81F 31
- 书签0D48B866 32
- 书签ECF6FAA7 33
- 书签4EEF120B 34
- 书签B27319DC 35
- 书签093A3E2A 36
- 书签6A4A7B3C 38
- 书签CD3456B1 37
- 书签71EB79EB Washer
- 书签F6BFE133 Lock Nut
- 书签695EB2D6 Pop-Up Body
- 书签EF8E2F72 Ball Rod
- 书签7D53FE16 Lift Rod Strap
- 书签80F3433B Button
- 书签73A9EDA7 Lift Rod
- 书签7E70D173 Ball Nut
- 书签930D904C Mounting Bolt
- 书签944306D4 O-rings
- 书签90D4A4EE Adapters
- 书签9A0BFAEC Screen Filters
- 页 3
- 书签8191EF28 1. Turn off the water shut offs before installation. Remove the current faucet. Clean and dry the surface the new faucet will be installed on. Note: This faucet fits 3 cm/1-3/16" countertops.
- 书签F53785A0 2. Deck Plate \(3 Hole\) Installation: Verify the O-ring \(#18\) is in place. Attach the gasket \(#25\) to the deck plate \(#24\), ensuring the notches on the deck plate \(#24\) line up for proper installation. Apply silicone sealant beneath the gasket \(#25\). Install the faucet through the second hole from the left. Note: Do not remove the customer service tag with the model number and phone number. This information will be needed when calling the customer service department.
- 书签88321CA5 3. Single Hole Installation: Verify the O-ring \(#18\) is in place. Apply silicone sealant beneath the base \(#17\). Install the faucet through the single faucet hole. Note: Do not remove the customer service tag with the model number and phone number. This information will be needed when calling the customer service department.
- 书签4E7331D2 17
- 书签A1E55441 18
- 书签4DF4A981 4. From underneath the sink, slide the metal washer \(#21\) onto the mounting bolt \(#20\). Screw on the lock nut \(#22\), then tighten using the socket wrench \(#39\). Hint: Have someone hold the body \(#16\) in place while tightening.
- 书签DB6A6EEC Step 1-4
- 书签11014AF4 21
- 书签5499F8F6 22
- 书签FB37D434 39
- 书签C5FC2F5D 20
- 书签FDC77A4E 16
- 页 4
- 书签2516F8AA Installation Instructions
- 书签93C17EB9 29
- 书签92E32589 30
- 书签5C8CCA66 31
- 书签1B17BE4A 32
- 书签96DBCCFF 33
- 书签0A27D343 35
- 书签E3947621 36
- 书签3CD379C4 38
- 书签3AA4AECA 34
- 书签D86112D6 37
- 书签EDC6F265 5. Apply Teflon tape onto the threads of the faucet water supplies in a clockwise direction. Tighten the water supply tubes/lines onto the water supply shut offs. Be sure to connect the cold water supply tube/line to the cold water supply valve \(typically on the right\) and the hot water supply tube/line to the hot water supply valve \(typically on the left\). Use a wrench \(as shown\) to tighten the nut. Hold the tubes/lines into a bucket and turn the water supply valves on for one minute. Turn off the water supply valves.
- 书签BDAE5789 6. Apply Teflon tape to the threads of the waterway \(#14\) in a clockwise direction. Slip 1/2" coupling nuts onto water supply tubes or use flexible stainless steel supply lines \(recommended\) - both are sold separately. Use two wrenches \(as shown\) to keep from twisting the supply tube off of the faucet when tightening the nut.
- 书签CF18CCED 7. Remove the stopper \(#29\), the threaded end \(#30\) and washer \(#31\). Note: Before installation, verify there is no damage to the pop-up body \(#33\) or the threaded end \(#30\). If there is damage, please call customer service for a replacement. Do NOT install damaged parts.
- 书签DD99E82B 8. Remove the old drain assembly. Clean the surface to remove the old adhesive and dirt before installing the new drain. Dry the area thoroughly.
- 书签B963158C 9. Place a ring of silicone sealant around the threaded end \(#30\) or the drain opening of the sink. Verify the washer \(#31\) and lock nut \(#32\) are on the pop-up body \(#33\). Insert the pop-up body \(#33\) into the drain hole from underneath and screw the threaded end \(#30\) to the pop-up body \(#33\).
- 书签5D530BDF 33
- 书签23E6F1DB 32
- 书签6418C200 10. Verify the ball nut \(#34\) is pointed straight back to the lift rod \(#38\) location. Tighten the lock nut \(#32\) firmly against the base of the sink to ensure a tight seal.
- 书签47711D22 32
- 书签268A7830 Step 5-10
- 书签85F026BD 34
- 页 5
- 书签FD8CAF80 Installation Instructions
- 书签0CE92039 34
- 书签D3073D65 35
- 书签3A705D8D 34
- 书签D010DDCF 35
- 书签7B99B61B 29
- 书签1985EF34 38
- 书签35E499E2 37
- 书签EBFC8CA7 11. Insert the stopper \(#29\) into the pop-up body \(#33\). Verify the hole in the stopper \(#29\) falls towards the ball nut \(#34\). Insert the ball rod \(#35\) through the hole in the stopper \(#29\). See the diagram for a visual.
- 书签228B76DD 13. Open the hot and cold water shut offs and check for leaks. If a leak occurs, refer to step 5 or 6.
- 书签91E6496C 15. Turn on both the hot and cold water and let it run for one minute. This will help clear any debris that may have come loose during installation and prevent the system from becoming clogged. Turn off the water.
- 书签FB464064 14. Close the drain and fill the sink with water. Check for leaks. If water is leaking from the drain, refer to step 9 or 10.
- 书签19F15E68 12. Insert the lift rod \(#38\) through the hole on the faucet. From underneath the sink, turn the button \(#37\) counterclockwise and insert the lift rod \(#38\) into the button \(#37\). Turn the button \(#37\) clockwise to lock. Next insert the ball rod strap \(#36\) into a hole on the ball rod \(#35\). Note: Ensure there is enough room to move the lift rod \(#38\) up and down to fully open and close the stopper \(#29\). Remove the lift rod strap \(#36\) from the ball rod \(#35\) and choose a different hole to make adjustments as needed.
- 书签E734D2FA Step 11-15
- 书签CD969022 33
- 书签CAEB9F2F 35
- 书签E2871A53 36
- 书签0FA1BF39 37
- 书签00FD5AB2 Open
- 书签C81E2A17 Locked
- 页 6
- 书签56EE8783 Revised on 04/03/2021
- 书签0A1BAB34 Release the pressure in the faucet system. Remove the handle button \(#1\), set screw \(#2\), handle \(#3\), and trim cap \(#4\). If the lock nut \(#7\) is loose tighten it. If the lock nut \(#7\) is tight, remove the lock nut \(#7\) and cartridge \(#9\). Verify the O-ring is clean and in proper alignment on the cartridge \(#9\). If the O-ring is dirty rinse in warm water. Reinstall the O-ring onto the cartridge \(#9\). Reinstall the cartridge \(#9\), lock nut \(#7\), trim cap \(#4\), handle \(#3\), set screw \(#2\) and handle button \(#1\). Turn the water supply supplies on.
- 书签641A8BF3 The lock nut \(#7\) has come loose or the O-ring on the cartridge \(#9\) is dirty or misaligned.
- 书签DF70F413 Dirty or damaged cartridge \(#9\).
- 书签9ABF1545 Screen filter \(#28\) is dirty.
- 书签E06FF9C6 Release the pressure in the faucet system. Remove the handle button \(#1\), set screw \(#2\), handle \(#3\), trim cap \(#4\), lock nut \(#7\), and cartridge \(#9\). Check the ceramic disk for dirt and damage. Replace the cartridge \(#9\) if damaged. If the cartridge \(#9\) is dirty, soak it in warm white vinegar for 4 hours. Every 30 minutes, while the cartridge \(#9\) is completely submerged, turn the stem on and off 10 times. Reinstall the cartridge \(#9\), lock nut \(#7\), trim cap \(#4\), handle \(#3\), set screw \(#2\), and handle button \(#1\). Turn the water supplies back on.
- 书签9460E495 Release the pressure in the faucet system. Disconnect the supply lines from the waterway \(#14\) and remove screen filters \(#28\). Keeping the raised face of the screen filter \(#28\) downward, clean the screen filter gently with a soft bristled brush. Reinstall the screen filters \(#28\) and supply lines. Open the hot and cold shut offs. Check for leaks. \(Refer to step 5 for instructions on reinstalling the supply lines.\)
- 书签53F8A24C Troubleshooting
- 书签552157B4 Leaks underneath the handle \(#3\).
- 书签E64187A6 The water will not shut off completely.
- 书签532AD64E Faucet has an inconsistent water flow.
- 书签DD889D51 The manufacturer warrants that the parts and assemblies of this product will be free from defects in material and workmanship under normal household use for as long as it is owned by the original consumer purchaser. This warranty covers the original purchaser with original receipt only and does not include business, commercial or industrial use of this product. This warranty shall not apply to goods which have been subject to accidents, negligence or improper installation. Our responsibility under this warranty is limited only to the replacement of parts and no other costs. Should a malfunction occur within the time covered by this warranty, replacement parts may be obtained from Customer Service Department 1-800-626-3525 or email warranty@cmiproduct.com. The manufacturer will, at its discretion, provide replacement parts for installation by consumer for any parts that prove defective under normal usage and care with new or equivalent parts.
- 书签AA301773 If the installation instructions have been followed carefully and the faucet still does not work properly, take these corrective steps. CAUTION: Faucets are under pressure. For safety, before preforming maintenance on the faucet always turn off the water at the water supply valve and turn on the handle\(s\) to release the pressure.
