
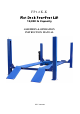
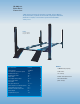
Installation Guide


5. Double check all dimensions and make sure that the layout is perfectly square.
6. Before continuing with the installation it is help
ful to stand the posts up at their respective locations
and get a visual of the shop, aisles and other clearances. Also, this is a good time to drive a vehicle
into position and check for adequate clearance.
7.
NOTE
All models MUST be installed on 3000PSI concrete only confirming to the minimum require
ments. New
concrete must be adequately cured by at least 28 days minimum.
STEP 4
: (Installing the Columns with cross bars)
1. Before proceeding, double check measurements and make certain that the bases of each column
are squar
e and aligned with the chalk line.
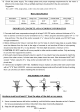
2. Locate the columns at their respective locations according to the chalk line layout. (See Fig.3) Pay
attention to the power
-side column. DO NOT BOLT columns at this moment. Use caution to
prevent columns from falling over.
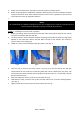
3. Unbolt the safety rack at the bottom inside the column.( See Fig. 4)
Fig.4 Fig.5 Fig.6
4. Insert the end of cross bar into every column. ( See Fig. 5) To be sure that the end with lock
release handle of front cross bar is inside the power-side column. Handle faces out (front). The
rear cross bar should be placed as a mirror image of the power-side one. ( The side with a tiny bar
link two ends face back)
5. Insert the safety rack into the cross bar end as shown in Fig. 6.
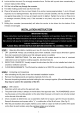
6. Hold down the safety rack then raise up the cross bar ends to
rest on the first (lowest) p
osition.
( See Fig. 7)
7. Tighten up the bolt of every safety rack at the bottom. (See Fig. 8)
7
REV A-083013