
Installation Guide


24
TP11KC-DX
Jun 2017
d. Check support adapters for secure contact at vehicle manufacturer recommended lift points.
e. Continue to raise to desired height only if vehicle is secure on lift. Then release the START button.
f. DO NOT go under vehicle if all four adapters are not in secure contact at vehicle manufacture
recommended lift point.
g. Repeat complete spotting, loading and raising procedures if required.
h. Press down the hydraulic pressure release lever on the motor pump to lower the vehicle into the locking
position. The locking latches are engaged.
DO NOT GO UNDER VEHICLE IF LOCKING LATCHES ARE NOT ENGAGED.
BEFORE ATTEMPTING TO LIFT PICKUP TRUCKS OR OTHER TRUCK FRAME VEHICLES,
BE SURE THAT:
• Vehicle frame is strong enough to support its weight and has not been weakened by modification or
corrosion.
• Vehicle individual axle weight does not exceed one-half lift capacity.
• Adapters are in secure contact with frame at vehicle manufacturers recommended lift point.
• Vehicle is stable on lift
• The overhead switch bar will contact the highest point on the vehicle
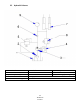
4.1.4 While Using Lift
a. Avoid excessive rocking of vehicle while on lift.
b. Always use safety stands as needed or when removing or installing heavy components.
4.1.5 To Lower Lift
a. Remove all tools or other objects from lift area
b. Press START button a few seconds to raise up a little. Then pull down the latch-release handle by left hand
and at the same time press down the pressure-release lever.
REMAIN CLEAR OF LIFT WHEN LOWERING VEHICLE. OBSERVE PINCH POINT WARNING DECALS.
4.1.6 Unloading Lift
After the lift is lowered down onto the ground, remove adapters from under vehicle and swing arms to full drive-thru
position before moving vehicle out.
IF LIFT IS NOT OPERATING PROPERLY, DO NOT USE UNTIL ADJUSTMENT OR REPAIRS ARE MADE BY
QUALIFIED LIFT SERVICE PERSONNEL.