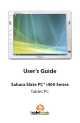
User’s Guide Sahara Slate PC® i400 Series Tablet PC
Chapter 00 Preface Reading this manual will help you get the most out of your new Sahara Slate PC. If you are a new computer user, or just new to Tablet PCs, you should read through the manual carefully before first using your new Sahara Slate PC. Visit us online at www.tabletkiosk.com for additional resources and information to help you get the most from your Sahara Slate PC i400 Series Tablet PC. Copyright ©2007 Sand Dune Ventures, Inc. All Rights Reserved.
Disclaimer The specifications and information in this manual are subject to change without prior notice in order to improve reliability, design and/or function, but this does not represent a commitment on the part of the manufacturer. The manufacturer assumes no responsibility for errors or omissions in this document.
maximum rated voltage may cause damage to the AC adapter or to the Sahara Slate PC. This could result in fire or electrical shock. When the AC adapter is plugged into an electrical outlet, place the power cord so it will not be stepped or walked on. Do not place objects over or on the power cord. Use the Sahara Slate PC in a clean, dry, temperature controlled environment. Do not use the Sahara Slate PC in areas of high humidity, around water or outdoors while it is raining.
charged with hazardous voltage levels that can cause serious personal injury. A defective power supply must be returned to your dealer. Safety Notices for the Power Cord This equipment has a 2 or 3-wire power cord. Replace the power cord if it becomes damaged. Contact your dealer for an exact replacement. In the U.S.A. and Canada, the power cord must be a UL-listed detachable power cord (in Canada, CSA-certified).
generates, uses, and can radiate radio frequency energy and if not installed and used in accordance with the instruction manual may cause harmful interference to radio communications. However, there is no guarantee that interference will not occur in a particular installation.
the substitution of the connecting cables and equipment other than manufacturer specified. It is the responsibility of the user to correct any interference caused by such unauthorized modification, substitution or attachment. Manufacturer and its authorized resellers or distributors will assume no liability for any damage or violation of government regulations arising from failing to comply with these guidelines. c. For portable devices without co-location condition (eg.
FCC Statement to Users for the FaxModem This equipment complies with Part 68 of the FCC rules. On the bottom of this equipment is the label that contains, among other information, the FCC Registration Number and Ringer Equivalence Number for this equipment. IF REQUESTED, THIS INFORMATION MUST BE GIVEN TO THE TELEPHONE COMPANY. The REN is useful to determine the number of devices you may connect to your telephone line and still have all of those devices ring when your telephone number is called.
The Telephone Consumer Protection Act of 1991 makes it unlawful for any person to use a computer or their electronic device to send any message via a telephone facsimile machine unless such message clearly contains in a margin at the top or bottom of each transmitted page or on the first page of the transmission the following information: The date and time of transmission Identification of either business, business entity or individual sending the message; Telephone number of either the sending machine
b. For LPD “Operation is subject to the following two conditions: (1) this device may not cause interference, and (2) this device must accept any interference, including interference that may cause undesired operation of the device.” This Class B digital apparatus complies with Canada RSS-210. The abbreviation, IC, before the registration number signifies that registration was performed based on a Declaration of Conformity (DoC) indicating that Industry Canada technical specifications were met.
This page intentionally left blank.
Table of Contents Getting Started What’s in the Box Setting Up Your Sahara Slate PC Step 1: Inserting the Battery Pack To Remove the Battery Pack Step 2: Connecting the Tablet PC to an external power source Step 3: Connecting applicable peripherals and networking cables (optional) Step 4: Powering on the Sahara Slate PC Step 5: Navigating with the Stylus Pen 1 1 2 2 3 3 4 4 5 Touring Your Sahara Slate PC Front View Top View Left Side View Back View Right View Bottom View 9 10 12 14 16 18 18 Battery Usa
Upgrading Your Sahara Slate PC Before you Begin ANY Upgrade Procedure Upgrading Memory (RAM) Upgrading the Hard Disk Drive (HDD) Replacing the Wireless Networking Card (Advanced) 27 27 28 30 32 Troubleshooting General Hardware Problems / Possible Causes and Solutions Audio Problems/Solutions Battery Problems/Solutions Internet Problems/Solutions Networking Problems/Solutions Power Problems/Solutions Screen Display Problems/Solutions USB Problems/Solutions Upgrade Problems/Solutions Contacting Your Dealer
This page intentionally left blank.
Chapter 01 Getting Started Your Sahara Slate PC was des gned to allow you to get up and runn ng and qu ckly as poss ble. Due to the fact that the Sahara Slate PC sh ps to var ous countr es around the world, set-up may vary sl ghtly depend ng on where you are located. If you have any quest ons that are not answered by th s manual to your sat sfac t on, plea se v s t our web s te at www.tabletk osk.com for more nformat on or to subm t a support request.
webs te at www.tabkletk osk.com for the most up-to-date l st f your package contents vary from th s l st. 2 There are three models n the Sahara Slate PC 400 Ser es: 412T / 440T / 440D. Please check to make sure you have rece ved the correct model 3 Please be sure to check that the System Recovery D sc matches the Operat ng System (OS) preloaded on your Sahara Slate PC. There w ll not be a System Restore D sc ncluded f you ordered your Tablet PC w thout an OS opt on.
Inserting the battery To Remove the Battery Pack Turn off the Sahara Slate PC and remove the power cord from the “DC Power In” port. Turn over the computer and place t on a sol d, flat surface. Sl de the Lock ng Tab n the d rect on of the arrow engraved on the tab to set t n the unlock pos t on. Use your other hand to sl de the battery latch n the d rect on of the arrow engraved on the tab and hold t there. Use both hands to carefully s de the battery out of the bay.
! @ Plugging into an external power source NOTE: When you first connect the tablet into an external power source, the battery charge indicator will begin to glow amber. When the battery is fully charged the indicator will turn green. (See the section entitled Battery Care for tips on maximizing battery life and performance.) Step 3: Connecting applicable peripherals and networking cables (optional) If you have any e ternal per pherals you’d l ke to use w th the tablet ( .e. USB mouse, USB keyboard, etc.
Powering on the Sahara Slate PC. Slide and hold the toggle switch until it lights up blue. Step 5: Navigating with the Stylus Pen Unl ke a standard laptop or desktop PC, standard nav gat onal act v t es are completed us ng the stylus pen, or even your fingers f us ng the touch screen. The tablet w ll react to the pen d fferently depend ng on what mode you are us ng. Touch Screen mode: Nav gat ng w th a touch screen s d fferent than nav gat ng w th a mouse.
TIP: When trying to select or activate something on the screen with the stylus pen, pay attention to the position of the pointer icon instead of the tip of the pen. Tapp ng l ghtly on the screen w ll perform a standard left mouse button cl ck. If you want to perform a r ght mouse button cl ck, locate the n the task bar and cl ck on t. The “V sual Mouse” w ndow screen should appear. Cl ck ng on the top r ght bo w ll perform the funct on of a r ght mouse button cl ck.
Chapter 01: Gett ng Started
This page intentionally left blank.
Chapter 02 Touring Your Sahara Slate PC The Sahara Slate PC features a number of physical characteristics designed to help you work as efficiently as possible. Take a moment to familiarize yourself with the controls and Input/ Output (I/O) ports on the faces and sides of the computer. Understanding the layout of the system will aid you when using the Sahara Slate PC in the field or on the go.
Front View ! @ # # $ % ^ & * ( BL BM BN BO 1. Battery Charge Indicator Glows Amber when the battery is charging and changes to green when the battery is fully charged. 2. Hard Disk Drive Activity Light Glows amber when the hard drive is being accessed 3. Built-in Stereo Speakers Listen to music, movies, games and more. 4. Secure Attention Sequence (SAS) A computer without an attached keyboard must support a hardware mechanism to generate the SAS which also known as “CTRL-ALT-DEL” or “CAD”. 5.
6. Volume Up This button will increase the volume of sound emitted from the computer’s internal speakers and headphone port. 7. Volume Down This button will increase the volume of sound emitted from the computer’s internal speakers and headphone port. 8. Screen Mode Toggle (i440D only) This button will toggle the i440D’s input screen between electromagnetic active digitizer and touch screen. This button can be reprogrammed by the user. 8.
Top View ! @ # $ % ^ & 1. DC Power In Jack Plug the AC adapter’s connection cable into this port to provide power to the computer. 2. Ventilation Port Fan exhaust port for expelling hot air from the interior of the Tablet PC. Do not block to prevent over heating. 3. Wireless Networking Power Toggle Slide toggle switch to the left to activate the wireless networking adapter’s transmitter. The switch will glow blue when powered on. Slide switch back to the right to turn off wireless networking.
5. System Power/Resume Toggle Sliding this button to the right and hold for - seconds will turn on the computer. Sliding this button while the computer is in Suspend Mode will resume normal operation. Sliding and holding for 4-6 seconds will immediately turn off the computer. Note: Using this switch to power off the computer is not recommended unless the computer has stopped responding to user input as it allows no time for the OS to shut down normally, and as a result, data loss may occur. 6.
Left Side View ! @# $ % ^ & * ( 1. VGA Port This port enables you to connect the Sahara Slate PC to any external display monitor that uses a cable with a standard male HD 5 connector. Supports using the external monitor in clone, span and dual view modes. Great for driving an LCD or Plasma HDTV with a PC In (VGA) port. 2. LAN Port This jack provides a standard RJ45 connection for accessing a network or high speed internet connection via an Ethernet cable. Supports 0/ 00/ 000 bps protocols. 3.
5. Two USB 2.0 Ports High speed (480 Mbs) Universal Serial Bus .0 ports for connecting peripherals such as a mouse, keyboard, wedge reader, CD/DVD drive, printer, digital camera and more. Backwards compatible with USB . devices. 6. eSATA (External Serial Advanced Technology Attachment) Port With transfer speeds reaching three times that of USB .0 or IEEE 3 4, eSATA is an excellent choice for external disk storage. Supports both SATA II (300 Mbps) and SATA I ( 50 Mbps) hard drives. 7.
Back View $ & @ # % ! ^ $ 1. Wireless Networking Card Expansion Slot Expansion slot contains wireless networking adapter. User upgradeable. 2. RAM (Memory) Compartment Allows access to the user upgradeable memory slot. Primary RAM module resides on the other side of the motherboard and is NOT user upgradeable. 3. Docking Connector This connector will allow the use of optional VESA mounting plate, docking station and other optional expansion devices. 4.
5. Battery The Sahara Slate PC comes equipped with a standard 6-cell lithium ion battery pack that can be removed by the user and replaced. 6. Battery Latch Used along with the battery lock to release the battery from its bay for removal. 7. Battery Lock Allows the battery to be locked into place during use to prevent accidental removal and subsequent power loss.
Right View ! 1. Anti-Theft Kensington Lock Used with the locking device (sold separately) to attach the Sahara Slate PC to a desk, table, kiosk, or other stationary apparatus to help prevent the computer from being stolen. Bottom View ! @ ! 1. Docking Station Support Grooves Serves as a support and alignment guide when using the Sahara Slate PC with the optional Docking Station. 2. Ventilation Port Cooling fan intake port. Do not block to help prevent overheating.
Chapter 02: Touring Your Sahara Slate PC
This page intentionally left blank.
Chapter 03 Battery Usage and Care Depending on your system’s configuration and your application usage, a fully charged battery should be able to run your Sahara Slate PC for between 3 – 4 hours. Operations that will significantly reduce battery life include, but are not limited to, the following: 1. Using external bus powered optical, floppy and hard disk drives 2. Using wireless communications devices including the internal wireless networking card, Bluetooth adapter, PCMCIA Cards, or USB devices. 3.
To calibrate the battery pack, follow these steps: 1. Turn the computer off. Connect the AC adapter and let the battery fully recharge. 2. Disconnect the AC Adapter and Power On the computer. Let the battery run down until it is so low that you hear continuous warning beeps and the system automatically enter the Suspend mode. 3. Reconnect the AC adapter, let the battery fully recharge and then run the computer with the external power still connected for at least five (5) continuous hours.
When fully charged, the battery indicator will change to green and the battery’s charge will be maintained while connected to the external power source. When the computer is disconnected from the electrical outlet, the battery indicator will turn off. NOTE: The time to fully recharge the battery is approximately 90 – 100 minutes when the computer is powered off.
When the battery’s power level drops to a “Battery Very Low” status the beeping sound will be heard every second. When this continuous beeping occurs, your battery has only approximately one to two minutes of charge left. You should save what you are working on and plug in the AC Power Adapter to avoid potential data loss. When there is only one minute of battery charge remaining, the computer will suspend its current state to the hard drive and power off.
If the computer is left without a power source for long periods of time, this battery can be exhausted and system information will be lost. This will not affect any of your data stored on the computer’s hard drive, but rather settings in the BIOS that tells the computer how to operate. It recommended, therefore, that if you plan to store the computer for a long time you periodically attach the battery pack, plug in the computer to an external power source and allow the battery to recharge.
This page intentionally left blank.
Chapter 04 Upgrading Your Sahara Slate PC Out of the box, your new Sahara Slate PC is a powerful, mobile companion capable of accomplishing a wide variety of tasks with speed and precision. Depending on your system’s configuration, there are still ways to make your Tablet PC do more and do it faster. This chapter will focus on the procedures for upgrading, and/or replacing, your computer’s memory (RAM), storage capacity (hard disk drive) and wireless networking card.
4. All components should be handled with care. Do not touch the components or contacts on the cards or underside of the drives. Always hold such components by the edges or sides. 5. All electronic components inside a computer are sensitive to electrostatic discharges. It is therefore important that you properly ground yourself before attempting any of the following procedures either by using a wrist grounding strap or by periodically touching an exposed, unpainted metal surface. 6.
memory module. Be sure to follow the procedures in the preceding section, Before you Begin ANY Upgrade Procedure. 1. Turn off your computer, turn it over and place it face down on a solid, flat surface. Be careful not to place it on something rough that could damage the display screen. 2. Locate the RAM module compartment near the center of the back panel of the system. Loosen the two screws that secure the RAM module compartment cover. 3.
6. To insert a new RAM module, align the connector pins on the bottom of the RAM module with the RAM module socket and slide the module into the socket. Once properly inserted in the socket, press the RAM module down until it clicks into place. 7. Replace the cover on this compartment and then replace and tighten the screws. NOTE: Your Sahara Slate PC supports dual channel RAM.
Refer to the following instructions and illustrations for information on how to upgrade your computer’s HDD. Be sure to follow the procedures in the preceding section, Before you Begin ANY Upgrade Procedure. 1. Turn off your computer, turn it over and place it face down on a solid, flat surface. Be careful not to place it on something rough that could damage the display screen. 2.
Replacing the Wireless Networking Card (Advanced) Currently there are three standard wireless networking protocols, . a/ . b/ . g, that are widely used and offer various capabilities and ranges. Right on the horizon is a third, . n, which promises higher throughput and a longer operational range. The Sahara Slate PC was built with this new, impending standard in mind, and features a user upgradeable wireless networking adapter.
adapter is located at the bottom of the slot and is seated inside a small slot connector. 4. The wireless card is held in place by two small screws. First, carefully remove the yellow tape covering the screws and antenna leads. Then remove the screws and set them aside in a safe place. Once the screws are removed, the card will pop up slightly. 5. Carefully, slide the card out of the slot. Be sure to unscrew the antenna leads from the card before fully removing the card from the interior of the compartment.
This page intentionally left blank.
Chapter 05 Troubleshooting This chapter describes some techniques for locating information and solving problems that you may encounter while using your Sahara Slate PC. If you find, after reading this section, you are unable to solve a problem you are having, please check out more online resources at www.tabletkiosk.com or contact the Authorized Dealer where you purchased your Tablet PC (see the section below, Contacting Your Dealer for a list of the information you’ll need to supply them).
Battery Problems/Solutions Problem Possible Cause Solution Beeping sound. The computer’s battery is low and Hibernation Mode is disabled. Connect the computer to an external power source immediately. The battery pack is warm after charging. This is a normal condition. No action is required. The battery LED indicator does not light whether the battery is charging or not. No power is connected to the computer. Check the power source. The battery is fully charged.
Networking Problems/Solutions Problem Possible Cause Solution The system does not connect to the network The settings are not correctly set. Contact your network administrator. If connecting wirelessly, wireless card is turned off. Look at wireless power toggle on the top of the Tablet to make sure it is switched on. Power Problems/Solutions Problem Possible Cause Solution The computer is connected to an external power source but does not turn on even though the battery pack is connected.
Screen Display Problems/Solutions Problem Possible Cause Solution The screen is blank. Standby or Hibernate has initiated. Slide the Power toggle switch to the right and hold for a second to resume. External monitor display is selected Check the external display and use the VGA utility to change back the primary display to the Tablet’s internal screen. Calibration is off. Rerun the calibration routine in the TouchSet application. The mouse pointer won’t follow the stylus pen properly.
Upgrade Problems/Solutions Problem Possible Cause Solution After upgrading the computer’s RAM, the system does not boot up properly The RAM module is not seated properly. Following the instructions in the section entitled Upgrading Your Memory, try removing and reseating the RAM module. The RAM module is defective. If reseating the module from the above step does not solve the problem, the RAM module could be defective. Contact your dealer for assistance.
Contacting Your Dealer If you still have a problem after reading the preceding section, the next step is to contact your dealer where you purchased your Sahara Slate PC. Your dealer can determine if the problem will require that the computer be taken to a service center for repair. Before you call your dealer, however, please have the following information available: 1. Which model do you have? 2. What is the serial number? 3. How is your computer configured? What peripheral devices you are using. 4.
Chapter 05: Troubleshooting
This page intentionally left blank.
Appendix A Specifications Processor i412T: Intel® Celeron® M ULV 423 1.06 GHz, 32KB/32KB L1 cache, 1 MB L2 cache, 533 MHz Front Side Bus (FSB) Intel Enhanced SpeedStep® Technology i440D and i440T: Intel® Core™ Duo LV L2500 2 CPU Cores @ 1.
Memory 2x SODIMM DDR2 (Unbuffered, 64-bits/channel) slots with initial configurations of 512 MB - 2.0 GB Upgradeable to 4.0 GB with 2.0 GB SODIMMs (modules available Q2 2007) Supports Single Channel, Dual Channel Symmetric, or Dual Channel Asymmetric DDR2 Configurations Supports Reduced Power DDR2 (RPDDR2) Intel® Rapid Memory Power Management Battery Rechargeable 6-Cell Lithium Ion Smart Battery Pack (3800 mAh @ 11.
Dual Display Support External Display up to QXGA (2048 x 1536) with CRT Hot Plug support Display 12.
64-bit and 128-bit WEP Encryption, Hardware AES (128bit, 192-bit, 256-bit key sizes) Supports IEEE 802.11 Power Save Protocol (PSP) Bluetooth® 2.0+EDR built-in USB module with Power ON/OFF Switch Finger Print Reader Patented TruePrint Technology for best Ability to Acquire (ATA) High Definition 128x8 TruePrint Technology based pixels 6.5mm x .40mm 500 pixel per inch array USB 2.
I/O Ports 1x RJ-11 56Kbps v.90 Fax/Modem 1x RJ-45 10/100/1000 Mbps Full Duplex (2.5 Gbps single-lane channel) Ethernet 2x USB 2.0 1x IEEE 1394a, 6-pin 1x eSATA 1x DC-In 1x 3.5mm Audio Out, 1x 3.5mm Audio In 1x VGA port, HD15 1x Cradle Connector Weight 1.49 kg (3.3 lbs.) with Battery Pack Installed Measurements 11.81 in x 9.45 in x .
Function Buttons (L) SAS (Ctrl+Alt+Del) Screen Rotation Volume Up Volume Down Function Buttons (R) Digitzer/Touch Screen Mode Switch (i440D only) and User Programmable User Programmable User Programmable User Programmable Control Switches Power Switch Wireless On/Off Bluetooth On/Off Finger Print Reader Lead-Free 40 Ball Grid Array (BGA) Package Ultra-Hard Wearing Surface Coating is scratch and impact resistant Rated for over 10 million rubs without degradation 0°C to +
AC Adapter 100~240V, AC 47~63 Hz, 20V DC output, 3.25A, 65W adapter SCP: Short Circuit Protection plus Auto-Recovery Function OVP: Over-Voltage Protection, Latch Mode, up to 27.0Vdc maximum OCP: Over-Current Protection, Auto-Recovery, up to 5.5A maximum OTP: Over-Temperature Protection to prevent catastrophic failure from overheating.
This page intentionally left blank.
386 Beech Avenue, Suite 6, Torrance, CA 90501 310 782 1201 tel 310 782 1205 fax www.tabletkiosk.com UG.SG22.Rev 002FCC.3.14.