
User's Manual


Octopus Series Wireless LAN Card
WWW.TwinMOS.COM
Page 9
INSTALLATION FOR WINDOWS
The following section will assist you to install Octopus WLAN Card successfully. You will plug in the
Octopus WLAN card and then install driver firstly, and finally set the network properties to
accommodate resource sharing and select the type of wireless network that you want to install.
In order to establish your wireless network connection, make sure some steps below will be performed.
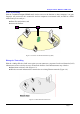
■ Install the Access Point (AP) at first if you use Access Point network mode.
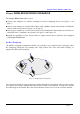
■ Plug in the Octopus wireless LAN card.
■ Install the driver using the Installation CD.
■ Install the network protocol(s) required to communicate on your network. Most likely you will
need the TCP/IP protocol.
The Octopus Wireless LAN Configuration Utility is installed by executing the “PRISMSTA.exe” file.
Note also that some versions of Microsoft Windows operating systems require administrator to install
software. If this is the case for your operating system, be sure that you have such privileges before
executing the Setup.exe file. To upgrade an existing driver, it is not necessary to remove your Octopus
driver from your computer. Simply run the Setup.exe file to replace the existing driver with the latest
version. After the new driver is installed, maybe you must restart the operating system (depend on the
Windows’ OS).
Please follow the following steps one by one in order to install the Octopus WLAN Card successfully.