Transport GX21 B2735 1 2 3 1 2 3 RST User’s Manual Document part number: D1577-100
Preface Copyright This publication, including all photographs, illustrations, and software, is protected under international copyright laws, with all rights reserved. Neither this manual, nor any material contained herein, may be reproduced without written consent of the manufacturer-. Copyright 2003-4 Version 1.00 Disclaimer Information contained in this document is furnished by TYAN computer Corporation and has been reviewed for accuracy and reliability prior to printing.
Federal Communications Commission Notice for the USA Compliance Information Statement (Declaration of Conformity Procedure) DoC FCC Part 15: This device complies with part 15 of the FCC Rules Operation is subject to the following conditions: 1) This device may not cause harmful interference, and 2) This device must accept any interference received including interference that may cause undesired operation.
About this manual This manual provides you with instructions on installing your Transport GX21 (B2735), and consists of the following sections Chapter 1: Provides an introduction to the Transport GX21 (B2735) bare bones, packing list, describes the external components, gives tables of key components, and provides block diagrams of the system. Chapter 2: Covers procedures on installing the CPUs, memory modules, optional PCI card, and hard drives.
Safety information Before installing and using the Transport GX21 , take note of the following precautions: iv • • • Read all instructions carefully. • Only use the power source indicated on the marking label. If you are not sure, contact the power company. • The unit uses a three-wire grounded cable, which is supplied with a third pin to ground the unit and prevent electric shock. Do not defeat the purpose of this pin.
Table of Contents Overview About the Transport GX21 (B2735) ................................................... Product models.................................................................................... Features ............................................................................................... B2735G21S2 specifications............................................................. B2735G21S4H specifications..........................................................
Replacing the floppy disk drive .......................................................... Replacing the floppy disk drive (B2735G21S2).............................. Replacing the floppy disk drive (B2735G21S4H/B2735G21U4H). Replacing the LED control board ....................................................... Replacing the storage backplane ......................................................... S-ATA backplane (B2735G21S4H) ................................................
BIOS security menu......................................................................... BIOS chipset settings....................................................................... Northbridge chipset configuration submenu.................................... Southbridge chipset configuration submenu.................................... Intel PCI-64 Hub 2 configuration submenu..................................... BIOS exit menu ..............................................................................
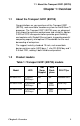
1.1 About the Transport GX21 (B2735) Chapter 1: Overview 1.1 About the Transport GX21 (B2735) Congratulations on your purchase of the Transport GX21 (B2735), rack mountable, barebone system for Intel® Xeon™ processor. The Transport GX21 (B2735) uses an advanced Intel chipset for optimum performance and reliability.
1.3 Features 1.3 Features 1.3.1 B2735G21S2 specifications Enclosure Storage • • • • • • • • Integrated dual channel IDE controller from ICH5R 2 Integrated S-ATA ports from ICH5R (RAID 0,1 support) 2 Internal (fixed) HDD bays Slim 24x CD-ROM drive Optional 3.
1.3 Features 1.3.2 B2735G21S4H specifications Enclosure Storage • • • • Industry standard, 19” rack mountable, 1U chassis 4 external access HDD bays, 1 slim CD-ROM bay, 1 slim FDD bay 21.5 x 17 x 1.
1.3 Features 1.3.3 B2735G21U4H specifications Enclosure Storage • • • • Industry standard, 19” rack mountable, 1U chassis 4 external access HDD bays, 1 slim CD-ROM bay, 1 slim FDD bay 21.5 x 17 x 1.
1.4 Unpacking 1.4 Unpacking 1.4.1 Box contents Component 1 2 3 1 2 RST P/N 541273080001 1 2 3 1 2 3 RST P/N 541273080002 Description 1 U chassis, 2 internal HDD bays B2735 G21S2 B2735 G21U4H Yes 1U chassis, 4 external HDD bays Tyan S2735 system board (pre-installed) B2735 G21S4H Yes Yes Yes Yes Yes P/N 541172850002 Tyan M8110 SATA RAID controller card (pre-installed) Yes P/N 541172850002 P/N 541190860001 J1 2 1 40 4 J3 1 94V-0 39 1 CORER1.
1.4 Unpacking Box contents (cont.
1.4 Unpacking 1.4.2 Accessories Power cord (US) Power cable (Germany) 4 x S-ATA cables, motherboard to backplane (B2735G21S4H) 1 x 34 pin FDD cable (B2735G21S2) 1 x front panel cable 1 x SCSI cable (B2735G21U4H) 2 x mounting ears 1 x 40 pin IDE cable for CD-ROM 2 x CPU heatsinks P/N 343730800001 2 x Sliding rails P/N 341730200001 http://www. tyan.com S-ATA power riser cable http://www. tyan.
1.4 Unpacking 1.4.3 Opening the box Open the box carefully and ensure that all components are present and undamaged. The product should arrive packaged as illustrated below. Box contents as packaged http://www.ty an.com http://w Accessory pack 8 ww.tyan .
1.5 About the product 1.5 About the product 1.5.
1.5 About the product B2735G21U4H Power switch LAN activity indicator Power indicator HDD activity indicator USB ports 1 2 3 1 2 3 4 RST Reset switch 1 2 RST 1.5.2 System rear view Ventilation fan EPS 12V 400W PSU Power switch Stacked PS/2 mouse and keyboard ports RJ-45 LAN port USB ports VGA port Serial port (COM 1) RJ-45 LAN ports Expansion slot Note: All models have identical rear panel features.
1.5 About the product 1.5.
1.
1.
1.5 About the product Block diagram Intel Xeon Intel Xeon VRM HOST BUS 400 or 533 DDR A DIMMS SLOT# 2 SLOT#1 DD R DD R DD R SO DIMM DD R BUS #02 HI 2.0 BUS #04 133MHz OR 100MHz PCI-X DD R MEM CNTRL AND DATA BUS A DD R BUS #03 133MHz OR 100MHz PCI-X Intel E7501 MCH P64H2 ICH3_PIRQ#A MEM CNTRL AND DATA BUS B SLOT# 1 *Option DDR B DIMMS GBIT LAN 82546 HI 1.
2.1 Before you begin Chapter 2: Setting up 2.1 Before you begin This chapter explains how to install motherboard components including CPUs, memory modules, and PCI card. There are also instructions in this section for installing S-ATA, SCSI and IDE hard drives. Careful attention should be given to the precautions mentioned in this section when setting up your system. 2.1.1 Work area Make sure you have a stable, clean working environment. Dust and dirt can get into components and cause malfunctions.
2.1 Before you begin 2.1.3 Precautions Components and electronic circuit boards can be damaged by static electricity. Working on a system that is connected to a power supply can be extremely dangerous. Follow the guidelines below to avoid damage to the Transport GX21 or injury to yourself. • Ground yourself properly before removing the top cover of the system. Unplug the power from the power supply and then touch a safely grounded object to release static charge (i.e. power supply case).
2.2 Installing motherboard components 2.2 Installing motherboard components This section describes how to install CPUs, memory modules and PCI card. 2.2.1 Removing the chassis cover Follow these instructions to remove the Transport GX21 (B2735) chassis cover. This step is required before any other procedures in this chapter can be undertaken. 1. Remove the six screws that secure the chassis cover. 2. Slide the cover in the direction of the arrow (A) and then lift the cover off (B).
2.2 Installing motherboard components 2.2.2 Installing CPUs This section describes how to install Intel® Xeon processors and heatsinks in your Transport GX21 (B2735) system. This section applies to all models. 1. Remove the chassis cover as described in section 2.2.1 Removing the chassis cover. 2. Locate the CPU sockets on the motherboard as shown below. 3. Lift the CPU locking lever as shown below.
2.2 Installing motherboard components 4. Place the CPU in the CPU socket, ensuring that pin 1 is located as shown in the following illustration. pin 1 5. Press the CPU locking lever back down to secure the CPU in the socket. 6. Repeat steps three to five for the second CPU. 7. Apply thermal grease to the top of the CPUs and place the CPU heatsinks on the CPUs. 8. Tighten the four screws to secure the heatsinks in place as shown below.
2.2 Installing motherboard components 2.2.3 Installing memory Follow the instructions in this section to install memory modules in your Transport GX21 (B2735) system. 1. Remove the chassis cover as described n section 2.2.1 Removing the chassis cover. 2. Locate the memory slots on the motherboard. 3. Press the memory slot locking levers in the direction of the arrows as shown below. Note: It is not possible to move the memory slot locking levers without first removing the CPU heatsinks. 4.
2.2 Installing motherboard components 5. Insert the memory module into the slot as shown. 6. Ensure that the locking levers are firmly in place and that the memory module is properly seated in the slot. 2.2.4 Installing a PCI card Follow the instructions in this section to install a PCI card in your Transport GX21 (B2735) system. 1. Remove the chassis cover as described in section 2.2.1 Removing the chassis cover. 2. Remove the PCI retention bar.
2.2 Installing motherboard components 3. Remove the screw securing the PCI faceplate to the chassis. 4. Slide the PCI card clamp out as shown. 5. Slide the dust cover out.
2.2 Installing motherboard components 6. Press the PCI card into place in the slot on the riser card. Ensure that the card is seated properly in the slot on the riser card and that the riser card is properly seated in its slot on the motherboard. Insert PCI card tip in slot here Riser card 7. Reinsert the PCI card clamp.
2.2 Installing motherboard components 8. Insert the screw to secure the PCI card to the chassis.
2.3 Installing a hard drive 2.3 Installing a hard drive Follow these instructions to install various different types of hard drives in your system. 2.3.1 Installing internal hard drives (B2735G21S2) This B2735G21S2 can support internal IDE or S-SATA hard drives. 2.3.1.1 Installing an IDE hard drive Follow these instructions to instal an internal IDE hard drive in your B2735G21S2 system. 1. Remove the chassis cover as described in section 2.2.1 Removing the chassis cover. 2.
2.3 Installing a hard drive 4. Slide the HDD tray out of the chassis. 5. Place a new HDD in the tray and slide it to the front. Note: If an you are replacing an existing hard disk you will need to remove the 4 screws securing it to the tray and remove it. 6. Secure the new disk drive in the tray with 4 screws.
2.3 Installing a hard drive 7. Reinsert the HDD tray and secure it to the chassis with a screw. 8. Connect the IDE data cable and power cable to the HDD. 2.3.1.2 Installing an internal S-ATA hard drive Follow these instructions to install an internal S-ATA hard drive in your B2735G21S2 system. 1. Remove the chassis cover as described in section 2.2.1 Removing the chassis cover. 2. If you are replacing an existing S-ATA hard drive, remove the power and data cables from it.
2.3 Installing a hard drive 3. Remove the screw securing the HDD tray to the chassis. 4. Slide the HDD tray out of the chassis. 5. Place a new HDD in the tray and slide it to the front. Note: If an you are replacing an existing hard disk you will need to remove the 4 screws securing it to the tray and remove it.
2.3 Installing a hard drive 6. Secure the new disk drive in the tray with 4 screws. 7. Reinsert the HDD tray and secure it to the chassis with a screw. 8. Connect the S-ATA data cable and power cable to the HDD.
2.3 Installing a hard drive 2.3.2 Installing an external S-ATA hard drive (B2735G21S4H) Follow these instructions to install an external S-ATA hard drive in your B2735G21S4H system. 1. Remove the chassis cover as described in section 2.2.1 Removing the chassis cover. 2. Press the drive bay locking latch in the direction of the arrow (1) and pull the locking lever open (2). 1 2 3 1 2 RST 1 2 3. Slide the drive bay out. 1 2 3 1 2 RST 4. Place a S-ATA drive in the drive bay.
2.3 Installing a hard drive Note: If you are replacing an existing HDD, you will need to remove the four screws that secure it in the drive bay and remove it. 5. Insert four screws to secure the new unit in the drive bay. 6. Reinsert the drive bay into the chassis. Ensure that the rear connector of the new drive is firmly seated in the backplane. 1 2 3 1 2 RST 2.3.
2.3 Installing a hard drive 2. Press the drive bay locking latch in the direction of the arrow (1) and pull the locking lever open (2). 1 2 3 1 2 RST 1 2 3. Slide the drive bay out. 1 2 3 1 2 RST 4. Insert a SCSI hard drive in the drive bay. Note: If you are replacing an existing HDD, you will need to remove the four screws that secure it in the drive bay and remove it.
2.3 Installing a hard drive 5. Insert four screws to secure the new unit in the drive bay. 6. Reinsert the drive bay into the chassis. Ensure that the rear connector of the new drive is firmly seated in the backplane.
2.4 Rack mounting 2.4 Rack mounting Follow these instructions to mount the Transport GX21 (B2735) into an industry standard 19" rack. Note: Before mounting the Transport GX21 in a rack, ensure that all internal components have been installed and that the unit has been fully tested. Maintenance can be performed on the unit while in a rack but it is preferable to install the device in a fully operational condition. 1.
2.4 Rack mounting on the front of the unit) are fixed to the front end of the rail. 3. Fully extend the sliding rails until they lock. Note: Do not tighten the brackets to the rails as you will need to adjust their position later. 4. Screw each sliding rail to the side of the Transport GX21 as shown. You will need 3 short, silver colored screws from the supplied nuts, screws and washers kit, for each rail. 5. Return the sliding rails to their shortest position.
2.4 Rack mounting release mechanism while pushing the sliding rails to shorten them. 6. With the rails in their shortest position, adjust both front mounting brackets so that they are flush with the front of the unit. 7. Accurately measure the depth of your rack and adjust the rear brackets accordingly. 8. When all brackets are positioned correctly, tighten them.
2.4 Rack mounting 9. Lift the unit into place in the rack and screw it into place as shown. 1 2 3 1 2 RST Note: To avoid injury, it is strongly recommended that two people lift the Transport GX21 into place while a third person screw it to the rack.
2.
3.1 Introduction Chapter 3: Replacing pre-installed components 3.1 Introduction This chapter describes how to replace all the pre-installed components of your Transport GX21 (B2735), including CPU, PCI card, riser card, memory modules, motherboard, CDROM drive, floppy disk drive and LED control board. There is also a section covering the replacement of the 4 port S-ATA backplane (B2735G21S4H only), and a section covering the replacement of the 4 port SCSI back plane (B2735G21U4H only).
3.2 Replacing motherboard components 1. Disconnect ATX power cables. Main power EPS 12V power 2. Disconnect CD-ROM drive cable (A) (all models) and S-ATA hard drive cable (B) (B2735G21S2 only).
3.2 Replacing motherboard components Note: If there is FDD or IDE HDD installed in the bay beneath the CD-ROM drive, you will have to disconnect those cables too before you can remove the motherboard. 3. Disconnect front panel LED and USB connectors.
3.2 Replacing motherboard components 3.2.2 Replacing the motherboard Follow these instructions to remove the motherboard from your Transport GX21 (B2735). Note: Before removing the motherboard you must remove all cable connections to the motherboard. See section 3.2.1 Disconnecting all motherboard cables for details on how to do this. 1. Remove the fan assembly bracket from the chassis. 2. Remove the PCI retention bar.
3.3 Replacing the CD-ROM drive 3. Remove the nine screws that secure the motherboard to the chassis. 4. Remove the motherboard from the chassis. 3.3 Replacing the CD-ROM drive This section describes how to remove and replace the CDROM drive in your Transport GX21 (B2735) system. 3.3.1 Replacing the slim CD-ROM drive (B2735G21S2) Follow these instructions to replace the slim CD-ROM drive in your B2735G21S2 system. 1. Remove the chassis cover as described in section 2.2.1 Removing the chassis cover. 2.
3.3 Replacing the CD-ROM drive 3. Remove the two screws that secure the CD-ROM backplane to the CD-ROM drive. 4. Remove the four screws that secure the drive bay to the chassis and lift the drive bay free. 5. Slide the slim CD-ROM from the drive bay.
3.3 Replacing the CD-ROM drive 3.3.2 Replacing the CD-ROM drive (B2735G21U4H/B2735G21S4H) Follow these instructions to replace the slim CD-ROM drive in your B2735G21U4H or B2735G21S4H system. 1. Remove the chassis cover as described in section 2.2.1 Removing the chassis cover. 2. Remove the power and data cables from the CD-ROM drive. 3. Remove the two screws that secure the CD-ROM bracket to the chassis and lift it free. 4. Lift the CD-ROM drive from the chassis.
3.3 Replacing the CD-ROM drive 5. Remove the two screws that secure the CD-ROM adapter to the CD-ROM drive and remove it.
3.4 Replacing the floppy disk drive 3.4 Replacing the floppy disk drive This chapter describes how to replace the floppy disk drive. 3.4.1 Replacing the floppy disk drive (B2735G21S2) Follow these instructions to replace the FDD in your B2735G21S2 system. 1. Remove the chassis cover as described in section 2.2.1 Removing the chassis cover. 2. Locate the drive bay housing the slim CD-ROM drive and the FDD and remove power and data cables from both.
3.4 Replacing the floppy disk drive 3.4.2 Replacing the floppy disk drive (B2735G21S4H/B2735G21U4H). Follow these instructions to replace the slim floppy disk drive in your B2735G21U4H or B2735G21S4H system. 1. Remove the chassis cover as described in section 2.2.1 Removing the chassis cover 2. Remove the ribbon cable from the back of the slim floppy disk drive. Note: The slim floppy disk drive uses a single ribbon cable that provides it with both power and data.
3.5 Replacing the LED control board 4. Remove the floppy disk drive from the chassis. 3.5 Replacing the LED control board Follow these instructions to replace the LED control board. 1. Remove the two screws that secure the metal retaining plate to the chassis and lift it free.
3.6 Replacing the storage backplane 2. Remove the front panel ribbon cable from the rear of the LED control panel. 3. Remove the two screws that secure the LED control panel to the chassis and lift the board free of the chassis. 3.6 Replacing the storage backplane This section describes how to replace the S-ATA or SCSI backplane on your Transport GX21 (B2735). 3.6.1 S-ATA backplane (B2735G21S4H) 3.6.1.
3.6 Replacing the storage backplane 1. Remove the chassis cover as described in section 2.2.1 Removing the chassis cover. 2. Remove the two screws that secure the metal retaining plate to the chassis and lift it free as shown. 3. Remove all cables connected to the S-ATA backplane, including front panel cable, power cables, and S-ATA data cables. 4. Remove the six screws that secure the S-ATA backplane bracket to the chassis. 5. Remove the S-ATA backplane bracket and backplanes free from the chassis.
3.6 Replacing the storage backplane 3.6.1.
3.6 Replacing the storage backplane 3.6.2 SCSI backplane (B2735G21U4H) 3.6.2.1 Replacing the SCSI backplane (B2735G21U4H) Follow these instructions to replace the SCSI backplane on your B2735G21U4H system. 1. Remove the chassis cover as described in section 2.2.1 Removing the chassis cover. 2. Remove the two screws that secure the metal retaining plate to the chassis and lift it free as shown. 3.
3.6 Replacing the storage backplane 4. Remove the 10 screws that secure the SCSI backplane to the chassis and lift the backplane free.
3.6 Replacing the storage backplane 3.6.2.
3.7 Replacing the power supply 3.7 Replacing the power supply Follow these instructions to replace the power supply in your Transport GX21 (B2735) system. 1. Remove the chassis cover as described in section 2.2.1 Removing the chassis cover. 2. Remove the four screws that secure the fan assembly to the chassis and lift it free. 3. Disconnect power cables from the motherboard, HDDs, FDDs, CD-ROM drive and fans. See section 3.4.2 Disconnecting Cables for details on how to do this. 4.
3.8 Replacing the cooling fans 3.8 Replacing the cooling fans Follow these instructions to replace the cooling fans in your Transport GX21 (B2735) system. 1. Remove the chassis cover as described in section 2.2.1 Removing the chassis cover. 2. Remove the PCI retention bar Note: You may need to cut the cable ties that secure the fan power cables before attempting to unplug them. 3. Remove the power cables for the 5 fans from the motherboard. 4.
3.8 Replacing the cooling fans 6. Remove the four screws securing each fan to the fan bracket to remove them from the fan bracket. Note: The Transport GX21 (B2735) uses two different types of cooling fans which operate at different speeds. The two fans installed nearest the power supply have a peak speed of 15,000 rpm. The remaining 3 fans have a peak speed of 11,500 rpm.
3.8 Replacing the cooling fans 3.8.1 Cooling fan connections The 2 fans closest to the power supply should be connected to the CPU_1FAN and CPU_2FAN pin headers on the motherboard.
3.
Appendix BIOS Introduction Your Transport GX21 (B2735) system includes a powerful Tiger i7501R S2735 motherboard with AMI BIOS v8.0 on 4 MB flash ROM. The BIOS is the motherboard’s basic input/output system. The BIOS contains all the settings required to control the keyboard, display, disk drives, serial communications, and a number of miscellaneous functions. This section of the appendix describes the various BIOS settings that can be used to configure your system.
BIOS setup utility Main Advanced PCI/PnP Boot Security Chipset Exit System Overview Use [Enter], [TAB] or [SHIFT_TAB] to select a field AMIBIOS Version :08.00.09 Build Date :xx/xx/2003 ID :0ABBP006 Processor Type :Intel® Xeon™ CPU x.xx GHz Logical Count : x System Memory Size : xxxx MB System Time System Date [12:59:59] [xxx xx/xx/2003 Use [+] or [-] to configure system time.
BIOS menu bar The menu bar at the top of the window lists the following selections: Menu bar selections Main To configure basic system setups Advanced Configure advanced chipset options PCI/PnP Configure legacy PnP or PCI settings Boot Configure system boot order Security Configure user and supervisor passwords Chipset Configure chipset management features Exit Exit setup utility Note: Options written in bold type represent the BIOS setup default.
BIOS legend bar The following chart describes the legend keys and their functions.
BIOS main menu The Main BIOS menu is the first screen that appears when you enter BIOS setup. The menu has two main frames. The left frame displays all the options that can be configured. "Grayed-out" options cannot be configured, options in blue can be changed. The right frame displays the key legend. Above the key legend is an area reserved for a text message. When an option is selected in the left frame, it is highlighted in white. Often, a text message will accompany it.
BIOS advanced menu You can select any of the items in the left frame of the screen, such as Super I/O Configuration, to go to the sub menu for that item. You can display an Advanced BIOS Setup option by highlighting it using the keys. All Advanced BIOS Setup options are described in this section. The Advanced BIOS Setup screen is shown below.
BIOS advanced menu Features Option Description Advanced settings CPU Configuration Menu Item Configure CPU IDE Configuration Menu Item Configure the IDE devices(s) Floppy Configuration Menu Item Configures devices connected to the floppy controller Super I/O Configuration Menu Item Configures devices connected to the SUper I/O controller ACPI Configuration Menu Item Section for advanced ACPI configuration DMI Event Logging Menu Item Views and controls event log Remote Access Configurati
CPU configuration submenu Main Advanced PCI/PnP Boot Security Chipset Exit CPU Configuration submenu Manufacturer: Intel Brand String : Intel® Xeon™ CPU x.xx GHz Use [Enter], [TAB] or [SHIFT_TAB] to select a field Cache L2 Cache L3 Use [+] or [-] to configure system time.
IDE configuration submenu You can use this screen to change IDE Configuration Settings. Use the up and down keys to select an item. Use the and keys to change the value of the selected option.
IDE configuration submenu Feature Option Description IDE Configuration IDE Legacy Configuration Disabled P-ATA only S-ATA only P-ATA & S-ATA S-ATA Running Enhanced Mode Yes No P-ATA Channel Selection Primary Secondary Both S-ATA Ports Definition P0-3rd/P1-4th P0-4th/P1-3rd Configure S-ATA as RAID No Yes S-ATA port 0/1 Master Both Primary Secondary Disabled While entering setup, BIOS auto detects the presence of IDE devices. This displays the status of auto detection of IDE devices.
Feature ATA (PI) 80 pin Cable Detection Option Description Host and Device Host Device Toggles the detection of 80 wire IDE cables S-ATA Port/Primary IDE/Secondary IDE configuration submenu You can use this screen to change SATA Port / Primary IDE / Secondary IDE Configuration Settings. Use the up and down keys to select an item. Use the and keys to change the value of the selected option.
Floppy configuration submenu You can use this screen to change the Floppy Configuration Settings. Use the up and down keys to select an item. Use the and keys to change the value of the selected option. Floppy configuration submenu Main Advanced PCI/PnP Boot Security Chipset Exit Floppy Configuration Floppy A Floppy B [1.44 MB 3 1/2”] [Disabled] Use [Enter], [TAB] or [SHIFT_TAB] to select a field Use [+] or [-] to configure system time.
Floppy configuration submenu Features Option Description Floppy Configuration Floppy A Disabled 360 KB 5 1/4” 1.2 MB 5 1/4” 720 KB 3 1/2” 1.44 MB 3 1/2” 2.88 MB 3 1/2” This setting defines the type of floppy drive installed in the system Floppy B Disabled 360 KB 5 1/4” 1.2 MB 5 1/4” 720 KB 3 1/2” 1.44 MB 3 1/2” 2.88 MB 3 1/2” This setting defines the type of floppy drive installed in the system Super I/O configuration submenu You can use this screen to change the configuration of Super I/O.
Super I/O configuration submenu Feature Option Description Win627 Super I/O Chipset Onboard floppy controller Enabled Disabled Enables or disables the onboard floppy controller Serial Port 1 Address 3F8/IRQ4 3E8/IRQ4 2E8/IRQ3 Disabled Sets the serial port 1 (com 1) base I/O address and an interrupt number. Disabled - port disabled Serial Port 2 Address 3F8/IRQ3 3E8/IRQ4 2E8/IRQ3 Disabled Sets the serial port 2 (com 2) base I/O address and interrupt number.
ACPI settings submenu Main Advanced PCI/PnP Boot Security Chipset Exit ACPI Settings [Yes] Use [Enter], [TAB] or [SHIFT_TAB] to select a field WOL S48S5 Support [Enabled] Use [+] or [-] to configure system time.
Advanced ACPI configuration submenu Use this screen to select options for ACPI. Use the up and down keys to select an item. Use the and keys to change the value of the selected option. A description of the selected item appears on the right side of the screen. Advanced ACPI configuration submenu Main Advanced PCI/PnP Boot Security Chipset Exit Advanced ACPI Configuration ACPI 2.
Advanced ACPI configuration Feature Option Description Advanced ACPI Configuration ACPI 2.0 Support Yes No Set this value to allow or prevent the system complying with the ACPI 2.0 specification APIC Support Enabled Disabled This option allows you to delete whether or not to enable ACPI management features Ami OEMB Table Enabled Disabled Set this value to allow the ACPI BIOS to add a pointer to an OEMB table in the Root System Description Table (RSDT).
DMI event logging submenu You can use this screen to view the Event Log Control Menu. This logs system events (such as CMOS clear, ECC memory errors, etc.) and writes the log into NVRAM. Use the up and down keys to select an item. Use the and keys to change the value of the selected option. The settings are described on the following pages.
Remote access configuration submenu You can use this screen to view the Remote Access Configuration Menu. This feature allows remote access to the Server via serial port. Use the up and down keys to select an item. Use the and keys to change the value of the selected option.
USB configuration menu You can use this screen to view the USB Configuration Menu. Use the up and down keys to select an item. Use the and keys to change the value of the selected option. The settings are described on the following pages. USB configuration menu Main Advanced PCI/PnP Boot Security Chipset Exit USB Configuration Use [Enter], [TAB] or [SHIFT_TAB] to select a field Model Version - X.XX.X-XX USB Devices Enabled: None USB Function Legacy USB Support USB 2.
USB configuration submenu Feature Option Description USB Configuration USB Function Disabled 2 USB ports 4 USB ports Enables USB host controllers Legacy USB Support Auto Disabled Enabled Enables support for legacy USB devices such as keyboards, mice and bootable USB devices USB 2.0 Controller Disabled Enabled Select “Enabled” if your system contains a USB controller and you have a USB keyboard USB 2.0 Controller Mode FullSpeed HiSpeed Configures the USB 2.
USB mass storage device configuration submenu You can use this screen to view the USB Mass Storage Device Configuration Menu. Use the up and down keys to select an item. Use the and keys to change the value of the selected option.
Onboard devices configuration submenu Use this screen to changer the Onboard Devices Configuration Settings. Use the up and down keys to select an item. Use the and keys to change the value of the selected option.
Hardware monitor submenu You can use this screen to view the Hardware Monitor Configuration Settings. Use the up and down keys to select an item. Use the and keys to change the value of the selected option. Hardware monitor submenu Main Advanced PCI/PnP Boot Security Monitor CPU Temperature, Fan Speed and Voltage CPU Temperature CPU1 CPU2 :xx C :xx C Fan Speed CPU1 Fan CPU2 Fan Fan2 Fan3 Fan 5 Fan 7 :xxxx RPM :xxxx RPM :xxxx RPM :xxxx RPM :xxxx RPM :xxxx RPM Voltage +3.
Hardware monitor submenu Feature Option Description Monitor CPU Temperature, Fan Speed and Voltage CPU1 Temperature CPU2 Temperature Displays CPU temperatures CPU1 Fan CPU2 Fan Fan 2 Fan 3 Fan 4 Fan 5 Fan 7 Displays speed of fans connected to appropriate fan headers +3.3V +5V +12V Displays voltages for CPU, memory and other devices Auto-Control Fan’s Speed Disabled Enabled All fan speeds are controlled by temperature sensor to reduce noise. This feature is not supported by old 603 Xeon processor.
Advanced PCI/PnP menu You can use this screen to view PnP (Plug & Play) BIOS Configuration Menu. This menu allows the user to configure how the BIOS assigns resources & resolves conflicts. Use the up and down keys to select an item. Use the and keys to change the value of the selected option.
Advanced PCI/PnP Menu Feature Option Description Advanced PCI/PnP Menu Plug & Play OS Yes No The Yes setting allows the operating system to change the interrupt, I/O, and DMA settings. Set this option if the system is running Plug and Play aware operating systems. Set No for operating systems that do not meet the Plug and Play specifications. PCI Latency Timer 32, 64, 96 ...248 This setting controls how many PCI clocks each PCI device can hold the bus before another PCI device takes over.
BIOS boot settings menu You can display Boot Setup option by highlighting it using the keys and pressing . BIOS boot settings menu Main Advanced PCI/PnP Boot Security Chipset Exit Boot Settings Boot Settings Configuration Boot Device Priority Hard Disk Drives Removable Drives ATAPI CD-ROM Drives Use [Enter], [TAB] or [SHIFT_TAB] to select a field Use [+] or [-] to configure system time.
Boot Settings configuration submenu Use this screen to select options for the Boot Settings Configuration. Use the up and down keys to select an item. Use the and keys to change the value of the selected option.
Boot settings configuration submenu Feature Option Description Boot Settings Configuration Quick Boot Mode Enabled Disabled Allows user bypass BIOS self test during POST.
Boot device priority submenu Use this screen to select options for the Boot Device Priority. Use the up and down keys to select an item. Use the and keys to change the value of the selected option.
Boot device priority submenu Feature Option Description 1st Boot Device 1st FLOPPY DRIVE Disabled IBA FE Slot 0108 V4110 IBA GE Slot 0409 V1211 IBA GE Slot 0408 V1211 Settings for boot priority can be customized depending on your preference.
Hard disk submenu Use this screen to select options for the Hard Disk Drives. Use the up and down keys to select an item. Use the and keys to change the value of the selected option. Hard disk drives submenu Main Advanced PCI/PnP Boot Security Chipset Exit Hard Disk Drives 1st Drive [xx,xxx-xxxxx:xxx] Use [Enter], [TAB] or [SHIFT_TAB] to select a field Use [+] or [-] to configure system time.
Removable drives submenu Use this screen to select options for the Removable Drives. Use the up and down keys to select an item. Use the and keys to change the value of the selected option. Removable drives submenu Main Advanced PCI/PnP Boot Security Chipset Exit Removable Drives 1st Drive [1st FLOPPY DRIVE] Use [Enter], [TAB] or [SHIFT_TAB] to select a field Use [+] or [-] to configure system time.
ATAPI CD-ROM drives submenu Use this screen to select options for the ATAPI CD-ROM Drives. Use the up and down keys to select an item. Use the and keys to change the value of the selected option. ATAPI CD-ROM drives submenu Main Advanced PCI/PnP Boot Security Chipset Exit ATAPI CD-ROM Drives 1st Drive [xx,xxx-xxxxx:xxx] Use [Enter], [TAB] or [SHIFT_TAB] to select a field Use [+] or [-] to configure system time.
BIOS security menu The system can be configured so that all users must enter a password every time the system boots or when BIOS Setup is entered, using either the Supervisor password or User password. The Supervisor and User passwords activate two different levels of password security. If you select password support, you are prompted for a one to six character password. Type the password on the keyboard. The password does not appear on the screen when typed. Make sure you write it down.
BIOS security menu Feature Option Description Supervisor Password Not Installed Installed If the password has been set, Installed displays. If no password is set, Not Installed displays. User Password Not Installed Installed If the password has been set, Installed displays.
BIOS chipset settings This menu allows the user to customize functions of the Intel Chipset. Select a menu by highlighting it using the keys and pressing . BIOS chipset settings Main Advanced PCI/PnP Boot Security Monitor CPU Temperature, Fan Speed and Voltage WARNING: Setting wrong values in below sections may cause system to malfunction. Feature Option Exit Use [Enter], [TAB] or [SHIFT_TAB] to select a field Use [+] or [-] to configure system time.
Northbridge chipset configuration submenu This menu gives options for North Bridge Chipset Configuration settings. Select a menu by highlighting it using the keys and pressing . Northbridge chipset configuration menu Main Advanced PCI/PnP Boot Security Chipset Exit Configure Advanced Settings for Northbridge Chipset Memory Remap Feature CAS Latency [Enabled] [Auto] Use [Enter], [TAB] or [SHIFT_TAB] to select a field Use [+] or [-] to configure system time.
Southbridge chipset configuration submenu This menu gives options for South Bridge Chipset Configuration settings. Use the up and down keys to select an item. Use the and keys to change the value of the selected option. Southbridge chipset configuration menu Main Advanced PCI/PnP Boot Security Chipset Exit Southbridge Chipset Configuration MPS Revision [1.1] Use [Enter], [TAB] or [SHIFT_TAB] to select a field Use [+] or [-] to configure system time.
Intel PCI-64 Hub 2 configuration submenu This menu gives options for Intel PCI-64 Hub 2 Configuration settings. Select a menu by highlighting it using the keys and pressing . Intel PCI-64 Hub 2 configuration submenu Main Advanced PCI/PnP Boot Security Chipset Exit Intel PCI-64 Hub 2 Configuration PCI Bus Frequency [Auto] Use [Enter], [TAB] or [SHIFT_TAB] to select a field Use [+] or [-] to configure system time.
BIOS exit menu You can display an Exit BIOS Setup option by highlighting it with the keys and pressing . BIOS exit menu Main Advanced PCI/PnP Boot Security Chipset Exit Exit Options Save Changes and Exit Discard Changes and Exit Discard Changes Load Optimal Defaults Load Failsafe Defaults 102 Use [Enter], [TAB] or [SHIFT_TAB] to select a field Use [+] or [-] to configure system time.
BIOS exit menu Feature Save Changes and Exit Option Description Use this option to exit setup and reboot. Changes you have made are stored into CMOS. Discard Changes and Exit Use this option to exit setup and reboot. Changes you have made are not stored in CMOS. Discard Changes Use this option to discard all changes that you have made but not saved in CMOS. Load Optimal defaults Use this option to load default performance setup options when settings have become corrupt.
SCSI and S-ATA controller cards Controller card location Controller card slot for TYAN M7902 Ultra 320 SCSI controller card (B2735G21U4H) or TYAN M8110 SATA RAID controller card (B2735G21S4H) 104
M7902 Ultra 320 SCSI controller card features Extendible SCSI channel connector for optional external SCSI devices. Connector to fit dedicated SO-DIMM socket on motherboard. Ultra 320 SCSI connector to backplane. Key Features • Based on Adaptec AIC-7902 dual-channel Ultra320 SCSI Host Controller. • Up to 320Mbytes/sec on each Ultra320 SCSI channel for a total bandwidth of 640Mbytes/sec.
M8110 S-ATA RAID controller card features Connector to fit dedicated SO-DIMM socket on motherboard. 4 S-ATA ports connecting to backplane. Key Features 106 • Based on Adaptec/Marvell 8110 SATA Host Controller providing 4 S-ATA ports and a flash controller. • • • • Compliant with S-ATA rev. 1.0 specifications. • • 64-bit PCI-X interface. • Dimensions: 78 mm x 76 mm. Supports 4-port 1.5Gbps S-ATA Supports S-ATA power save mode and hot-plug.
Technical support If a problem arises with this system, you should consult your dealer first for help. The system is likely to have been configured by your dealer, making him the most appropriate choice when seeking technical advice. Your dealer may also be close enough to visit with the hardware for servicing or testing. Help resources: 1. See the beep codes section in the motherboard manual 2. See the TYAN website for FAQs, bulletins, driver updates and other information: http://www.tyan.com 3.
108