QUICK START GUIDE Modular 3000 Series • 3045CLR • 220-240 V / 50 Hz
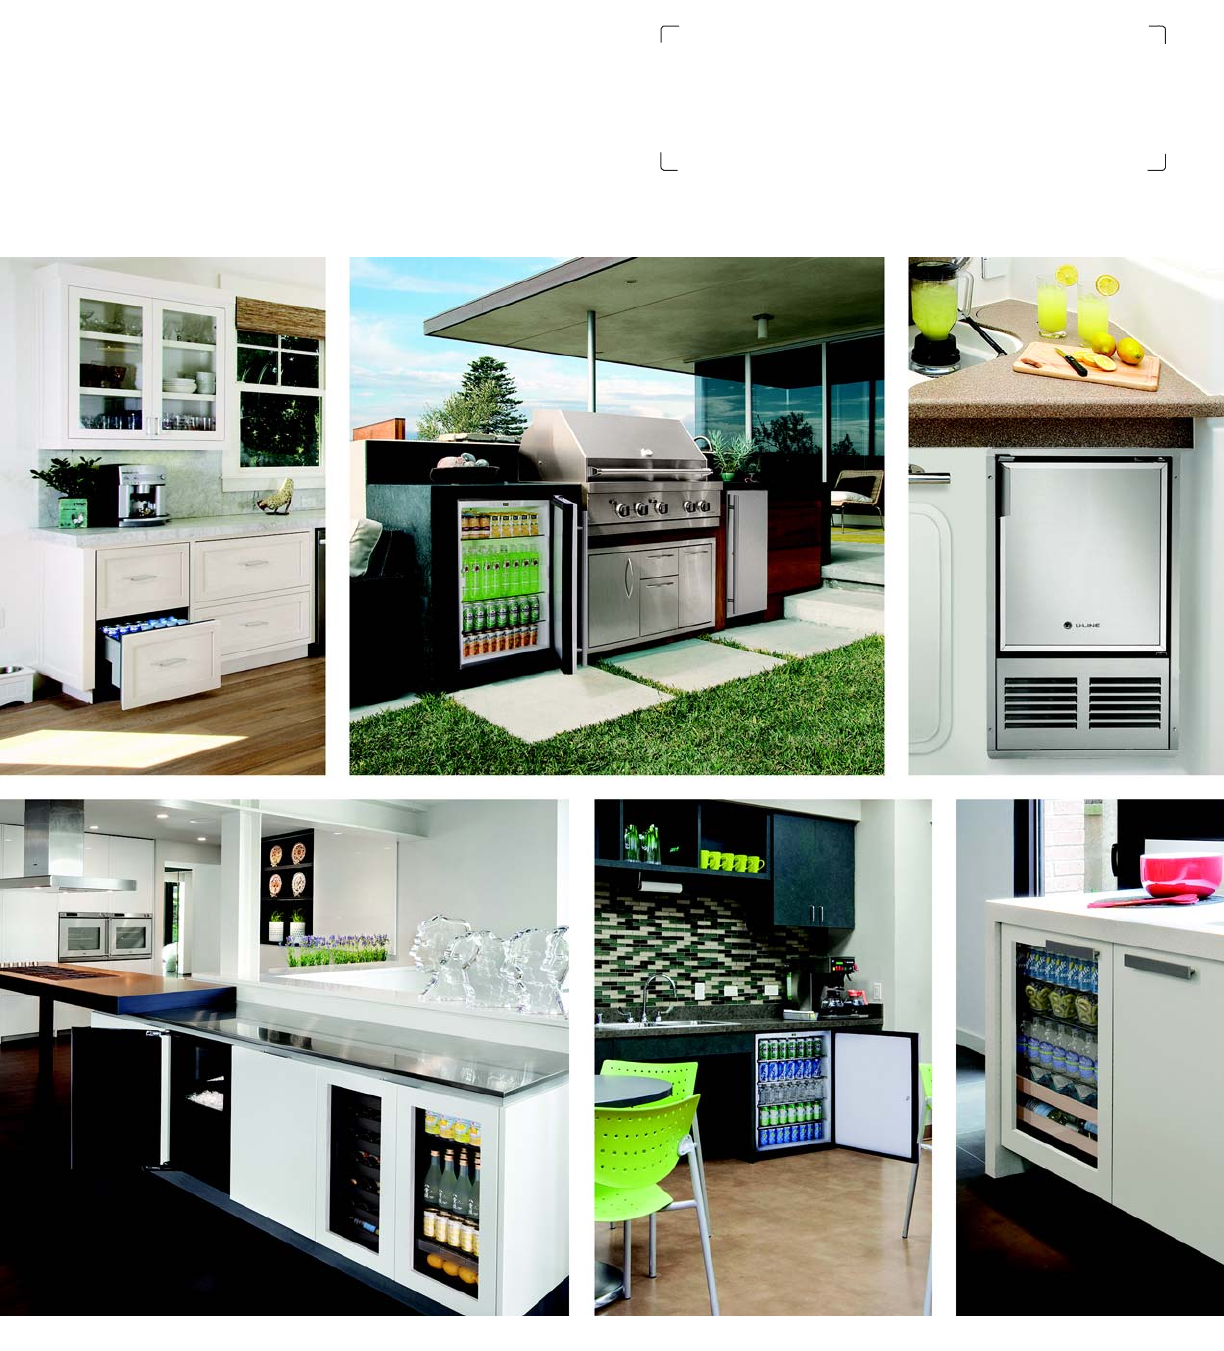
QUICK START GUIDE u-line.com WELCOME TO U-LINE Congratulations on your U-Line purchase. Your product comes from a company with over five decades and three generations of premium modular ice making, refrigeration, and wine preservation experience. U-Line continues to be the American leader, delivering versatility and flexibility for multiple applications including residential, light commercial, outdoor and marine use.
QUICK START GUIDE u-line.com This Quick Start Guide covers the basics of installation and general use of your product. For more details, see the complete User Guide & Service Manual on u-line.com.
QUICK START GUIDE u-line.com Safety and Warning that they do not play with this appliance. Cleaning and NOTICE without supervision. user maintenance shall not be performed by children PLEASE READ all instructions before installing, operating, or servicing the appliance. ! DANGER SAFETY ALERT DEFINITIONS Do not use electrical appliances inside the food Throughout this guide are safety items labeled with a storage compartment of this appliance.
QUICK START GUIDE u-line.com This appliance is intended to be used in household and ! CAUTION similar applications such as: Use care when moving and handling the unit. • Staff kitchen areas in shops, office and other working Use gloves to prevent personal injury from sharp environments. edges. • Farm houses and by clients in hotels, motels and other If your model requires defrosting, DO NOT use residential type environments. medical devices or other means to accelerate the defrosting process.
QUICK START GUIDE u-line.com Electrical Water Hookup PREPARE PLUMBING ! WARNING The water valve uses a standard 1/4" (6.35 mm) compression fitting. U-Line recommends using accessory SHOCK HAZARD — Electrical Grounding water hook up kit – part # WATERHOOKUP. The kit Required. Never attempt to repair or perform includes a 10' (3 m) braided flexible water supply line and maintenance on the unit until the electricity has a brass hose fitting. When using a 1/4" (6.35 mm) O.D. been disconnected.
QUICK START GUIDE u-line.com 3. Locate water ! CAUTION valve in the front of the unit and Do not use any plastic water supply line. The line thread water is under pressure at all times. Plastic may crack supply line or rupture with age and cause damage to your through. home. NOTICE Do not use tape or joint compound when Route the water attaching a braided flexible water supply line supply line that includes a rubber gasket.
QUICK START GUIDE u-line.com 8. Install retaining clip. NOTICE Drain can NOT be located directly below the unit. Unit has a solid base that will not allow the unit to drain below itself. There is a possibility that hose connections may have loosened during shipment. Verify all connections and fittings are free from leaks. GRAVITY DRAIN Normal Proper Drain With Trap Poor Drainage, Water Will Back Up Drain Model numbers including “-00” or “-07” do not include a factory installed drain pump.
QUICK START GUIDE u-line.com Disposal Assembly P60 Pump Required ! CAUTION Air Gap (Optional Hook-Up) Failure to connect water supply or drain line connections properly can result in personal injury and property damage. Gravity drain connections must be routed downward from the Waste rest of the unit at the rate of 1/4" per foot (1 cm per 50 cm).
QUICK START GUIDE u-line.com Door Swing General Installation For models that are installed adjacent to a wall, 1/4" 1. Use a level to confirm (6 mm) clearance is recommended from wall on hinge side the unit is level. Level to allow the door to open 90°. Allow for additional space should be placed along for any knobs or pulls installed on the integrated panel/ top edge and side frame. edge as shown. Units have a zero clearance when installed adjacent to 1 2.
QUICK START GUIDE u-line.com INSTALLATION NOTICE 1. Plug in the power/electrical cord. Due to differences in floor construction or surrounding cabinetry, the panel may not sit flush with the top of the door. 2. Gently push the unit into position. Be careful not to entangle the cord or water and drain lines. 6. Secure integrated panel to door using 3. Re-check the leveling, from front to back and side to Bar Clamp clamps. A robust side. Make any necessary adjustments.
QUICK START GUIDE u-line.com 10.Ensure the screws sit flush against the bottom of the channel. Integrated Panel Integrated Panel 11.Remove clamps from door. NOTICE If panel requires additional adjustment after removing clamps, slightly loosen each screw and adjust panel as necessary. Tighten screws upon completion. 12.Starting at the corners, re-install the gasket into the gasket channel in the frame. Make sure the gasket is fully seated.
QUICK START GUIDE u-line.
QUICK START GUIDE u-line.com ICE ADJUST (6.4 mm to 12.7 mm) in depth. A fuller cube with less of a dimple results in a thicker ice bridge. As the ice bridge Up thickens, the tendency for the cubes to stay together as a Select slab increases. A bridge thicker than 1/8" (3.2 mm) may RETURN TO MENU ICE ADJUST ICE ADJUST = 0 cause cubes to overfill the ice bucket. 32 ice cubes are formed on a 4 x 8 slab during each cycle.
QUICK START GUIDE u-line.com L Sabbath Mode 1 2 3 4 5 6 7 U-Line Clear Ice Machine models are Star-K certified and can be used during the Sabbath. View a full list of Star-K certified U-Line units at www.star-k.org. To prepare the unit for the Sabbath: 1. Press and hold the until the unit turns off. 2. No new ice will form when the unit is off, but previously made ice will still be accessible/present for over 24 hours.
U-Line Corporation (U-Line) Limited Warranty One Year Limited Warranty For one year from the date of original purchase, this U-Line product warranty covers all parts and labor to repair or replace any part of the product that proves to be defective in materials or workmanship. For products installed and used for normal residential use, material cosmetic defects are included in this warranty, with coverage limited to 60 days from the date of original purchase.