™ Installation Guide 2075WC Wine Captain® and 2075WCOL Wine Captain® with Overlay www.U-LineService.com Phone (414) 354-0300 • FAX (414) 354-7905 Service & Parts Tech Lines Phone (800) 779-2547 • FAX (414) 354-5696 OnlineService@U-Line.
™ 2075WC/2075WCOL Wine Captain® Contents Exterior Cleaning . . . . . . . . . . . . . . . . . . . . . . . . . . . . . . Cut-Out Dimensions . . . . . . . . . . . . . . . . . . . . . . . . . . . Product Dimensions . . . . . . . . . . . . . . . . . . . . . . . . . . . . Door Swing/Clearances Information . . . . . . . . . . . . . . Reversing the Door. . . . . . . . . . . . . . . . . . . . . . . . . . . . . Other Site Requirements . . . . . . . . . . . . . . . . . . . . . . . .
™ 2075WC/2075WCOL Wine Captain® General Precautions 2 Inspect and Plan Use this appliance for its intended purpose only and follow these general precautions along with those listed throughout this guide: You have received a carton containing your 2075WC or 2075WCOL Wine Captain® with a package inside containing a User Manual, a Product Registration Card and an Anti-Tip Bracket Installation Kit. 2075WCOL units are shipped with a cardboard-wrapped door and an additional package of hardware.
™ 2075WC/2075WCOL Wine Captain® After all the protective coating has been removed from the unit/door, clean all Stainless Steel surfaces with Claire Stainless Steel Polish and Cleaner or comparable product or a mild detergent and warm water solution and soft cloth. Do NOT use abrasive cleaning agents. 3 Prepare Site Your U-Line product has been designed for either freestanding or built-in installation. When built-in, your unit does not require additional air space for top, sides or rear.
™ 2075WC/2075WCOL Wine Captain® Product Dimensions Door Swing/Clearances Information Black, White and Wood Overlay units have a zero clearance for the door to open 90° (see Figure 3). Stainless Steel models require a minimum of 2-1/8" door clearance to accommodate the handle if the unit is installed next to a wall or similar type of structure. 25-3/8" Including Handle 23-1/4" Including Handle Wall 34-1/8" Wall 2-1/8" Min.
™ 2075WC/2075WCOL Wine Captain® 2. Remove plastic screw plugs (3 each, top and bottom) from new hinge location. Do not discard (see Figure 6). 7. With bottom of door facing up, remove pivot plate (2 screws), flip over, and remount on opposite side of door (see Figure 9). Be sure angled side of plate faces center. Screw Plugs Figure 5 Figure 6 Figure 9 3. Remove top hinge (3 screws), reinstall hinge screw pin, and remount on opposite side BOTTOM (see Figure 7). 8.
™ 2075WC/2075WCOL Wine Captain® Side-By-Side Installation Instructions 4 Prepare Racks and Door Frame The U-Line Wine Captain® is equipped with woodtrimmed wine racks that are coated at the factory with a clear vinyl sealer, which will adequately protect the wood in normal usage. A final finish coat was not applied so that the wood trim could be stained to match décor or overlay frame. The trim on the racks may be coated with a final finish or stained.
™ 2075WC/2075WCOL Wine Captain® Staining Wood Trim a Different Color Overlay Frame 1. Remove each wine rack by sliding it out and up. See Figure 12. Frame Preparation 2. Remove and save screws securing wood trim to the racks. An overlay frame covers the door frame to give a built-in appearance. Appropriate hardware and a copy of these instructions will be included in the unit. 3. Apply Minwax Water-Based Wood Stain to wood with a synthetic foam brush. Stain must penetrate approximately 3 minutes.
™ 2075WC/2075WCOL Wine Captain® 2. Typical routing dimensions are shown in Figure 14. Route notch in top corner of overlay frame as shown (see Top and Side Views). Top of notch is entire depth of frame, front to back. 3/4" Width: 13/16" 1-1/8" Depth: 1/8" 1-13/16" 2-1/4" Route notch in backside of top corner of overlay frame (see Back and Side Views). 11/16" (Ref.) Width: 13/16" 7/16" (Ref.
™ 2075WC/2075WCOL Wine Captain® Installation Instructions Applying Foam Tape to Overlay Frame (If required) Preparing Door Gasket Note: Door is not attached. It is in a separate box inside the unit box and taped to the unit. Inside Edge 1. Lay door on a clean, flat surface with the gasket facing up. Door 2. Pull gasket completely out of the groove. Start in the Figure 16 middle and pull outward, moving toward the edge (see Figure 16). This may take some force.
™ 2075WC/2075WCOL Wine Captain® Note: The door frame is designed with a slight amount of “play” to square it to the overlay frame. Door Frame Tape 6. Remove all traces of tape securing overlay frame to door frame. 7. Starting at the corners and working toward the center, push the door gasket back into place. Make sure gasket is seated on all four sides. Installing the Door IMPORTANT Pivot posts must be clean. Closers must also be clean and greased to ensure proper operation. Overlay Frame 1.
™ 2075WC/2075WCOL Wine Captain® 5 Adjust Door Checking Door Alignment Slotted Mounting Holes The unit’s door is aligned at the factory before shipment. However, its alignment could have been disturbed during shipment or during overlay frame installation. Angled Edge Towards Center of Door IMPORTANT Properly aligned, the door should be 1/8" below the top of the unit’s cabinet, NOT flush with the top (see Figure 23). Raise Outside Door Edge Lower Outside Door Edge Figure 25 1/8" 3. See Figure 25.
™ 2075WC/2075WCOL Wine Captain® 6 Prepare Power Supply 7 Level the Unit Electrical Specifications Leveling Information Note: It is recommended that the unit is level. CAUTION 1. Use a level to check the levelness of the Wine Captain® from front to back and from side to side. Level should be placed along top edge and side edge as shown (see Figure 28). Electrical installation must observe all state and local codes.
™ 2075WC/2075WCOL Wine Captain® 8 Install the Unit Anti-Tip Bracket Installation 1. Locate two Anti-Tip Brackets included inside the unit. 2. Place the unit into the area where it will be installed. Check the door, sides and top for a proper fit. Also test to make sure the door opens and closes freely. 3. Remove grill and place a mark on the floor at the front of the unit. Also place a mark on the floor in the center of the unit. See Figure 30.
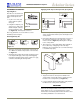
™ 2075WC/2075WCOL Wine Captain® Installation Troubleshooting 9 Start-Up for the First Time Q: Problem Initial Start-Up The door remains open unless it is pushed closed. The unit is shipped with the control preset. No adjustments should be necessary at this time. For information about Adjusting the Temperature Control, see the User Manual. A: Solution The hinges should be self-closing when the door is open approximately 8".
™ Who to Call Service Information If the need for service arises, contact the dealer from whom the unit was purchased. State the Model Number and Serial Number and explain the problem. The Model and Serial Number plate is located inside unit at upper right hand corner. If you need to locate a service company, you can go online at www.U-LineService.com and search for a service company by zip code.