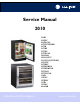
Service Manual 2010 2115R 2115WC 2115WCOL 2175/2275DWRR 2175R 2175RF 2175WC 2175WCOL CLR2160 CLRCO2175 CO2175/CO2275DWR CO2175F 2175BEV 2275DWRWS 2275DWRWOL 2275ZWC 2275ZWCOL 1115R 1115WC 1175BEV 1175R 1175WC ADA24R Entertain with U-Line Elegance www.u-line.
Section 1 - General Information INTRODUCTION Three generations of pride and quality manufacturing and design improvements are built into all U-Line products. The result: U-Line leads the market with innovative technology and superior craftsmanship.
Section 1 - General Information TABLE OF CONTENTS SECTION 1 - GENERAL INFORMATION Introduction ..................................................................................................................................................................1-1 Potential Problems With HFC-134A.......................................................................................................................1-1 Safety Precautions ............................................................................
Section 1 - General Information 2175R ............................................................................................................................................................................4-14 2115R ............................................................................................................................................................................4-18 2175WC/2175WCOL ..................................................................................................
Section 1 - General Information SAFETY PRECAUTIONS IMPORTANT PLEASE READ all instructions completely before attempting to service the unit. • Proper installation procedures must be followed if this unit is being initially installed, or is moved to a new location after being in service. An INSTALLATION GUIDE for your unit, providing complete installation information is available from U-Line Corporation directly, and must be consulted before any installation is begun.
Section 1 - General Information U-LINE CORPORATION LIMITED WARRANTY U-Line Corporation warrants each U-Line product to be free from defects in materials and workmanship for a period of one year from the date of purchase; and warrants the sealed system (consisting of the compressor, the condenser, the evaporator, the hot gas bypass valve, the dryer and the connecting tubing) in each U-Line product to be free from defects in materials and workmanship for a period of five years from the date of purchase.
Section 1 - General Information PRODUCT LIABILITY POLICY Field service technicians are authorized to make an initial assessment. If in the servicer’s judgment the damage is the result of a product defect, the product would be removed and returned to U-Line in an unaltered condition. The dealer would then be authorized to permanently replace the end-user’s product at no cost to the end-user. Please call U-Line immediately at 800-779-2547 to initiate the RA and product exchange process.
Section 1 - General Information SERIAL NUMBER FORMAT IMPORTANT Starting October 2009 U-Line Corporation went to a 13 digit serial number. Anything before that date will have 12 digits. The serial number is divided into four segments. A typical serial number is 0914997-11-0005. 0914997-11-XXXX Year Month Shop Order Number Factory Internal Control Number The first two digits of the first segment, 09, represents the year the unit was made.
Section 1 - General Information PARTS LISTING How to Order Replacement Parts 1. Refer to Service Parts and locate the illustration(s) for the model you are servicing. 2. Locate the desired part to be serviced and note the item number assigned to it. Our warranty records may not match the customer's information. In this case, a proof of purchase will be required.
Section 2 - Troubleshooting CUSTOMER CALL GUIDE The following guide has been developed to help answer frequently asked questions. It can be used by persons Concern The unit is not cold enough. scheduling service calls.
Section 2 - Troubleshooting CLR2160 Model Only: Concern Response The cubes are wet. • The storage bin that holds the ice is not refrigerated. The cubes in the bin are slowly melting down. The bin will maintain a temperature of 32°F to 34°F. The floor is very warm in front of my unit. • The unit is designed for a built-in application, so warm air will vent through the front grille, below the door.
Section 2 - Troubleshooting REFRIGERATION SYSTEM DIAGNOSIS GUIDE System Suction Pressure Suction Line Compressor Discharge Condenser Capillary Tube Evaporator Wattage Normal Normal Slightly below room temperature Very hot Very hot Warm Cold Normal Overcharge Higher than normal Very cold may frost heavily Slightly warm to hot Hot to warm Cool Cold Higher than normal Undercharge Lower than normal Warm-near room temperature Hot Warm Warm Extremely cold near inlet - Outlet below r
Section 2 - Troubleshooting TROUBLESHOOTING DANGER Never attempt to repair or perform maintenance on the unit until the main electrical power has been disconnected from the unit. Cause Remedy Will not eject ice (water frozen). 1. Control setting too cold. 1. Adjust control warmer. 2. Control inoperable. 2. Replace control. 3. Bin switch inoperable. 3. Replace bin switch. 4. Limit switch defective (open). 4. Replace limit switch. 5. Ice maker assembly motor stalled. 5. Replace motor. 6.
Section 2 - Troubleshooting Cause Remedy Low ice production. 1. Control set too cold. 1. Adjust control warmer. 2. Fan motor stalled. 2. Replace fan motor. 3. Ice cubes too large. 3. Lower water fill adjustment. 4. Dirty condenser. 4. Clean condenser. 5. Bypass valve stuck open (Frost Free units only). 5. Replace bypass valve (Frost Free units only). Not freezing (compressor and fan motors operating). 1. Little or no frost pattern on evaporator. 1. Check for sealed system leak or restriction.
Section 2 - Troubleshooting Cause Remedy Water leak (under unit). 1. Water supply line leaking at solenoid valve inlet. 1. Tighten or replace fitting. 2. Water line leaking at solenoid valve outlet. 3. Water line leaking at fill tube. 4. Defrost drain line not in drain pan. 5. Crack in water line. 2. Replace water line and fitting. 3. Tighten clamp or replace fill tube assembly. 4. Position drain line in drain pan. 5. Replace water line. Water leak (inside unit). 1.
Section 3 - Service and Repair OPERATION CLR2160 GENERAL Upon initial startup, this unit will enter mode number 5 which is a three-minute water fill regardless of the thermistor temperatures. This only occurs when the initial startup is caused by a power-up of the main board. Following the three-minute water fill, the unit moves into mode 1 which is the freezing mode. In this mode the water is pumped from the sump trough over the ice maker grid by the circulation pump.
Section 3 - Service and Repair .
Section 3 - Service and Repair TROUBLESHOOTING (CONTINUED) No ice Check the ice bin temperature. If the temperature is in the 3435°F range, the unit is shut down due to low temperature inside. This could be caused by low ambient temperatures or running the unit without a water supply attached. If the ice bin temperature is above 35°F, the unit should be producing ice. Check to ensure the water trough is full and the pump is operating. Too much ice Ensure there is Permagum around the thermistor hole.
Section 3 - Service and Repair CLRCO2175 GENERAL The U-Line Model CLRCO2175 combines the best of Échelon refrigeration and clear ice-making capabilities into a single unit. A state-of-the-art microprocessor-based controller simplifies operation and troubleshooting. There are four primary modes of operation: 1. Ice Making and Refrigeration (Figure 2). 2. Ice Making and No Refrigeration (Figure 3). 3. Refrigeration and No Ice Making (Figure 4). 4. Ice Harvest/Water fill (No Refrigeration Possible) (Figure 5).
Section 3 - Service and Repair ULIN_0328_A Figure 2.
Section 3 - Service and Repair ULIN_0329_A Figure 3.
Section 3 - Service and Repair ULIN_0330_A Figure 4.
Section 3 - Service and Repair ULIN_0331_A Figure 5.
Section 3 - Service and Repair ULIN_0332_A Figure 6.
Section 3 - Service and Repair Figure 7.
Section 3 - Service and Repair Figure 8.
Section 3 - Service and Repair THERMISTOR OUTAGE E1, E2, E7, E8, E9 Bad thermistor errors. Replace thermistor. Check for thermistor errors by accessing “View thermistor # status (2, 19, 20, or 21).” If the error code is repeated, the thermistor is open or shorted. If a temperature is displayed, the thermistor is not defective. E3 This will be accompanied by a beep every minute. This signals that the door has been left open for longer than 20 minutes. Close the door to reset.
Section 3 - Service and Repair Too much ice Ensure there is Permagum around the thermistor hole. If there is, proceed to the next step. The control board is equipped with adjustment to adjust the level of ice in the bin for customer preference or when used in abnormal installations. With ice stacked to the desired level, check the bin temperature by holding WARMER and COLDER for five seconds. We’ll assume the display showed 38°F for this example. Go to service mode #24 and adjust the setting to that number.
Section 3 - Service and Repair 2175R/2115R 2175WC/2115WC 2175BEV 2175DWRR/2275DWRWS 2275ZWC (Includes Overlay Models) pressure of the refrigerant is reduced to the evaporating or low side pressure. GENERAL Refrigerant is pumped from the compressor to the condenser as a high pressure, high temperature vapor. As the refrigerant cools in the high pressure condenser, the vapor condenses to liquid. During this phase change, a great amount of heat is rejected with the help of the condenser fan.
Section 3 - Service and Repair COMPRESSOR COMPRESSOR TOP TOP COMPARTMENT COMPARTMENT CONDENSER CONDENSER THERMISTOR THERMISTOR SOLENOID SOLENOIDVALVE VALVE DRYER DRYER SOLENOID SOLENOIDVALVE VALVE EVAPORATOR EVAPORATOR CAPILLARY CAPILLARYTUBE TUBE BOTTOM BOTTOM COMPARTMENT COMPARTMENT THERMISTOR THERMISTOR DRYER DRYER EVAPORATOR EVAPORATOR CAPILLARY CAPILLARYTUBE TUBE DWR052 DWR052 Figure 10. 2275DWRWS/2275ZWC REVIEW THE FOLLOWING NOTES FOR GENERAL INFORMATION.
Section 3 - Service and Repair suspected of not operating correctly, you can run through this sequence to ensure each component is turning on and off through the board correctly. Go into service mode and choose option #22. This will cycle every relay on and off showing 10 11 20 21 …. If a component fails to turn on when the relay does, you can verify if there is voltage present by using a voltmeter to check the board output. 1 means ON and 0 means OFF.
Section 3 - Service and Repair CO2175F/2175RF/CO2175DWR • Drain heater off (CO2175F/2175RF only) GENERAL Defrost Mode: U-Line Frost Free Refrigeration System • Bypass solenoid valve open Cooling Mode: • Refrigerant flows through bypass system • Bypass solenoid valve closed • Vapor flows from condenser to evaporator without a phase change • Evaporator fan operating • Drain heater on (CO2175F/2175RF only) • Refrigerant flows through capillary tube • Normal vapor/compression cycle refrigeration CO
Section 3 - Service and Repair Air flow in at evaporator blade Air flow out at evaporator outlet Air passes though fin tube evaporator Condensate drains down trough under evaporator, into drain pan, and into condensate pan through drain hose. The drain trough is warmed during defrost by contact with evaporator fins and drain heater attached to the drain pan. ULIN_0370_A Figure 12. CO2175R & 2175RF Only: Typical Frost Free Airflow Configuration THERMISTORS Three or four thermistors are employed.
Section 3 - Service and Repair ICE MAKER • Following the water fill relay 7 remains energized for the balance of the 10 minutes that it needs to remain on. WARNING DO NOT cycle ice maker by hand. This will cause damage to the ice maker. Freeze cycle • Neither ice maker relay is energized. • Unit is cooling down to 15°F set-point. • The unit may cycle on and off as the ice maker is pulling down to maintain the proper refrigerator/freezer temperatures.
Section 3 - Service and Repair ULIN_0348a_A Figure 13. CO2175F Harvest-1 Cycle (First 30 Seconds Figure 14.
Section 3 - Service and Repair Figure 15. CO2175F Harvest-3 Cycle (Post Harvest) Figure 16.
Section 3 - Service and Repair ULIN_0350a_A Figure 17. CO2175F Freeze Cycle Figure 18.
Section 3 - Service and Repair ULIN_0345_A Figure 19. CO2175/2275DWR Harvest-2 Cycle (After 30 Seconds) Figure 20.
Section 3 - Service and Repair ULIN_0346_A Figure 21. CO2175/2275DWR Water Fill Cycle ULIN_0347_A Figure 22.
Section 3 - Service and Repair THERMISTOR OUTAGE E1, E2, E7, E8, E9 Bad thermistor errors. Replace thermistor. Check for thermistor errors by accessing “View thermistor # status (2, 19, 20, or 21).” If the error code is repeated, the thermistor is open or shorted. If a temperature is displayed, the thermistor is not defective. E3 This will be accompanied by a beep every minute. This signals that the door (or bottom drawer) has been left open for longer than 20 minutes. Close the door to reset.
Section 3 - Service and Repair Too much ice Ensure the bin arm is correctly moving during an ice production cycle and that it can touch the top of the ice. If not, the arm may have been bent. Display is showing a random snaking of characters or a degree symbol is flashing. The unit is in a special showroom mode. Hold the COLDER key and press the LIGHT key three times to exit. Excessive frost on evaporator Display not illuminating but unit operating Force a defrost cycle via the keypad input.
Section 3 - Service and Repair 1175R/1115R 1175WC/1115WC 1175BEV/ADA24R GENERAL Refrigerant is pumped from the compressor to the condenser as a high pressure, high temperature vapor. As the refrigerant cools in the high pressure condenser, the vapor condenses to liquid. During this phase change, a great amount of heat is rejected with the help of the condenser fan. The liquid then flows to the dryer where it is strained and filtered.
Section 3 - Service and Repair THERMISTOR OUTAGE Noise If the refrigerator thermistor (T1) fails, the unit will continue to operate based on a preset time interval of 10 minutes on and 30 minutes off. The display will show “E1.” Some noise is normal, such as a hum from the fans/compressor. TROUBLESHOOTING Push one of the keys to see if the display is reset. Error Code E1, E2 Bad thermistor errors. Replace thermistor. Check for thermistor errors by accessing "View thermistor # status (2).
Section 3 - Service and Repair OPERATING ENVIRONMENTAL/ CLIMATE CONTROL REQUIREMENTS For All - Except WC, ADA, DWRWS, BEV Center, CODWR & Dual Zone(Z) Many U-Line models are designed to operate in harsh outdoor/ marine environments. Special considerations include the following: • The units are designed to operate between 50°F (10°C) and 110°F (40°C).
Section 3 - Service and Repair ADJUSTING THE SET-POINT - 2275DWRWS ONLY 1. Press and release the WARMER icon. The top of the F in °F of the top drawer will begin to flash. This will allow you to adjust the temperature of the top drawer. In 10 seconds of inactivity, the bottom bar of the F in °F will begin to flash (see below); this will allow you to adjust the temperature of the bottom drawer. Adjustments to the lower drawer can be made immediately if the LIGHT icon is pressed. 2.
Section 3 - Service and Repair VIEWING ACTUAL TEMPERATURE - 2275DWRWS ONLY To view the temperature in the top and bottom drawer (T1 and T2), hold the WARMER key for five seconds until “°F” flashes. Release and the display will show the corrected temperatures of both zones on their respective displays. To view the temperature of T3 and T4, you must use the service mode. VIEWING ACTUAL TEMPERATURE - 2275ZWC/2275ZWCOL ONLY To display actual zone temperatures (not set-point): 1.
Section 3 - Service and Repair FORCED DEFROST This will allow the unit to defrost quickly. For R and WC units, this is just an off cycle. For units with hot gas defrost the unit will enter a hot gas defrost per the specification. Hold the LIGHT key and press ON/OFF three times. The unit will beep once when entering this mode. To exit this mode either do the same key combination or turn the unit off via the display. Not available on CLR2160. 6. Press and release LIGHT key.
Section 3 - Service and Repair This allows calibration of the sensor to cabinet for abnormal operations. By adjusting this number colder you can change the average cabinet temperature to a colder value. Not available on CLR2160. 11. Data download Along with the separate ESPY software you can download the rolling data file. 12. Clear error log Perform this operation after checking the errors. 13. Clear download memory Clears the rolling data file if desired. 14.
Section 3 - Service and Repair E2 E8 Thermistor 3 open or shorted. Not available on Rs, WCs or CLR2160. Thermistor 1 is shorted. Not available on CLR2160. E3 Main door or bottom drawer is open longer than 20 minutes. Not available on CLR2160. E4 Compressor had 100% runtime between two defrost cycles. Does not show on display—only in error log. E5 Thermistor 1 out of range + 10°F for more than 12 hours. Not available on CLR2160. 3-34 E11 EE Memory error. Thermistor 2 open or shorted.
Section 3 - Service and Repair Model Thermistor 1 Thermistor 2 Thermistor 3 Thermistor 4 Door Switch 1 Door Switch 2 2175R REF EVAP N/A N/A Yes N/A 2115R REF EVAP N/A N/A Yes N/A 2175WC REF EVAP N/A N/A Yes N/A 2115WC REF EVAP N/A N/A Yes N/A 2175DWRR REF EVAP Ambient N/A Bottom Drawer Top Drawer CO2175F REF IM FZR Drain Pan Yes N/A 2175RF REF N/A FZR Drain Pan Yes N/A CO2175DWR REF IM FZR Drain Pan Bottom Drawer Top Drawer CLR2160 N/A IB N/A
3-36 61 62 63 64 65 66 67 68 70 71 72 85 87 Thermistor #1 open Thermistor #1 shorted Door or bottom drawer open longer than 20 minutes Thermistor #1 out of range (+10˚) for more than 12 hours Thermistor #1 out of range (-10˚) for more than 12 hours Thermistor #2 open or shorted Thermistor #3 open or shorted Thermistor #4 open or shorted Top drawer open longer than 20 minutes EE Memory Error Pump circuit open due to high water level in ice bin E1 E2 E3 E5 E6 E7 E8 E9 E10 E11 P1 Error
Hold Hold or or Adjust Refrigerator Set-point 2275DWRWC adjust lower drawer set-point Adjust zone set-points 2278ZWC View actual temperature (T1) View actual temperature (T2 – T4) Toggle F – C Toggle Showroom Mode Service Mode Display Toggle Glass door/drawer models only Blackout Mode Clean Cycle Icemaker Off Mode Forced Harvest Forced Refrigerator Defrost Ice Thickness Adjustment Temporary Shutdown (Office Mode) Relay Status Change Mode Number (with jumper) 3 4 5 6 7 8 9 10 11
Section 3 - Service and Repair ORIGINS ELECTRONIC CONTROL Origins Keypad Options DANGER Electrocution can cause death or serious injury. Burns from hot or cold surfaces can cause serious injury. Take precautions when servicing this unit. • Disconnect the power source. • Do not stand in standing water when working around electrical appliances. • Make sure the surfaces you touch are not hot or frozen.
Section 3 - Service and Repair turn back on. If desired, you can manually cancel this mode by touching the LIGHT button. Release and the unit will automatically start normal operation. MODEL NUMBER CHANGE Origins Model Selection: 1. 2. 3. 4. 5. 6. 7. 8. 9. Make sure board is not plugged in. Hold down ON/OFF key and plug in unit. Release ON/OFF key. Press and release LIGHT icon. Use WARMER/COLDER to select the model number desired.
Section 3 - Service and Repair Error Codes E4 Compressor had 100% runtime between two defrost cycles. E1 Thermistor 1 is open. E5 Thermistor 1 out of range + 10°F for more than 12 hours. E2 Thermistor 1 is shorted. E6 Thermistor 1 out of range -10°F for more than 12 hours. E3 Main door or bottom drawer is open longer than 20 minutes. All errors show up on display alternating between SP and the actual code.
Section 3 - Service and Repair Refrigeration System Diagnosis Guide System Condition Suction Pressure Suction Line Compressor Discharge Condenser Capillary Tube Evaporator Wattage Normal Normal Slightly below room temperature Very hot Very hot Warm Cold Normal Overcharge Higher than normal Very cold may frost heavily Slightly warm to hot Hot to warm Cool Cold Higher than normal Undercharge Lower than normal Warm near room temperature Hot Warm Warm Extremely cold near inlet out
Section 3 - Service and Repair CAUTION If frost is heavy, divert water from drain to prevent water from overflowing on the floor. S R STARTING RELAY C SPECIFICATIONS CLR2160 COMPRESSOR/COIL SPECIFICATIONS DANGER 3/4" OVERLOAD PROTECTION Electrocution can cause death or serious injury. Burns from hot or cold surfaces can cause serious injury. Take precautions when servicing this unit. • Disconnect the power source. • Do not stand in standing water when working around electrical appliances.
Section 3 - Service and Repair CLRCO2175 COMPRESSOR/COIL SPECIFICATIONS FF7.5HBK DANGER Electrocution can cause death or serious injury. Burns from hot or cold surfaces can cause serious injury. Take precautions when servicing this unit. • Disconnect the power source. • Do not stand in standing water when working around electrical appliances. • Make sure the surfaces you touch are not hot or frozen.
Section 3 - Service and Repair 2175R/2115R 2175WC/2115WC 2175BEV 2175DWRR/2275DWRR 2275DWRWS/2275ZWC COMPRESSOR/COIL SPECIFICATIONS LRA 26.5 FLA 2.7 Start Winding 8.1 Run Winding 3.2 Capacitor N/A Refrigeration coils Electrocution can cause death or serious injury. Burns from hot or cold surfaces can cause serious injury. Take precautions when servicing this unit. • Disconnect the power source. • Do not stand in standing water when working around electrical appliances.
Section 3 - Service and Repair CO2175F/2175RF/CO2175DWR COMPRESSOR/COIL SPECIFICATIONS EMU45HSC EMY70HER 5408 70081 Voltage 115.0 115-127 Frequency 60.0 60.0 LRA 6.5 26.5 FLA 1.5 2.7 Start Winding 5.6 8.1 Run Winding 6.7 3.2 15uF N/A DANGER Electrocution can cause death or serious injury. Burns from hot or cold surfaces can cause serious injury. Take precautions when servicing this unit. • Disconnect the power source.
Section 3 - Service and Repair 1175R/1115R 1175WC/1115WC 1175BEV/ADA24R To ensure the windings are not shorted, check the S and R to ground. OVERLOAD PROTECTOR COMPRESSOR/COIL SPECIFICATIONS STARTING RELAY DANGER C Electrocution can cause death or serious injury. Burns from hot or cold surfaces can cause serious injury. Take precautions when servicing this unit. S RELAY COVER • Disconnect the power source. • Do not stand in standing water when working around electrical appliances.
Section 3 - Service and Repair ADJUSTMENTS AND REPAIR Leveling IMPORTANT It is extremely important that the unit is level for maximum production. If it is not: Doors or drawers will not work properly. In ice maker units, uneven sized cubes will be formed. Ice production will reduce and water spilling into the storage area can occur causing the ice in the bin to melt prematurely (Figure 32). Remember, floors surrounding a drain have a tendency to slope toward the drain. FRONT Figure 34 1.
Section 3 - Service and Repair NOTE: If door is adjusted correctly, but panel is not square with the adjacent cabinets, slight adjustments can be made by drilling the holes in the vinyl-coated steel panel slightly oversized (Figure 37).
Section 3 - Service and Repair ADJUSTING DOOR ALIGNMENT 1. Loosen (do not remove) top and bottom hinge screws (Figure 42 and Figure 43). Door Closer Inserts Boss ULIN_0298a_A Figure 41 8. Mount the door, install top hinge pivot pin. Door Alignment - Origins Models The unit’s door is aligned at the factory before shipment. However, its alignment could have been disturbed during shipment or during door panel installation.
Section 3 - Service and Repair CHECKING DRAWER ALIGNMENT 3. Remove the mounting screws (Figure 45 and Figure 46). The unit’s drawers are aligned at the factory before shipment. However, their alignment could have been disturbed during shipment or during overlay panel installation. Mounting Screw Aligned Front-to-Back ULIN_0313_A Figure 45 Aligned Side-to-Side 4. Pull the drawer completely out of the unit. CAUTION Use care when handling the drawer.
Section 3 - Service and Repair SIDE-TO-SIDE ADJUSTMENT Mark and Drill New Mounting Holes See Figure 46. The drawer will need a side-to-side adjustment if, when viewed from the top, the drawer front is not square with the sides of the cabinet. This is caused by one of the slides being mounted too far forward on the unit’s liner. Push Slide Backward ULIN_0318_A Figure 48 Not Aligned Side-to-Side NOTE: Front location holes are shown. Corresponding rear holes will also need to be marked.
Section 3 - Service and Repair Screws Should Be Loose TOP-TO-BOTTOM (AND LEFT-TO-RIGHT) ADJUSTMENT Not Aligned Top-to-Bottom Level the Slide Not Aligned Left-to-Right ULIN_0320_A Figure 50 4. Repeat the procedure for the other slide. Severe Adjustment NOTE: The slides have extra mounting holes that may be used. 1. Loosen one slide’s rear mounting screws. 2. Remove the slide’s front mounting screws. 3. Reposition the slide so it is level. 4.
Section 3 - Service and Repair Mark and Drill New Mounting Holes Push Slide Upward or Downward ULIN_0325_A Figure 54 NOTE: Front location holes are shown. Corresponding rear holes will also need to be marked. 4. Drill all the new holes with a #30 drill bit. 5. Remount the slide. RE-INSTALLATION OF DRAWER CAUTION Use care when handling the drawer. Drawer edges, drawer rail and the unit’s slide may be sharp. 1. Set the drawer’s rails onto the slides. 2. Re-install the rails’ mounting screws (Figure 55).
Section 3 - Service and Repair Ice Cube Thickness Adjustment Sample area INTERVAL - AS REQUIRED Ice thickness adjustments are made using the control panel as follows: 1. To enter the thickness adjustment mode: a. Touch and hold the UP ARROW button. b. Touch and release the DOWN ARROW button three times, then release the UP ARROW button. c. The display will switch to “0” to confirm the thickness adjustment mode has been selected. 2.
Section 3 - Service and Repair Parts Replacement 7. Plug in the fan connection. NOTE: Echelon models do not require removal of the ice maker or freezer housing to access the fan motor, drain or evaporator. 8. Reinstall fan bracket to liner, making sure the fan wires are tucked behind the fan bracket. REPLACING EVAPORATOR FAN MOTOR - CO2175F/2175RF 9. Reinstall unit and test. 1. Disconnect unit from power source. ACCESSING EVAPORATOR OR DRAIN - CO2175F/2175RF 2.
Section 3 - Service and Repair REPLACING EVAPORATOR FAN MOTOR - CO2175DWR 9. Reinstall fan bracket to liner, making sure the fan wires are tucked behind the fan bracket. 1. Disconnect unit from power source. 10. Reinstall unit and test. 2. Remove two screws (Figure 58) holding evaporator fan cover to evaporator cover. To access evaporator or drain: 3. Unplug fan connection. 4. Remove two nuts and two washers holding the fan to the fan bracket. 5. Replace with new fan. 6.
Section 3 - Service and Repair REPLACING ICE MAKER 7. Remove three screws from wall of freezer housing. 1. Unplug unit. 8. Remove ice maker assembly. 2. Disconnect ice maker wire harness at plug (Figure 60). 9. Install new ice maker assembly. 3. Disconnect thermistor plug. 11. Reconnect thermistor plug. 4. Remove water inlet tube. 12. Insert water inlet tube. 5. Remove front cover. 13. Apply Permagum® to all exit holes. 6.
Section 3 - Service and Repair REPLACING MOLD AND HEATER - CO2175F/CO2175DWR 4. Remove one screw and detach limit switch from mold. 1. Remove ice maker assembly. Refer to Replacing Ice Maker Assembly. 6. Remove two screws and mold from support housing. 5. Detach heater leads. 7. To assemble, replace parts in reverse order. 2. Remove one stripper screw (Figure 61) and stripper. 8. Install the ice maker assembly. 3. Remove three face plate screws and face plate.
Section 3 - Service and Repair Plumbing - CLR2160 and CLRCO2175 Gravity Drain CAUTION Plumbing installation must observe all state and local codes. All water and drain connections MUST BE made by a licensed/qualified plumbing contractor. Failure to follow recommendations and instructions may result in damage and/or harm. Waste Shut-Off Valve DRAIN CONNECTION Cold Water Hot Water IMPORTANT Drain can NOT be located directly below unit.
Section 3 - Service and Repair Disposal Assembly Screws Back Panel Air Gap (Optional Hook-Up) Waste Hot Water Cold Water Grommet Shut-Off Valve ULIN_0572_A Drain Fitting Power Cord Figure 65 Water Connection ULIN_0574_A Figure 67 3. Remove 12 screws and back panel. Spigot Assembly WARNING Air Gap (Optional Hook-Up) Waste Shut-Off Valve Hot Water Cold Water Back panel serves as a guard.
Section 3 - Service and Repair 9. Unplug unit power cord from electrical outlet. 10. Reinstall back panel. To connect to drain: 1. Attach the 5/8" ID drain connection on the back of the unit to a 5/8" OD rigid tube, using a worm clamp. 2. Attach the other end of the rigid tube to your 5/8" ID drain line with a worm clamp. 3. Insulate the drain line, if necessary, to prevent condensation.
Section 3 - Service and Repair Drain Fitting from Back of Unit 9/16" Wrench 1/4" Copper Water Supply Line 5/8" x 5/8" Barb Connector Worm Clamps Drain Line 7/16" Wrench From Water Supply to Ice Maker ULIN_S_0166b2_A ULIN_S_0168_A Figure 70 Figure 72 3. Your U-Line icemaker requires a drain connection. This unit can be purchased with or without a factory-installed drain pump.
Section 3 - Service and Repair 10. Once pushed completely into the opening finish routing the drain tubing to the desired location. Common installations use a floor drain, standpipe, garbage disposal, or Y-branch tailpiece-type drain connection (Figure 73 - 76). After the installation is complete, check the unit to ensure it is level both side to side and front to back. For disposal connections an optional adapter may be required (included with the kit) to adapt from the 7/8" connection.
Section 3 - Service and Repair WATER SUPPLY CONNECTION When connecting the water supply, follow these guidelines: • Review the local plumbing codes before you install the unit. • Connect to the cold water supply. 2. Locate the U-Line supplied garden hose fitting. Ensure the end of the copper tubing has been cut straight and free of burrs. Slide the compression nut and ferrule onto the copper tubing as shown (Figure 78).
Section 4 - Parts PARTS LISTING How to Order Replacement Parts 1. Refer to Service Parts and locate the illustration(s) for the model you are servicing. 2. Locate the desired part to be serviced and note the item number assigned to it. 3. Locate the item number within the parts list. Note the full description and the corresponding part number. If this is for a warranty unit, indicate and record the model and serial numbers. 4.
Section 4 - Parts CLR2160 (1 of 2) 4-2
Section 4 - Parts CLR2160 (1 of 2) Item 1 2 3 4 5 6 7 8 9 10 11 12 13 14 15 16 17 18 19 20 21 22 23 24 25 26 27 28 29 30 31 32 33 34 35 36 37 38 39 40 41 42 Not Shown Part No.
Section 4 - Parts CLR2160 (2 of 2) 4-4
Section 4 - Parts CLR2160 (2 of 2) Item Part No. Black Part No. White Part No.
Section 4 - Parts CLRCO2175 (1 of 4) 4-6
Section 4 - Parts CLRCO2175 (1 of 4) Item 1 2 3 4 5 6 7 8 9 10 11 12 13 14 15 16 17 18 19 20 21 22 23 24 25 26 27 28 29 30 31 Not Shown Not Shown Part No. Black 80-17072-01 N/A 23025 26070-01-S 42173-BLK 12094-01 12095-07 11901-1-BLK-S 42161-ZP 11898-S-BLK 11899-S-BLK 31673-S 42101-BLK 42096 41604 80-29010-01 20033-BLK 12095-01 31690 N/A 11969-02 41342 31317 2891-01 31696 70078-S 2819 2693 31021 71011 71012 70078-CAP 41978 Part No.
Section 4 - Parts CLRCO2175 (2 of 4) 4-8
Section 4 - Parts CLRCO2175 (2 of 4) Item Part No. Black Part No. White Part No.
Section 4 - Parts CLRCO2175 (3 of 4) 4-10
Section 4 - Parts CLRCO2175 (3 of 4) Item 1 2 3 4 5 6 7 8 9 10 11 12 13 14 15 16 17 18 19 20 21 22 23 24 25 26 27 28 29 30 31 32 33 34 35 Part No. Black Part No. White Part No.
Section 4 - Parts CLRCO2175 (4 OF 4) 4-12
Section 4 - Parts CLRCO2175 (4 of 4) Item 1 Part No. Black 80-37005-00-S Part No. White 80-37005-00-S Part No.
Section 4 - Parts 2175R (1 of 2) 4-14
Section 4 - Parts 2175R (1 of 2) Item 1 2 3 4 5 6 7 8 9 10 11 12 13 14 15 16 17 18 19 20 21 22 23 24 25 26 27 28 29 30 31 32 33 34 35 36 37 38 39 40 41 42 43 44 Part No. Black 80-17060-01 N/A 23025 26070-01-S 42173-BLK 12094-01 11901-1-BLK-S 42161-ZP 11898-S-BLK 11899-S-BLK 31673-S 42101-BLK 42096 41604 80-29010-01 20033-BLK 2945 31686 N/A 11969 41342 31685 40021 40020 5400-S 2800 2694 31021 5411 5412 5400-CAP 5263-S 5188 41787 31550-1-S 31664 66016 20050 66019 11859 31317 2891-01 41319 2938-2 Part No.
Section 4 - Parts 2175R (2 of 2) 27 26 25 24 3 1 2 4 5 23 6 22 21 7 18 20 19 8 17 10 16 9 11 15 12 14 13 4-16
Section 4 - Parts 2175R (2 of 2) Item Part No. Black Part No. White Part No.
Section 4 - Parts 2115R (1 of 2) 4-18
Section 4 - Parts 2115R (1 of 2) Item 1 2 3 4 5 6 7 8 9 10 11 12 13 14 15 16 17 18 19 20 21 22 23 24 25 26 27 28 29 30 31 32 33 34 35 36 37 38 39 40 41 42 43 44 Part No. Black Part No. White Part No.
Section 4 - Parts 2115R (2 of 2) 4-20
Section 4 - Parts 2115R (2 of 2) Item 1 2 3 4 5 6 7 8 9 10 11 12 13 14 15 16 17 18 19 20 21 22 23 24 25 26 27 28 29 30 31 32 Not Shown Not Shown Part No. Black 68092 68072-S 68080 41992 41993 2950-01 26086 68074 68059-01 26089 42162 2694 2800 2303-02-S 66010 20026 31434-1 26091 41855 31213 2878-01-S 31154 2694 2800 31391-4 21012-WHT 11508 31578 31726 11835 41158 41156 N/A Part No.
Section 4 - Parts 2175WC/2175WCOL/2175WCOL2 (1 OF 2) 4 6 5 9 41 40 22 13 20 19 21 12 39 37 1, 2 7 8 38 6 3 7 17 8 16 15 38 27 23 37 18 26 11 35 25 36 31 29 30 34 12 28 7 13 8 24 10 32 33 4-22
Section 4 - Parts 2175WC/2175WCOL/2175WCOL2 (1 OF 2) Item 1 2 3 4 5 6 7 8 9 10 11 12 13 14 15 16 17 18 19 20 21 22 23 24 25 26 27 28 29 30 31 32 33 34 35 36 37 38 39 40 41 Not Shown Part No.
Section 4 - Parts 2175WC/2175WCOL /2175WCOL2(2 OF 2) 4-24
Section 4 - Parts 2175WC/2175WCOL /2175WCOL2(2 of 2) Item 1 2 3 4 5 6 7 8 9 10 11 12 13 14 15 16 17 18 19 20 21 22 23 24 25 26 27 28 29 30 31 32 33 34 35 36 37 38 39 40 41 42 43 Part No. Black Part No.
Section 4 - Parts 2115WC/2115WCOL/2115WCOL2 (1OF2) 4-26
Section 4 - Parts 2115WC/2115WCOL/2115WCOL2 (1 of 2) Item 1 2 3 4 5 6 7 8 9 10 11 12 13 14 15 16 17 18 19 20 21 22 23 24 25 26 27 28 29 30 31 32 33 34 35 36 37 38 39 40 41 42 Not Shown Part No.
Section 4 - Parts 2115WC/2115WCOL/2115WCOL2 (2 OF 2) 4-28
Section 4 - Parts 2115WC/2115WCOL/2115WCOL2 (2 of 2) Item 1 2 3 4 5 6 7 8 9 10 11 12 13 14 15 16 17 18 19 20 21 22 23 24 25 26 27 28 29 30 31 32 33 34 35 36 37 38 39 40 41 42 Part No. Black 68092 68072-S 68080 41992 41993 2950-1 11835 68074 68059-01 41158 41156-02 2694 2800 2303-02-S 66010 20026 31434-2 26091-02 41855-02 31213 2649-02-S 31154 2694 2800 31391-8 21012-BLK 11508-02 31578-02 31726 18052 31434-2 31648-02 14135-02 41405 42106 39006-02 42122 39004-02 4816 42106 18067-Vinyl 23027-03 Part No.
Section 4 - Parts 2175BEV/2175BEVOL/2175BEVOL2 (1 OF 2) 43 4-30 4816 4816 Screw (included with 23027-03)
Section 4 - Parts 2175BEV/2175BEVOL/2175BEVOL2 (1 of 2) Item 1 2 3 4 5 6 7 8 9 10 11 12 13 14 15 16 17 18 19 20 21 22 23 24 25 26 27 28 29 30 31 32 33 34 35 36 37 38 39 40 41 Not Shown Part No.
Section 4 - Parts 2175BEV/2175BEVOL/2175BEVOL2 (2 OF 2) 4-32
Section 4 - Parts 2175BEV/2175BEVOL/2175BEVOL2 (2 of 2) Item 1 2 3 4 5 6 7 8 9 10 11 12 13 14 15 16 17 18 19 20 21 22 23 24 25 26 27 28 29 30 31 32 33 34 35 36 37 38 39 40 Part No. Black Part No.
Section 4 - Parts 2175DWRR/2275DWRR (1 OF 2) 4-34
Section 4 - Parts 2175DWRR/2275DWRR (1 of 2) Item 1 2 3 4 5 6 7 8 9 10 11 12 13 14 15 16 17 18 19 20 21 22 23 24 25 26 27 28 29 30 31 32 33 34 35 36 37 38 39 40 41 42 43 44 45 Part No.
Section 4 - Parts 2175DWRR/2275DWRR (2 of 2) 4-36
Section 4 - Parts 2175DWRR/2275DWRR (2 of 2) Item 1 2 3 4 5 6 7 8 9 10 11 12 13 14 15 16 17 18 19 20 21 22 23 24 25 26 27 28 29 30 31 Not Shown Not Shown Part No. Black 68092 68072-S 68080 41992 41993 2950-01 68074 68059-01 11508 11508-02 31578 31578-02 31726 2694 2800 2303-S 66010 20026 31434-1 31434-2 26091 26091-02 41855 41855-02 31213 2333-S 2333-02-S 31154 2694 2800 31391-6 31391-7 21012-WHT 21012-BLK 11835 41158 41156 41156-02 2953 2952 26070-01-S Part No.
Section 4 - Parts 2275DWRWS/2275DWRWOL (1 OF 2) 4-38
Section 4 - Parts 2275DWRWS/2275DWRWOL (1 of 2) Item 1 2 Part No.
Section 4 - Parts 2275DWRWS/2275DWRWOL (2 OF 2) 4-40
Section 4 - Parts 2275DWRWS/2275DWRWOL (2 of 2) Item 1 2 3 4 5 6 7 8 9 10 11 12 13 14 15 16 Part No.
Section 4 - Parts CO2175F (1 of 4) 4-42
Section 4 - Parts CO2175F (1 of 4) Item 1 2 3 4 5 6 7 8 9 10 11 12 13 14 15 16 17 18 19 20 21 22 23 24 25 26 27 28 29 30 Part No. Black Part No. White Part No.
Section 4 - Parts CO2175F (2 0f 4) 9 13 41 42 40 20 21 12 2 3 4 19 5 24 14 18 23 39 37 7 8 38 6 22 1, 2 15 27 43 16 11 35 26 13 25 29 30 34 28 8 47 50 32 33 4-44 45 49 46 10 7 48 31 44 12 36 51 17 26 27
Section 4 - Parts CO2175F (2 of 4) Item Part No. Black Part No. White Part No.
Section 4 - Parts CO2175F (3 of 4) 4-46
Section 4 - Parts CO2175F (3 of 4) Item Part No. Black Part No. White Part No.
Section 4 - Parts CO2175F (4 of 4) 4-48
Section 4 - Parts CO2175F (4 of 4) Item 1 2 3 4 5 6 7 8 9 10 11 12 13 14 15 16 17 18 19 20 21 22 23 24 25 26 27 28 29 30 31 32 33 34 Not Shown Part No.
Section 4 - Parts 2175RF (1 of 3) 4-50
Section 4 - Parts 2175RF (1 of 3) Item 1 2 3 4 5 6 7 8 9 10 11 12 13 14 15 16 17 18 19 20 21 22 23 24 25 26 27 28 29 30 Part No. Black Part No. White Part No.
Section 4 - Parts 2175RF (2 of 3) 4-52
Section 4 - Parts 2175RF (2 of 3) Item Part No. Black Part No. White Part No.
Section 4 - Parts 2175RF (3 of 3) 4-54
Section 4 - Parts 2175RF (3 of 3) Item 1 2 3 4 5 6 7 8 9 10 11 12 13 14 15 16 17 18 19 20 21 22 23 24 25 26 27 28 29 30 31 32 33 34 35 36 37 38 39 40 Not Shown Not Shown Part No. Black Part No. White Part No.
Section 4 - Parts CO2175DWR/CO2275DWR (1 of 4) 4-56
Section 4 - Parts CO2175DWR/CO2275DWR (1 of 4) Item 1 2 3 4 5 6 7 8 9 10 11 12 13 14 15 16 17 18 19 20 21 22 23 24 25 26 27 28 29 30 31 32 33 34 35 Part No. Black 80-29010-01 20033-BLK 11969 41342 26014 80-48001-00 26000 70081-FFS 2800 72018 31021 71027 71028 70081-CAP 5263-S 5188 41787 31550-1-S 31664 11859 31317 2891-01 41319 2946 41826 41893-ZP 2552A 41254 404-CO207DWR 73002-FFS 73002-2 2800 72018 14147-01 80-47002-00 Part No.
Section 4 - Parts CO2175DWR/CO2275DWR (2 of 4) 4-58
Section 4 - Parts CO2175DWR/CO2275DWR (2 of 4) Item 1 2 3 4 5 6 7 8 9 10 11 12 13 14 15 16 17 Not Shown Not Shown Part No. Black 2175DWR-TOP-BLK 41604 26070-05-S 12094-07 26094 14138-02 23025 N/A 18025 2175DWR-BTM-BLK 11933-18-BLK 41156 41965 66016 41259 N/A 20026 26070-01-S Part No.
Section 4 - Parts CO2175DWR/CO2275DWR (3 of 4) 29 30 4-60
Section 4 - Parts CO2175DWR/CO2275DWR (3 of 4) Item 1 2 3 4 5 6 7 8 9 10 11 12 13 14 15 16 17 18 19 20 21 22 23 24 25 26 27 28 29 30 Part No. Black 68092 68072-S 68080 41992 41993 2950-03 20004 68074 68059-01 26094 11952 4816 35005 31656 14038 5434 41444 41566 41158 2303-FFS 74002-S 31726 11952 2800 72018 31154 72018 2800 2953 2952 Part No.
Section 4 - Parts CO2275DWR (4 of 4) 4-62
Section 4 - Parts CO2275DWR (4 of 4) Item 1 2 3 4 5 7 8 9 13 14 15 17 18 19 20 21 22 23 24 25 26 27 28 29 30 32 33 34 35 36 37 38 39 41 42 43 44 Part No.
Section 4 - Parts 2275ZWC/2275ZWCOL (1 of 3) 4-64
Section 4 - Parts 2275ZWC/2275ZWCOL (1 of 3) Item 1 2 3 4 5 6 7 8 9 10 11 12 13 14 15 16 17 18 19 20 21 22 23 24 25 26 27 28 29 30 31 32 33 34 35 36 37 38 Not Shown Part No. Overlay Part No.
Section 4 - Parts 2275ZWC/2275ZWCOL (2 of 3) 4-66
Section 4 - Parts 2275ZWC/2275ZWCOL (2 of 3) Item 39 40 41 42 43 44 45 46 47 48 49 50 51 52 53 54 55 56 57 Part No. Overlay 41319 2948 70077-S 2800 2694 31021 71009 71010 70077-CAP 5263-S 5188 41787 31550-1-S 31664 71013 73002-S 73002-2 2800 2694 Part No.
Section 4 - Parts 2275ZWC/2275ZWCOL (3 of 3) 4-68
Section 4 - Parts 2275ZWC/2275ZWCOL (3 of 3) Item Part No. Overlay Part No.
Section 4 - Parts 1175R (1 of 2) 4-70
Section 4 - Parts 1175R (1 of 2) Item Part No. Black Part No. White Part No.
Section 4 - Parts 1175R (2 of 2) 17 1 16 5 15 3 4 6 14 11 13 7 12 10 9 8 4-72 2
Section 4 - Parts 1175R (2 of 2) Item 1 2 3 4 5 6 7 8 9 10 11 12 13 14 15 16 17 Part No.
Section 4 - Parts 1115R (1 OF 2) 4-74
Section 4 - Parts 1115R (1 OF 2) Item 1 2 3 4 5 6 7 8 9 10 11 12 13 14 15 16 17 19 20 21 22 23 24 25 26 27 28 29 30 31 32 33 34 35 36 37 38 39 40 41 42 43 44 45 Part No. Black Part No.
Section 4 - Parts 1115R (2 of 2) 4-76
Section 4 - Parts 1115R (2 of 2) Item 1 2 3 4 5 6 7 8 9 10 11 12 13 14 15 16 17 18 19 20 Part No. 26059-02 31434-1 26091 66010 68073 41863 2878-01-S 31154 31391-2 11508 31578 31594 41855 21012-WHT 41318 41342 2223-S 2800 2694 31213 Description Control Display Assembly Rivet, thermostat cover Cover, thermistor Reed switch Thermistor, quick connect white Rivet, reed switch Evaporator, roll-bond Insulation, .38 ID x .
Section 4 - Parts 1175WC (1 of 2) 4-78
Section 4 - Parts 1175WC (1 of 2) Item Part No. Black Part No.
Section 4 - Parts 1175WC (2 of 2) 17 1 16 5 15 3 4 6 14 11 13 7 12 10 9 8 4-80 2
Section 4 - Parts 1175WC (2 of 2) Item 1 2 3 4 5 6 7 8 9 10 11 12 13 14 15 16 17 Part No.
Section 4 - Parts 1115WC (1 of 2) 4-82
Section 4 - Parts 1115WC (1 of 2) Item 1 2 3 4 5 6 7 8 9 10 11 12 13 14 15 17 18 19 20 21 22 23 24 25 26 27 28 29 30 31 32 33 34 35 36 37 38 39 40 41 42 43 44 Part No. Black Part No.
Section 4 - Parts 1115WC (2 of 2) 18 1 17 16 15 4 14 3 5 13 12 11 6 10 9 8 7 4-84 2
Section 4 - Parts 1115WC (2 of 2 Item 1 2 3 4 5 6 7 8 9 10 11 12 13 14 15 16 17 18 Part No. Black Part No.
Section 4 - Parts 1175BEV (1 OF 2) 4-86
Section 4 - Parts 1175BEV (1 OF 2) Item 1 2 3 4 5 6 7 8 9 10 11 12 13 15 16 17 18 19 21 22 23 24 25 26 27 28 29 30 31 32 33 34 35 36 37 38 39 40 41 42 43 44 45 Not Shown Part No.
Section 4 - Parts 1175BEV (2 OF 2) 12 1 11 4 10 3 5 6 9 8 7 4-88 2
Section 4 - Parts 1175BEV (2 of 2) Item 1 2 3 4 5 6 7 8 9 10 11 12 Part No.
Section 4 - Parts ADA24R (1 0F 2) 2 1 13 3 12 11 4 10 9 6 5 7 8 4-90
Section 4 - Parts ADA24R (1 0F 2) 25 24 26 23 27 22 21 20 19 18 17 16 15 14 Item Part No. Description 1 2 3 4 5 6 7 8 70077-S 68103 2819 2694 41319 31021 74021-S 67009 9 10 11 12 13 14 2938-2 71013 71010 71009 31550-1-S 31579 Compressor** Transformer Process Tube* Drier* Leveling Leg Grommet* Condenser** DC Condenser Fan (includes fan blade) Power Cord Capacitor* Relay* Overload* Drain Pan Drain Tube * Included with the compressor Item Part No.
Section 4 - Parts ADA24R (2 0F 2) 4 2 3 22 1 21 5 6 7 8 9 10 20 19 11 4 1 12 2 13 18 14 11 17 4-92 16 15
Section 4 - Parts ADA24R (2 0F 2) 25 23 24 26 28 Item 1 2 3 4 5 6 7 8 9 10 11 12 13 14 15 16 17 18 19 20 21 22 23 24 25 26 27 28 27 Part No. Black Part No.
Section 4 - Parts This page intentionally left blank.
Section 5 - Wiring Diagrams CLR2160 PINK PINK GREEN (GROUND) WHITE OVERLOAD BLACK HOT JUMPER PLUG WITHOUT P60 WASTE PUMP RELAY NEUTRAL GREEN (GROUND) WASTE WATER PUMP Lawrence BLACK WHITE WHITE GREEN (GROUND) TO DISPLAY 7 BIN 1 WHITE (NEUTRAL) WHITE BLACK/YELLOW MODEL PLUG EMBRACO COMPRESSOR WATER VALVE YELLOW FAN CONTROL BOARD WHITE PURPLE WATER PUMP COND BROWN THERMISTER REED JUMPER WHITE WHITE (NEUTRAL) 1 PINK PINK HOT GAS VALVE GREEN BLUE (HOT) 12 6 FUSE 10 (GROU
Section 5 - Wiring Diagrams 2115R, 2115WC, 2175R, 2175WC, 2175BEV 2275DWRWS, 2275ZWC WIRING DIAGRAM POWER CORD ASSEMBLY BLACK-HOT (SMOOTH) BLACK GREEN GROUND BLACK-NEUTRAL (RIBBED) TO MAIN DISPLAY WHITE WHITE TO BOTTOM DISPLAY WHITE BTM VALVE WHITE TOP VALVE BLACK WITH YELLOW J2 J6 7 BROWN OVERLOAD 1 1 TOP REF TOP EVAP BOTTOM EVAP DOOR 1 DOOR 2 12 6 F1 J5 BOTTOM LAMP BLUE J1 TOP LAMP BOTTOM REF PURPLE CONTROL BOARD J3 COND FAN YELLOW RED WHITE 10 BLACK CAPACITOR EMBRAC
Section 5 - Wiring Diagrams 2175DWRR, 2275DWRR 2175RF 5-3
Section 5 - Wiring Diagrams CO2175F CO2175DWR, CO2275DWR 5-4
Section 5 - Wiring Diagrams 1175R, 1115R, 1175WC, 1115WC, 1175BEV ADA24R 5-5
Section 5 - Wiring Diagrams This page intentionally left blank.
PRODUCT INFORMATION Installation Guides with complete installation information, Custom Wood Panel Size Specifications & Installation Instructions, CAD Drawings, Use and Care Guides, Specifications & Feature Benefits are available for viewing and download on-line at www.u-line.com/specs/. GENERAL INQUIRIES: SERVICE ASSISTANCE: U-Line Corporation P.O. Box 245040 Milwaukee, Wisconsin 53224-9540 U.S.A. Phone (414) 354-0300 FAX (414) 354-7905 Email: sales@u-line.com www.u-line.