For IP Camera/NVR Management System use with the following airCam models:
airVision™ User Guide Table of Contents Table of Contents Chapter 1: Installation . . . . . . . . . . . . . . . . . . . . . . . . . . . . . . . . . . . . . . . . . . . . . . 1 Overview. . . . . . . . . . . . . . . . . . . . . . . . . . . . . . . . . . . . . . . . . . . . . . . . . . . . . . . . . . . . . . . . . . . . . . . . . 1 System Requirements . . . . . . . . . . . . . . . . . . . . . . . . . . . . . . . . . . . . . . . . . . . . . . . . . . . . . . . . . . . . 1 Hardware Installation . . . . . . .
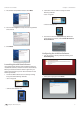
airVision™ User Guide Chapter 1: Installation Chapter 1: Installation 3. The airVision NVR Setup Wizard will start. Click Next. Overview airVision™ is a comprehensive camera management software solution from Ubiquiti Networks, Inc. that is designed to work with Ubiquiti’s airCam™ product line. The software interface design is based on the popular and easy to use UniFi™ software interface. System Requirements ! Microsoft Windows 7, Windows Vista, Windows XP or Ubuntu Linux version 11.04 4.
airVision™ User Guide 8. If your computer doesn’t have Java 1.6 or above installed, you will be prompted to install it. Click Install to continue. 9. Be sure that Start AirVision after installation is selected and click Finish. Chapter 1: Installation 3. The airVision NVR Setup Wizard will start. Click Next. 4. You must click I agree to accept the license agreement and continue. 5. Click Finish. 10. The airVision software startup will begin.
airVision™ User Guide 3. The airVision Setup Wizard will start. Click Next. Chapter 1: Installation 2. Launch the airVision software using one of the following methods: ! Start > Programs ! airVision desktop icon. 4. You must click I agree to accept the license agreement and continue. 3. The airVision software startup will begin. When the option becomes available, click Launch a Browser to Access AirVision. 5. Click Finish. Configuring the airVision Software 1.
airVision™ User Guide Chapter 1: Installation 2. Enter an admin name and password to use when accessing the management interface. Confirm your password in the Confirm field. Click Next. 5. The first detected camera will appear. You will need to enter the User Name and Password for the camera to begin managing it. 3. The first detected NVR (Network Video Recorder) will appear. Select an NVR and click manage. 6. Assign the camera to an NVR from the drop-down list and click manage.
airVision™ User Guide Chapter 1: Installation 8. Review your settings. Click Back to make changes or Finish to save your settings. Once finished you will be redirected to the management interface via your web browser. 9. A login screen will appear for the airVision management interface. Enter the admin name and password that you created and click Login. Proceed to the next chapter for information on using the airVision software. Ubiquiti Networks, Inc.
airVision™ User Guide Chapter 2: Using the AirVision Software Chapter 2: Using the AirVision Software Common Interface Options The common interface options are accessible from all tabs in the airVision interface. The airVision software has a browser-based interface for easy configuration and management. To access the interface, perform the following steps: 1. Launch the airVision application if hasn’t already been started. Windows users go to Start > All Programs > Ubiquiti airVision > AirVision. 2.
airVision™ User Guide Recent Recordings Displays a list of recent recordings including the date and time the recording occurred and camera and details. Chapter 2: Using the AirVision Software Designated recordings all appear under the Recordings tab. If you wish to remove a recording, simply click the next to the recording and it will be removed from the list. This doesn’t delete the actual recordings, it just removes the entries from this list.
airVision™ User Guide Settings Camera Settings Chapter 2: Using the AirVision Software Event Frame Pre Padding When motion is detected, this is the amount of frames included in the recording before the motion occurs. By default this is set to 30. Event Frame Post Padding When motion is detected, this is the amount of frames included in the recording after the motion occurs. By default this is set to 30. Recording Clip Length Defines the maximum length of a recording clip in seconds.
airVision™ User Guide Chapter 2: Using the AirVision Software Admin Settings Admin Name Displays the current admin name used to login. To change the admin name, simply enter a new name and click Apply. Password A new password can be entered in this field. Be sure to enter the password again in the Confirm field and then click Apply to save your new password. Confirm Used to confirm your new password. Language Selects the language for use in the interface.
airVision™ User Guide Chapter 3: Map Tab The airVision software allows you to upload map images of your location or use Google Maps™ for a visual representation of your camera layout. When you initially launch airVision, a default sample map is displayed. Chapter 3: Map Tab Adding a Map You can add an image you’ve created as a map image or use Google Maps™ to generate an image for use as a background.
airVision™ User Guide 2. Click Add a Map. Chapter 3: Map Tab 5. You can adjust the zoom using the slider on the right. Add a Map 3. Enter a map name in the Description field and click Upload my own. Click the Browse button to locate the file to use as a map (valid file formats are .jpg, .gif, and .png). Click Continue. 6. Drag the Camera icon(s) from the Cameras list on the left to the appropriate location(s) on the map. The camera will appear in the area that you place it.
airVision™ User Guide Chapter 3: Map Tab Google Maps™ To create a custom map using Google Maps™, perform the following steps: 1. Click Configure Maps. Configure Maps button 4. In order to use Google Maps™, you must register with Google for a Google Maps API key. To do so, perform the following steps: a. Copy and paste the web link from the window into a new web browser window. Do not close the airVision window. http://code.google.com/apis/maps/signup.html 2. Click Add a Map. Add a Map b.
airVision™ User Guide e. Navigate back to the Google window and paste the address into the My web site URL: field. Chapter 3: Map Tab 5. The default Google Map location will appear. Click the Set Location button in the lower left. Set Location button 6. Select Specify Address to enter an address. Type in the address and then click Go. f. Click the Generate API Key button. You also have the Specify Coordinates option to enter the latitude and longitude of a specific location. g.
airVision™ User Guide 8. Click Close. Chapter 3: Map Tab 11. Drag the Camera icon(s) from the Cameras list on the left to the appropriate location(s) on the map. 9. Select the new map you created from the Map drop-down. Camera Icons Camera The Camera icon(s) can be placed on the map to show the location of the camera(s). Click and hold the icon to drag the camera to another location on the map. Click on the Camera icon to reveal additional options.
airVision™ User Guide Details Brings up the Details window. Chapter 3: Map Tab Zoom Slider Use to zoom the map detail in and out. There are 4 tabs to select from in the Details window. Details, Monitor, Archive, and Configuration. ! Details Displays the IP Address, Model, Firmware, Uptime, Assigned NVR, NVR IP, and Mode of NVR operation. ! Monitor Displays camera transmit information in kbps when Camera Connection is selected.
airVision™ User Guide Chapter 3: Map Tab 3. Enter the distance that the line represents in the Distance: field. The distance is specified in meters by default but you can switch to feet using the drop-down selection menu on the right. Click Confirm. Ubiquiti Networks, Inc.
airVision™ User Guide Chapter 4: Live View Tab The Live View tab provides access to your live camera feeds. You can view individual cameras or create custom multiple camera views. Chapter 4: Live View Tab Views Custom views can be created to allow you to monitor multiple cameras from a single view. Create a New View To create a new camera view, perform the following steps: 1. Click Create a New View under Views.
airVision™ User Guide Chapter 4: Live View Tab 2. Click-drag a camera from the list of Cameras to the area on the right that says “Drag a camera here to begin”. 4. To finalize your camera view, click Save New in the lower right corner. 3. Click-drag additional cameras to the desired positions on the screen. A blue position indicator highlights the area where the camera will be placed. Release the mouse to lock a camera into place.
airVision™ User Guide 3. Enter a new name for the camera view in the View label: field and click Save. Chapter 4: Live View Tab 3. You can save the updated view as a new view or replace the existing view. Click Save to replace the existing view. Click Save New if you want to save it as a new view. Adding Cameras to an Existing View To add cameras to an existing view, perform the following steps: Deleting a View 1. Click on the view that you want to add cameras to.
airVision™ User Guide Chapter 4: Live View Tab Quality The camera quality can be changed at the bottom of the Live View tab. This selection applies to all of the cameras viewed in the Live View window. Select the quality of the live feed that you want to use. ! High ! Med ! Low Ubiquiti Networks, Inc.
airVision™ User Guide Chapter 5: Devices Tab Chapter 5: Devices Tab Cameras The Devices tab displays two device separate lists. One for cameras and one for NVRs. Cameras are displayed with their name, operation mode, the connected NVR, IP address, throughput, last recording date and time, camera status, and an action button to locate the camera on the map and another action button to view the live feed of the camera. Add Camera Click this button to add a camera manually.
airVision™ User Guide ! HTTP(s) Port The port used for HTTP or HTTPS access to the camera. The standard default port for HTTP communication is port 80. The standard default port for HTTPS communication is port 443. Chapter 5: Devices Tab NVRs ! RTSP Port The RTSP port is typically port 554. ! User Name The user name used to access the camera. ! Password The password used to access the camera. Search Allows you to search the tables for specific search criteria.
airVision™ User Guide ! Model Displays the camera model information. ! Firmware Displays the version of software used on the camera. Chapter 5: Devices Tab ! 1 Day Displays a chart of the camera transmission information for the last day. The chart displays the low, average, and high transmission information in kbps. ! Uptime Displays the amount of time the camera has been running without interruption. ! Assigned NVR Displays the name of the NVR that the camera has been assigned to.
airVision™ User Guide Activity Chapter 5: Devices Tab Configuration Displays activity from the last 24 hours. Archive Basic Configuration ! Alias This field defines the name of the camera. ! NVR Assignment Defines the NVR that the selected camera is assigned to. ! Date Displays the date and time of the recording. ! Cause Displays the cause of the recording. ! Record Mode Allows you to define the recording mode of the camera on the NVR.
airVision™ User Guide Connection Chapter 5: Devices Tab ! Orientation Defines the image orientation. Below are the options for image orientation. Orientation Description Normal Displays the video feed in normal mode. Rotate Right Rotates the entire video feed to the right 90 degrees. Rotate Left Rotates the entire video feed to the left 90 degrees. Flip Horizontally Flips the entire image horizontally. Flip Vertically Flips the entire image vertically.
airVision™ User Guide ! Brightness Adjusts the image brightness using the adjustment slider. The range is from 0 (darkest) to 100 (brightest). Chapter 5: Devices Tab Analysis & Recording ! Contrast Adjusts the image contrast using the adjustment slider. The value goes from 0 (lowest) to 100 (highest). ! Hue Adjusts the image hue using the adjustment slider. The range is from 0 (lowest) to 100 (highest). ! Saturation Adjusts the image color saturation using the adjustment slider.
airVision™ User Guide Chapter 5: Devices Tab Label Format The timestamp label on the image is defined here. If the field is left blank, there will be no timestamp on your images. Below is a list of strings that can be used to create custom timestamp information. The strings are case sensitive. You can separate the strings with dividing characters such as spaces, slashes, dashes, and colons. String %N - Edit Select the schedule that you want to edit from the Select a schedule drop-down. Click edit.
airVision™ User Guide Chapter 6: Statistics Tab Chapter 6: Statistics Tab Disk Usage (NVR) The Statistics tab contains four primary windows: ! Activity Distribution (Last 24 Hours) ! Disk Usage (NVR) ! Camera Activity (Last 24 Hours) ! NVR Load Activity Distribution (Last 24 Hours) Disk Usage statistics are displayed for all managed NVRs. If you have multiple managed NVRs and want to display disk usage statistics for only specific NVRs, click the edit icon in the Disk Usage header.
airVision™ User Guide Usage Trending Displays a chart of the disk space usage trends for the last month. Hovering over the chart will display details. Chapter 6: Statistics Tab Clicking on a bar on the chart will open the Event Viewer window with all of the recordings that took place that hour. The first recording will begin playing and the rest of the recordings will play in order.
airVision™ User Guide Chapter 6: Statistics Tab Tx Bandwidth Load (kBps) The Tx Bandwidth Load details the transmitting bandwidth usage from all of the cameras connected to the selected NVRs. Drag the mouse over the timeline to view detailed statistics in the timeline. CPU Utilization Displays the CPU Utilization of the selected NVRs. Drag the mouse over the timeline to view detailed statistics in the timeline. Ubiquiti Networks, Inc.
airVision™ User Guide Chapter 7: Recordings Tab Chapter 7: Recordings Tab Recording Type The Recordings tab allows you to search recordings by date, recording type, and camera. Date Range ! Motion Detection Select this if you want your search results to include motion detection recordings. ! Recording Select this if you want your search to include standard recordings. Devices ! From Click in the From date field and a calendar will appear that will allow you to select a beginning date.
airVision™ User Guide Searching Zones Chapter 7: Recordings Tab Recordings View For cameras that have multiple zones configured, you can select individual zones to search. To search individual zones, perform the following steps: 1. Click the arrow between the checkbox and the camera icon. 2. Deselect any zones that you do not want searched. ! Play Place a checkmark next to the videos that you want to play and then click the Play button. The selected recordings will begin playing in Event Viewer.
airVision™ User Guide Chapter 8: Analytics Tab Chapter 8: Analytics Tab 3. Click on the image where you want to start the zone. The Analytics tab allows you to define zones for motion detection. You can define multiple zones for each camera and adjust the sensitivity threshold. This allows your NVR to record only when motion is detected in areas of a camera feed that you’ve defined. Setting the sensitivity level allows you to define how much motion is required to trigger the motion detection recording.
airVision™ User Guide 4. Click to define as many additional points as you need until you close the zone by clicking on the starting point again. Chapter 8: Analytics Tab 7. (Optional) If you want to create additional zones, click the Create New button. Create New b button 5. The Zone Settings window will appear. Type in a name for the zone in the Zone Label field. 6. Adjust the sensitivity using the Sensitivity slider. If you want to test the sensitivity, click the test button.
airVision™ User Guide Editing a Zone 1. Click on the zone that you want to edit. Chapter 8: Analytics Tab 4. Once you’ve made all your changes, click Save to apply the changes or Discard Changes if you don’t want to apply them. 2. If you want to expand or reduce the zone coverage, click-drag on the points you want to change. To delete a point, click on it without dragging it. If you need to add a point, click in between two defined points (white in color) to add another point to the zone.
airVision™ User Guide Appendix A: Contact Information Appendix A: Contact Information Ubiquiti Networks Support Ubiquiti Support Engineers are located in the U.S. and Europe and are dedicated to helping customers resolve software, hardware compatibility, or field issues as quickly as possible. We strive to respond to support inquiries within a 24 hour period. Email: support@ubnt.com Phone: 408-942-1153 (9 a.m. - 5 p.m. PST) Online Resources Wiki Page: www.ubnt.com/wiki Support Forum: www.ubnt.