
Installation Guide

WEATHERED WOOD ACCENT BOARDS
INSTALLATION INSTRUCTIONS
Tools Needed
• Caulk gun
• Construction adhesive
• Dust mask
• Hammer or
brad nailer
• Jigsaw or small
hand saw
• Level
• Miter saw or miter box
• Nails
• Paint
• Pencil
• Stud finder
• Roller brush and pan
• Safety glasses
• Square
• Tape measure
Before Installation
1. Allow the wood to acclimate for several days prior to
installation in the room in which it will be installed.
Variances in temperature and moisture between
the storage and application areas have a negative
effect on the finished appearance, so it’s important
to allow the product to adjust to room conditions
prior to installation.
2. As wood dries, a slight joint may open up. Note: It is
recommended to paint the surface behind the wood
a dark color prior to installation.
Installation (continued)
3. Locate Studs
Using a stud finder, mark the stud locations on the wall.
(Studs are typically spaced 16 inches on center.)
4. Define Pattern
You may want to consider a vertical staggered,
horizontal staggered, herringbone or diagonal
staggered pattern to complement your decor. See
Figure 2 for pattern options. (Vertical installation
requires additional steps. Figure 5).
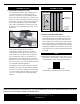
5. Draw Reference Line
Determine your starting point. Using a level and pencil,
draw a straight line (or snap a chalk line) across the
area on which you’ll place the boards. This will ensure
your starting point is level. If you are installing a full
wall, it is best to start at the floor and work your way
up. Always start with a level line. Floors and ceilings
may vary. (Figure 3).
(continued on back)
Installation
1. Measure Wall
Using a tape measure, measure the height and width of
your wall in inches. Multiply the height times the width,
then divide the total by 144 to get the approximate
square feet you will need to cover (add 10% for cutting
and waste). Each weathered wood box contains
enough material to cover 10.7 square feet.
2. Prepare Surface
Clean the surface with soapy water, then remove
nails and outlet covers. Paint the wall with a dark
complementary color to help hide gaps. Wood may
expand and contract over time, leaving slight gaps
between boards (Figure 1).
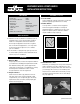
Figure 1
Figure 2
Figure 3