Prima 3 Reverse transfer ID card printer Printer Driver Manual PROFESSIONAL SERIES Secure ID card printers
Prima 3 Driver Manual Welcome to the high performance printer driver for the Prima 3 series printer. This manual will help you to install, set-up and configure the driver to get the best results for your prints. The driver runs on 32-bit Windows platforms and was successfully tested under Windows 2000, Windows XP Professional as well as under new Windows Vista operating system. This driver was designed for the best performance and stability.
Prima 3 Driver Manual Table of contents 1. Legal and Copyright Information .........................................................................................................6 2. 2.1. 2.2. Installation..............................................................................................................................................7 Printer Driver Installation...................................................................................................................
Prima 3 Driver Manual 6.3. Application Setup ............................................................................................................................66 6.4. Multi-printer encoding......................................................................................................................67 6.5. Printing and encoding over network................................................................................................68 6.6. Multiple encodings on one card ..................
Prima 3 Driver Manual 1. Legal and Copyright Information This product is provided on an "as is" basis, without any other warranties, or conditions, expressed or implied, including but not limited to warranties of merchantable quality, merchantability or fitness for a particular purpose, or those arising by law, statute, usage of trade or course of dealing. You assume the entire risk as to the results and performance of the Software.
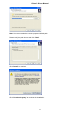
Prima 3 Driver Manual 2. Installation Cont. 2.1. Printer Driver Installation Note 1: It is recommended to install the driver before you connect the printer to the PC! Note 2: System administrator privileges are required for driver installation! Log on to Windows as system administrator. Start the installer program "Setup XID5xx 5.5.exe" from your driver CD ROM. Follow the instructions (See the following screen shots).
Prima 3 Driver Manual Note: Please note that you have to choose the exact name of the delivered member of our XID Printer Family. The wrong choice will result in a non-working printer!!! An administrator password can be set during initial installation. This password grants access to the Administration Center. Note: It is possible to leave this field empty, but it is recommended to enter a password. If both entries match, click "Next" to continue.
Prima 3 Driver Manual Note: It is recommended to use the proposed default path. Please verify the path shown and click "Next". Click "Install" to continue. Click "Continue Anyway" to continue the installation.
Prima 3 Driver Manual Click "Continue Anyway" to continue the installation. Click "Continue Anyway" to continue the installation. Now the files will be installed.
Prima 3 Driver Manual Click on "Finish" to complete the installation.A reboot may be necessary, as shown below. Please wait until the driver installation is completed, then click "Finish".
Prima 3 Driver Manual By calling the printer properties, from the "General" tab, you can print a test page as follows: After your test page has been printed successfully, click "OK". After the installation has been completed, connect the printer to the PC and power on. The Hardware Wizard appears and shows a signature warning: Click "Continue" to proceed.
Prima 3 Driver Manual The Wizard will ask you to connect to Windows Update: Choose "No, not this time" and click "Next". Choose "Install the software automatically" and click "Next". Note: The hardware name ("XID 5xxie U2") may differ depending on the firmware and the ID of the printer. The Hardware Wizard appears and shows a signature warning. Click "Continue Anyway".
Prima 3 Driver Manual The Hardware wizard will install the needed files automatically. Click "Finish" to close the Hardware Wizard. Congratulations! You have successfully finished the printer driver installation.
Prima 3 Driver Manual 2.2. Advanced Printer Configuration If the printer is used in a network environment and will be shared with other users, then click "Shared as:" and name the printer. Afterwards other users can select this printer within the network environment. Note: The screenshot may differ depending on system configurations: The required printer port will be linked automatically to DIGID5 port.
Prima 3 Driver Manual The Color Management settings should only be used by experienced users.
Prima 3 Driver Manual Note: The screenshot may differ depending on system configuration: On the "About" tab you will find the version of the installed printer driver: 16
Prima 3 Driver Manual 3. Printing Preferences 3.1. Introduction into driver and print technology In graphic user interfaces all options are shown dynamically as there are card feeding, loading card in magazine, card leaving the printer etc. The printing technology contains printing of the colors as a mixture from Yellow, Magenta and Cyan ("Y", "M", "C"). Black ("K"), also known as Carbon black or process black, is often available on color ribbons.
Prima 3 Driver Manual 3.2. Layout / Setup 3.2.1.Page Orientation This option will be used to setup the page orientation between Portrait and Landscape. 3.2.2.Set-up for Control of Printing / Encoding This option sets up the control of "Print and Encode", "Encode only" or "No Encoding".
Prima 3 Driver Manual Set-up for use of cards with magnetic stripe or smartchip (Card Type) If the "Magstripe" or "Smartchip" checkbox is enabled, all options regarding encoding and positioning of card will be enabled. In addition, the "Card placement in the printer tray" shows dynamically the correct images to the operator. Please note that the magstripe function is for visualization AND activation. 3.2.3.
Prima 3 Driver Manual A Flip Axis: Here you can setup the orientation of the 'card body', which is the same as the function as former 'Image Orientation'. The advantage is that you do not need to imagine how the card will rotate. Just pick up a card and you will understand the idea behind flipping the card horizontally or vertically. B Side A or B: Use the pull down menu to set up the patch usage of the color ribbon for side A (Front side) and side B (Back side).
Prima 3 Driver Manual 3.3.3.Selection of text objects to be printed on K-plane By enabling "Text", you are able to specify if all text or only black text should be printed on the K-plane.
Prima 3 Driver Manual 3.3.4.Selection of black & white images to print on K-plane By enabling "Black and White Images" you can specify if black or black & grey images should be printed on the K plane. 3.3.5.K Plane options 3.3.5.1. Definition of "special colors" for printing on K-plane If you use special colors to match existing ones on your layout they will be printed on K-plane. After clicking on the color button, pick up or define a new color as you need.
Prima 3 Driver Manual It is recommended to choose either black or an extreme color, which will not be used in the rest of the layout. Pure colors (like Magenta) will never appear in digital photos, so it is safe to use them without introducing side-effects. By clicking "OK" the color will be shown on the button.
Prima 3 Driver Manual 3.3.5.2. Definition of areas for printing on K-plane In combination with the special colors (see chapter 3.3.
Prima 3 Driver Manual To create a new area: Click and draw a rectangle area while pressing and holding down the CTRL-key on the keyboard. To edit an area: Select an area you want to move or resize by clicking on the area itself or choose it from the list. You can move the area pixel by pixel using the cursor-keys.
Prima 3 Driver Manual Preview of defined sample K-Panel areas Measurement changes The following sample shows a change of units e.g.
Prima 3 Driver Manual Tip: Keeping values after disabling gives you the flexibility to design the areas before you enable this setting.
Prima 3 Driver Manual 3.3.6.PO Panel Area Definition (Peel Off) This function is designed to define areas which will be prevented from printing (e.g. signature fields). The YMCK-PO looks like shown: Yellow Magenta Cyan Carbon (K) Peel Off (PO) Note: A special ribbon type is required to use this option.
Prima 3 Driver Manual The peel off area is enabled by clicking the checkbox: Warning: Use of full PO area results in non-visible printout. In each case you need to define smaller areas (e.g. signature fields).
Prima 3 Driver Manual 3.3.6.1. Definition of areas Peel Off To create a new area: Click and draw a rectangle area while pressing and holding down the CTRL-key on the keyboard. To edit an area: Select an area you want to move or resize by clicking on the area itself or choose it from the list. You can move the area pixel by pixel using the cursor-keys.
Prima 3 Driver Manual Preview of defined sample K-Panel areas Tip: Keeping values after disabling gives you the flexibility to design the areas before you enable this setting.
Prima 3 Driver Manual 3.4. UV Panel 3.4.1. Introduction The new generation of EDIsecure XID580ie and XID590ie printers supports using of YMCK - UV (ultra violet) ribbon as high level security feature. This feature contains the option to print layout objects with a special patch on the ribbon onto the card, which is invisible under normal daylight environment. To show this objects, a special UV lamp must be used.
Prima 3 Driver Manual 3.4.2.1. Option 'Bitmap from file' This option allows to place static bitmap files on the UV plane. The bitmap must fullfil following conditions: 1. Graphic: Bitmap format 2. Size: 1036 x 664 Pixel with 300 dpi resolution 3. Color mode: 256 Grayscale For security reasons the bitmap can be stored locally as well on the network. Refer to the sample below: 3.4.2.2. Option 'UV Area + Offset' If area(s) were defined, all content within will be copied to be printed on UV plane.
Prima 3 Driver Manual As in all the other area definitions, the content once created can be used if enabled or stored for future use if disabled: 3.4.2.3. Option 'UV from second page' If an application is capable to print multipage documents (e.g.
Prima 3 Driver Manual 3.4.3.
Prima 3 Driver Manual 3.5. Advanced 3.5.1.Global Print Offset and K Plane Offset Global Print Offset: Here you can shift the offset of the layout in horizontal and vertical direction by changing the values; this influences the complete layout. K-plane Offset: The changing of the values for K-plane only influences the offset of the K-plane. 3.5.2.
Prima 3 Driver Manual 3.5.3.Synchronization This is only required if the application controls the chip encoding. When encoding and printing batch jobs without the built-in Advanced Chip Encoding Framework, the option "Wait for card exit" must be checked: 3.5.4.Track Formats The track formats are shown for informational purpose. Only standard formats are allowed to be encoded.
Prima 3 Driver Manual 3.5.5.Card Output By enabling the "Card Output" option, the user can force or override the default setting of the printer driver. Independent from speed or material usage settings, the Card Output options "Front up" or "Front down" will force the card orientation when leaving the printer. This option should be used only if an external lamination unit is attached to the printer. 3.5.6.
Prima 3 Driver Manual 3.5.7.Sample of magnetic stripe Encoding Sending Track Information Magnetic track data is sent in the form of text strings from the application software to the printer driver, along with all of the other printable objects within your card design. For the printer driver to differentiate between magnetic track data and the rest of the printable objects, the magnetic track data strings must be uniquely "tagged" and formatted by using the "System" font.
Prima 3 Driver Manual 4. Advanced Intelligent Printer Management (AIPM) 4.1. Introduction The "Advanced Intelligent Printer Management" was developed with a focus on giving the most power and flexibility to the user. All necessary controls and settings are stored centrally in the Dispatcher (DISP) application. The user has direct access to all setting parameters he needs.
Prima 3 Driver Manual 4.2.1.Printers The printer line shows the printer’s status: If the printer is connected and detected by the Dispatcher and has no low level errors (e.g. 'No cards'), the printer’s related signs become active. The 'LED' to the right of the printers ID shows with several colors the related state: - Green - Green flashing - Yellow - Red Ready Printing Initializing mode Fatal error Every printer can be set into Pause Mode or continue individually. This function is very useful e.g.
Prima 3 Driver Manual During the run time of DISP the card counter shows the Cards for print and Cards printed. Cards for print shows all jobs in the file list including copy prints. In special cases, e.g. if a cleaning procedure is needed, an info line at the bottom shows the related info message. 4.2.4.
Prima 3 Driver Manual Inside the Print Jobs list, the user can handle single jobs by right clicking with the mouse button as follows: - Delete (e.g. if unwanted after error recovery) - Suspense (e.g. job can wait) - Restart (e.g. after an error occurred) - Move to top (prioritization) Depending on the actual status of the print job, particular functions may not be available. In addition, the user can multi-select several print jobs by hold CTRL or Shift and clicking on the desired print jobs.
Prima 3 Driver Manual 5. Administration Center The "Administration Center" is the central point for administrative management of hardware related settings, printer driver and LUT/password control. Based on the innovative "Plug-In" architecture, this framework allows you to implement administrative functions by copying new DLL files to the Administration Center directory; no modification of the driver is needed.
Prima 3 Driver Manual 5.1.1.Re-transfer settings Ribbon Type Counts per roll (1000, 750) Temperature -3 (Low) ..Standard + 2 (High) Speed (Front/Back) -10 (Slow) .. Standard .. +2 (Fast) 5.1.2.Bend remedy Temperature Off .. -5 (Low) .. Standard .. 0 (High) Speed -2 (Slow) .. Standard .. +2 (Fast) Cooling Time 0 sec .. 15 sec Note: Cooling Time is only available if temperature is not Off. 5.1.3.
Prima 3 Driver Manual 5.1.5.
Prima 3 Driver Manual 5.2. Options With the "Options" it is possible to enable / disable following items: see 4.4.1 see 4.4.2 5.2.1.General Options Start DISP with printers in paused mode If enabled, the next time DISP is started (either by closing or rebooting PC) the printer will stay in paused mode. Dispatch copy print to all available printers If enabled, all copy print jobs will be served to all available printers.
Prima 3 Driver Manual 5.2.2.Printer Driver Profiles and Printer Grouping Definition The Printer Group Definition is a unique technique powered by Digital Identification Solutions to define several groups of "virtual" printers. If created, every Windows application can print to one virtual driver shown in the Windows printer folder without sending jobs individually. In addition, a single printer can be defined as a virtual printer for routing the jobs to specific printer.
Prima 3 Driver Manual 5.2.2.1. Creation of Printer Groups After clicking on "Add" in Printer Driver Profiles and Printer Grouping, the user needs to enter a new group name and the ID of the printer which will belong to this group. In the following window, the user can enter the following settings. Note: Printer IDs will be enabled only by choosing XID590.
Prima 3 Driver Manual The following two samples show how to enter the information: Sample A: 1. 2. 3. 4. As a result of this definition the printer appears in the list.
Prima 3 Driver Manual Sample B: When checking the maximum number of available printers you will get the maximum performance: It is possible to add several groups including overlapping IDs, as shown in the sample two groups named: - "PrinterXID #2 to #4" with the IDs 2, 3 and 4 was added. - "XID ARF's Printer Farm" with the IDs 1 - 7 was added.
Prima 3 Driver Manual 5.2.2.2. Deleting of Printer Groups There are two different ways of deleting Printer Groups: by Dispatcher or by use of the standard procedure in the Windows printer folder. We strongly recommend using Dispatcher. To delete Printer Groups the following steps have to be done: 1. 2. Highlight a group by clicking the right mouse button and Click button "Delete Group" 2. 1.
Prima 3 Driver Manual By clicking on the "Printing Preferences ..." button the user can view and setup the printer settings out of the Dispatcher for the highlighted printer name as shown below: 5.2.3.2. Exporting of Printer Driver Profiles By clicking on the "Export ...
Prima 3 Driver Manual 5.2.3.3. Importing of Printer Driver Profiles If the customer needs to import the printer profiles he can do this by clicking on the 'Import ...' button.
Prima 3 Driver Manual 5.3. LUT / Password 5.3.1.Lookup Table Configuration Inside the Lookup Table Configuration the user has the possibility of using his own LUT tables. LUT tables contain the color control values, which can be used instead of the internal printer LUT. The Lookup Table contains the values to control the print density for every color separately.
Prima 3 Driver Manual 5.4. Driver Config This page allows setting, changing and removing the password of the Administration Center. When you click on "Reset" button, the following dialog appears. If a password has been set during installation, it can be changed here. To do so, retype the old password and type the new password twice to confirm. Click on OK to store the changes. If the new passwords do not match or the old password is wrong, an error message appears.
Prima 3 Driver Manual 6. Advanced Chip Encoding Framework (ACEF) Included in the printer driver is the Advanced Chip Encoding Framework, which is capable of handling all card encoding itself. The mechanism is independent from the application, allowing virtually any Windows based application to perform chip encoding. The main features will be described in detail in the following chapters.
Prima 3 Driver Manual 6.1. Plugin architecture As the printer driver does not do the encoding itself but loads an additional piece of software that know how to "talk" with a certain encoder hardware and chip card, it is not limited to chips and encoders that are currently present on the market. Such a piece of software is called "Plugin". The driver can handle an almost unlimited number of these plugins. Important The base driver will come with no plugins installed.
Prima 3 Driver Manual 6.2. Software and Hardware Setup 6.2.1.Plugin Info When a plugin is installed properly and appears in the list of Installed Plugins, clicking on it will select and activate it.
Prima 3 Driver Manual This prevents plugins from crashing the driver by attempting to use unsupported functions of a later driver release. Plugin version The plugin's version number is shown here. This is for support purposes to determine which version of the plugin is installed on the system. Unicode Some applications require to encode Unicode characters on the chips. This shows whether the plugin is capable of handling unicode data in the encoding string.
Prima 3 Driver Manual This mechanism allows easy recognition of the port name of each single encoder device in a multiple printer (and encoder) environment by plugging them in one-by-one. Creating the link between encoder and printer ID When having identified the port name of an encoder that is connected to a specific printer, the link between both must be created so the driver knows on which port the encoding must be performed when printing on a certain printer ID.
Prima 3 Driver Manual 6.2.3.Format Templates Some applications require different encodings, depending on the layout of the card, but use one chip type. Plugins can be developed to support multiple encoding styles, definitions, formats, and all in combination. In order to understand what "Format Templates" do, let's have a look at the following example.
Prima 3 Driver Manual Each layout must then contain a "reference" to each format template, along with the encoding data, and the plugin would be able to understand what, where and how needs to be encoded. For an example how this reference looks like, please refer to section 6.8, keyword "ft". Note that neither the contents nor the usage of "Format Templates" is defined or restricted by the driver.
Prima 3 Driver Manual 6.2.4.Configuration (Global Settings and Test) The most important part in the chip encoding setup is to test the communication with the encoding device and to test if the encoder can access, write to and read from the chip. Some encoders require even global settings like authentication keys or the transfer speed, which is common for COM ports. Each plugin can optionally provide a user interface for both, the global settings and the encoding test.
Prima 3 Driver Manual 6.3. Application Setup The chip encoding features of the driver are application independent, i.e. the application does not need to be set-up for the specific encoder hardware of the encoding plugins. The entire encoder-specific configuration is done in the Plugin Manager, stored and handled outside the printing application, as well as the encoding process itself. However, there are application requirements that need to be fulfilled in order to process the encoding data in the driver.
Prima 3 Driver Manual Special transformations for shading, blending, winding, squeezing, skewing, twisting, outlining and anything else do process the text "as graphic" and are therefore not suggested for the encoding string. The font, however, is not relevant for parsing, as long as if it is a standard Windows font.
Prima 3 Driver Manual 6.5. Printing and encoding over network Multiple workstations on the network can print on a PC that has one or more printers attached locally and has shared the printers in Windows. Such a PC is called print server. On the print server, it is mandatory that a user is logged on, otherwise the dispatcher will not be able to process the jobs.
Prima 3 Driver Manual 6.7. Precoding Introduction A special preprocessing might be required by the application before encoding or printing the card, or both. In some cases, a serial number from a card needs to be processed and the card which has to be produced is selected by this serial number, i.e. the card holder record is determined by the number that is pre-encoded on the card. Another example of the need to preprocess the card is when the card's pre-encoded serial number must be printed on the card.
Prima 3 Driver Manual 6.8. Encoding String In an encoding environment, there are many parameters that must be configured in order to the encoding to be performed correctly. We have seen above how to set-up the hardware, a way to configure the formatting and positioning of the data with sophisticated plugins, and now there's one thing left: The user data that actually needs to be encoded on the card. Since this data is different for each printed card, it is placed directly on the layout.
Prima 3 Driver Manual corresponding section of the application's handbook on how to set up a text field with a string that can hold both, fixed and variable data.
Prima 3 Driver Manual The following keywords in an encoding string are reserved by the driver and processed in a special way. Keyword pi Option Format mandatory Text Description plugin name This name must match with the one shown in the Installed Plugins list in Plugin Manager. ft optional Text format template name This name must match with one of the format templates shown in the Format Templates list in Plugin Manager for the plugin selected above (keyword "pi").
Prima 3 Driver Manual 6.8.1.Encoding string examples 1. Simple encoding string {pi="Contact" ft="Guest" ...encoding data... } Uses the plugin "Contact" and the format template "Guest" to encode the encoding data, then prints the card. 2. Multiple encoding strings {pi="Mifare" ft="All Access" so="2" ...encoding data... } {pi="Contact" ft="Payment" so="1" ...encoding data...
Prima 3 Driver Manual 4.
Prima 3 Driver Manual 7. Troubleshooting and known limitations Print Errors As a result of the enhanced error recovery capability of the AIPM driver, the user can decide in case of an error to cancel, delete, recover, pause or re-print jobs. In case the error persists, mostly due to a hardware error, please write down the error message and contact the company from which you purchased the printer. Known limitations - Copy printouts depend on the applications used.
Prima 3 Driver Manual 8. Appendix A Layout placement on card The printer driver uses a technology that allows you to quickly setup and adjust the document properties for correct layout placement on the printed card. This section describes the idea behind it and how to find the correct settings in six intuitive steps. For first time users, take the card template that was used for designing the layout. Place it in front of you to be able to look at it and to turn the card.
Prima 3 Driver Manual Step 1: One- or two-sided layout Check if the design is a one or two-sided layout, i.e. if the layout has only a front side or a front and back side.
Prima 3 Driver Manual Step 2: Landscape or portrait Check if the design is a landscape or a portrait design.
Prima 3 Driver Manual Step 3: Visible encoding features, Magnetic Stripe or Contact Chip If the card is not blank, it is important to select the features so the driver knows in which order and the sides must be printed. Magnetic stripe card Select = or Contact chip card Select = Note: If the card has both encoding features, you need to select both types, Magstripe and Smartchip.
Prima 3 Driver Manual Step 4: Flip axis The driver determines the rotation of the layout sides from the flip axis of the card, which is the axis around which the card can be flipped and the layout stays in the correct orientation, not upsidedown. The following illustration shows a vertical flip axis, i.e.
Prima 3 Driver Manual Step 5: Rotation of the card For non-blank cards, the layout design must cope with either the contact chip or the magnetic stripe or both on each side of the card. In the layout, these areas are usually left blank and the Rotation-button allows the print to match the layout, i.e. to place the elements in the correct positions as they were intended during layout creation. Magnetic stripe: The stripe can either be on the top or the bottom of the layout.
Prima 3 Driver Manual Step 6: Exchange the card sides As seen in the last step, for non-blank cards, the position of the magnetic stripe or contact chip or both must be adjusted to fit the layout. While the Rotation-button rotated the card on both sides, the Exchange-button allows to swap the front and back sides if the magnetic stripe or the chip are shown at the wrong side of the layout. Magnetic stripe: The stripe can either be on the front or the back side of the layout.
Prima 3 driver manual cover 07:Layout 1 Ultra Electronics Card Systems Hampshire Road, Weymouth, Dorset DT4 9XD, United Kingdom Tel: +44 (0) 1305 784 738 Fax: +44 (0) 1305 777 904 email: UKsales@ultramagicard.com 17/12/07 10:56 Page 2 Ultra Electronics Card Systems North American Sales & Support Center 6711 - 176th Avenue NE Redmond WA 98052 Toll Free: 877 236 0933 Tel: (425) 556 9708 Fax: (425) 556 3962 email: USsales@ultramagicard.