
Instruction manual

22
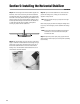
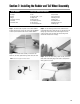
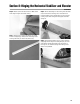
Step 8. With the fuselage and horizontal stabilizer together on a
flat surface, check to be sure the wing and horizontal stabilizer
are parallel with each other. If adjustment to the horizontal stabi-
lizer saddle is necessary because the wing and stabilizer are not
parallel, carefully sand the horizontal stabilizer saddle to adjust
as necessary. Be absolutely sure that the fuse and stabilizer are
on a flat surface and the wing is installed correctly before
removing any material from the saddle area.
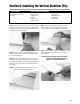
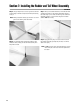
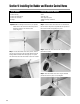
Step 9. Mix approximately 1/2 ounce (minimum) of 30-minute
epoxy to install the horizontal stabilizer to the fuselage. Using an
epoxy brush or mixing stick, spread the epoxy onto the top of
the horizontal stabilizer where it comes into contact with the
fuselage. Also, coat the stabilizer saddle area that will come in
contact with the horizontal stabilizer.
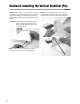
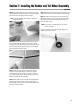
Step 10. Lay the horizontal stabilizer onto a flat surface and
position the fuselage onto it, making sure it’s centered and
aligned as in Steps 3 and 4.
Hint: Reference the bare wood you just exposed to re-align
the stabilizer.
Place a heavy object (one that won’t damage the fuselage struc-
ture) on top of the fuselage to press the stabilizer and fuselage
together.
Note: Be sure that the horizontal stabilizer and fuselage are
assembled on a firm, flat surface and that they are
level with each other.
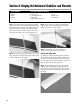
Step 11. Wipe off any excess epoxy using a paper towel and
rubbing alcohol. Allow the epoxy to cure fully before proceeding
to the next step.
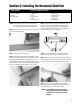
Section 5: Installing the Horizontal Stabilizer
CONTINUED