
Instruction manual

26
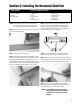
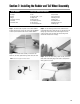
Step 5. Using a hobby knife, cut a slot or groove into the back
of the fuselage as marked to accept the tail wheel pivot bushing
in Step 3.
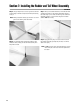
Note: When you attach the elevator, you’ll have to cut a small
groove so the bushing clears the elevator.
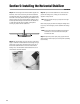
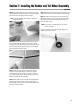
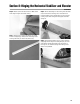
Step 6. Trial fit the tail wheel assembly and rudder in place.
Deflect the rudder, making sure the tail wheel assembly turns
freely with the rudder.
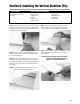
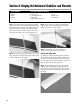
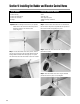
Step 7. When you’re satisfied with the fit, remove the tail wheel
assembly and rudder from the fuselage. Reinstall the hinges in
the rudder using T-pins to make sure the hinges are centered as
described in Section 1. You will CA the hinges to the vertical
stabilizer after the next step.
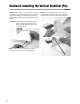
Step 8. Apply petroleum jelly or oil to the music wire area of
the tail wheel assembly, especially the pivot area, so it will not
adhere to the epoxy.
Note: Do not apply to the music wire area that will go into the
rudder. This part of the music wire will be epoxied into
the rudder.
Section 7: Installing the Rudder and Tail Wheel Assembly
CONTINUED