
Instruction manual


Section 11: Assembling the Fuel Tank
33
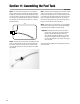
Step 1. Locate the tank parts.
Step 2. The holes you see in one end of the rubber stopper are
not completely open. You will need to open the holes in the rub-
ber stopper by "pushing" the tubes through or using a 1/16" drill
bit. Insert the short tube into one of the holes in the stopper.
This will be the fuel tank pickup tube that provides fuel to the
engine. Take the other tube and insert it though a second hole in
the rubber stopper. This will be your "vent" tube. Have both tubes
extend out about 1/2" from the end of the stopper.
Step 3. Slide the smaller of the two caps over the tubes on the
smaller end of the rubber stopper. The small end will be inserted
into the fuel tank. The larger cap is placed on the other side of
the rubber stopper which makes the cap.
Step 4. Insert the 3 mm screw into the center hole of the larger
cap and then insert the cap and screw through the center hole in
rubber stopper. Thread the screw onto the smaller inner cap and
tighten it until it just threads into the smaller cap on the other
side of the rubber stopper.
• Metal tubes (2)
• Clunk (fuel pickup)
• Fuel pickup tubing
• Fuel tank
• Metal caps (2)
• Rubber stopper
• 3 mm screw
• Hobby knife
• Medium screwdriver
• Drill Bit: 1/16"
Parts Needed Tools and Adhesives Needed