Connevans Solutions to improve the quality of life This product may be purchased from Connevans Limited secure online store at www.DeafEquipment.co.uk DeafEquipment.co.
USING YOUR MINICOM 6000 PLUS™ 305-009754
Acknowledgement In 1963, Dr. Robert H.Weitbrecht, an American physicist who was deaf, developed an acoustic coupler that could send and receive teletypewriter signals over the telephone lines. His invention, the Weitbrecht Modem, enabled people who are deaf to use the telephone for the first time. While modern technology now makes it possible to build advanced microcomputer Dr. Robert H. Weitbrecht, devices like your new Ultratec text 1920–1983, inventor of the first TTY modem.
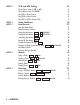
CONTENTS CHAPTER 1 CHAPTER 2 CHAPTER 3 CHAPTER 3 Contents Safety Instructions Introduction Special Features Overview of the Minicom 6000 Plus Function Keys Setup Selecting a Location Making Connections Setting the Clock Ctrl + 9 /OPTIONS Basic Calling Making a Call in Direct Connect Ctrl + 1 /DIAL About the Signal Light and Display Dialling Tips Answering a Call in Direct Connect Acoustic Calling and Answering Advanced Calling Auto ID™ The Printer The Built-In Help Feature Ctrl + H /HELP Turbo Code® Con
CHAPTER 5 CHAPTER 6 CHAPTER 7 CHAPTER 8 CHAPTER 9 2 • CONTENTS VCO and HCO Calling Direct Connect Setup for VCO or HCO Using Different Codes for VCO/HCO Using VCO in Direct Connect Using HCO in Direct Connect Using VCO or HCO in Acoustic Mode Using TextDirect Auto-Answer How Auto-Answer Works About Auto-Answer Memory Setting Up Auto-Answer Ctrl + += /AUTO-ANSWER Turning On Auto-Answer Ctrl + += /AUTO-ANSWER Interrupting Auto-Answer Esc Turning Off Auto-Answer Esc Reading Auto-Answer Messages Esc Changi
CHAPTER 10 CHAPTER 11 CHAPTER 12 CHAPTER 13 Options Setting the Print Case Ctrl + 9 /OPTIONS Setting the Print Size Ctrl + 9 /OPTIONS Setting the Display Mode Ctrl + 9 /OPTIONS Setting Pulse Dialling Ctrl + 9 /OPTIONS Setting the Auto-Answer Rings Ctrl + 9 /OPTIONS Selecting an Auto-Answer Memo Ctrl + 9 /OPTIONS Setting the Auto-Answer Password Ctrl + 9 /OPTIONS Selecting a Greeting Memo Ctrl + 9 /OPTIONS Turning Off Printing of the Date and Time Ctrl + 9 /OPTIONS Setting the Date and Time Ctrl + 9 /OPT
SAFETY INSTRUCTIONS SAVE THESE INSTRUCTIONS! Important safety instructions When using your Minicom 6000 Plus™, basic safety precautions should always be followed to reduce the risk of fire, electric shock, and injury to persons. 1. Read and understand all instructions. 2. Follow all warnings and instructions on the Minicom 6000 Plus. 3. Unplug the Minicom 6000 Plus from the wall socket before cleaning. Do not use liquid or aerosol cleaners. Use a damp cloth for cleaning. 4.
CHAPTER 1 INTRODUCTION Special Features Welcome to the Minicom 6000 Plus™ minicom (text telephone) from Ultratec. Your new minicom has the following special features: A Ring Indicator that tells you when someone is calling. Turbo Code® communication protocol. This feature transmits signals to other Turbo Code-equipped minicoms as fast as you can type. Turbo Code also lets you interrupt the other person’s typing. Auto ID™ alerting system.
Overview of the Minicom 6000 Plus 6 • INTRODUCTION
Function Keys Use the function keys to tell the Minicom 6000 Plus to do something or to change a setting. For example, use the Greeting function key ( 4 /GREETING) to send the Greeting memo. Or, use the Options function key ( 9 /OPTIONS) to set the time and date. Hold Down the Control Key to Use Function Keys Ctrl You must hold down the Ctrl key and then press the function key to use a function. For example, to dial, hold down the Ctrl key while you press the 1 /DIAL key.
Diagram of Function Keys This diagram shows the most important functions on the Minicom 6000 Plus.
GA INTRODUCTION • 9
Complete List of Function Keys Dial Ctrl + 1 /DIAL Dials a telephone number p. 15 Hangup Ctrl + 2 /HANGUP Hangs up the telephone line p. 18 Print Ctrl + 3 /PRINT Turns the printer on and off p. 22 Greeting Ctrl + 4 /GREETING Sends the Greeting memo p. 27 Send Memo Ctrl + 5 /SEND MEMO Sends a Memo p. 47 Memo Ctrl + 6 /MEMO Saves, edits or clears a Memo p. 45 Save Conversation Ctrl + 7 /SAVE CONV. Saves a conversation as a Memo p.
CHAPTER 2 SETUP The Minicom 6000 Plus is simple to set up. You will need a mains power socket to plug in the AC adapter and either: (1) a connection to a standard telephone line or, (2) access to a telephone. The best way to use the Minicom 6000 Plus is to plug it into a standard telephone line. This is called direct connect. See Selecting a Location below for more information on direct connect.
Making Connections Pull the plastic tab out of the battery compartment on the bottom of the Minicom 6000 Plus before you plug in the AC adapter. The Ring Indicator will not work if the tab is not removed and the batteries are not fully charged. The AC adapter supplies electricity to the Minicom 6000 Plus and charges the batteries. You should leave the adapter plugged in at all times. New batteries will be fully charged after 24 hours.
Setting the Clock Ctrl + 9 /OPTIONS The clock feature displays the date and time at the beginning of each conversation, at the beginning of each Auto-Answer message and whenever you press the Time key ( Ctrl + T ). You must set the clock after you plug in the Minicom 6000 Plus to display the correct date and time. 1. Press the Options key ( Ctrl + 9 /OPTIONS). PRINT (UP/LOW) CASE is displayed. 2. Press until you see CHANGE CLOCK (NO). Then, press the Spacebar to change the setting to (YES).
4. Press the or the key to set the month. Then, press Return to move to the next setting. Press Esc when you finish to save changes and exit this menu.
CHAPTER 3 BASIC CALLING This chapter covers the basics of making and receiving minicom calls. Making a Call in Direct Connect Ctrl + 1 /DIAL 1. Turn on the Minicom 6000 Plus. 2. Hold down the and press the key /DIAL key.
3. Type the telephone number you are calling. Then, press Return to dial the number. While typing, you can use the Back Space key to correct mistakes. 4. When you see an answer on the display, type a greeting. Turn off the Minicom 6000 Plus when you are finished with your call. About the Signal Light and Display The Signal light and the display show what is happening on the telephone line (the display shows call progress in direct connect only). The following chart explains what you see.
Dialling Tips Special Dialling Characters You may need to type a ‘9’ or other number to reach an outside line if you are using the Minicom 6000 Plus in an office. The exact method of dialling will depend on your local telephone system. Dialling a text telephone call should be the same as dialling a voice call. Use a comma to put in a one-second pause. For example: 9,01234 756026 Use an ‘!’ for a timed break recall. A timed break recall is used in a voice mail system or to transfer a call.
Using the Hangup Key Ctrl + 2 /HANGUP Follow these steps to hang up and make another call without turning off the Minicom 6000 Plus: 1. Press the Hangup key ( Ctrl + 2 /HANGUP). HANG UP PHONE Y/N is displayed. 2. Press Y to hang up. The telephone line is hung up, even though the Minicom 6000 Plus is still turned on. Press N if you decide not to hang up. Answering a Call in Direct Connect 1. The Ring Indicator flashes when the Minicom 6000 Plus receives a call. 2. Turn on the Minicom 6000 Plus.
Acoustic Calling and Answering 1. Put the telephone handset in the acoustic cups on the Minicom 6000 Plus. Make sure that the telephone cord is on the left side. 2. Turn on the Minicom 6000 Plus. If you are making a call, go to Step 3. If you are answering a call, type a greeting to begin your conversation. 3. Dial the number on the telephone. Watch the signal light and display for call progress. 4. When you see an answer on the display, type a greeting.
20 • BASIC CALLING
CHAPTER 4 ADVANCED CALLING This chapter describes Minicom 6000 Plus features that can make your calling easier and more enjoyable. Auto ID™ About Auto ID The Auto ID feature alerts a hearing person that you are calling from a text telephone. It alerts the person by sending several audible tones over the telephone line every few seconds. Auto ID helps emergency services detect that you are calling by text telephone.
The Printer About the Printer Ctrl + 3 /PRINT The printer is on when you turn on your Minicom 6000 Plus for the first time. Press the Print key ( Ctrl + 3 /PRINT) to turn off the printer. The display says PRINTER OFF. Press the Print key again to turn the printer back on. You can turn the printer on or off at any time, including during a call. When normal-sized print is used, the printer starts a new line after 24 characters are typed.
Your choice will remain, even when you turn the unit off and on, until you change it again or reset the Minicom 6000 Plus. Turning Off Printing of the Date and Time /OPTIONS Ctrl + 9 You can stop the Minicom 6000 Plus from printing the date and time on conversations and messages by following these steps: 1. Press the Options key ( Ctrl + 9 /OPTIONS). PRINT (UP/LOW) CASE is displayed. 2. Press Return until you see PRINT DATE/TIME (ON) on the display. 3. Press the Spacebar to change the setting to (OFF).
When you are connected to another Turbo Code-equipped minicom, you will see a small dot in the lower left corner of the display. Turning Off Turbo Code Ctrl + Shift + B You can switch to Baudot code at any time by pressing Ctrl + Shift + B . The Minicom 6000 Plus will return to using the automatic code setting when you turn it off. Using Turbo Code Interrupt Ctrl + I You can interrupt the other person when he or she is typing by following these steps: 1.
3. Press the Spacebar to change the setting to (OFF). 4. Press Esc to save the new setting and exit the Options menu. Conversation Memory Reading Conversation Memory Shift + Your Minicom 6000 Plus automatically records your conversations. These can be re-read by anyone unless you clear them. A conversation is everything you and the other person type during a call. Conversations are saved one after another in the conversation memory until the memory fills up.
Clearing Conversations Ctrl + 8 /CLEAR If for some reason you do not want to leave a conversation in memory, you can clear the conversation memory yourself. This erases all conversations but does not clear Memos, Directory entries or Auto-Answer messages. To clear conversations: 1. Press the Clear key ( Ctrl + 8 /CLEAR). CLEAR CONVERSATION is displayed. 2. Press Return . CLR CONVERSATION Y/N is displayed. 3. Press Y to clear the conversation. (Press N if you decide not to clear conversations.
The Greeting Memo Ctrl + 4 /GREETING Your Minicom 6000 Plus comes with a Greeting saved in the list of Memos. The Memo is called ‘Greeting.’ The message saved for it is, ‘Hello ga.’ To answer a call with the Greeting: 1. Turn on the Minicom 6000 Plus. 2. Press the Greeting key ( Ctrl + 4 /GREETING). HELLO GA is displayed while the Memo is sent over the telephone line (GA is a common abbreviation for ‘Go ahead’). Editing the Greeting Memo Ctrl + 6 /MEMO 1. Press the Memo key ( Ctrl + 6 /MEMO).
Wait for Response Ctrl + Shift + W Use the Wait for Response feature when the other person tells you to hold. The Ring Indicator will alert you when the other person starts typing again. This lets you do other things in the vicinity while you are on hold. To turn on Wait for Response: 1. When the other person types, ‘Hold please,’ or something similar, hold down the Ctrl and Shift keys and press the W key ( Ctrl + Shift + W ). The display says WAITING. 2.
2. Ask the first person to hold. Then, hold down the Ctrl and Shift keys and press the F key to place the first person on hold. You will see RECALL on the display followed by TYPE NAME, NUM, OR CR. 3. Dial the second number and begin your conversation. 4. Press Ctrl + Shift + F to reconnect to the first person. You now have a three-way calling conversation. If the second number is busy, press Ctrl + Shift + F to reconnect with the first person.
Sticky Keys Ordinarily, when you use the Ctrl or Shift keys, you must hold down either key while you press another key. If you have trouble pressing two keys at one time, the Sticky Keys feature lets you use the Ctrl and Shift keys by pressing one key at a time. Press either Shift key five times to turn on Sticky Keys. You will see STICKY KEYS ON on the display. Now you can dial by pressing Ctrl and then pressing 1 /DIAL. You do not need to hold down Ctrl .
CHAPTER 5 VCO AND HCO CALLING If you cannot hear but wish to speak for yourself during a call, you can use Voice Carry-Over (VCO). When you use VCO, you speak into a telephone handset. The other person can hear what you say and then respond by typing back on a text telephone keyboard. If you wish to hear what the other person says and type your response, you can use Hearing Carry-Over (HCO). When you use HCO, you listen with a telephone handset and then respond by typing on the Minicom 6000 Plus.
Using Different Codes for VCO/HCO If you are communicating with another minicom user you can use VCO or HCO in either direct connect or acoustic modes. If you are communicating with Typetalk or a Qwertyphone-user in CCITT then you should use the direct connect instructions and follow the special commands for Typetalk. If you are communicating with a European minicom user who is using EDT, then you must use the acoustic mode instructions.
Using HCO in Direct Connect If you want to type to the other person and hear the reply, do the following: 1. Tell the other person you want to use HCO by typing ‘HCO PLEASE GA.’ Check that they say ‘OK’ before continuing. 2. Pick up the telephone handset. 3. Hang up the Minicom 6000 Plus by Pressing the Hangup key ( Ctrl + 2 /HANGUP) and then pressing Y . You will not lose the call as you have the telephone handset in your hand. You will see MINICOM 6000+ on the display. 4.
CHAPTER 6 USING TEXTDIRECT TextDirect is a Relay Service that allows you to use an operator to translate text into words. This enables conversations between Minicom 6000 Plus users and ordinary phone users. To access the service you dial a special prefix number. For more information on how to access TextDirect contact: Textphone Users To contact Typetalk Customer Service Team dial: 18001 0800 500 888 Fax: 0151 709 8119 Switchboard: 18001 0151 709 94 94 Website: http://www.typetalk.
Using the Relay Voice Announcer Ctrl + V /RELAY VOICE The relay voice announcer is a recording that tells a hearing person you are answering with a text telephone and that the call should go through TextDirect if the caller does not have a text telephone. It also gives the number to dial for Typetalk. When the signal light flickers, telling you that someone is speaking instead of typing, press Ctrl + V /RELAY VOICE to turn on the Relay Voice Announcer.
36 • AUTO-ANSWER
CHAPTER 7 AUTO-ANSWER Use Auto-Answer when you want the Minicom 6000 Plus to answer and take messages when you are busy or away. For Auto-Answer to work, the Minicom 6000 Plus must be plugged directly into the telephone line. How Auto-Answer Works The Minicom 6000 Plus answers a call by sending the Relay Voice Announcer message and your outgoing Auto-Answer Memo. See Using the Relay Voice Announcer on page 35 for more information.
Setting Up Auto-Answer Ctrl + + = /AUTO-ANSWER The first time you turn on Auto-Answer, you need to tell the Minicom 6000 Plus which Memo you want to use as your outgoing Auto-Answer message. 1. Press the Auto-Answer key ( Ctrl + += /AUTOANSWER). 2. Type a Memo name. (This example uses the name ‘AA.’) 3. Press Return . You will see the Memo name that you typed and space for the Memo. 4. Type the contents of your outgoing Auto-Answer message.
5. Press Esc . Your Memo is saved and Auto-Answer is on. This Memo will be your outgoing Auto-Answer message whenever you turn on Auto-Answer. Use these function keys when you type your outgoing Auto-Answer Memo: • The left arrow key Shift + and the right arrow key Shift + move the text back and forth across the display. • The Back Space key erases characters. • The Clear key ( Ctrl + 8 /CLEAR) erases the Memo contents. You can change your outgoing Auto-Answer Memo at any time.
Interrupting Auto-Answer Esc If you see the Minicom 6000 Plus sending your outgoing Auto-Answer Memo or receiving a message and you want to answer yourself, press Esc to turn off Auto-Answer. If you see REVIEW MESSAGES Y/N on the display, press N . You will be in conversation mode and you can start typing. Remember to turn on Auto-Answer again after you finish the call. Turning Off Auto-Answer Esc Press Esc or turn off the Minicom 6000 Plus to turn off Auto-Answer.
3. Press the Press the continue. Spacebar Spacebar to pause. again to If you want to read your messages again, do the following: Press the right arrow key ( Shift + ) to read messages at normal speed. To go faster, press the right arrow key ( Shift + ) again. To return to normal speed, press the right arrow key ( Press the left arrow key ( Shift + Shift + ) a third time. ) to read back through messages. 4. To stop reading messages, press Esc . 5.
Changing the Outgoing Auto-Answer Memo Ctrl + + = /AUTO-ANSWER You can change your outgoing Auto-Answer Memo by typing a new Memo name and contents when you turn on Auto-Answer. Follow these steps to change your Auto-Answer Memo: 1. Press the Auto-Answer key ( Ctrl + += /AUTO-ANSWER). You will see ANSWER MEMO and the name of your answer Memo on the display. 2. Type a new name and press Return . 3. Type the new message and press Esc . Auto-Answer is on. 4.
Turning Off the Auto-Answer Relay Voice Announcer Ctrl + 9 /OPTIONS When the Minicom 6000 Plus answers the telephone, it voices the Relay Voice Announcer message before it sends your Auto-Answer Memo. If you do not want the Minicom 6000 Plus to send the message, follow these steps to turn it off: 1. Press the Options key ( Ctrl + 9 /OPTIONS). PRINT (UP/LOW) CASE is displayed. 2. Press Return until you see AUTO-ANSW VOICE (ON) on the display. 3. Press the Spacebar to change the setting to (OFF). 4.
4. Press Return . PASSWORD: / is displayed. 5. Type a password using up to 8 characters (you cannot use @ # % & or * symbols). The ‘/’ character is part of your password. 6. Press Return . 7. Press Esc to exit the Options menu. Changing Your Password You can change your password at any time by repeating the steps above. Reading Messages While You are Away 1. Call your Minicom 6000 Plus. The Minicom 6000 Plus must have AutoAnswer turned on when you call. 2. Wait for the answer message to end.
CHAPTER 8 MEMOS A Memo is a short message that you save in the Minicom 6000 Plus memory and later send to someone during a conversation. Examples of Memos are: • The Auto-Answer Memo that the Minicom 6000 Plus sends out when you are away. • The Greeting Memo that you can send when you answer the telephone. • The Memo that you create when you save a conversation. • A Memo that contains a message, perhaps about a forthcoming meeting, that you want to send to several people.
2. Type a name and press Return . Names can be up to 8 letters, numbers, or spaces. The display shows the Memo name with space to type the Memo. (This example uses the name ‘MEETING.’) 3. Type the Memo. Use these function keys when you type your Memo: • The left arrow key ( Shift + ) and the right arrow key ( Shift + ) move the text back and forth across the display. • The Return key starts a new line when the Memo is printed. • The Back Space key erases characters.
Sending a Memo Ctrl + 5 /SEND MEMO 1. Press the Send Memo key ( Ctrl + 5 /SEND MEMO). 2. Press the Spacebar until you see the name of the Memo you want to send. You can also type the name instead of pressing the Spacebar . 3. Press Return . The Minicom 6000 Plus sends the Memo. Press Esc if you want to stop sending the Memo before it ends.
Editing Memos 1. 2. 3. 4. 6 /MEMO Press the Memo key ( Ctrl + 6 /MEMO). EDIT MEMO is displayed. Press the Spacebar until you see the Memo name on the display. Press Return . Use these function keys to edit the Memo: • The left arrow key ( Shift + ) and the right arrow key ( Shift + ) move the text back and forth across the display. • The Return key starts a new line when the Memo is printed. • The Back Space key erases characters.
Printing Memos Ctrl + 6 /Memo Printing One Memo 1. Press the Memo key ( Ctrl + 6 /MEMO). EDIT MEMO is displayed. 2. Type the name of the Memo or press the Spacebar to read through the list of Memos. 3. Press Return when you see the name of the Memo you want to print. 4. Press the Print key ( Ctrl + 3 /PRINT). The Minicom 6000 Plus prints the Memo. Press any key to stop printing before the end of the Memo. 5. Press Esc to exit.
50 • DIRECTORY
CHAPTER 9 DIRECTORY The Directory lets you dial a number by typing the name of an entry. This makes dialling the number much faster and easier. There is no limit to the number of telephone numbers you can save as long as the total number of characters in all Directory entries and Memos is less than 9,500. Saving a Telephone Number Ctrl + Back Space /DIRECTORY 1. Press the Directory key ( Ctrl + Back Space /DIRECTORY). 2. Type a name and press Return .
3. Type the number. You may use spaces, parentheses and dashes to make numbers easier to read. NOTE: For information on special characters, see Dialling Tips on page 17. Use these function keys when you type the number: • The left arrow key ( Shift + ) and the right arrow key ( Shift + ) move the number back and forth across the display. • The Back Space key erases characters. • The Remain key ( Ctrl + R /REMAIN) shows the amount of free space in memory.
Editing a Number Ctrl + Back Space /DIRECTORY 1. Press the Directory key ( Ctrl + Back Space /DIRECTORY). DIR NAME is displayed. 2. Press the Spacebar until you see the number you want to change on the display. 3. Press Return . Use the following function keys to make your changes: • The left arrow key ( Shift + ) and the right arrow key ( Shift + ) move the number back and forth across the display. • The Back Space key erases characters.
Printing Directory Numbers Ctrl + Back Space /DIRECTORY Printing One Number 1. Press the Directory key ( Ctrl + Back Space /DIRECTORY). DIR NAME is displayed. 2. Press the Spacebar until you see the number you want to print on the display. 3. Press Return . 4. Press the Print key ( Ctrl + 3 /PRINT). The entry is printed. Printing a List of Numbers in the Directory 1. Press the Directory key ( Ctrl + Back Space /DIRECTORY). DIR NAME is displayed. 2. Press the Spacebar .
CHAPTER 10 OPTIONS The Minicom 6000 Plus can be adjusted in many ways to suit your individual needs. The following instructions explain how to change the default options (the way the Minicom 6000 Plus works when you first use it or reset it). Changes made in the Options menu are saved when the Minicom 6000 is turned off. This chapter describes all of the settings you can change with the Options key. They are listed in the order they appear on the display when you are in the Options menu.
Setting the Print Size Ctrl + 9 /OPTIONS Follow the steps below to choose one of the following three print sizes: • Normal (24 characters per line) • Bold (19 characters per line) • Wide (14 characters per line) 1. Press the Options key ( Ctrl + 9 /OPTIONS). PRINT (UP/LOW) CASE is displayed. 2. Press Return until you see PRINT SIZE (NORMAL) on the display. 3. Press the Spacebar to select (NORMAL), (BOLD) or (WIDE). 4.
Setting Pulse Dialling Ctrl + 9 /OPTIONS The Minicom 6000 Plus is set for tone dialling, which is correct for almost all telephone lines. You can, however, change the setting to pulse dialling if your line does not accept tone dialling. Follow these steps to set pulse dialling: 1. Press the Options key ( Ctrl + 9 /OPTIONS). PRINT (UP/LOW) CASE is displayed. 2. Press Return until USING (TONE) DIAL is displayed. 3. Press the Spacebar to change the setting to (PULSE). 4.
Selecting an Auto-Answer Memo Ctrl + 9 /OPTIONS Follow these steps to choose any Memo as your outgoing Auto-Answer message: 1. Press the Options key ( Ctrl + 9 /OPTIONS). PRINT (UP/LOW) CASE is displayed. 2. Press Return until ANSWER MEMO is displayed. 3. Type a Memo name or press the Spacebar to read through the list of Memos. Press Back Space to move back through the list. 4. Press Return when the display shows the name of the Memo you want to use. 5.
Selecting a Greeting Memo Ctrl + 9 /OPTIONS Follow these steps to change the Memo that the Minicom 6000 Plus sends when you press the Greeting key ( Ctrl + 4 /GREETING): 1. Press the Options key ( Ctrl + 9 /OPTIONS). PRINT (UP/LOW) CASE is displayed. 2. Press Return until GREET MEMO>GREETING is displayed. 3. Type a new name or press the Spacebar to find the name of a different Memo in the list of Memos. 4. Press Return to save this Memo as your Greeting. 5. Press Esc to exit.
Setting the Date and Time Ctrl + 9 /OPTIONS Follow these steps to set the clock: 1. Press the Options key ( displayed. 2. Press Return 3. Press the 4. Press + 9 /OPTIONS). PRINT (UP/LOW) CASE is until you see CHANGE CLOCK (NO). Spacebar Return . Ctrl to change the setting to (YES). The date and time are displayed with the day flashing. 5. Press the Spacebar or the Back Space key to set the day. Then, press to move to the next setting. Return 6. Repeat step 5 to change the month and year.
Turning Off Turbo Code Ctrl + 9 /OPTIONS Follow these steps to turn off Turbo Code: 1. Press the Options key ( Ctrl + 9 /OPTIONS). PRINT (UP/LOW) CASE is displayed. 2. Press Return until you see TURBO CODE (ON) on the display. 3. Press the Spacebar to change the setting to (OFF). 4. Press Esc to save the setting and exit the Options menu or press Return to save the setting and go to the next option. Turning Off Auto ID Ctrl + 9 /OPTIONS Follow these steps to turn off Auto ID: 1.
Changing CCITT Seek Time Ctrl + 9 /OPTIONS Follow these steps to set the length of time during which the Minicom 6000 Plus sends out a CCITT seek tone. Normal minicom communication requires a seek time of three seconds. You may need a longer seek time when you connect with a computer. Six seconds is recommended. 1. Press the Options key ( Ctrl + 9 /OPTIONS). PRINT (UP/LOW) CASE is displayed. 2. Press Return until you see CCITT SEEK TIME (3) on the display. 3.
CHAPTER 11 CODES Your Minicom 6000 Plus is ready for use in Great Britain when you turn it on. When you type a message to someone, your Minicom 6000 Plus sends sounds over the telephone line. The other minicom ‘translates’ those sounds into letters that are read by the other person. These sounds are called a code. Different kinds of minicoms use different codes, like people from different countries who use different languages.
Setting EDT Code 1. Press the Code key ( + 0 /CODE). Ctrl + 0 /CODE Ctrl 2. Press the Spacebar until you see (EDT). 3. Press Esc to select. Using CCITT Code This code is used by minicoms in the European countries listed below. If you are calling a country that uses CCITT, you can set the Minicom 6000 Plus to use only CCITT for the call. You can also use CCITT to connect with computers that have modems for communication, electronic mail or bulletin board services.
Setting CCITT Code Ctrl + 0 /CODE 1. Press the Code key ( Ctrl + 0 /CODE). 2. Press the Spacebar until you see (CCITT). 3. Press Return to select CCITT (If you need to change a CCITT default setting, see Changing CCITT Settings on the next page). CCITT Settings and Computer Connections If you use CCITT code often, you may need to change settings.
Return determines what the Minicom 6000 Plus sends when you press Return . You can choose (CR) or (CR+LF). (CR) (carriage return) goes to the beginning of the current line. (CR+LF) (carriage return plus line feed) goes to the beginning of the next line. The default is (CR). Seek Time determines how many seconds the Minicom 6000 Plus tries to connect in CCITT before it tries to connect in Baudot or Turbo. You can choose 2 to 9 seconds. The default is 3 seconds. Changing CCITT Settings Ctrl + 0 /CODE 1.
Using Baudot Code This code is used by minicoms in the countries listed below. Baudot code has two speeds: 45 and 50 baud. If you are calling a country that uses Baudot, you can set the Minicom 6000 Plus to use only Baudot code for the call. Countries that use Baudot are: 45 Baud 50 Baud Canada Republic of Ireland Australia Great Britain South America New Zealand Latvia United States South Africa Setting Baudot Code Ctrl + 0 /CODE 1. Press the Code key ( Ctrl + 0 /CODE). 2.
4. Press the Spacebar until you see the baud rate you want. 5. Press code. Return to select Baudot NOTE: You will have three choices when choosing baud rates in Baudot code: 45, 50, and auto. The auto setting enables Turbo Code, which allows the Minicom 6000 Plus to communicate faster and you can interrupt the person typing to you. In order for auto baud to work, Turbo Code needs to be on. See page 23 for more information about Turbo Code.
Calling the Gateway 1. Press the Dial key ( + 1 /DIAL). TYPE Ctrl + 1 /DIAL Ctrl NAME, NUM, OR CR is displayed. 2. Type the Danish Gateway number, 00 45 65 99 65 99. 3. After you connect to the gateway, you will see this display screen, which means: Enter the telephone number. 4. Type the person’s number you want to call. Do not add the international code. Type the number as if you were calling locally.
5. Press Return . You will see this display, which means: Calling started. Wait while your call is connected. 6. When you see a greeting, you can begin your conversation. Turn off the Minicom 6000 Plus when you finish.
CHAPTER 12 SERVICE Ordinary care of your Minicom 6000 Plus includes changing the printer paper when the paper runs out and replacing the batteries when they no longer hold a full charge. If you have any other problems, you may be able to solve them by reading Troubleshooting on page 74. Besides the printer paper and battery compartments, the Minicom 6000 Plus has no other user-serviceable parts. Any servicing should be done by a qualified service person.
About the Batteries The Minicom 6000 Plus runs on batteries when you unplug the AC adapter or when the power fails. Fully-charged, the six AA rechargeable Nickel Metal Hydride (NiMH) batteries will provide about 90 minutes of normal use without mains power. When the power light blinks, you have about 10 minutes of battery power left. The batteries will last longer if you turn off the printer when you use battery power.
Replacing the Batteries Replace the batteries every two or three years, or when they run down in less than 30 minutes and exercising them does not help. Use only AA Nickel Metal Hydride (NiMH) rechargeable batteries. Turn over the Minicom 6000 Plus and follow these steps to change batteries: CAUTION! The rechargeable batteries contain dangerous chemicals. Do not burn or puncture them. If you do, they could release toxic material that could injure you. Do not dispose of them in household refuse.
Troubleshooting Direct Connect Dialling does not work Make sure you have the right tone or pulse setting for your telephone system. The display says NO DIRECT CONNECT The Minicom 6000 Plus is not properly connected to the telephone line. Be sure the cord is firmly plugged into the Minicom 6000 Plus and the telephone wall jack. You can also try using a different telephone cord or wall jack. Poor reception The display shows numbers, symbols or unreadable characters instead of words. • Press the Spacebar .
The printer prints only the bottom half of characters The print head should be replaced. Contact your dealer or Teletec. On battery power, the printer prints too slowly or lightly The batteries are low. Connect the AC adapter for 24 hours to recharge the batteries. Power The Ring Indicator does not work Be sure the plastic tab has been pulled out of the battery compartment and that you have plugged in the Minicom 6000 Plus for at least 24 hours.
Resetting the Minicom 6000 Plus Resetting the Minicom 6000 Plus returns all options to their original settings and clears all conversations, Auto-Answer messages, Memos and Directory entries. Follow these steps to reset the Minicom 6000 Plus: 1. Press the left Shift key, the right Shift key, and the Ctrl key ( Shift + Shift + Ctrl ) all at the same time. You will see a version number and RESET Y/N on the display. IMPORTANT! After the next step, everything in all memory will be cleared.
CHAPTER 13 SPECIFICATIONS Physical Dimensions Size: 25.4 cm x 24.1 cm x 7.6 cm (10 in. x 9.5 in. x 3 in.) Weight: 1.7 Kg (3.6 lbs) with batteries Power AC adapter: 9VDC, 1200 mA (barrel is positive) Batteries: Six AA, NiMH rechargeable batteries are userreplaceable. They power the unit for approx. 90 minutes. Keyboard 50 ergonomic keys in 5 rows Control key plus 24 function keys Sticky keys for single-handed typists Character set: A-Z, 0-9, Back Space, Return/LF, Space, +=£’()”/:;?,.
Statement of Intended Use This modem is for connection to the British public switched telephone network. The Minicom 6000 Plus has been tested for use of the following facilities: • Timed break recall • On-hook dialling • Incoming call indicator • Operation in absence of secondary proceed indicator • Recorded speech announcement • Detection of initial proceed indication (dial tone) • Automatic storage of last number dialled • Tone detection, i.e.
SPECIFICATIONS • 79
80 • SPECIFICATIONS
I INDEX AC adapter...11, 12, 75, 77 connecting...12 jack...6 Acoustic cups...6, 11, 19, 32-33, 77 Adapter. See AC adapter Address, Teletec...inside front cover Address, Typetalk...34 Announcer. See Voice Announcer or Relay Voice Announcer Answer setting, CCITT code...65 Answering calls automatically. See Auto–Answer in acoustic mode...19 in direct connect...18 Australia, calling...67 Austria, calling...63 Auto ID...5, 21 turning off...21, 61 Auto-Answer...5, 37-44, 77 clearing messages...43 key...
Dial key...8-10 from the Directory...17 from the keyboard...5 in acoustic mode...19 pulse...12, 17, 57, 74 Redialing the last number...17 tips...17 tone...74 Direct Connect...11, 12, 77 problems...74 Directory clearing entries...53 dialling from...17, 51 Directory key...8-10 editing entries...53 memory...45, 51 printing entries...54 saving entries...51-52 Display...6 mode...56 Duplex setting, CCITT code...65 EDT code turning on...64 Electrical power. See AC adapter, Batteries or Power Escape (Esc) key...
Slovakia, calling...63 Slovenia, calling...63 South Africa, calling...67 South America, calling...67 Spacebar...6 Spain, calling...63 Specifications...77 Sticky Keys...5, 30 Sweden, calling...64 Switzerland, calling...63 Telephone line...11 connecting...12 jack...6 type...11, 77 Three-way calling...28 Time. See Clock Tone dialling...81 Transferring a call...29 Troubleshooting...74-76 Turbo Code...5, 23-25 Typetalk...34-35 saving the number for...34 telephone numbers...34 using...34 United States, calling...
Text Telephone Manners GA GA OR SK SKSK Q When you talk with another person by text telephone, you type while the other person reads. When you want the other person to respond, type GA for ‘Go ahead.’ To say goodbye, type GA OR SK. This gives the other person a chance to say any last words before ending the conversation. Type SKSK to end the conversation. Some people prefer to type Q instead of a question mark because it saves time and is easier to type.