
Installation Guide
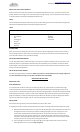


www.eastcoastrustic.com
Questions? info@eastcoastrustic.com
Figure A - Cut tip of glue tube off to give you a ¼” opening.
Figure B - If you are stopping on the flat wall leave a 1/2” space and cover the edges with our flat wall trim pieces.
Figure C - Depending on the board width, apply adhesive as in and place the first row on lightly.
3) We suggest you start from the bottom and work your way up, cutting the last top row to suit. Make sure
the bottom row is straight. It will make subsequent rows easier to install.
4) Install the second row above, lightly. Now you can adjust these rows to align them straight, then push
them tight on the wall, and add a few nails to keep them in place.
5) Install successive rows by placing each board on wall giving a slight twisting motion as you push it firmly to
the wall. This will distribute the adhesive for better contact. Some boards may need a nail or two to help
hold them tight to wall. Push side to side ½ inch and Push Up and down ½ inch.
HINT FOR ELECTRICAL OUTLETS
1) Locate circuit breaker or fuse and turn power off to the plug or switch.
2) Loosen the screws that hold the device to the wall, enough for the wood to slide under the device.
3) Use a jig saw to cut a notch to fit the screw and then apply board to wall. Refer to Figure D
4) Re-tighten screws. In some cases, you may need to replace the screw with a longer one. Usually available
from any hardware store.
Figure D