
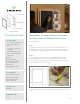
Project Ideas
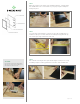
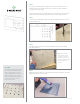


STEP 3
Apply wood glue to the back of the chalkboard panel. Carefully align
the chalkboard to the corner marks on your project panel and press
firmly into place.
STEP 4
Use your mitre saw and box to cut two 20-3/4” cap moulding pieces
and two 14-3/4” pieces. Next, with the moulding facing right-side-up,
cut a 45-degree angle inward on each end.
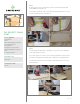
STEP 5
Run a bead of wood glue along the inside angle of each piece of cap
moulding and press firmly against the four sides of the chalkboard.
page 2 of 3
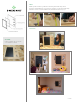
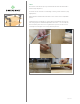
OPTIONAL
If you’d like to add a few small finish-
ing nails to secure the moulding, use
wood filler to hide the holes.