
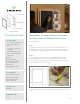
Project Ideas


OPTIONAL
If you’d like to permanently secure
the shelves in place, use a small
paint brush to coat the inside of
each hole, the inserted portion of
each dowel, and the back of each
shelf with wood glue. Set the shelves
in place and allow glue to dry.
Note: This is why it’s important to
determine how you want to hang
your pegboard and install that sys-
tem in Step 7—because if you’d like
to glue your shelves in place, it will
be difficult to place your pegboard
facedown to apply mounting strips
or hanging hardware in Step 8.
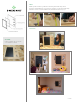
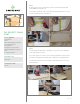
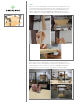
STEP 7
Plan your wall mounting method. We used damage-free picture
hanging strips, but if you’d prefer to use traditional picture-hanging
hardware, you’ll find a variety of options at your local hardware store.
Be sure to follow the hardware manufacturer’s installation instructions
carefully, including the installation of any necessary wall anchors.
STEP 8
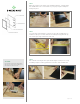
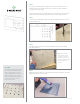
Decide where you’d like your shelves positioned by inserting four
dowels — two per row of your choice with an open hole in between.
Place your two remaining 4” x 8” pieces of project panel across them,
creating shelves.
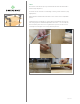
Next, hold one of your shelves firmly against the dowels and try moving
it to a different position on your board. This is your moment of truth!
How well did you evenly space your holes? If your dowel shelves can
be moved to any other position on the pegboard, YOU DID IT! A+!
Once you’ve determined your shelf placements, carefully mark the po-
sition of each dowel on the underside of each shelf and use your wood
glue to adhere them.
Hang your masterpiece, add your shelves and use your extra dowels to
dress it up any way you’d like. Enjoy!
THE END!