
User's Manual


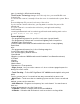


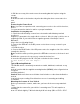

Table Of Contents
mm).
Caution: Be sure to avoid obstructions behind the mounting surface.
Follow these steps to mount the scanner in your vehicle.
1. Choose a mounting location, then use the supplied
mounting bracket as a template to mark the positions for
the mounting screw holes.
2. In the marked positions, drill holes slightly smaller than
the supplied screws.
3. Attach the mounting bracket to the mounting location
using the supplied screws and lock washers.
4. Attach the scanner to the mounting bracket using the
supplied mounting knobs.
5. Connect the antenna’s cable to the ANT. connector
on the rear of the scanner.
Note: If the antenna cable’s connector does not fit in the ANT.
connector, you might also need a Motorola-to BNC
antenna plug adapter (available at a local
electronics store).
• Table top mount • Bulkhead mount • Overhead mount
SQL
VOL
ANT.
EXT.
SP.
DC 12V
REMOTE
Page 11
Applying Power for Vehicle Installation
You can power your scanner using the supplied DC cigarette lighter power cord or
an DC
power cord.
DC power Installation
To power the scanner from a vehicle’s 12V power source (such as a
cigarette-lighter
socket), you need a cigarette-lighter adapter.
To connect an DC cigarette-lighter power cable, insert its barrel plug into the
DC 12V jack on the rear of the scanner, then plug the power cable into your
vehicle’s
cigarette lighter socket.
Note : If you use a cigarette-lighter power cable and your vehicle’s engine is
running, you
might hear electrical noise from the engine while scanning. This is normal.
Caution: DC 12 V Jack can use a power source that supplies 12V DC at least 500