ScanControl Version 7.1.
ScanControl One Program, Multiple Scanners, Made in USA ScanControl User’s Guide Version 7.1.x – 03/2009 SC230, BC246T, BR330T, BCD396T, BCT15, BCD996T Introduction Table of Contents INTRODUCTION..............................................................................................................................................2 TABLE OF CONTENTS ................................................................................................................................................
ScanControl One Program, Multiple Scanners, Made in USA Software Overview ScanControl has been developed to provide sophisticated scanning radio monitoring, control and automation. It currently supports the Uniden BC95XLT, BC245XLT, BC895XLT, BC898T, BCT8, BC780XLT, BC250D, BC296D, BC785D, BC796D, SC230, BC246T, BR330T, BCD396T, BCT15, BCD996T, PSR-500, PSR-600 and the Radio Shack PRO2052, PRO-106 and PRO197. Visit our Web Site at http://www.scannersoft.
ScanControl One Program, Multiple Scanners, Made in USA • • • BCT15, BCD996T, Radio Shack PRO2052 AND GRE Manufactured PSR-500, PSR-600, Radio Shack PRO-106, PRO-197 Intelligent Audio Capture (IAC) requires a PC Sound Card with available audio input jack and an audio cable to connect the scanner audio output to the sound card input. Cable type will vary with specific sound card jack requirements.
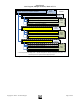
ScanControl One Program, Multiple Scanners, Made in USA System A – System Type & System Attributes CONVENTIONAL SYSTEM System Frame Group 1 – Group Type (Frequencies) & Group Attributes Group Frame Frequency 1 & Frequency Attributes Group Data Frame Frequency 2 & Frequency Attributes Frequency n & Frequency Attributes Group 2 – Group Type (Frequencies) & Group Attributes Group Frame Frequency 1 & Frequency Attributes Group Data Frame Frequency 2 & Frequency Attributes Frequency n & Frequency Att
ScanControl One Program, Multiple Scanners, Made in USA System B – System Type & System Attributes TRUNKED SYSTEM System Frame Group 1 – Group Type (System Frequencies*) & Group Attributes Group Frame Frequency 1 & Frequency Attributes Group Data Frame Frequency 2 & Frequency Attributes Frequency n & Frequency Attributes Group 2 – Group Type (Talkgroups) & Group Attributes Group Frame Talkgroup 1 & Talkgroup Attributes Group Data Frame Talkgroup 2 & Talkgroup Attributes Talkgroup n & Talkgroup A
ScanControl One Program, Multiple Scanners, Made in USA System B – System Type & System Attributes System Frame Sites 1 to n – Site Type (Site Frequencies*) & Site Attributes BCT15, BCD996T TRUNKED SYSTEM Site Frame Frequency 1 & Frequency Attributes Site Data Frame Frequency 2 & Frequency Attributes Frequency n & Frequency Attributes Group 1 – Group Type (Talkgroups) & Group Attributes Group Frame Talkgroup 1 & Talkgroup Attributes Group Data Frame Talkgroup 2 & Talkgroup Attributes Talkgroup n
ScanControl One Program, Multiple Scanners, Made in USA • • • Control Channel – An active data Channel frequency programmed into one of the available Channels in a Trunked Bank. Alphanumeric Tags – Bank, Channel and Talkgroup ID information stored in the ScanControl Data File. The BCT8, BC95XLT, BC245XLT, BC895XLT, BC898T and PRO2052 scanners do not have memory space for these alphanumeric tags so they are not stored in the radio.
ScanControl One Program, Multiple Scanners, Made in USA Getting Started 1. Connect scanner to an available PC serial port via the cable supplied by the scanner manufacturer. 2. Turn scanner power on. 3. Put scanner in PC communications mode. See your radio’s Users Guide for detailed instructions or visit our Radio Setup Web Page at http://www.scannersoft.com/radio_setup.htm . 4.
ScanControl One Program, Multiple Scanners, Made in USA Main Control Screen The Main Control Screen is the first screen presented to the user once all the program initiation steps have completed. It provides all feature / function selection and program status information to the user.
ScanControl One Program, Multiple Scanners, Made in USA configuration session file for future use. If you change the port your radio is connected to ScanControl will automatically re-configure itself the next time you start the program or the next time you click on the “Connect Radio” button. Ports COM1 through COM9 are supported. o Connect / Disconnect Radio Button – Click to attempt to connect to radio after communications settings in radio are changed or when radio is switched to a different type.
ScanControl One Program, Multiple Scanners, Made in USA Backlight – Drop down list box to select the LCD backlight operation mode. Key Beep – Drop down list box to select the Key Beep mode. Battery Saver – Drop down list box to select the Battery Saver mode. BL Color – Backlight color setting. (BCD996T Only) PRI Mode – Selects Priority Mode ON or OFF. Scrn Contrast – Drop down list box to select the Screen Contrast level.
ScanControl One Program, Multiple Scanners, Made in USA o Memory Used – Fuel gauge indicating the amount of radio memory in use by all stored systems. o Close Call Mode Section – Controls to set Close Call Mode parameters in the radio and then turn Close Call Mode ON or OFF. See your radio Owner’s Manual for details on each of these settings and what they mean. o BearTracker Settings – Controls to select / set options for BearTracker Mode in scanner models that support this feature.
ScanControl One Program, Multiple Scanners, Made in USA • ScanControl Memory for saving under another name. However, you can't go the other way. A data file created for the BC246T or BCD396T cannot be used directly with the BC780XLT or the BC245XLT. You would need to use one of the other data export or copy functions available in ScanControl to move data in this direction. o Save File Button – Click to save the current ScanControl Memory Area to a data file on the PC’s hard disk.
ScanControl One Program, Multiple Scanners, Made in USA • • • • Weather / SAME Settings - Launches the Weather Alert / SAME Settings edit screen. See below for details on how to use this screen. L/O Settings – Launches the Radio Lockouts screen. See below for details on how to use this screen. Load Fr / Prog To Radio Section o From Button – Selects direction of data flow when All Systems button is clicked. FROM loads data from radio.
ScanControl One Program, Multiple Scanners, Made in USA Edit Systems Screen (Frequencies & Talkgroups) The Edit Systems Screen consists of four main sections. 1) The System Tabs, 2) The Radio System Frame, 3) The Site / Group Frame and 4) The Frequency / Talkgroup Frame. Each section allows the user to perform configuration and data changes for the radio systems being stored in ScanControl Memory and programmed into the radio.
ScanControl One Program, Multiple Scanners, Made in USA Figure 11 – Edit System Screen – SC230, BC246T, BR330, BCD396T Copyright 2009 – 3D Technologies Page 17 of 86
ScanControl One Program, Multiple Scanners, Made in USA Figure 12 - Edit System Screen – Racing Edition • • System Tabs – Selects the system to be edited. System Frame – Used to create, configure, edit, update, delete, copy, print, program and load system level data.
ScanControl One Program, Multiple Scanners, Made in USA Figure 13 - System Frame - Edit Systems Screen – BCT15, BCD996T Figure 14 - System Frame - Edit Systems Screen – SC230, BC246T, BR330T, BCD396T o Name – Drop down list box used to display / select the currently selected System. This tag is stored in the ScanControl Memory Area and data file. o Sys Type – Drop down box to select the type of Trunked system being programmed.
ScanControl One Program, Multiple Scanners, Made in USA o Status Bit – Checkbox to set the Status Bit attribute for the System in a trunked system. o End Code – Checkbox to set the End Code attribute for the System Frequency Group in a trunked system. o AFS – Checkbox to set the Dec / AFS mode for TGID display in a trunked system. Checked means AFS TGID display. o I-Call – Drop down list to set I-Call mode for the System in a trunked system.
ScanControl One Program, Multiple Scanners, Made in USA Figure 15 – Export / Import System Data Screen • • • • • • System to System Copy – Copies all system data in the currently selected system to a new system placed at the end of the System Navigator list. User can enter a new name for the copied system or accept the default. Sys Export to CSV File (.csv, Excel) – Exports all system data in the currently selected system to a .csv file for use by text editors and other applications such as MS Excel.
ScanControl One Program, Multiple Scanners, Made in USA • o Add New Button – Click to add a new system into the ScanControl Memory Area. NOTE: To maintain data integrity between the radio and ScanControl Memory the program will not allow duplicate system names to be entered. If you try to create a new system with a name identical to an existing system ScanControl will display an error message and ask you to choose another name.
ScanControl One Program, Multiple Scanners, Made in USA o Group Name – Drop down list box used to display / select the currently selected Group. This tag is stored in the ScanControl Memory Area and data file. o Group Quick Key – Drop down list box to select the Quick Key # for the selected Group. o Group Emg Alt (BR330T, BCT396T, BCT15, BCD996T Only) – Drop down list box to select the Emergency Alert mode at the Group level.
ScanControl One Program, Multiple Scanners, Made in USA multiple uses and its’ layout will change based on what function the user is trying to perform. If the user selects or creates a frequency group within a conventional system then all the frequencies and attributes for that group can be entered and edited within this frame.
ScanControl One Program, Multiple Scanners, Made in USA Figure 19 - Group Data Frame – Frequencies – SC230, BC246T, BR330T, BCD396T o # - Displays the absolute number from 1 to the maximum number of frequencies in the Group. These numbers cannot be edited. The << Prev 15 and Next 15 >> buttons (see below) are used to move among all the frequencies in the Group o << Prev 15 (10) – Click to display the previous screen of frequencies in the Group.
ScanControl One Program, Multiple Scanners, Made in USA o Mode / Step / Alert / LCN / Aud - Data display field for Radio Mode (AUTO, AM, FM, NFM) setting, Step (KHz) setting, Alert (BCD396T), Alert Level (BCD396T), LCN (Logical Channel Number) setting, Aud (Audio Type) setting (BCD996T). The appropriate boxes are grayed out or not visible when the radio in use doesn’t support the setting or the frequency is designated as a trunked frequency.
ScanControl One Program, Multiple Scanners, Made in USA Figure 21 - Motorola Custom Band Plan Screen Motorola Custom Band Plan Screen – Selecting a trunk system/site type of M-800C will enable the “Edit Bandplan” button on the bottom of the System Editor screen. Clicking the Edit Bandplan button will open the Custom Bandplan screen above.
ScanControl One Program, Multiple Scanners, Made in USA that configuration for setting the appropriate Base and Spacing parameters. All valid base configurations are then programmed into the bank when you perform the Program System step. o Base –Data entry field for Base Frequency in the selected Base Configuration. If a system is configured as a MP25 then a Base Frequency must be entered. This box will only appear if the corresponding System Type is selected above.
ScanControl One Program, Multiple Scanners, Made in USA Figure 23 - Group Data Frame - Talkgroup IDs – SC230, BC246T, BR330T, BCD396T • TGIDs in Group Section – Talkgroup data entry fields for the selected Group. o # – Displays the Talkgroup number in the group. These numbers cannot be edited. o TGID – Data entry field for the Talkgroup ID. This can be up to a 6 digit number as assigned by the Trunked radio system.
ScanControl One Program, Multiple Scanners, Made in USA Figure 24 - Edit Talkgroup Alerts • • Trunk Actions Section o Edit Fleet Maps Button – Enabled if the System type is designated as Motorola Type I (E1). Click to launch the Edit Fleet Maps Screen (See Below). Edit Rows Section – Frequencies or Talkgroup IDs o Edit: Ins – INSERT - Inserts an empty frequency or Talkgroup ID row in the current location and moves all subsequent rows down the list.
ScanControl One Program, Multiple Scanners, Made in USA • • o Prev Tab < - When the radio contains more than 20 systems these buttons provide for navigation between groups of 20 tabs. o Next Tab > - When the radio contains more than 20 systems these buttons provide for navigation between groups of 20 tabs. DataGrabber Section o Paste Button - Click to paste frequencies into the Group from the DataGrabber clipboard. o Undo Button – Click to undo the last DataGrabber paste action.
ScanControl One Program, Multiple Scanners, Made in USA o Time Display Window – Displays the current system time.
ScanControl One Program, Multiple Scanners, Made in USA Edit Fleet Map Screen The Edit Fleet Map Screen is only available for Banks configured for Trunked mode Motorola Type I (E1, T1 including T1 / T2 Hybrid). It gives the user the ability to select from 16 Preset Fleet Maps stored in the BC246T, BR330T, BCD396T and BCD996T scanners or to manually program the 8 Fleet Map blocks with different block sizes to customize the Fleet Map.
ScanControl One Program, Multiple Scanners, Made in USA o Use Preset Checkbox – Checking this box enables the Preset Fleet Maps Section and disables the Fleet Map Blocks Section allowing the user to select a Preset Fleet Map. Unchecking this box disables the Preset Fleet Maps Section and enables the Fleet Map Blocks Section allowing the user to manually program the Fleet Map Blocks o Help Button - Click to open this Help file.
ScanControl One Program, Multiple Scanners, Made in USA DataGrabber Overview Go to our DataGrabber web page ( www.scannersoft.com/datagrabber.htm ) for brief demonstration videos showing how to use the DataGrabber features. The ScanControl DataGrabber revolutionizes the way you program frequency and talkgroup data into your Uniden scanner.
ScanControl One Program, Multiple Scanners, Made in USA Figure 26 – DataGrabber:Conventional Frequencies Highlight the desired rows of frequency data (see above) by dragging your mouse from the upper left corner of the row section to the lower left corner of the row section. The DataGrabber needs to have the field name row (“Frequency, Input, License, … etc.”) in at least one of the copy steps on any given web page. Be sure to highlight entire rows of data or the DataGrabber will ignore them.
ScanControl One Program, Multiple Scanners, Made in USA Open the System Editor and create a new system or open to an existing system. BE SURE TO CORRECTLY SET THE SYSTEM TYPE BEFORE ATTEMPTING THE PASTE / APPEND. The DataGrabber can APPEND the frequency rows to the data already in the Group or PASTE the frequency rows over the data already in the Group. To APPEND the data just click the DataGrabber Append button.
ScanControl One Program, Multiple Scanners, Made in USA Clicking OK on the message screen will complete the Paste / Append. Clicking Cancel will abort the Paste / Append. The DataGrabber has pasted the data rows (below) and accounted for the frequency, alpha tag, PL or CTCSS tone and modulation values found in the data rows. If the rows do not contain any of these data elements they will be defaulted during the Paste / Append.
ScanControl One Program, Multiple Scanners, Made in USA Figure 28 – DataGrabber:Conventional Frequencies • Multiple Group Copy / Paste- If the user had “grabbed” multiple frequency groups on the RadioReference.com web page and pasted them starting with group #1 as above then the DataGrabber would have asked the user if he / she wanted to split the groups and paste them into the system as separate, named groups OR paste all the frequencies together in the one group.
ScanControl One Program, Multiple Scanners, Made in USA • Grabbing Trunk System Frequencies – Trunk system frequencies are organized differently on RadioReference.com web pages. In a large trunk system they are organized by sites. A site is a specific transmitter location, usually identified by its location name, that transmits the radio system traffic on a specific set of frequencies. The system used in the example below has one site named “Primary” but a complex trunk system will have multiple sites.
ScanControl One Program, Multiple Scanners, Made in USA Open the ScanControl System Editor and create a new system or open to an existing system. BE SURE TO CORRECTLY SET THE SYSTEM TYPE BEFORE ATTEMPTING THE PASTE / APPEND. The DataGrabber can APPEND the frequency rows to the data already in the Group or PASTE the frequency rows over the data already in the Group. To APPEND the data just click the DataGrabber Append button.
ScanControl One Program, Multiple Scanners, Made in USA The DataGrabber has pasted the data rows (below), accounted for the frequency and defaulted the alpha tag. Note also the Undo button has become un-grayed after the Paste / Append. You can use the Undo button to reverse the Paste / Append action and return the Group data back to what it was before the Paste / Append.
ScanControl One Program, Multiple Scanners, Made in USA associated systems if you wish. It is for this reason you may want to “grab” all the Talkgroup IDs FIRST and paste them into the first system in the chain. Then, when you do a multiple site frequency copy and create all the associated systems all the Talkgroup IDs will also be reproduced. If the user had “grabbed” multiple frequency sites on the RadioReference.
ScanControl One Program, Multiple Scanners, Made in USA • Grabbing Trunk System Talkgroup IDs – Trunk system Talkgroup IDs are displayed in several different formats on RadioReference.com. The DataGrabber is aware of this and compensates for it during the paste process. The copy / paste process for Talkgroup IDs, however, is the same. Display the Talkgroup IDs on the RadioReference.com page in your browser.
ScanControl One Program, Multiple Scanners, Made in USA of data so in the example above you could have highlighted both the “Zone C3 Talkgroups” AND the adjacent zone talkgroups in one copy action. In fact you can highlight ALL the talkgroup IDs on the entire page for the entire system in one copy action. Open the ScanControl System Editor and create a new Talkgroup ID group or open to an existing group.
ScanControl One Program, Multiple Scanners, Made in USA Clicking OK on the message screen will complete the Paste / Append. Clicking Cancel will abort the Paste / Append. The DataGrabber has pasted the data rows (below) accounting for the Talkgroup ID and the alpha tag. The alpha tag has been truncated to the maximum of 16 characters supported in the radio. Note also the Undo button has become un-grayed after the Paste / Append.
ScanControl One Program, Multiple Scanners, Made in USA • Multiple Talkgroup ID Group Copy / Paste - If the user had “grabbed” multiple Talkgroup ID groups on the RadioReference.com web page and pasted them starting with group #1 as above then the DataGrabber would have asked the user if he / she wanted to split the groups and paste them into the system as separate, named groups OR paste all the Talkgroup IDs together in the one group.
ScanControl One Program, Multiple Scanners, Made in USA Import CSV File Data Screen The Import CSV File Data Screen is a powerful feature of the ScanControl data import capabilities. This screen allows the user to view the rows and columns in a CSV file produced by Excel, or any other ASCII text program, and designate which rows and columns are to be imported into ScanControl. The user can select what type of data is contained in the columns of the file: Frequencies, Talkgroup IDs or Both..
ScanControl One Program, Multiple Scanners, Made in USA • • • o Frequencies – Click to tell ScanControl the CSV file contains only Frequencies to be imported. o Talkgroup IDs – Click to tell ScanControl the CSV file contains only Talkgroup IDs to be imported. o RACE – Click to tell ScanControl the CSV file contains “RACE” system frequencies. This invokes the special Group sort that places each Driver’s frequencies into their own Group.
ScanControl One Program, Multiple Scanners, Made in USA • o Starting Row - Select the starting row number for the import. This list box is automatically filled with the available rows based on the group selected but also contains the choice “New” at the bottom of the list. This allows you to append new rows on the end of the selected group.
ScanControl One Program, Multiple Scanners, Made in USA Figure 36 - Edit Custom Search Ranges • • • • # – The Custom Search Range number being edited. These values are fixed and cannot be changed. Act – Checkbox to activate or deactivate the search range. When a box is checked or unchecked the radio is immediately updated in real time.
ScanControl One Program, Multiple Scanners, Made in USA • • • • • • • • • • • • • • • Upper Limit – The Upper Limit frequency for the search range. Step (kHz) – The frequency step size for the search range. You can choose from the list of available steps or select Auto to have the radio select the step. Delay – The delay value (in seconds) for the search range. Mod – The reception mode (modulation) for the search range.
ScanControl One Program, Multiple Scanners, Made in USA Edit Service Search Settings Screen (BR330T, BCT396T, BCT15, BCD996T) The Edit Service Search Settings Screen allows programming and loading of the Service Search Range Settings found in the BR330T, BCD396T, BCT15 and BCD996T. These values are stored in the ScanControl Memory Area and saved in the ScanControl data file. This screen will appear slightly different than the screen shot below depending on which radio is connected.
ScanControl One Program, Multiple Scanners, Made in USA • • • Srch w/Scan ON – Checkbox to turn on or off Search with Scan mode for each service search range. Srch w/Scan Hold – Drop down list to select the Hold time (in seconds) for Search with Scan hold for each service search range. Operations Controls o Load Settings – Loads all service search range settings from the scanner’s radio memory into the ScanControl Memory Area.
ScanControl One Program, Multiple Scanners, Made in USA • • • • • • • • • • • • • • Name – The alphanumeric name assigned to the tone out settings. The first 16 characters of this string are stored in the radio when the search ranges are programmed. Frequency – The frequency setting for the tone out. Mod – The reception mode (modulation) for the tone out. You can choose from the list of available modes or select Auto to have the radio select the mode.
ScanControl One Program, Multiple Scanners, Made in USA Figure 39 - Edit Location Alerts Settings (BCT15, BCD996T) • • • • • • • • • • • • • • All, POI, DROAD, DXING – The type of Location Alert being displayed in the current alert list. POI = Point of Interest, DROAD = Dangerous Road, DXING = Dangerous Crossing. Name – The alphanumeric name assigned to the Location Alert. The first 16 characters of this string are stored in the radio when the Location Alerts are programmed.
ScanControl One Program, Multiple Scanners, Made in USA o Close Button – Click to close the Edit Location Alerts Screen and return to the Main Control Screen. Edit Weather / SAME Settings Screen The Edit Weather / SAME Settings Screen allows setting of the Weather Alert parameters in the radio and programming and loading of the 5 S.A.M.E. weather alert settings found in the SC230, BC246T, BR330T, BCD396T, BCT15 and BCD996T.
ScanControl One Program, Multiple Scanners, Made in USA o Reset Settings – Resets all weather alert settings to their default settings in the ScanControl Memory Area. NOTE: This function DOES NOT clear the data for the weather alert settings in the scanner’s radio memory. o Help Button - Click to open this Help file. o Close Button – Click to close the Edit Service Search Settings Screen and return to the Main Control Screen.
ScanControl One Program, Multiple Scanners, Made in USA Radio Lockouts Screen The Radio Lockouts Screen provides user access to the frequency and TGID lockout lists kept in the radio. These lists are normally manipulated through the radio keypad by the user setting lockout attributes, entering global lockout frequencies or setting lockouts during TGID searches. NOTE: This screen does not store any lockout data in ScanControl Memory.
ScanControl One Program, Multiple Scanners, Made in USA • o Select System – Displays a drop down list of all trunk systems in the radio for selection. When adding a TGID to the lockouts list the user must tell the radio which system to add the TGID lockout into. o Enter TGID- Field for entering a new TGID to be added to the lockout list. o Add – Button to add the TGID in the TGID field to the system in the TGID Lockouts list.
ScanControl One Program, Multiple Scanners, Made in USA Radio Control / Monitor Screens (SC230, BC246T, BR330T, BCT396T, BCT15, BCD996T) The Radio Control / Monitor Screen is designed to allow real time control of the SC230, BC246T, BR330T, BCD396T and BCD996T through a simulated keypad / display mechanism while also providing extensive additional information about active frequencies or Talkgroup IDs.
ScanControl One Program, Multiple Scanners, Made in USA Figure 42 - SC230 Control / Monitor Screen ** See Screen Function descriptions below Figure 46.
ScanControl One Program, Multiple Scanners, Made in USA Figure 43 - BC246T Control / Monitor Screen ** See Screen Function descriptions below Figure 46.
ScanControl One Program, Multiple Scanners, Made in USA Figure 44 - BR330T Control / Monitor Screen ** See Screen Function descriptions below Figure 46.
ScanControl One Program, Multiple Scanners, Made in USA Figure 45 - BCD396T Control / Monitor Screen ** See Screen Function descriptions below Figure 46.
ScanControl One Program, Multiple Scanners, Made in USA Figure 46 - BCD996T & BCT15 Control / Monitor Screen (NOTE: Key assignments will differ slightly from above for BCT15.) • • • • Display Section – Presents the contents of the radio LCD display in real time. Keypad Section – Replicates all the radio keypad functions. VFO Keys – VFO control buttons that mimic VFO dial located on the scanner. See your radio’s Users’ Guide for details on how to use these keys.
ScanControl One Program, Multiple Scanners, Made in USA o o o o o selected by the user in the Program Options screen. If the number of Hits exceeds the maximum then the list “rolls over” saving the newest Hits and overwriting the oldest. The Search / Scan Hit List can be scrolled horizontally to view the entire Hit data row. Additionally, the Hit duration is appended to the end of the data row when the transmission is complete.
ScanControl One Program, Multiple Scanners, Made in USA • • • o Tag All Button – Turns on automatic tagging of all Search / Scan Hits. When clicked this button will tag all existing Search / Scan Hits AND it will start automatically tagging all new hits that arrive in the list. o Clr All Button - Turns off (Clears) automatic tagging of all Search / Scan Hits.
ScanControl One Program, Multiple Scanners, Made in USA • Scanner Monitor – Displays real time snapshot information about the active channel or talkgroup ID being monitored. o Freq / TG ID – Displays the active frequency or talkgroup ID. o Tag – Displays the Alpha Tag associated with the frequency / talkgroup ID. o Sys / Grp – Displays the associated system and group of the scan hit. o Hits – The current number of hits in the Search / Scan Hit list. Updated as new hits arrive.
ScanControl One Program, Multiple Scanners, Made in USA • o Type – Displayed the type of Group being programmed or loaded: Conventional Frequency, Trunk Frequency or Talkgroup ID. o No. – The number of the frequency or TGID in the Group being programmed or loaded. o Frequency/TGID – Displays the frequency or TGID value being programmed or loaded. o Alpha Tag – Displays the alphanumeric tag for the frequency / TGID being programmed or loaded.
ScanControl One Program, Multiple Scanners, Made in USA Intelligent Audio Capture (IAC) Intelligent Audio Capture, or IAC, provides the ability to record to your PC hard disk the audio normally heard from your scanner’s speaker or earphones. These audio files can then be played back using any PC media file application such as iTunes or Windows Media Player. IAC is intelligent in that it records audio in “streams”.
ScanControl One Program, Multiple Scanners, Made in USA radio, in others the audio volume is output at a constant level regardless of where the volume control on the radio is set. ScanControl Intelligent Audio Capture (IAC) Radio Usage Parameters 3/24/2009 WARNING: Using incorrect audio output / input connections can damage your sound card and / or your radio.
ScanControl One Program, Multiple Scanners, Made in USA be able to hear the radio’s audio coming from the PC speakers if your channels have been programmed to enable Record Out. The general rule of thumb is the volume level you hear from the PC speakers will be the volume level that is recorded by IAC, however, you should use the audio level bar graphs in the IAC section of the ScanControl Control / Monitor screen to verify the proper level. Figure 51 - PC Audio Control 3.
ScanControl One Program, Multiple Scanners, Made in USA into the radio. Those that handle the Record Out attribute in S/W only require that you check the R box for the channel / TGID but there’s no need to then program the data into the radio.
ScanControl One Program, Multiple Scanners, Made in USA Group by option – Session: Time Session Folder w/ Date (012007) and Time (084824) Date Frequency / TGID# Channel / TGID Alpha Tag Figure 53 - IAC Session Group by Option Copyright 2009 – 3D Technologies Page 75 of 86
ScanControl One Program, Multiple Scanners, Made in USA Group by Option - Date / Time: Channel / TGID Alpha Tag Frequency / TGID# Date Time Date / Hour Folders Figure 54 - IAC Date / Time Group by Option Group by Option – Channel / TGID: Time Date Frequency / TGID# Channel / TGID Alpha Tag Channel / TGID Folders Figure 55 - IAC Chnl / TGID Group by Option Copyright 2009 – 3D Technologies Page 76 of 86
ScanControl One Program, Multiple Scanners, Made in USA 8. IAC Troubleshooting – If you are having trouble getting IAC to record your scanner’s audio the following flowchart should help.
ScanControl One Program, Multiple Scanners, Made in USA Program Options Screen The Program Options Screen allows the user to set various program option defaults and thus tailor the ScanControl environment. Each option is enabled when checked and disabled when unchecked. These values are stored as part of the current session and saved for all future sessions. In most cases these defaults can be temporarily overridden on their respective screens when using the program.
ScanControl One Program, Multiple Scanners, Made in USA • • • • • • • • • • • Search / Scan Hit Logging - Sets the default for Search / Scan Hit Logging on the Control / Monitor Screen. If checked Search / Scan Hit Logging is ON when you enter the Control / Monitor screen. If unchecked Search / Scan Hit Logging is OFF when you enter the Control / Monitor screen. Setting can be overridden on the Control / Monitor screen. Log Size - Sets the Log Size for Search / Scan Hit Logging.
ScanControl One Program, Multiple Scanners, Made in USA • • • • DataGrabber SmartTag – Enables / disables automatic alpha tag abbreviation during DataGrabber pastes. When enabled, commonly found phrases like "Police Dept" or "Public Service" are automatically abbreviated to "PD" and "Pub Svc" during the paste process. This results in shorter alpha tags that don't have their right end characters "chopped off" in ScanControl and in the radio's display.
ScanControl One Program, Multiple Scanners, Made in USA • • • Initial Screen Location - Sets the default value for initial screen location for all screens. This option allows users with lower resolution monitors (800 X 600) to maximize the screen area to be used by ScanControl. 800 / 600 screen users may want to set this value to “Top Left” so they see full screens when the program runs. Higher resolution screen users would want this setting to be “Centered” in most cases.
ScanControl One Program, Multiple Scanners, Made in USA Load File Screen The Load File Screen allows the user to select the drive, folder and filename of the ScanControl Data File to be loaded into the ScanControl Memory Area. Figure 58 - Load File Screen • • • • • Drive Selection – Drop down box used to select the drive letter of the device where a ScanControl Data File will be loaded from.
ScanControl One Program, Multiple Scanners, Made in USA Figure 59 - Save File Screen • • • • • Drive Selection - Drop down box used to select the drive letter of the device where a ScanControl Data File will be saved. Folder Selection - Selection box used to select the folder on the drive where a ScanControl Data File will be saved. File Selection - Selection box used to select the file from the folder on the drive where a ScanControl Data File will be saved.
ScanControl One Program, Multiple Scanners, Made in USA Appendix Table of Figures Figure 1 - DMA Organization - Conventional Systems Figure 2 - DMA Organization - Trunked Systems BC246T, BR330T, BCD396T Figure 3 - DMA Organization - Trunked Systems BCT15, BCD996T Figure 4 - Radio Memory Configurations Figure 5 - Radio Search Screen Figure 6 - Main Control Screen Figure 7 - Radios Settings Screen Figure 8 – AGC Adjustment Screen – Pre V3.
ScanControl One Program, Multiple Scanners, Made in USA Figure 45 - BCD396T Control / Monitor Screen Figure 46 - BCD996T & BCT15 Control / Monitor Screen Figure 47 - Mini Monitor Screen Figure 48 – Program / Load Progress Screen Figure 49 - Intelligent Audio Capture Figure 50 - IAC Usage Matrix Figure 51 - PC Audio Control Figure 52 - IAC Program Options Figure 53 - IAC Session Group by Option Figure 54 - IAC Date / Time Group by Option Figure 55 - IAC Chnl / TGID Group by Option Figure 56 - IAC Troubleshoo
ScanControl One Program, Multiple Scanners, Made in USA Limited Software Warranty: LIMITED WARRANTY. The warranties and disclaimers described in this paragraph are collectively the "Limited Warranty".