Precautions Before you use this scanner, please read and observe the following. IMPORTANT! This scanning radio has been manufactured so that it will not tune to the radio frequencies assigned by the FCC for cellular telephone usage. The Electronic Communications Privacy Act of 1986, as amended, makes it a federal crime to intentionally intercept cellular or cordless telephone transmissions or to market this radio when altered to receive them.
LTR® is a registered trademark of E.F. Johnson Co. EDACS® is a registered trademark of M/A-COM Private Radio Systems Inc. Uniden® and Bearcat® are registered trademarks of Uniden America Corporation. Trunk Tracker™, Trunk Tracking™, and Close Call™ are proprietary trademarks of Uniden America Corporation. Other trademarks used throughout this manual are the property of their respective holders.
Table of Contents Precautions........................................................................................................................................ 2 Power Related Issues ................................................................................................................... 3 Table of Contents ............................................................................................................................. 4 The FCC Wants You To Know .................................
Setting Up an Audio Recording Device or Computer Recording ................................................... 33 Vehicle Installation ......................................................................................................................... 33 Mounting Using the Bracket ........................................................................................................ 33 Mounting Using the DIN-E Sleeve .....................................................................................
Setting the Serial Port Speed ........................................................................................................ 58 Displaying Scanner Information ..................................................................................................... 59 Viewing Memory Used ................................................................................................................ 59 Viewing the Firmware Version and Electronic Serial Number ............................................
Assigning a Search Range to a Search Key ................................................................................. 98 Saving a Found Channel (Quick Save) ......................................................................................... 99 Auto Search and Store .................................................................................................................. 99 Selecting a System to use for Storing ...............................................................................
GPS Review Location Mode ........................................................................................................ 126 Care and Maintenance ................................................................................................................. 128 General Use ................................................................................................................................. 128 Location ....................................................................................
The FCC Wants You To Know This scanner has been tested and found to comply with the limits for a scanning receiver, pursuant to Part 15 of the FCC Rules. These limits are designed to provide reasonable protection against harmful interference in a residential installation. This scanner generates, uses, and can radiate radio frequency energy and, if not installed and used in accordance with the instructions, may cause harmful interference to radio communications.
up these transmissions. Do not open your scanner’s case to make any modifications that could allow it to pick up transmissions that are illegal to monitor. Modifying or tampering with your scanner’s internal components or using it in a way other than as described in this manual could invalidate your warranty and void your FCC authorization to operate it. In some areas, mobile and/or portable use of this scanner is unlawful or requires a permit. Check the laws in your area.
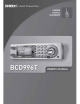
Introduction Your BCD996T scanner is a state-of-the-art scanner radio with Trunk Tracker IV™ and automatic scanning capabilities. You can store in the dynamic memory conventional frequencies such as police, fire/emergency, marine, air, amateur, and other communications. You can store and scan services that use Trunked Radio Systems and so much more.
Lower Edge 806.0000 849.0125 894.0125 1240.0000 Frequency (MHz) Upper Edge Modulation 823.9875 NFM 868.9875 NFM 956.0000 NFM 1300.0000 NFM Step (kHz) 12.5 12.5 12.5 25.0 Note: The scanner’s frequency coverage is not continuous and does not include the cellular telephone or UHF TV bands. Feature Highlights General Close Call™ RF Capture Technology — Instantly detects and tunes to nearby transmissions with no additional programming. See “Using the Close Call Feature” on Page 101 for more information.
Channel Lockout — You can lock out any system, group, frequency, or channel while scanning. If you lock out a system or group, any channels belonging to that system or group are also locked out. Frequency Lockout — You can lock out up to 500 frequencies (250 permanently locked out + 250 temporarily locked out). The scanner skips locked-out frequencies while using the Close Call™ feature or while searching. CTCSS and DCS Squelch Modes — Prevent interference from stations not using the tone code you select.
Automatic Channel Step — Accepts frequencies on any valid channel step, even if it does not fall within the band plan’s default step. Frequency Step — Lets you select a frequency step (5, 6.25, 7.5, 8.33, 10, 12.5,15, 20, 25, 50 or 100 kHz) for manual mode and search mode. Text Tagging — You can name each system, group, channel, talk group ID, custom search range, and SAME group, using up to 16 characters per name.
Control Channel Only Scanning — If the scanner is set to scan a Motorola system, you can set it so it scans using only control channel data. You do not have to program voice channel frequencies into memory in this mode as long as all possible control channels are programmed. Adaptive Digital Threshold — Automatically sets the digital decode threshold for APCO 25 systems.
Quick Search — Lets you search from the currently-tuned frequency if you are searching a conventional system. Auto Store Frequency AutoStore — Automatically stores all active frequencies into the selected conventional system. Talk Group ID AutoStore — Automatically stores all new talk group ID’s into a channel group you select. Priority Priority Scan — Priority channels let you keep track of activity on your most important conventional channel(s) while monitoring transmissions on other channels.
Search Lockout Limits Frequencies 500 Temporary L/O Frequencies 250 Permanent L/O Frequencies 250 Skipped Search Mode Close Call Mode Review Menu Mode About This Manual The screen displays used in this manual are representations of what might appear when you use your scanner. Since what you see depends on the frequencies and user IDs for your area and the settings you select, you might notice some differences between what is in this manual and what appears on your scanner.
How the Scanner’s Controls Are Represented in This Manual To help navigate the scanner’s menus, the steps shown in this manual show the displays you see and the keys you press or control you operate to get a desired result. We use a form of shorthand symbols to save space. The following example shows you how to use the scanner’s menu to edit an existing system name.
A Short User’s Guide to Assist the First-Time Scanner Enthusiast Welcome to the family of Uniden scanner users. You have just unpacked your Uniden BCD996T scanner. You are anxious to scan and hear something so you rotate the [VOL/POWER] control and wait a moment as the opening Message and Copyright screens confirm the model information. Then, if you live in a residential area, you probably hear nothing or very little. Why? The reason is simple.
2. Program the system based on the plan. Enclosed with the materials provided with your scanner is a reprinted article from Popular Communications, which, in clear, easy-to-understand language, tells you how to start the programming session. The article also includes a glossary of terms and other valuable data. Be sure to take time out to look it over before proceeding. To provide you with useful sized worksheets and instructions to complete them, we have established links at our company website.
Understanding Scanning and the BCD996T This section provides you with additional background on how scanning works and how your scanner provides that feature. You don’t really need to know all of this to use your scanner, but some further background knowledge will help you get the most from your BCD996T. Understanding the Scanner’s Memory Your scanner’s memory is organized in an architecture called Dynamic Allocated Channel memory.
channels, then press the GQK within 2 seconds. Systems can have up to 20 channel groups, and multiple channel groups can be assigned to the same GQK. What is Scanning? Unlike standard AM or FM radio stations, most two-way communications do not transmit continuously. Your BCD996T scans programmed channels until it finds an active frequency, then stops on that frequency and remains on that channel as long as the transmission continues.
even interfere with each other to the point where it is impossible to clearly receive any of the stations. A scanner, such as your BCD996T, equipped with CTCSS and DCS, can code each received frequency with a specific sub-audible CTCSS or DCS frequency or code. Then, when you receive multiple signals, you only hear the transmission with the CTCSS or DCS tone you programmed. If you do not receive the correct tone with a signal, the scanner’s squelch remains closed and you hear nothing.
Repeater Operation Repeater systems use two frequencies: one transmits from the radio to a central repeater; the other transmits from the repeater to other radios in the system. With a repeater-based system, the repeater is located on top of a tall building or on a radio tower that provides great visibility to the area of operation. When a user transmits (on an input frequency), the signal is picked up by the repeater and retransmitted (on an output frequency).
Trunked Scanning While conventional scanning worked great while there were only a few groups wanting to use the frequencies, with the advent of smaller, lower-cost radios more and more agencies and businesses wanted to take advantage of the utility of 2-way radio. As a result, the bands that were used most became full, so new users were not able to take advantage of the technology as quickly as they wanted.
channels (typically 10, 20, or 28 total channels). When a user presses Push To Talk (PTT) to transmit, their radio first sends the person’s talk group information to the control channel. The computer then assigns that talk group to a specific voice channel and transmits that data over the control channel. All radios in that talk group switch over to the assigned voice channel and the user can begin speaking. This all typically takes place in about a second.
radios in that talk group will switch to the correct channel. To program an EDACS system in your scanner, you will need to know both the frequencies used by the system and the LCN for each frequency. Agency-Fleet-Subfleet — talk group ID’s for EDACS systems are assigned in a way that makes it easy to see at a glance the affiliation of the user. Each radio is assigned a 2-digit agency identifier from 00 — 15.
data matches a talk group ID that you have stored in the talk group ID list and have not locked out. LTR systems are frequently programmed so that each radio has a unique user ID. Startup Configuration Setup/Operation The Startup Configuration option lets you quickly and automatically lock and unlock systems based on your desired configuration. Simply hold down a number button while powering on the scanner or while the opening screens are displayed.
I-Call (Motorola/EDACS) I-calls are direct unit-to-unit transmissions that are not heard by other system users. Your BCD996T can receive I-call transmissions. See “Setting I-Call (Motorola and EDACS Systems Only)” on Page 72 for more information about monitoring I-call transmissions. Where To Get More Information By itself, this manual only provides part of what you need to know to have fun scanning — how to program and use the scanner. Other sources provide additional information.
Included With Your Scanner Cigarette Lighter Adapter Power Cord AC Adapter (P/N AD-1009) BCD996T Scanner Three Wire DC Power Cord — See Step 5, “Mounting Using the DIN-E Sleeve” on Page 34 Mounting Bracket and Hardware DIN-E Sleeve and Removal Keys for vehicle installation Remote PC to Scanner Cable (scanner plug to Front PC Connecter) Push-on type Telescopic Antenna Owner’s Manual and other printed material If any of these items are missing or damaged, immediately contact your place of purchase or
Setting Up Your Scanner These guidelines will help you install and set up your new scanner: The BCD996T can be placed on a convenient surface in your home as a base station, and connected to a standard outlet that supplies 120VAC, 60Hz. You must use either the supplied antenna or an electrically correct outdoor antenna, properly and safely mounted at your chosen site. The scanner is also designed to accommodate the DIN-E and ISO-DIN automotive mounting configurations. A DIN-E sleeve is supplied.
BCD996T Desk Surface Bracket Wood Screws Mounting Feet (4) To secure the radio, by means of the mounting bracket, to a surface, follow the steps below: 1. Attach the four protective rubber feet to the mounting bracket when you casually use the scanner on a flat surface. Should you desire to permanently mount the scanner, remove the feet and use wood screws through the bracket as described in Steps 2 and 3. 2. Use the bracket as a template to mark positions for the two mounting screws. 3.
WARNING! Use only the Uniden-supplied AC adapter with this scanner. Insert the connector of the supplied indoor telescoping antenna to the BNC Antenna Connector and apply moderate pressure to secure it. Setting Up an Audio Recording Device or Computer Recording It is best if you plan ahead when you initiate the basic setup of the scanner if you include the components to record incoming reception.
drill carelessly, expensive damage can result. If in doubt, consult your vehicle dealer’s service department or a qualified professional installer. Important: AVOID AIRBAG DEPLOYMENT ZONES. Ignoring this installation concern may result in bodily harm and the inability of the airbag to perform properly. Mounting Screws Star Washers 1. Using appropriate screws or other hardware, secure the bracket. 2. Insert the scanner and insert the bracket knobs to lock the scanner in position. 3.
Hole in dash DIN-E Sleeve BCD996T with outer case removed 1. Remove the bracket if previously attached. 2. Remove the four Philips screws on the rear that secure the outer metal case and pull off the case with care. 3. Install the DIN sleeve into the opening in your dashboard, lip facing out. 4. Push out the top and bottom tabs to hold the sleeve firmly in place. 5. Before inserting the scanner in the sleeve, attach the cable from the previously mounted antenna. Attach the DC Power leads.
Removing the Scanner from the DIN-E Sleeve If you plan to connect other devices or wires to the radio, such as a GPS unit, at a later time, you should plan to remove the scanner from the DIN-E sleeve. This is easily done using the provided Removal Keys. Refer to the illustration that shows the removal key(s), on Page 30. Fully insert both Removal Keys into the slots on the left and the right edges of the radio’s dress panel. You cannot remove the radio if only one key is available.
Once the original radio is removed from the vehicle dash and the fit of the scanner is correct, be sure to connect all the power, audio, antenna, and any other cables or wires, to the scanner before the scanner is secured. The following illustration is a typical example of the ISO technique and the general side mounting screw holes often encountered. It does not actually represent your vehicle or your vehicle’s mounting bracket.
WARNING! Never connect anything other than the recommended amplified extension speaker to the scanner’s headphone jack. Damage to the scanner might occur. Connecting an Extension Speaker In a noisy area, an optional amplified extension speaker, positioned in the right place, might provide more comfortable listening. Plug the speaker cable’s 1/8-inch (3.5-mm) mini-plug into your scanner’s back-panel Ext. Sp. Jack.
Controls, Keys, and Functions 2 1 Antenna Connector Record Out External Spkr 5 4 6 13 7 3 9 8 10 11 12 DC Adapter DC Vehicle Power In GPS/Remote The knobs and keys on the BCD996T produce several different actions. You can, for example, rotate the knobs as well as press them to achieve a different result. Pressing a key briefly can produce one result while pressing and holding, gives a different result.
Control/Key [Power/VOL] Squelch Label 1 2 Scroll Control and 3 Function F [PRI] 40 4 Mode Action Result All Rotate Power ON — Volume Increase or decrease All Press Backlight enabled and intensity changes: Green Low-Green Medium-Green High-Red Low-Red Medium-Red High Function Press F then tap VOL Rotate Scroll Control Sets APCO threshold All Rotate Sets the Squelch Level to permit strong signals to be heard with no background noise or lower strength signals with some background noise P
Control/Key [WX] [GPS] [L/O] Label 5 6 7 Mode Action Result WX Scan or WX Alert Scan Press Toggle between WX Scan and WX Alert Scan Other Press Turn to toggle WX Alert Priority On and Off Press & Hold Starts WX Scan All Press Changes to GPS Mode GPS Press & Hold Stores current GPS data [GPS] + F Change GPS Display Press Temporarily locks out a system channel, a search frequency, or location data. Cancelled when Power is turned off.
Control/Key [0] to [9] Label 8 [4] move left [6] move right [.
Control/Key [EYES] Label 10 [SCAN/SEARCH] 11 Mode Action Result MENU Press Use as the key for menu choices Scan Scan Hold Press Edit the channel data for active channel Search Search Hold Close Call Close Call Hold WX Scan WX Scan Hold Press Saves the active frequency Tone-Out Standby Press Switches to Tone Out edit Menu to change Tone Out Settings Scan Hold Press Start Scanning Press Other than Scan or Scan Hold or GPS Instant switch to Scan Mode Search Hold F + Press Toggl
A Look At The Display The display has indicators that show the scanner’s current operating status. The display information helps you understand how your scanner operates. The LCD screens shown here are only a few of many that you will see while in different modes. The ones we show here are more common and will assist you to get started. 㪛㪸㪻㪼㩷㪚㫆㫅㫍㪼㫅㫋㫀㫆㫅㪸㫃 㪚㪪㪠㩷㪦㫇㪼㫉 1. 2. 3. 4. 5. 6. 7.
Operation Turning On the Scanner and Setting the Squelch To turn the scanner on, rotate [VOL] clockwise. Turn the knob to a comfortable sound level. Rotate the squelch control [SQ] clockwise until you either hear a broadcast or noise just stops. The control is now set for strong signals. If you desire to hear a weaker signal, turn it counter clockwise from that point until you hear background noise once more.
[MENU] J 4 Search for… JF 4 Edit Custom JF 4 Select a Custom RangeJF 4 Search with Scan JF 4 Set Startup KeyJF Assign all the systems/sites that you want to scan at the same time to the same startup key [0] to [9]. You can only assign a site/system to one startup key. To leave a system unassigned, press [.No]. Scanning Systems To begin scanning preprogrammed or programmed systems, press [SCAN/SEARCH].
Preprogrammed System Tips All systems preprogrammed into the scanner are assigned to a Quick Key. See “Preprogrammed Systems with Quick Keys” on Page 140 for a list of preprogrammed systems and their Quick Key assignments. Notes: • The systems preprogrammed into the scanner are located primarily in major metropolitan areas. • You might hear transmissions on frequencies assigned to very distant stations. This will happen if a local system also uses the same frequency.
Locking/Unlocking Systems Follow these steps to lock out a system so that it does not scan even if its quick key is selected. 1. Tap F to switch to the Function Mode then rotate the control to select the desired system. 2. Press [L/O] to temporarily lock out the system. Temporary L/O appears. Or, quickly press [L/O] twice to permanently lockout the system. Locked Out appears. 3. To unlock temporarily locked out systems, turn power off and then back on.
To toggle between ID Scan and ID Search, press while the scanner is scanning the system. F then press [SCAN/SEARCH] If the scanner does not scan the system long enough for you to easily do this, press F and rotate the Scroll Control to select the changed system. Then, press [SCAN/SEARCH] within 2 seconds. Holding On a System To temporarily hold on a system, tap F. To hold on a different system, tap F then rotate the control to select the system.
If you enter a frequency then press [EYES], the scanner stores it in the Qck Save Grp group in a system called Qck Save Cnv Sys. These groups are created if they do not exist. Then, the scanner prompts you to save other channel settings. If you enter a talk group ID then press [EYES], the scanner stores it into a channel group named Qck Save Grp in the current system.
Toggling the Display Mode To change the display so the channel and frequency or Talk Group ID appear instead of extended channel information, hold on any channel then press F + [0]. The scanner displays Display Mode 2. To return to Mode 1, press F + [0] Mode1 indicates the channel data under the Channel Name. Mode2 indicates the frequencies under the Channel Name for Conventional systems or the TGID number for Trunked systems.
Optimizing P25 Performance You can optimize the scanner’s performance with digital APCO 25 systems. Follow these steps for each system where you can hear APCO 25 traffic. Notes: These steps work only when you can clearly receive the system. If you are in a weak-signal area or receive interference, these steps will not work. These steps do not compensate for weak signals or signals subject to interference.
• The next to last line on the display now shows the digital error rate and the AUTO decode threshold start level (0-20). • The last line on the display shows the decode threshold levels for the system. Allow the scanner to monitor channel activity for several minutes. The error rate should drop for each transmission and the threshold levels should automatically adjust to a more optimal setting. Then, once the threshold level settles to a stable setting, write down these values.
Using the Menu The BCD996T incorporates an effective menu system that lets you make all the necessary setting options required to program the scanner and effectively use the many features. To use the menu, press [MENU]. You immediately see the screen display the menu title at the top and three of ten menu options beneath. Using the Multifunction Scroll Control, you can rotate the control left or right to quickly review all ten listings. The depth of each menu selection is extensive.
Programming General Settings This section covers your scanners general settings. Setting and Using the Backlight The LCD has a backlight that can be set to green or red with three levels of intensity for each color plus OFF. To make your selection, press [VOL]. Each time you press the control, the backlight cycles in the following order.
Manual — Use this setting to manually set the dimmer level to High, Middle, Low, or Off. To guide you in your selection, at each setting the display shows what you can expect to see. Setting the Backlight Color [MENU] J 4 Settings JF 4 Set Backlight JF 4 Set Color JF Set this option to either Red or Green. Adjusting the Key Beep [MENU] J 4 Settings JF 4 Adjust Key Beep JF Auto — the scanner automatically sets the key beep to match the master volume setting level you select.
Off — Press F to select. Setting the Display Orientation [MENU] J 4 Settings JF 4 Set Upside-down JF This setting controls the orientation of the display. If you set Upside-down to On, the scanner inverts the display text and graphics. Adjusting the Display Contrast There are 15 contrast levels. As you scroll from level 1 to 15 you see the contrast change. Press the Scroll Control to lock the desired level until the time you desire to change it.
Setting the Time Format [MENU] J 4 Settings JF 4 Set GPS Format JF 4 Set Time Format JF This setting controls the format used for displaying the time on the GPS data screens. 12H — the scanner displays time in 12-hour format using am for mornings and pm for evening times. 24H — the scanner displays time in 24-hour format using 0 for midnight and 23 for 11 pm.
your PC (default 115200 bps) and the back port to the speed used to communicate with an attached GPS (default 4800 bps). Note that the back port is male. You may need a gender changer and a null modem adapter to use a typical DB9 serial cable from the rear port.
2. While pressing [2], [9], and [HOLD] at the same time, turn on power. At that point anything you have programmed is gone. You are given a last opportunity to keep the factory programmed data when you see the question: Restore Preprogram List? Yes=”E”/”No= ”.” If you do not say Yes, the scanner is totally empty. Connecting Your Scanner to a Personal Computer You can connect your scanner, by means of the supplied cable, to a personal computer to download data from the computer to the memory of the scanner.
To clone (transfer) data directly from one BCD996T scanner to another BCD996T scanner, you must first connect the scanners to each other using the included connection cables and a DB9 null modem adapter and for the rear port, a DB9 gender changer (neither included), available at most computer stores. Then you must set one scanner as the source and the other as the target. Connected as shown, and with both ports correctly selected, no other hardware is needed. 1. Select the Front Port for the Master.
Programming Your Scanner Your BCD996T comes preprogrammed with over 500 state and local agencies, both analog and digital, selected from the most populous areas in the US. This should let you get started quickly to enjoy your new scanner. However, to get the most enjoyment from your scanner (especially if you do not live near one of these counties), you must customize the programming for your area. To edit an existing system, use the menu to navigate to the system setting you want to change.
System Settings MOTOROLA System Settings CNV EDACS TYPE I P25 / TYPE II Wide /Narrow SCAT LTR See Pages Edit Name • • • • • • P. 67 Edit Sys Option • • • • • • P. 68 • • • • • P. 76 • P. 83 Edit Site Edit Group • • • • Copy System • • • • • • P. 76 Delete System • • • • • • P. 76 LTR See Pages System Options MOTOROLA System Option Settings CNV TYPE I P25/ TYPE II EDACS WIDE/ NARROW SCAT Set Quick Key • P. 68 Set Startup Key • P.
MOTOROLA System Option Settings CNV EDACS LTR See Pages TYPE I P25/ TYPE II WIDE/ NARROW Set I-Call • • • P. 72 Emergency Alert • • • P. 73 • P. 73 EDCS ID Format • • • Rvw ID:Srch L/O • • Clr All L/O IDs • • Set Record Adjust P25 Level 64 • • SCAT • • P. 74 • • P. 74 • • P. 74 P.
Site Settings MOTOROLA TYPE I MOTOROLA P25/TYPE II EDACS Site Setting L T R 800MHz Standard 800MHz Splinter P25 800MHz Standard 800MHz Splinter 900MHz Band VHF Band UHF Band Edit Name • • • • • • • • • • Set Quick Key • • • • • • • • • • • • Set Startup Key • • • • • • • • • • • • Set Frequencies • • • • • • • • • • • • Set Modulation • • • • • • • • Set Attenuator • • • • • • • • • • • • Set Lockout • • • • • • • •
Channel Settings Channel Setting CNV MOT TYPE I MOT TYPE II/P25 EDACS LTR Edit Name • • • • • Edit Frequency • • • • • • • • • Edit TGID Set Audio Type • Set Modulation • Set Attenuator • Set Priority • Set Alert • • • • • Set Record • • • • • Set Lockout • • • • • Copy Channel • • • • • Delete Channel • • • • • New Channel • • • • • Programming Conventional Systems [MENU] J Program System JF 4 New System JF 4 Conventional JF Confirm? Yes=”E”
Programming Trunked Radio Systems [MENU] J Program System JF 4 New System JF Then, select the system type: MOT TYPE 1 — Motorola Type I systems MOT TYPE 2/P25 — Motorola Type II and APCO 25 systems EDCS WIDE/NARROW — EDACS Wide and Narrow systems EDCS SCAT — EDACS SCAT systems LT — LTR Systems The scanner creates an empty system with a default name of System n x. Note that “n” is a number that increments as you add new systems.
Specifying the Correct System Type In order for trunk tracking to work properly, you have to specify the correct system type when you create the system. Here are some tips for selecting the correct type: • Use online resources, such as the www.radioreference.com database, to identify the system type. • Even though a system has digital channels, it is not necessarily a P25 system.
Notes: • Access single-digit system/site Quick Keys by pressing the single digit on the keypad during scanning. Access two-digit system Quick Keys by pressing [.No] then both digits. • You can assign as many systems to the same quick key as you want. • To be scanned, a system’s Quick Key must be activated and the system must be unlocked.
Setting the System Hold Time C [MENU] J Program System JF 4 Select a conventional system JF 4 Edit Sys Option J F 4 Set Hold Time J F Set how long the scanner will remain scanning on this system before moving to the next system (up to 255 seconds). Note that the scanner will scan all unlocked channels at least one time, regardless of the system hold time setting.
This setting controls whether the scanner automatically skips channels it identifies as data. This includes channels with either no audio or a constant-level audio source. If turned on, the scanner resumes scanning as soon as it detects the data signal. Setting Location Information C [MENU] J Program System JF 4 Select a Conventional system JF 4 Edit Sys Option JF 4 Set LocationInfo JF This setting control whether the system is automatically enabled and disabled when you connect a GPS to the scanner.
Setting the Status Bit M [MENU] J Program System JF 4 Select a Motorola Type I or II system JF 4 Edit Sys Option JF 4 Set Status Bit JF Ignore — the scanner rounds all received ID’s down to the next interval of 16. The default setting is Ignore. Yes — the scanner treats all received ID’s as unique ID’s. Note: Motorola analog systems use talk group ID’s in multiples of 16. ID numbers that fall between these ID’s indicate special status flags for the system.
Off — the scanner ignores I-calls. The default setting is Off. Only — the scanner only tracks I-calls and ignores other radio traffic on the system. Press F to select. Note: To set the I-Call to a wildcard receive condition, press [.No] + [0]. Setting the Emergency Alert Option ME [MENU] J Program System JF 4 Select a Motorola Type I, II or EDACS Wide/Narrow system JF 4 Edit Sys Option JF 4 Emergency Alert JF Off — the scanner does not alert you to emergency transmissions.
Setting the System Record Option MELCS [MENU] J Program System JF 4 Select a system JF 4 Edit Sys Option JF 4 Set Record JF This setting controls how the scanner handles the record option for channels in the system. All Channel — The scanner sends the audio for all channels in the system to the REC jack, regardless of the channel’s record option setting. Marked Channel — The scanner only sends the audio for channels that have the Record option turned on to the REC jack.
Adjust the P25 Decode Threshold C [MENU] J Program System JF 4 Select a conventional system JF 4 Edit Sys Option JF 4 Adjust P25 Level JF This setting determines some system-specific parameters for digital channels. In most cases, setting this to Auto provides the best performance. However, you can also manually set the digital decode threshold. This setting affects all channels in the current system. See “Optimizing P25 Performance” on Page 52.
Copying Systems MECSL Occasionally you might want to copy and rename a system to highlight one group over another. One system might be called City - Fire and the same system City - PD with adjustments to data within. This lets you quickly locate the desired set of data.
MS1: Motorola 800 MHz Type I Standard MS2: Motorola 800 MHz Type II Standard MP1: Motorola 800 MHz Type I Splinter MP2: Motorola 800 MHz Type II Splinter P25: APCO 25 (all bands) M92: Motorola 900 MHz MV2: Motorola VHF MU2: Motorola UHF EDW: EDACS Wide EDN: EDACS Narrow Follow these steps to change the system name. [MENU] J Program System JF 4 Select a trunked systemJF 4 Edit Site JF 4 Select a Site JF 4 Edit Name JF To enter a letter, turn the Scroll Control until the character you want appears.
Notes: • Access single-digit system/site Quick Keys by pressing the single digit on the keypad during scanning. Access two-digit system Quick Keys by pressing [.No] then both digits. • You can assign as many systems to the same quick key as you want. • To be scanned, a system/site’s Quick Key must be activated and the system must be unlocked.
Note: If you select Control Channel Only mode (see “Setting Control-Channel Only (Motorola Systems Only)” on Page 81), you only need to enter the frequency(s) that can be assigned as the control channel. Most frequency lists usually indicate which of the frequencies are the control channel frequencies. Otherwise, you must enter all of the frequencies.
4 Edit SiteJF 4 Select a site JF 4 Set LockoutJF 4 Select from the following choices then press F Unlocked — the system is scanned when its quick key is enabled. Temporary L/O — the system is locked for this session. Lockout — the system is not scanned. Setting Site Hold Time MESL [MENU] J Program System JF 4 Select a trunked system JF 4 Edit Site JF 4 Select a site JF 4 Set Hold Time JF This setting controls how many seconds the scanner looks at a site before moving to the next unlocked site or system.
4 Select a site JF 4 Edit Band Plan JF You can enter up to 3 band plans. Select the plan to enter or edit, then follow the prompts to enter the Base Frequency, Channel Step, and Channel Offset for the site. Setting P25 Band Plans (P25 Only) The BCD996T includes two operation modes for P25 systems: explicit mode and implicit mode channel assignment. Explicit mode systems include all information needed to determine voice frequencies on the control channel.
This setting determines the frequencies you need to enter for Motorola systems. Select your setting, then press F. On — You only need to enter control channel frequencies. Off — You must enter all voice and control channel frequencies. Note: The scanner defaults to On.
Auto — the scanner automatically adjusts the digital decode threshold to match the transmission you are hearing when it receives a strong signal and has a high decode rate. Manual — lets you manually adjust the digital decode threshold. To manually adjust the P25 level, select Manual. Default — sets the digital decode threshold to the default value. Use this setting to return to the value that usually provides adequate performance.
Follow these steps to enter/edit the group name. 1. The current name displays with the first character of the name highlighted. 2. Rotate the Scroll Control to select a new first letter. Press [6] to move one character to the right. Repeat the Scroll Control action to change the character. To move one character to the left, press [4]. 3. Repeat Step 2 until you have entered the system name. Then press F to accept the setting. Notes: • Each group name can be up to 16 characters.
This setting determines whether the scanner will scan this group of channels. Select your setting, then press F. Lockout — the group is not scanned. Temporary L/O — the group is not scanned for this session. The L/O is cancelled when you cycle power. Unlocked — the group is scanned. The default setting is Unlocked. Deleting Channel Groups [MENU] J Program System JF 4 Select a system JF 4 Edit Group JF 4 Select a channel group JF 4 Delete Group JF MECL Confirm Delete? Yes=”E” / No= ”.
4 Select the channel JF 4 Edit Name JF Follow these steps to enter/edit the channel name. 1. The current name displays with the first character of the name highlighted. 2. Rotate the Scroll Control to select a new first letter. 3. Press [6] to move one character to the right. 4. Repeat the Scroll Control action to change the character. To move one character to the left, press [4]. Press [.No] twice to delete the current character. Press [.No] three times to clear the entire alpha tag. 5.
4 Select a channel group JF 4 Edit Channel JF 4 Select the channel JF 4 Edit TGID JF To edit the Talk Group ID, enter the Talk Group ID you want using the number keys. Then press F. Setting the Audio Type MECL For each channel, you can select the audio type that the channel receives.
4 Set Audio Type JF 4 Analog Only JF At this point you can scroll to CTCSS or DCS and select the subaudible frequency in the CTCSS range or the DCS code. 4 CTCSS or DCS JF This setting controls how a sub audible CTCSS or DCS is used for the channel. Select your setting, then press F. Off — any signal opens squelch. The default setting is Off. Search — the scanner searches for and displays any CTCSS or DCS tone that accompanies the transmission.
Auto — the scanner uses the default modulation for the channel. The default setting is Auto. AM — the scanner uses AM (amplitude modulation) for the channel. FM — the scanner uses FM (frequency modulation) for the channel. NFM — the scanner uses narrowband FM for the channel. WFM — the scanner uses wideband FM for the channel. WFM (Broadcast) — the scanner uses FM Broadcast for the channel. This setting controls the modulation method used for the channel.
This setting controls whether the scanner treats the channel as a priority channel while scanning. Select On or Off, then press F. On — when you turn on the Priority feature, the channel will be scanned every 2 seconds. Off — the channel will not be treated with priority. The default setting is Off.
Note: In order for the function to work, you must set the channel to record. You must also set the system’s record option to either All Channel (which will record all channels regardless of the channel’s record setting) or Marked Channel (which only records the channels you’ve set to record).
4 Select a channel JF 4 Delete Channel JF You see Confirm Delete? Yes= ”E” / No= ”.” Select one to delete the channel or to cancel.
Searching and Storing Service Search Service Search lets you select and search the scanner’s preprogrammed search ranges. During service search, the scanner searches starting with the lowest frequency in the search range you select to the highest frequency in the range. There are two ways to do this. [MENU] J 4 Search for ... JF 4 Service Search JF Select the service search range JF The other approach is: F + [SCAN/SEARCH] JF Quick Search? Yes=”E” / No=”.” Press [.
To lock out a frequency found while searching, press [L/O] one time to temporarily lock it out (Temporary L/O appears) or twice to permanently lock it out (Locked Out appears). Notes: • If all frequencies in the search range you selected are locked out, All Locked! appears and the scanner does not search the range. • If the service range you select uses channels (such as CB Radio or Marine), the scanner displays the service channel number.
The scanner starts custom search of the custom search range you selected, stopping on any transmission it finds and displaying the frequency. Turn the Scroll Control to change the search direction. An arrow appears, showing the current search direction. To turn search ranges on or off, press [0] and [1] - [9]. To hold searching, press [HOLD/RESUME]. To resume searching, press [HOLD/RESUME]. To lock out a frequency found while searching, press [L/O].
Set Delay Time — lets you set the amount of time the scanner will delay before continuing to search after a transmission ends. Set Modulation — lets you set the custom search range’s modulation type. Set Attenuator — lets you set whether the scanner will attenuate reception by 20 dB during search. Set Data Skip — lets you set whether the scanner will skip data transmissions during search. Set Step — lets you set the custom search range’s step (the gap between frequencies).
for your metropolitan area that are unlocked and have their System Quick key enabled. In addition to this scan you can search any of the preprogrammed service or custom search ranges. While scanning, press F. Rotate the Scroll Control until you reach the desired service or custom search range. Press [L/O] to unlock it. You can also assign a System Quick Key to the search to make it easy to quickly enable/disable the search range for search and scan.
Set Delay Time Choose a delay time to set how long the scanner stays on a transmission after it ends. 4 to select a value from 1 sec, 2 sec, 3 sec, 4 sec, 5 sec, and Off. JF Set Attenuator Choose to attenuate all frequencies by about 20 dB. 4 to select to choose an attenuation for all frequencies in the range. JF On — the frequencies are attenuated. Off — the frequencies are not attenuated. Set Record 4 to enable real time audio output from REC to an audio recording device.
Saving a Found Channel (Quick Save) If you hold on a channel or receive a desired channel, you can save it by pressing [EYES] instead of using Direct Entry. The alpha data is also stored. If a GPS unit is attached, the longitude and latitude data is saved and becomes the name of that channel. For example, if the position is 32°57’33.60 N latitude and 97°05’34.18 W longitude, the name saved is 3257.33-09705.34.
line changes to Memory Check when the scanner detects a transmission while it is checking to see if the frequency has already been stored. When the scanner finds an active transmission, it checks to see if the frequency has already been stored in the system. If it has already been stored, the scanner continues to search. If the frequency has not been stored, it stores the frequency into a group named Found Channels, then resumes searching. The scanner creates this group if it doesn’t already exist.
Using the Close Call Feature Your scanner’s Close Call™ feature lets you set the scanner so it detects, displays the frequency of, and lets you hear a nearby strong radio transmission. You can set the scanner so the Close Call feature works “in the background” while you are scanning other frequencies, turn off normal scanning while the Close Call feature is working, or turn off the Close Call feature and use the scanner normally.
Call mode and stores any Close Call hits, up to the maximum you specified in the Max Auto Store setting. If the scanner stores more hits than this setting, it stops auto store operation. Turn the Scroll Control 4 to display an option, then press F. Set CC Mode — Lets you select the Close Call mode. If you set CC Pri, then every 2 seconds the scanner switches the filter settings to the ones set by the CC Bands option. This does not occur with CC DND. Off — Close Call is turned off for all modes.
Set CC Bands — Lets you select the Close Call band settings. You can turn the following bands on or off. VHF Low 1 — (25.0000 - 53.9800 MHz) VHF Low 2 — (54.0000 - 107.9000 MHz) Air Band — (108.0000 - 136.9750 MHz) VHF High 1 — (137.0000 - 224.9800 MHz) VHF High 2 — (225.0000 - 319.9750 MHz) UHF — (320.0000 - 512.0000 MHz) 800MHz+ — (764.0000 - 775.9875 MHz, 794.0000 - 823.9875 MHz, 849.0125 868.9875 MHz, 894.0125 - 956.0000 MHz,1240.000 - 1300.
resuming scan. This lets you continue to hear transmissions detected with the Close Call feature, even after you are no longer close enough to receive it as a Close Call hit. Follow these steps to set up the option. [MENU] J 4 Close Call JF 4 Hits with Scan JF 4 Set Quick Key or Set Lockout or Set Hold Time JF Set the available option as you would for other menu items. This special channel group is automatically cleared whenever you cycle the scanner’s power.
Search and Close Call Options The settings in this section affect custom searches, service searches, and Close Call operation. The following table shows what options are available for various search modes. Setting Freq.
Unlocking All Frequencies [MENU] J 4 Srch/CloCall Opt JF 4 Freq Lockouts JF 4 Unlock All JF The scanner prompts you to confirm the change in lockout status. To confirm the change of all locked-out frequencies, press F. If no frequencies are locked, you see Nothing Locked Press Any Key. Otherwise, to cancel, press [MENU].
This setting determines whether the scanner automatically ignores transmissions found during Custom Search, Quick Search, or Close Call operation that are on common broadcasts, paging systems, and other annoyance radio sources. Note: Broadcast screening does not work in All service search ranges. Set All Band On — turns on broadcast screen on each band. Set All Band Off — turns off broadcast screen on each band. Set Each Band — lets you set broadcast screen only on specific bands you select.
4 Repeater Find JF 4 On or Off JF This feature sets whether the scanner tries to tune to a repeater output frequency during Custom Search, Quick Search, or Close Call operation when it detects a transmission on a repeater input frequency.
AM — the scanner uses AM (amplitude modulation) for the frequency band. FM — the scanner uses FM (frequency modulation) for the frequency band. NFM — the scanner uses narrowband FM for the frequency band. WFM — the scanner uses wideband FM for the frequency band. WFM (Broadcast) — the scanner uses FM Broadcast for the frequency band. Setting Attenuation Turn on this setting if you are near other strong signal sources.
Setting the Delay Time [MENU] J 4 Srch/CloCall 4 Set Delay Time JF Opt JF This setting determines how long the scanner waits after a transmission ends before resuming Quick Search or Close Call operation. 1-5 sec — The scanner waits the set amount of time after the transmission ends before resuming. The default setting is 2 sec. Off — The scanner resumes immediately when the transmission ends.
Adjust P25 Level You can select the best threshold for the APCO mode. [MENU] J 4 Srch/CloCall Opt JF 4 Adjust P25 Level JF Auto — The automatic adjust feature is enabled. Manual — you can set the threshold manuals depending on your circumstances. Default — sets the factory default value. Note: Applies to P25 signals received during Search and Close Call. Priority Scan If you activate a Priority Scan while scanning, the radio interrupts its scan every two seconds to check the priority channel (P-Ch).
[MENU] J 4 Set Priority JF 4 Choose Off, On, or Plus On JF 112
Using Weather Alert (SAME) Your BCD996T has been primarily designed as a multi-band, general services scanner. While it incorporates a weather alert ability as one of its features, we recommend that you not use the scanner as your sole means for receiving emergency alerts. Your local electronics retailer can supply a selection of weather radios that are dedicated to weather service monitoring including SAME alerts. Such radios can be more dependable for this application.
Turning Weather Alert On/Off In weather alert mode, your scanner functions as a severe weather warning radio. This is especially useful when your area is expecting severe weather conditions late at night. When you set the scanner to weather alert mode, it holds on the weather channel, but does not play the channel’s audio. If it detects a weather alert, it sounds a tone, displays information about the weather alert, and turns on the audio so you can hear the weather broadcast.
SS: The state code. CCC: The county code. For example, Tarrant County in Texas is assigned to FIPS code 048439. 0 indicates the entire county 48 indicates the state of Texas 439 indicates Tarrant County To get the FIPS code for your county, visit the National Weather Service web site at http://www.nws.noaa.gov and search for “FIPS Listing”. [MENU] J 4 WX Operation JF 4 Program SAME JF Select the SAME group to edit JF Edit Name — enter the name you want to assign to the SAME group you selected.
Fire Tone-Out Your scanner can be set to respond to fire tone-outs, a system comprised of standardized two-tone sequential paging, short one-tone paging, and long group tone paging. You can save up to 10 settings. When you select a setting in standby mode, the scanner also monitors for any other setting that uses the same transmit frequency, modulation, and attenuation settings. To quickly switch to Fire Tone-Out mode, press F and then [SQ].
• Edit Frequency — Enter the desired frequency that the scanner should monitor for the tone-out. • Set Modulation — Set the modulation type for the paging signal. Next choose the modulation setting: • Auto — The scanner uses the default modulation for the frequency band. If the default modulation is AM, WFM, or FMB, the modulation operates as FM. • FM — The scanner uses FM for the frequency band. This is the default setting. • NFM — The scanner uses NFM modulation.
After you select an alert pattern, the scanner prompts for the alert level for a received alert. Level options 1 to 15 sets a fixed audio level independent of the main volume setting. AUTO uses the main volume setting for the alerts. Tone-Out Multi-Channel Monitoring The scanner can check multiple tone combination pages for channels whose settings are the same. To achieve this, set the channel to the same frequency, modulation, and attenuation.
Using the BCD996T with a GPS The scanner lets you connect a compatible GPS device to it to provide two very convenient operation features: • automatically locks and unlocks systems and sites based on data you input. This fine-tunes the scanning operation and makes it that much enjoyable. • provides you with valuable displayed information and audio alerts for Points of Interest, Dangerous Roads, and Dangerous Crossings. The GPS works in close coordination with your scanner.
Location-Based (GPS) Scanning The BCD996T uses data, supplied by an attached GPS unit, that lets the radio automatically unlock and lockout sites based on the geographical information you provide. • Latitude (the center of the range or site) • Longitude (center of the range or site) • Range (the radius of a circle around the latitude and longitude coordinates selected from up to 50 miles form that center.
Another Example of Multiple Site Creation The geographic area of Arlington, TX, is separated into multiple site locations to enable automatic lockout and unlock as one moves from area to area. Non-Radio Location Based GPS Features When connected to a GPS, you can program specific location information which will trigger an alert from the scanner. The scanner becomes an extension of the GPS device. The following geographical values are typical of use you might find valuable while traveling.
To store your current location, press and hold [GPS] for more than 1 second. You are prompted to enter the type of entry (Dangerous Xing, Dangerous Road, or POI), as well as the other location parameters. When you set the beep type, you are next prompted to set the alert volume. The following table shows the attributes available for each category. Note that some options are different for a specific location type. Refer to the information that follows to set those specific attributes.
Type JF At this level you have an opportunity to reassign or edit the location type you first selected and set the location to either one of the other types or change the data in an existing location. 4 Set 4 Set 4 Set LocationInfo JF Input the latitude and then the longitude. Lockout JF As you near your target location, an alert sounds at 0.5, 0.25, and 0.1 mi. You can stop this operation by pressing [L/O]. All the data is retained. You can use the menu Lockout option as well.
An Example of a POI Alert The Uniden America Corporation is located at 4700 Amon Carter Blvd in Ft. Worth, TX. The Latitude and Longitude of the front entrance is 32° 50’00.63” N and 97°02’54.16” W. When you program that data as a POI, you can select alert ranges of .1, .25, .5, .75, 1.0, 1.5, and 2.0 mile distances to the POI. Shown on the map are .5 and 1.0 mile markers. You are alerted when you come within range of your set distances.
Car One The BCD996T, a GPS, and a Dangerous Road Car One is driving south. Car Two is driving east. Car One is alerted since the Latitude and Longitude of the Dangerous Road is programmed as well as the Range and the Direction. When all three conditions are met, the alert sounds. Since Car Two is going east, no alert sounds. Programmed Settings 41° 17’ 58.64” N 74°11’ 10.30” W Heading South Car Two 4 Location to be deleted JF 4 Delete Location JF 4 Confirm Delete? Yes=”E” / No=”.
GPS Review Location Mode If you have programmed data for a Point of Interest, Dangerous Crossing, and a Dangerous Road, you can review each set on a screen dedicated to showing just that data. Press [EYES] in GPS Mode. The most recent stored location is displayed. Use the Scroll Control to display the next screen for review. Important: While you are in normal GPS mode or Scan Mode and you press and hold [GPS] for 2 seconds, location data at that point is stored.
4 — select a programmed location from all stored locations. The location data is stored in the order POI, Dangerous Xing, and Dangerous Road. Then, in each category, the data is stored using the programmed name. 1. 2. 3. 4. 5. POI — Indicates a Point of Interest location. DXG — Indicates a Dangerous Crossing location. DRD — Indicates a Dangerous Road location. Range — Indicates the programmed distance to your POI.
Care and Maintenance General Use Turn the scanner off before disconnecting the power. If memory is lost, simply reprogram each channel. Always press each button firmly until you hear the entry tone for that key entry. Location Do not use the scanner in high-moisture environments such as the kitchen or bathroom. Avoid placing the unit in direct sunlight or near heating elements or vents.
Troubleshooting From time to time, Uniden might update the BCD996T’s firmware to change the scanner’s performance or incorporate new features. These updates can be applied by you using the supplied PC cable and the software that we will provide. Please note that firmware data must be input by means of the front panel serial cable connection, not the rear connector. We recommend you visit the Uniden web site periodically to check for the latest updates.
Problem Scan won’t start. Weather scan doesn’t work. Possible Cause Suggestion You must press [SCAN/SEARCH] to scan. Press [SCAN/SEARCH]. The squelch might need to be adjusted. Adjust the squelch threshold. See “Turning On the Scanner and Setting the Squelch” on Page 45. One or more channels might be locked out. Make sure the channels you want to scan are not locked out. The antenna might need to be adjusted. Check the antenna connection. The squelch might need to be adjusted.
Problem Possible Cause Suggestion Scanner won’t acquire the data channel. The squelch might need to be adjusted. Adjust the squelch threshold. See “Turning On the Scanner and Setting the Squelch” on Page 45. The frequency used for the data channel might be missing. Check your frequency list for the data channel. The scanner might need to be changed to a Type 1 scanner setup. Change to a Type 1 scanner setup. See the programming instructions on the web at www.uniden.com/scanners.
Specifications Certificated accordance with FCC Rules and Regulations Part 15 Subpart C as of date of manufacture. Dynamic Allocation Capacity Systems : 500 max Groups : 20 per system Site : 1000 max (All) 256 per system Channels : up to 6000 (3000 typical) Channels per Trunked System : up to 250 Band Coverage : 31 Bands Frequency Range : Range (MHz) 25.0000 to 26.9600 26.9650 to 27.4050 27.4100 to 27.9950 28.0000 to 29.6800 29.7000 to 49.9900 50.0000 to 53.9800 54.0000 to 71.9500 72.0000 to 75.
Range (MHz) Step (kHz) 764.0000 to 775.9875 12.5 794.0000 to 805.9875 12.5 806.0000 to 823.9875 12.5 849.0125 to 868.9875 12.5 894.0125 to 956.0000 12.5 1240.0000 to 1300.0000 25 Mode NFM NFM NFM NFM NFM NFM Public Service Band Public Service Band Public Service Band Public Service Band Public Service Band 25 cm Amateur Band Sensitivity (nominal) 12dB SINAD : 0.4µV 0.3µV 0.7µV 0.3µV 0.6µV 0.4µV 0.3µV 0.6µV 0.3µV 0.4µV 0.4µV 0.3µV 0.7µV 25 - 27.995 MHz 28 - 53.98 MHz 54 - 71.95 MHz 72 - 75.
Remote Interface Jack 4pin Mini Type GPS / Remote Interface Jack D-sub 9pin Male Type Ext. DC Power / ORNG Wire Jack 3pin (Center Orange Wire) Operating Temperature : Size : Nominal -20°C to +60°C -4°F to +140°F Close Call -10°C to +60°C +14°F to +140°F 7.2 in. (W) x 5.9 in. (D) x 2.2 in. (H) 183mm (W) x 150mm (D) x 56mm H) Weight : 3.46 lbs [1.57 kg.] (without Mounting Bracket) Features, specifications, and availability of optional accessories are all subject to change without notice.
Reference Preset Fleet Maps Note: Size Codes in parenthesis indicates that the Size Code spans more than one block.
Preset Map 7 Block 0 1 2 3 4 5 6 7 Size Code Size Code 10 Size Code 10 Size Code 11 Size Code 4 Size Code 4 Size Code 4 Size Code 4 Size Code 4 Preset Map 9 Block 0 1 2 3 4 5 6 7 Size Code Size Code 4 Size Code 4 Size Code 0 Size Code 0 Size Code 0 Size Code 0 Size Code 0 Size Code 0 Preset Map 11 Block 0 1 2 3 4 5 6 7 Size Code Size Code 4 Size Code 0 Size Code 0 Size Code 0 Size Code 0 Size Code 0 Size Code 0 Size Code 0 Preset Map 13 Block 0 1 2 3 4 5 6 7 136 Size Code Size Code 3 Size Code 3 Siz
Preset Map 15 Block 0 1 2 3 4 5 6 7 Size Code Size Code 4 Size Code 4 Size Code 4 Size Code 11 Size Code 11 Size Code 0 Size Code 12 (Size Code 12) Preset Map 16 Block 0 1 2 3 4 5 6 7 Size Code Size Code 3 Size Code 10 Size Code 10 Size Code 11 Size Code 0 Size Code 0 Size Code 12 (Size Code 12) User Defined Fleet Maps Type I Programming Information When a Type I system is designed, the address information for all the ID’s is divided into 8 equal sized blocks, numbered 0–7.
seems. Select a size code for a block, and then press Scan. Now listen to the communications. If you decide you are receiving most of the replies to the conversations with ID’s assigned to the block you just programmed, then you’ve probably selected the right size code and can work on the next block of the map. Finally, for most public safety systems there are some size codes which are more common. S-3 and S-4 are probably the most common, followed by S-10, S-11, and S-12.
Preprogrammed Systems and Lockout Options Your scanner is preprogrammed with over 500 channels covering police, fire, and ambulance operations in the 25 most populated counties in the US. The following list details the preprogrammed information. By default, only the Nationwide systems are unlocked, and your scanner begins to scan them when you turn it on. To speed up scanning, you can lock out systems that are beyond your reception area (typically no more than 25 miles using the supplied antenna).
Preprogrammed Systems with Quick Keys State, or City Area Alameda, CA Area Alaska Albuquerque, NM Area Atlanta, GA Area Austin, TX Area Boston, MA Area Charlotte, NC Area Chicago, IL Area Cincinnati, OH Area Cleveland, OH Area Colorado Connecticut Dallas-Fort Worth, TX Area Detroit, MI Area Harrison County, WV Houston County, GA Houston, TX Area Indiana Las Vegas, NV Area Los Angeles, CA Area Massachusetts Miami-Dade, FL Area Michigan Minnesota Montana Nationwide New York City, NY Area Newark, NJ Area Oakla
State, or City Area Quick Key San Antonio, TX Area San Diego, CA Area Santa Fe, NM Area Seattle, WA Area South Texas St. Clair County, IL Tucson, AZ Area Virginia 54 26 44 57 55 33 23 56 CTCSS Frequencies 67.0 82.5 100.0 123.0 151.4 171.3 189.9 210.7 69.3 85.4 103.5 127.3 156.7 173.8 192.8 218.1 71.9 88.5 107.2 131.8 159.8 177.3 196.6 225.7 250.3 74.4 91.5 110.9 136.5 162.2 179.9 199.5 229.1 254.1 77.0 94.8 114.8 141.3 165.5 183.5 203.5 233.6 79.7 97.4 118.8 146.2 167.9 186.2 206.5 241.
506 612 703 142 516 624 712 523 627 723 526 631 731 532 632 732 546 654 734 565 662 743 606 664 754
Index A Alert Channel 13 Custom 13 Dangerous Xing-Road 123 Duplicate Frequency 14 Emergency 73 GPS 15 POI 124 Setting Channel 90 Weather 15, 113 Antenna 19, 31, 33, 37 APCO 14, 15, 24, 26, 40, 52, 87, 111 Attentuator, Attenuation 13, 44, 79, 89, 98,109 Auto Store 16, 99, 101, 102, 108 B Backlight 14,35, 55, 56 Band Plan 80-81 Beep 26 Alert 73, 123 Close Call 102 Key 56 Birdies 14, 128 Broadcast 13 Broadcast Screen 106 C Channel Add CTCSS/DCS 87 Alert 13 All 33 Attenuation 89 Control 15, 25, 26 Control Mode
CTCSS Display Indicator 44 Frequencies 141 Quick Save 88 Selecting 87 What is 22 D Dangerous Xing, Road Deleting Location 124 Option Setting 122 Review Mode 126 Road 121 Screens 127 Settings 123 Xing 121 Data Alpha 99 Channel 51 Download 60 GPS 58 LCN 26 Programming 16 SCAT 27 Setting Skip 109 Skip 14, 70 Talk Group 26 Transfer 60 Dimmer 14, 35, 55 DIN-E 31, 34, 36 E Edit Channel Data 43 Menu 43 System 62 System Name 67 Tone Out 43 Editing Band Plan 80 Channel Groups 75 Channel Name 85 144 Channels 84 Cus
Options 139 Search Limits 17 Setting 91 Sites 79, 120 Systems 69 LTR Display 84 ID 27 LCN 78 Scan Time 80 Site Limit 76 Trunking 27 M Menu 17 Entering Text 18 Using 18, 54 Motorola Band Plan 80 Control Channel 82 Edit System Names 67 Emergency Alert Options 73 End Code 72 Fleet Maps 71 I-Call 29 Specifying System Type 68 Status Bit 72 Trunking 25 Types 26 Multi-Site 14, 28 N NOAA 113, 115 P POI Display 127 Distance 58 Example 124 Location, Range 121 Lock, Unlock 126 Only For 123 Setting 122 Port 58, 61 Pre
Frequency Step 110 ID 48 Lockout Limits 17 Quick 94 Range 45 Reviewing ID Lockouts 74 Scan Delay 13 Service 93 Store ID 49 Trunked and Store 100 Weather 15 What Is 22 Squelch 13, 22, 45, 60 Subfleet 26-27, 137 W Weather Alert Priority 115 Features 15 SAME Alert 15 Searching 113 Turning on Alert 114 146
One-Year Limited Warranty Important: Evidence of original purchase is required for warranty service. WARRANTOR: UNIDEN AMERICA CORPORATION (“Uniden”) ELEMENTS OF WARRANTY: Uniden warrants, for one year, to the original retail owner, this Uniden Product to be free from defects in materials and craftsmanship with only the limitations or exclusions set out below. WARRANTY DURATION: This warranty to the original user shall terminate and be of no further effect 12 months after the date of original retail sale.
defective, pack the Product carefully (preferably in its original packaging). Include evidence of original purchase and a note describing the defect that has caused you to return it. The Product should be shipped freight prepaid, by traceable means, or delivered, to warrantor at: Uniden America Corporation Parts and Service Division 4700 Amon Carter Boulevard Fort Worth, TX 76155 (800) 297-1023, 8:00 a.m. to 5:00 p.m.
MEMO MEMO 149
MEMO 150
MEMO MEMO 151
OUTSIDE BACK COVER