▲ Uniden Data 2000 Wireless CDPD PC Card Contents Section 1 - Uniden Data 2000 Introduction . . . . . . . . . . . . . . . .1-1 1.0 1.3 1.4 1.5 1.6 1.7 Getting Ready . . . . . . . . . . . . . . . . . . . . . . . . . . . . . . . . . . . . . . . . .1-1 What is the PCMCIA Standard for PC Cards? . . . . . . . . . . . . . .1-2 Product Highlights . . . . . . . . . . . . . . . . . . . . . . . . . . . . . . . . . . . .1-3 Package Contents . . . . . . . . . . . . . . . . . . . . . . . . . . . . . . . . . . . . . .
▲ Uniden Data 2000 Wireless CDPD PC Card 2.8.6 Adding TCP/IP Protocol Support . . . . . . . . . . . . . . . . . . . . . . . . . . .2-50 2.8.7 Connecting to the CDPD Network . . . . . . . . . . . . . . . . . . . . . . . . .2-51 2.9 Installation Procedures/Windows CE . . . . . . . . . . . . . . . . . . .2-52 2.10 Using Windows CE Remote Networking . . . . . . . . . . . . . . . . .2-53 2.10.1 Installing Remote Networking . . . . . . . . . . . . . . . . . . . . . . . . . . . . .2-53 2.10.
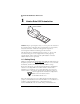
▲ Uniden Data 2000 Wireless CDPD PC Card 1 Uniden Data 2000 Introduction RAISE ANTENNA Caution - Before operating this device, be sure to place the antenna in the vertical position. This offers the best performance of your modem, and, at the same time, reduces the risk of possible exposure to electromagnetic radiation emanating from the antenna.
▲ Uniden Data 2000 Wireless CDPD PC Card 1.1 What is the Uniden Data 2000? The Uniden Data 2000 is a wireless CDPD (Cellular Digital Packet Data) PC Card which enables most laptops, hand held computers, and Personal Digital Assistants with Type II PC Card slots to communicate with host-based applications such as web servers, intranet servers, databases, dispatch systems, and other host computer systems. The Uniden Data 2000 uses the Internet suite of protocols running over the CDPD system.
▲ Uniden Data 2000 Wireless CDPD PC Card In 1989, an international standards body and trade association was founded, called the PCMCIA (Personal Computer Memory Card International Association.). This organization was founded to establish standards for Integrated Circuit cards and to promote interchangeability among mobile computers where ruggedness, low power, and small size are critical.
▲ Uniden Data 2000 Wireless CDPD PC Card 1.5 Package Contents ● Uniden Data 2000 Wireless CDPD PC Card: The physical module containing all of the electronic and other hardware elements. (Includes the battery compartment, antenna and PCMCIA interface connector.) The PC Board is protected by a clam shell structure made from a 2-piece plastic sub-frame, molded together with a stamped stainless steel cover.
▲ Uniden Data 2000 Wireless CDPD PC Card 1.7 Battery Life Expectations The Uniden Data 2000 is powered by 4 AAA size alkaline batteries that, depending upon your application, should provide you with several days of use.
▲ Uniden Data 2000 Wireless CDPD PC Card 1.8 Host Computer System Requirements Before you install the Uniden Data 2000 Setup and Installation software, please check your host computer to make sure that it meets or exceeds the following system requirements: Minimum requirements for MSWindows computer: ● PC with a 486/33DX or higher processor; Pentium 90 or higher recommended ● Microsoft Windows 95 or higher, or NT 4.
▲ Uniden Data 2000 Wireless CDPD PC Card 2 Setting Up the Uniden Data 2000 This chapter explains how to set up the Uniden Data 2000 for operation with host computers running Windows 95/98, Windows NT and Windows CE. 2.1 Setup Preparation 2.1.1 Hardware Required for Uniden Data 2000 Setup ● A host terminal, (laptop or hand held computer). ● The Uniden Data 2000 Wireless CDPD PC Card. 2.1.
▲ Uniden Data 2000 Wireless CDPD PC Card should be ready for use. If you have a problem or question, please review the manual or contact Technical Support at 1 (888) 6UNIDEN. Check the following: ● Has the Uniden Data 2000 host application loaded properly on the host computer? ● Have you established a CDPD data account with your cellular CDPD provider? ● Is there a Dial Up Networking Icon on your host computer for the Uniden Data 2000 .
▲ Uniden Data 2000 Wireless CDPD PC Card 2.2 Uniden Data 2000 Host Application Installation The Uniden Data 2000 host applications, UDConfig and UDInsight are distributed on a CD-ROM and floppy disks: the Uniden Data 2000 Setup and Installation CD-ROM and floppy disks. These applications must be downloaded to the host terminal, in order to set up the host applications to use with the Uniden Data 2000. To install and set up the UDConfig and UDConfig host applications, take the following steps: 1.
▲ Uniden Data 2000 Wireless CDPD PC Card 6. Click Next. Note: Host application software needs to be installed once, (when you initially set up the Uniden Data 2000 for use with a particular host computer); however, you must repeat the installation process for each new host computer used with the Uniden Data 2000. 7. Click Next.
▲ Uniden Data 2000 Wireless CDPD PC Card 8. Enter the DNS of your provider. (See Section 2.1.3, Requesting Service Activation, for details.) 9. Click Finish to Restart Computer. Please go to the following section, depending on your host computer operating system.
▲ Uniden Data 2000 Wireless CDPD PC Card 2.3 Installation Procedures/Windows 95 Follow the steps below to setup Dial-up Networking to connect your Uniden Data 2000 to the Internet. To install the Uniden Data 2000, take the following steps: 1. Insert the Uniden Data 2000 into the PC Card slot of the host terminal you are using. 2. Move the On/Off Power Switch to the ‘on’ position. The following dialog box displays on screen: 3. Click Next. 4.
▲ Uniden Data 2000 Wireless CDPD PC Card 5. The following dialog box displays on the screen: 6. Click Finish. The Location Information dialog appears. To check to see which COM port was selected during the setup process, take the following steps: 7. Click the Start button on your Windows 95 desktop, then select Settings, Control Panel.
▲ Uniden Data 2000 Wireless CDPD PC Card The following dialog box displays on the screen: 8. Double-click the Modems icon.
▲ Uniden Data 2000 Wireless CDPD PC Card 9. Select Uniden Data 2000 PC Card from the modems listed in the dialog box. 10. Click Properties. The following dialog box displays on the screen. 11. The COM port that was selected during the setup process is displayed on the General tab. 12. Click OK.
▲ Uniden Data 2000 Wireless CDPD PC Card 2.3.1 Verifying the Connection The host computer should display a Uniden Data 2000 icon in the system tray when the PC Card has made a proper connection. If you do not see this icon on the screen, take the following steps to determine if your host computer has been set to display system tray icons. 1. Click the Start button on your Windows 95 desktop, then select Settings. Control Panel. 2. Double-click the PC Card (PCMCIA) icon.
▲ Uniden Data 2000 Wireless CDPD PC Card The following dialog box displays on the screen: 3. Select the Show control on task bar check box, then click OK. If you have verified that the host computer has been set to display system tray icons, and you do not see the Uniden Data 2000 icon in the system tray, then the Uniden Data 2000 has not made a proper connection. If the Host Applications (UD Config and Insight) have loaded successfully, go to Section 2.
▲ Uniden Data 2000 Wireless CDPD PC Card 2.4 Using Windows 95 Dial-Up Networking To use your Uniden Data 2000 modem with Windows 95 Dial-up Networking, take the following steps: 2.4.1 Checking Dial-Up Networking Installation To determine if dial-up networking is already installed, double-click on the My Computer icon. If you don't see an icon for Dial-Up Networking, you will need to add this feature: 2.4.2 Installing Dial-Up Networking.
▲ Uniden Data 2000 Wireless CDPD PC Card 6. Insert Uniden Data 2000 Setup and Installation floppy disk or CD-ROM with rnaplus.inf. Check file path. Click OK. . 7. Check the box for the Unix Connection for Dial-Up Networking, then click Install.
▲ Uniden Data 2000 Wireless CDPD PC Card 2.4.4 Setting Up Dial-Up Networking for SLIP To set up Dial-up Networking, take the following steps:: 1. Double-click on the My Computer icon. 2. Open the Dial-Up Networking folder. 3. Double-click on the Make New Connection icon. Follow the instructions provided for making a new connection. 4. When you are instructed to select a modem, click on Uniden Data 2000 PC Card. Change the name of the connection from My Connection to PC Card SLIP. Click Next. 5.
▲ Uniden Data 2000 Wireless CDPD PC Card 2.4.5 Setting Up Dial-Up Networking for PPP Dial-Up Networking for PPP is automatically created when installing UD Host Application (Section 2.2) If the computer has installed multiple modems, make sure to click on Connect Using and select Uniden Data 2000 PC Card. To setup Dial-Up Networking for PPP, take the following steps: 1. Double-click on the My Computer icon. 2. Open the Dial-Up Networking folder. Verify that a file PC Card PPP was created.
▲ Uniden Data 2000 Wireless CDPD PC Card 7. Click Next, then click Finish to create a new Windows 95 connection icon named Pccard. 8. Click on Server Type. 9. From the Type of Dial-Up Server box, click on PPP: Windows 95, Windows NT, Internet. 10. In the Advanced Options box, deselect Log on to Network, Enable software compression, and Require encrypted password. 11. In the Allowed network protocols box, deselect NetBEUI, and IPX/SPX Compatible. 12. Select TCP/IP.
▲ Uniden Data 2000 Wireless CDPD PC Card 13. From the TCP/IP Settings box, if you have been given the address of a Domain Name Server (DNS), select Specify name server addresses. Enter the address as your Primary DNS. Note: A DNS is needed to access sites by name, i.e. www.uniden.com. 14. Deselect Use IP header compression. 15. Select Use default gateway on remote network. 16. Click on OK 3 times to exit the properties program. 2.4.
▲ Uniden Data 2000 Wireless CDPD PC Card 2.5 Installation Procedures/Windows 98 Follow the steps below to create Dial-up Networking to connect your Uniden Data 2000 to the Internet. To install the Uniden Data 2000, take the following steps: 1. Insert the Uniden Data 2000 into the PC Card slot of the host computer you are using. 2. Move the On/Off Power Switch to the ‘on’ position. The following dialog box displays on screen: 3. Click Next.
▲ Uniden Data 2000 Wireless CDPD PC Card 4. Select Display a list of all the drivers in a specific location , so you can chose the driver you want. Click Next. 5. Select Modem from the list and click Next.
▲ Uniden Data 2000 Wireless CDPD PC Card 6. Click Have Disk… 7. When Install From Disk dialog appears, change the drive name to an appropriate one in Copy manufacturer's files from such as D:\ for CD-ROM. Then click OK.
▲ Uniden Data 2000 Wireless CDPD PC Card 8. Click Next. 9. Click Next.
▲ Uniden Data 2000 Wireless CDPD PC Card 10. Click Finish. To check to see which COM port was selected during the setup process, take the following steps: 1. Click the Start button on your Windows 98 desktop, then select Settings, Control Panel. 2. Double-click the Modems icon. 3. Select Uniden Data 2000 PC Card. 4. Click Properties. The following dialog box displays on screen: 5. The COM port that was selected during the setup process is displayed on the General tab.
▲ Uniden Data 2000 Wireless CDPD PC Card 2.5.1 Verifying the Connection The host computer should display a Uniden Data 2000 icon in the system tray when the PC Card has made a proper connection. If you do not see this icon on screen, take the following steps to determine if your host computer has been set to display system tray icons: 1. Click the Start button on your Windows 98 desktop, then select Settings, Control Panel. 2. Double-click the PC Card (PCMCIA) icon.
▲ Uniden Data 2000 Wireless CDPD PC Card The following dialog box displays on screen: 3 Select the Show control on taskbar check box, then click OK. If you have verified that the host computer has been set to display system tray icons, and you do not see the Uniden Data 2000 icon in the system tray, the Uniden Data 2000 has not made a proper connection. Remove and reinsert the Uniden Data 2000. If it still does not connect, contact Uniden Customer Service center at 1-888-6-UNIDEN.
▲ Uniden Data 2000 Wireless CDPD PC Card 2.6 Using Windows 98 Dial-Up Networking To use your Uniden Data 2000 modem with Windows 98 Dial-up Networking, take the following steps: 2.6.1 Checking Dial-Up Networking Installation To determine if dial-up networking is already installed, double-click on the My Computer icon. If you don't see an icon for Dial-Up Networking, you will need to add this feature: 2.6.2 Installing Dial-Up Networking.
▲ Uniden Data 2000 Wireless CDPD PC Card 2.6.4 Setting Up Dial-Up Networking for SLIP To set up Dial-up Networking, take the following steps: 1. Double-click on the My Computer icon. 2. Open the Dial-Up Networking folder. 3. Double-click on the Make New Connection icon. Follow the instructions provided for making a new connection. 4. When you are instructed to select a modem, click on Uniden Data 2000 CDPD Modem. Change the name of the connection from My Connection to PC Card SLIP. Click Next. 5.
▲ Uniden Data 2000 Wireless CDPD PC Card 7. Select the Server tab. 8. Select SLIP: Unix Connection. 9. Deselect Log on to network. 10. Click TCP/IP Settings…. 11. From SLIP TCP/IP settings dialog box, enter the IP Address provided by your CDPD carrier. 12. If you have been given the address of a Domain Name Server (DNS), select Name server addresses. Enter the address as your Primary DNS. Note: A DNS is needed to access sites by name, e.g. www.uniden.com. 13. Deselect Use IP header compression. 14.
▲ Uniden Data 2000 Wireless CDPD PC Card 2.6.5 Setting Up Dial-Up Networking for PPP Dial-Up Networking for PPP is automatically created when installing Uniden Data 2000 host application (Section 2.2). If the computer has installed multiple modems, be sure to click Connect Using and select Uniden Data 2000 PC Card. To setup Dial-Up Networking for PPP, take the following steps: 1. Double-click on the My Computer icon. 2. Open the Dial-Up Networking folder.
▲ Uniden Data 2000 Wireless CDPD PC Card 4. When you are instructed to select a modem, click on Uniden Data 2000 PC Card. Change the name of the connection from My Connection to PC Card PPP, then click Next. 5. Enter the area code and enter the single digit: 0 in the Telephone Number box, then click Next.
▲ Uniden Data 2000 Wireless CDPD PC Card 6. Click Finish to create a new Windows 98 connection icon named PC Card PPP. 7. Right click on PC Card PPP to obtain the PC Card PPP screen. Select Properties.
▲ Uniden Data 2000 Wireless CDPD PC Card 8. Deselect Use area code and Dialing Properties and click on the Server Types tab. 9. From the Type of Dial-Up Server box, select PPP: Internet, Windows NT Server, Windows 98. 10. In the Advanced Options box, deselect Log on to Network, Enable software compression, and Require encrypted password, Require data encryption, Record a log file for this connection.
▲ Uniden Data 2000 Wireless CDPD PC Card 11. In the Allowed network protocols, deselect NetBEUI and IPX/SPX Compatible and select TCP/IP. 12. Click TCP/IP Settings. 13. From the TCP/IP Settings box, if you have been given the address of a Domain Name Server (DNS), select Specify name server addresses. Enter the address as your Primary DNS. Note: A DNS is needed to access sites by name, i.e. www.uniden.com. 14. Deselect Use IP header compression. 15. Select Use default gateway on remote network. 16.
▲ Uniden Data 2000 Wireless CDPD PC Card 2.6.6 Adding TCP/IP Protocol Support To add TCP/IP Protocol Support, take the following steps: 1. Double-click on the Network icon in the Control Panel. 2. Click Add. 3. Click Protocol, then click Add. 4 From the Manufacturers box, select Microsoft. 5. From the Network Protocols box, select TCP/IP. 6. Click OK twice. Windows 98 installs the TCP/IP stack and any other protocol it requires. 7. After the protocols are installed, click OK. 8. Restart Windows 98. 2.6.
▲ Uniden Data 2000 Wireless CDPD PC Card 2.7 Installation Procedures/Windows NT Follow the steps below to create Dial-up Networking to connect your Data 2000 to the Internet. 1. Turn your host computer off. 2. Insert the Uniden Data 2000 into the PC Card slot of your host computer. 3. Move the Uniden Data 2000 On/Off Power Switch to the ‘on’ position. 4. Turn your host computer on.
▲ Uniden Data 2000 Wireless CDPD PC Card 2.7.1 Verifying the Connection 1. Click the Start button on your Windows NT desktop, then select Settings, Control Panel. 2. Double-click the PC Card (PCMCIA) icon. The following dialog box displays on the screen: If Uniden Data 2000 PC Card is shown at one of the PC Card sockets, the Uniden Data 2000 is properly installed to Windows NT. If the Host Applications (UDConfig and Insight) have loaded successfully, go to Section 2.
▲ Uniden Data 2000 Wireless CDPD PC Card 2.8 Using Windows NT Dial-up Networking To use your Uniden Data 2000 modem with Windows NT Dial-Up Networking, take the following steps: 2.8.1 Checking Dial-up networking installation To determine if dial-up networking is already installed, double-click on the My Computer icon. If you don't see an icon for Dial-Up Networking, you will need to add this feature: 2.8.2 Installing Dial-up networking.
▲ Uniden Data 2000 Wireless CDPD PC Card 2. Click Yes. 3. Select Don't detect my modem; I will select it from a list, then click Next.
▲ Uniden Data 2000 Wireless CDPD PC Card 4. Click Have Disk… 5. Insert a Uniden Data 2000 Setup and Installation floppy disk or CD-ROM with the file ud2k.inf.
▲ Uniden Data 2000 Wireless CDPD PC Card 6. Click Next. 7. Select the COM port assigned to the Uniden Data 2000, then click Next.
▲ Uniden Data 2000 Wireless CDPD PC Card Note: If you do not remember the COM port assigned to the Uniden Data 2000, open PC Card dialog from the Control Panel, then click Properties for the UD2000. It will show the COM port at the Device Map. 10. Click Finish.
▲ Uniden Data 2000 Wireless CDPD PC Card 11. Select UD2000 for the RAS Capable Devices, then click OK. 12. Click Network. 13.
▲ Uniden Data 2000 Wireless CDPD PC Card 14. Click Continue. WindowsNT will copy all required files from the Windows NT installation CD-ROM. 15. Click Restart. Note: Dial-Up Networking is part of the Remote Access Service (RAS). You must be an administrator to install RAS. You may take the following procedure to install RAS: 1. Click on the My Computer icon. 2. Select Control Panel. 3. Select Network. 4. Select Services tab. 5. Select Add. 6. Check the Remote access service box, then click OK. 7.
▲ Uniden Data 2000 Wireless CDPD PC Card 2.8.3 Setting Up Dial-Up Networking for SLIP 1. Double-click on the My Computer icon. 2. Open the Dial-Up Networking folder. 3. Click More and select Edit entry and modem properties. 4. From the Edit phone book entry dialog box, select the Basic tab. 5. Enter PC Card SLIP in the Entry name box. 6. Enter Uniden Data 2000 PC Card Modem in the Dial using box. 7. Enter 2 in the Phone number box.
▲ Uniden Data 2000 Wireless CDPD PC Card 8. Select the Server tab. 9. From the Dial-Up server type box, select SLIP: Internet. 10. Check TCP/IP in Network protocols. 11. Click TCP/IP Settings.
▲ Uniden Data 2000 Wireless CDPD PC Card 12. From SLIP TCP/IP settings dialog box, enter the IP Address provided by your CDPD carrier. 13. If you have been given the address of a Domain Name Server (DNS), select Name server addresses. Enter the address as your Primary DNS. Note: A DNS is needed to access sites by name, e.g. www.uniden.com. 14. Deselect Force IP header compression. 15. Select Use default gateway on remote network. 16. Click OK twice.
▲ Uniden Data 2000 Wireless CDPD PC Card 2.8.4 Installing Windows NT Support for SLIP 1. Click on the My Computer icon. 2. Select Control Panel. 3. Select Add/Remove Programs. 4. Select the Windows NT Setup tab. 5. Click Have Disk. Insert Uniden Data 2000 Setup and Installation disk or CD-ROM, then click OK. 6. Select Unix Connection for Dial-Up Networking, then click Install.
▲ Uniden Data 2000 Wireless CDPD PC Card 2.8.5 Setting Up Dial-Up Networking for PPP Dial-Up Networking for PPP is automatically created when installing the Uniden Data 2000 host application (Section 2.2) If the computer has installed multiple modems, make sure to click on Connect Using and select Uniden Data 2000 PC Card. To setup Dial-Up Networking for PPP, take the following steps: 1. Double-click on the My Computer icon. 2. Double-click the Dial-Up Networking icon. 3.
▲ Uniden Data 2000 Wireless CDPD PC Card 9. From the Edit Phone book Entry dialog box, select the Basic tab. 10. Select Uniden Data 2000 PC Card Modem in the Dial using box. 11. Enter 0 in the Phone number box. 12. Select the Server tab. 13. From the Dial-up server type box, select PPP: Windows 95, Windows NT, Internet. 14. Check TCP/IP in Network protocols. 15. Click TCP/IP Settings.
▲ Uniden Data 2000 Wireless CDPD PC Card 16. If you have been given the address of a Domain Name Server (DNS), enter the address as your Primary DNS. Note: A DNS is needed to access sites by name, i.e. www.uniden.com. 17. Deselect Use IP header compression. 18. Select Use default gateway on remote network. 19. Click OK twice.
▲ Uniden Data 2000 Wireless CDPD PC Card 2.8.6 Adding TCP/IP Protocol Support In order to add TCP/IP protocol support, Windows NT requires that the user be the administrator. To add TCP/IP protocol support, take the following steps: 1. Click the Start button on your Windows NT desktop, then select Settings, Control Panel. 2. Double-click on the Network icon. 3. Choose the Protocols tab, then click Add. 4. From the Select Network Protocol dialog box, select TCP/IP Protocol , then click OK. 5.
▲ Uniden Data 2000 Wireless CDPD PC Card 2.8.7 Connecting to the CDPD Network To connect to the CDPD Network, take the following steps: 1. Select Dial-up Networking from Start - Programs Accessories, or Double-Click the Dial-Up Networking icon in My Computer. 2. Select the entry for the Uniden Data 2000 from Phone book entry to dial menu. Then, click Dial. Note: No data entry is necessary for User Name, Password and Domain Field. 3. A window should appear, displaying the progress of your connection.
▲ Uniden Data 2000 Wireless CDPD PC Card 2.9 Installation Procedures/Windows CE Follow the steps below to create Dial-up Networking to connect your Uniden Data 2000 to the Internet. To install the Uniden Data 2000 Host Application for Windows CE, take the following steps: 1. Establish the mobile device connection between host PC and your Windows CE handheld computer. 2. Insert the Uniden Data 2000 Setup and Installation CD-ROM into the CD-ROM drive of your host computer. 3.
▲ Uniden Data 2000 Wireless CDPD PC Card 2.10 Using Windows CE Remote Networking To use your Uniden Data 2000 Modem with Windows CE Remote Networking, take the following steps: 2.10.1 Installing Remote Networking 1. From the Start, click Programs. Click Communication. Click Remote Networking. 2. In the Remote Networking window, double-click Make New Connection. 3. Type UD2000 in the Type a name for the connection and select Dial-up Connection. 4. Click Next. 5.
▲ Uniden Data 2000 Wireless CDPD PC Card 3. Minimize the window and proceed with Windows CE Internet programs such as web browsers or e-mail. Note: If you cannot connect to the network, connect manually by opening the properties of Uniden Data 2000 Remote Network and selecting Manual Dial. Start the Uniden Data 2000 network as described above. When a terminal screen displays, click OK, or select Continue from the File menu. 2.10.3 Modem Status Check 1.
▲ Uniden Data 2000 Wireless CDPD PC Card 2.11 Uniden Data 2000 Host Applications There are two host applications provided with the Uniden Data 2000: UDConfig and UDInsight. UDConfig allows the user to configure and modify the parameters of the Uniden Data 2000. UDInsight provides insight to the user regarding the state and status of the Uniden Data 2000 in the SLIP and PPP modes. Please refer to Section 2.12, UD Configuration and Insight Operation for Host Application Operation.
▲ Uniden Data 2000 Wireless CDPD PC Card 4. Click Setup Wizard. 5. Click Next.
▲ Uniden Data 2000 Wireless CDPD PC Card 6. Call your CDPD service provider and give them the EID to obtain an IP (NEI) of your Uniden Data 2000 as described in Section 2.1.3. Click Change IP Address. 7. Enter the IP Address (NEI) given to your Uniden Data 2000 in one of 10 fields and click Default to activate it. Click Apply.
▲ Uniden Data 2000 Wireless CDPD PC Card 8. Click Next. 9. Select the side preference and click Next.
▲ Uniden Data 2000 Wireless CDPD PC Card 10. Wait for the Uniden Data 2000 to register to the Network. Note: If it does not register to the network in a few minutes, go back to the IP Address display and check the IP Address. 11. When your Uniden Data 2000 is registered, cl.ick Perform Ping. Select an IP Address to ping and click Start Ping. 12. If Ping is successful, connectivity to the internet is confirmed. Click Back.
▲ Uniden Data 2000 Wireless CDPD PC Card 13. Click Next. 14. Click Finish. 2.11.1.2 Advanced Mode The nine areas are: ● Comm Settings ● Network ● CDPD ● Default Tables ● Modem ● Code Version ● Status ● AT Commands ● Power Management Note: Each field within each tabbed dialog offers tool tips which explain the field’s purpose, as well as how to select or add information to the field.
▲ Uniden Data 2000 Wireless CDPD PC Card Comm Settings The Comm Settings tab displays which COM Port the Uniden Data 2000 is configured to, as well as the baud rate it is using. UDConfig searches for the Uniden Data 2000 upon startup. If it finds the Uniden Data 2000, it ‘remembers’ which COM port, and at which baud rate it found the Uniden Data 2000. Subsequent executions of UDConfig will then look for the Uniden Data 2000, starting from the previously saved settings.
▲ Uniden Data 2000 Wireless CDPD PC Card Network The Network tab provides settings that identify the Uniden Data 2000 to its network. CDPD The CDPD tab provides settings that define how the Uniden Data 2000 interacts with the CDPD network.
▲ Uniden Data 2000 Wireless CDPD PC Card Default Tables The Default Tables tab provides the controls to load and/or save preset tables of Uniden Data 2000 settings. Modem The Modem tab provides the modem type settings that define how the Uniden Data 2000 behaves as a modem.
▲ Uniden Data 2000 Wireless CDPD PC Card Code Version The Code Version tab displays UDConfig’s code version, the Boot and software versions which have been loaded in the Uniden Data 2000.
▲ Uniden Data 2000 Wireless CDPD PC Card 2.11.2 UDInsight UDInsight provides insight to the user regarding the state and status of the Uniden Data 2000. The application works when the Uniden Data 2000 is in SLIP/PPP mode and a Winsock is in place and running. Winsocks include Windows 95/98/NT/CE Dial-up Networking, Trumpet, and other similar applications resident on a Windows 95/98/NT/CE platform.
▲ Uniden Data 2000 Wireless CDPD PC Card 2-66 ● The antenna icon has bars that represent 10 dB of RSSI, starting at -110. One bar is added for each 10 dB. ● The Cell Info button displays information regarding the specific cell that the Uniden Data 2000 is currently attempting to communicate with.
▲ Uniden Data 2000 Wireless CDPD PC Card ● The Hide button reduces UDInsight to a system tray icon. Double clicking on the icon, will reopen UDInsight to its normal size and state. UDInsight continues to communicate whether it is minimized in the system tray, or maximized on the screen. Note: The Uniden Data 2000 Insight icon in the system tray displays as UD with a colored dot. green dot - the Uniden Data 2000 is registered. red dot - UD Data 2000 is not registered.
▲ Uniden Data 2000 Wireless CDPD PC Card A A.1 Appendix: Specifications Size Standard Portion 85 mm x 54 mm x 4.8 mm (3.37" x 2.12" x .19") Extended Portion 64.3 mm x 57.9 mm x 20 mm (2.53" x 2.28" x .70"), including battery compartment. A.2 Weight 141 g (5 oz), not including batteries. A.3 PCMCIA Interface PCMCIA Type II interface A.4 Data Rate 19.2 Kbps Airlink (physical layer) as specified in the CDPD System Specification 1.1. A.5 Antenna Interface Custom antenna provided with the unit.
▲ Uniden Data 2000 Wireless CDPD PC Card A-7 Radio Specifications Transmit Frequencies 824 MHz-849 MHz Receive Frequencies 869 MHz - 894 MHz ● Full Duplex ● 0.6W transmit power ● Receiver sensitivity - 113 dBm The antenna must be maintained at least 4 inches (or 10 cm) from users and nearby persons to comply with FCC radio frequency exposure limits (and to reduce the risk of RF radiation) when the Uniden Data 2000 is in operation. A.
▲ Uniden Data 2000 Wireless CDPD PC Card B B.1 Appendix: Additional References Printed References Cellular Digital Packet Data System Specification, Release 1.1. January 19, 1995. Available from the CDPD Forum, 401 N. Michigan Avenue, Chicago, IL 60611-4267. Phone: 800-335-2373. Sreetharan, M. and Kumar, Rajiv. Cellular Digital Packet Data. Artech House 1996. ISBN 0-89006-709-0 B.
▲ Uniden Data 2000 Wireless CDPD PC Card C C.1 Appendix: Software About Uniden Data 2000 Software Uniden Data 2000 software has been factory installed. In most cases, you will not need to install software in your PC Card, however, there are some instances when software installation is required: ● You receive an upgraded version of the software. ● You wish to change the data encryption support.
▲ Uniden Data 2000 Wireless CDPD PC Card C.1.1 Requirements for Software Installation ● DNLD.EXE - A software downloading utility that can run under both Windows 95/98 and Windows NT. ● PPCard dnl C.1.2 Uniden Data 2000 Software Downloading Instructions 1. Insert the Uniden Data 2000 to a PC Card slot. 2. Create a directory such as UD2000 in a local hard drive and copy dnld.exe and pccard.dnl files into it from the installation CD-ROM.
▲ Uniden Data 2000 Wireless CDPD PC Card Name: (filename) Version: (version name) Date: (date) Erasing affected memory Erasing flash sector 4 Erasing flash sector 5 Erasing flash sector 6 Erasing flash sector 7 Erasing flash sector 10 Entering binary download mode ● The download process will take a few minutes depending on your PC's operating system and other programs that may be competing for the PC's CPU time.
▲ Uniden Data 2000 Wireless CDPD PC Card Command Description or DLL Utility Syntax -port COM1 Use PC COM port 1 -port COM2 Use PC COM port 2 -port COM3 Use PC COM port 3 -port COM4 Use PC COM port 4 -port COM5 Use PC COM port 5 -dlrate Specify the data rate used for a binary download (options: 4800, 9600, 14400, 19200, 28800, 38400, 57600, 115200 bps) (default rate=57600 bps, fastest rate=115200 bps) -atrate Specify the data rate used for AT commands (options: 4800, 9600,
▲ Uniden Data 2000 Wireless CDPD PC Card D Appendix: AT Commands As mentioned previously, AT commands allow an authorized user to: Read and modify configuration parameters supported by the Uniden Data 2000. ● Query status and statistics. ● Change the modem’s operational modes. This chapter describes the following items, in detail: ● The modem’s Default Value Tables. (MDT, SPDT, UDT) ● The System Table. ● Login and logout procedures. ● All of the available AT Commands supported by the modem.
▲ Uniden Data 2000 Wireless CDPD PC Card Most of the configuration changes you make using AT commands, are made to the Current Active Table only. (The only exception is the AT SLI SLIP [MDT][SPDT][UDT] command which automatically saves the changes to the default table you have defined.) Any changes made to the CAT can be saved to a particular default table by typing in the AT command AT SAVECFG [MDT] [SPDT][UDT] or AT&W for the UDT.
▲ Uniden Data 2000 Wireless CDPD PC Card D.1.2 Service Provider’s Default Table (SPDT) The Service Provider’s Default Table (SPDT) contains configuration information restricted by your local service provider’s CDPD network. Each of the parameters in the SPDT can be read by any user, but modified only by an authorized user. To set the configuration parameters for the SPDT, take the following steps: 1. Contact your service provider directly for specific configuration values restricted by their CDPD network.
▲ Uniden Data 2000 Wireless CDPD PC Card Note: You can type in the command AT RESETCFG MDT or AT&F0 followed by the command AT SAVECFG UDT or AT&W0, at any time, to reset the UDT to the factory default state. Important: Editing the UDT does not require a password. D.2 System Table The System Table contains specific configuration parameters which are preserved during the power cycle.
▲ Uniden Data 2000 Wireless CDPD PC Card D.3 AT Command Highlights The tables on the following pages list the AT Commands which are supported by the Uniden Data 2000 modem. Please note the following: ● When typing in AT commands, it is recommended, but not mandatory, that you insert at least one space after typing AT and between each parameter. Multiple spaces are acceptable. (The space after the AT is helpful for automated parsing.) ● AT commands are NOT case sensitive.
▲ Uniden Data 2000 Wireless CDPD PC Card D.5 AT Commands/Reading the Configuration AT Command Syntax Description of Command AT ACTNEI? Read the current Active IP address from the System Table. Response: NEI n ddd.ddd.ddd.ddd AT BOOTVER? Read the version of the boot code from the System Table. Response: Boot n.n (X) (Date Time) AT CDPDVER? Read the CDPD version supported by this modem from the System Table. (Currently 1.1 is the only version supported.) Response: CDPD Version 1.
▲ Uniden Data 2000 Wireless CDPD PC Card AT Command Syntax Description of Command AT ENCR? Read Data Encryption Mode from a [CAT][MDT][UDT][SPDT] particular default table. (If the option is not specified, the CAT will be used as the default table.) Response: Encryption Flag 0 or Encryption Flag 1 Encryption Flag 0 means encryption is off, Encryption Flag 1 means is on. AT FC? Read flow control mode from the System Table.
▲ Uniden Data 2000 Wireless CDPD PC Card AT Command Syntax Description of Command AT REG? Read Auto-Registration Mode from a [CAT][MDT][UDT][SPDT] particular default table. Response: Auto Registration Mode 0 or Auto Registration Mode 1 (If the option is not specified the CAT will be used as the default table.) Auto Registration Mode 0 means Auto Registration is off, Auto Registration Mode 1 means Auto Registration is on.
▲ Uniden Data 2000 Wireless CDPD PC Card AT Command Syntax Description of Command AT SWVER? or ATI1 Read the software code version downloaded in the Modem from the System Table. Data encrypted version: U-D_1000 (Version #) (Date Time) Non encrypted version: No Encrypt Version #)(Date Time) Response: U-D_1000 (Version #) (Date Time) No Encrypt (Version #) (Date Time) AT VERBOSE? Read 1 for verbose or 0 for terse modes from the System Table.
▲ Uniden Data 2000 Wireless CDPD PC Card AT Command Syntax Description of Command AT IP # Set the active NEI(# = number from 1 to 10) Response: OK AT NEIn d.d.d.d Set NEI n (n = from 1 to 10). 0 to 255. Response: OK AT PASSWORD "new password" "new password" ** Change the current password. This requires a logon Response: OK AT PREFER <1><2><3><4> Set the side preference (1 = Side A only; 2 = Side B only; 3 = Side A is scanned first, then Side B ; 4 = Side B scanned first then Side A).
▲ Uniden Data 2000 Wireless CDPD PC Card D.6 AT Commands/Saving to a Table AT Command Syntax AT SAVECFG or AT&W (Saves UDT) Description of Command Save the configuration in the current active table to the Service Provider’s Default Table (SPDT), or User’s Default Table (UDT). Password required for SPDT. Response: OK D.
▲ Uniden Data 2000 Wireless CDPD PC Card D.8 AT Commands/Reading Statistics and Status AT Command Syntax AT$RSSI Description of Command Read the current RSSI value. Response: CFG: Current RSSI: n D.9 AT Commands/Command/Control AT Command Syntax Description of Command AT Verifies that the AT interface is working. Response: OK AT$CHAN_< > Forces modem to stay on one or a limited Set of ten RF channels.
▲ Uniden Data 2000 Wireless CDPD PC Card AT Command Syntax Description of Command AT PING ip_addr [size] [I interval] Invokes the Ping application to test network connectivity and reports results; Optional is the size of the ping in bytes (64 default); Optional interval is in miliseconds following an I. Response: AT ping XXX.XXX.XXX.XXX size I interval PING host (xxx.xxx.xxx.xxx) size data bytes Ping size bytes from (xxx.xxx.xxx.xxx): icmp_sn (0) time (time ms) Ping size bytes from (xxx.xxx.xxx.
▲ Uniden Data 2000 Wireless CDPD PC Card D.10 Error Messages There are a number of different error message responses that may appear on screen in the event of an error. The following table reflects these error message responses, as well as the action(s) required to correct them.
▲ Uniden Data 2000 Wireless CDPD PC Card Error Message Response Action to Correct Error "Default table does not exist" Check the default table to see if correct table has been selected. "Invalid Password" Reenter the password being used. "Invalid AT Command" Retype the AT command. "Wrong number of arguments" Retype the argument and check its accuracy. "Wrong configuration table" Check the selected configuration table for accuracy. "Timeout" Retype the AT command.
▲ Uniden Data 2000 Wireless CDPD PC Card E Appendix: Warranty E.1 One Year Limited Warranty Important: Evidence of original purchase is required for warranty service. WARRANTOR: UNIDEN AMERICA CORPORATION (“Uniden”) ELEMENTS OF WARRANTY: Uniden warrants, for one year, to the original retail owner, this Uniden Product to be free from defects in materials and craftsmanship with only the limitations or exclusions set out below.
▲ Uniden Data 2000 Wireless CDPD PC Card F F.1 Appendix: Troubleshooting Troubleshooting Please contact Uniden Customer Service Center at 1-888-6-UNIDEN. Also, please consult the UD2000 Help.doc included on the Installation & Operation CD-ROM, or go to the Troubleshooting Page for the UD2000 at www.uniden.com.