m e n u OK i n t rdl/p clr power 1 2abc 3 def charge 4 ghi 5 jkl 6 mno in use 7 pqrs 8 tuv 9 wxyz * 0 # page DIGITAL ENHANCED CORDLESS TELECOMMUNICATIONS OWNER’S MANUAL DECT 1811
HANDSET FUNCTIONS Earpiece LCD Phonebook Dialling Key (S&T) Function Select Key (S) S = Standby Mode (Not holding a call) T = Talk Mode (During a call) Menu Key (S) Recall Key (T) Dial Delete Key (S) Menu Escape Key (S) Memory Clear Key (S) Microphone Mute Key (T) Keypad Number Keys Redial/Pause Key (S&T) m e n u OK i n t rdl/p clr 1 2abc 3 def 4 ghi 5 jkl 6 mno Handset Internal Key Call Transfer Key (T) Talk Key Menu Escape Key (S) Power Key (S) Lock Key (S) Ear Volume Key (T) 7 pqrs 8 tu
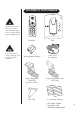
This page is a very condensed version of your owners manual and does not attempt to explain any of the advanced features of your phone. Installation A simple guide to setting up your new phone. DECT1811 Start Here! TEL PWR Line in from Telephone Jack Quick Reference Guide Australia New Zealand ✃ AC Adaptor Plug the phone jack into the base unit, then into the telephone connector on the wall. Plug the power cable into the base unit, then into the wall outlet.
Charging the Battery Installing the Handset Batteries Press battery cover release. Slide cover off. Install the 3 rechargeable Ni-MH batteries. + Slide the battery cover back until it snaps into place Place the handset on the base and charge uninterrupted for 14 hours. Only use the battery pack supplied or rechargeable AAA Ni-MH Batteries. DO NOT USE STANDARD BATTERIES. iii Using the Phone To make a call 1. Press talk [ ] and listen for the dial tone. 2. Dial phone number. OR 1. Dial phone number 2.
OF YOUR OWNER’S MANUAL CONTENTS CONTENTS Handset and Base Functions . . . . . . . . . . . . . . . . . . . . . . . . . . . . . . . . . . . . i Step 1 - Installation . . . . . . . . . . . . . . . . . . . . . . . . . . . . . . . . . . . . . . . . . . ii Step 2 - Charging the Battery . . . . . . . . . . . . . . . . . . . . . . . . . . . . . . . . . . . iii Step 3 - Using the Phone . . . . . . . . . . . . . . . . . . . . . . . . . . . . . . . . . . . . . . iii Features . . . . . . . . . . . . . . . . . . . . .
WELCOME 2 TO YOUR NEW PHONE INTRODUCTION Congratulations on your purchase of the Uniden DECT 1811 cordless telephone. This phone is designed for reliability, long life and outstanding performance utilising the latest in 1.8 GHz Digital Enhanced Cordless Telecommunication technology. FEATURES ● ● ● ● ● ● ● ● ● ● ● ● ● ● ● ● ● ● ● ● ● ● ● ● ● ● 1.
INCLUDED IN YOUR PACKAGE m e n u To get the most from your phone, please read this owner’s manual thoroughly. Be sure to complete and mail the product registration form. power OK i n t rdl/p charge clr in use 1 2abc 3 def 4 ghi 5 jkl 6 mno page 7 pqrs 8 tuv 9 wxyz * 0 # DIGITAL ENHANCED CORDLESS TELECOMMUNICATIONS If any of these items are missing or damaged, contact your place of purchase immediately.
IMPORTANT SAFETY INSTRUCTIONS This symbol indicates important operating and servicing instructions. Please do not attempt to unplug any appliance during an electrical storm. 4 When using your telephone equipment, these basic safety precautions should always be followed to reduced the risk of fire, electrical shock, and injury: 1. UNIDEN DOES NOT represent this unit to be waterproof. To reduce risk of fire, electrical shock or damage to the unit, DO NOT expose this unit to rain or moisture.
INSTALLATION CONSIDERATIONS Selecting a Location Before choosing a location for your new phone, here are some important guidelines you should consider: ▼ ● ● ● ● The location should be close to both a phone jack and a power outlet. Keep the base and handset away from sources of electrical noise such as motors and fluorescent lighting. You should charge the battery in your handset for 14 hours before connecting the phone line. Most phone equipment available now uses modular jacks.
DESCRIPTION OF HANDSET KEYS [OK] Refer to inside front cover for handset picture and key location.
DESCRIPTION OF DISPLAYED SYMBOLS EXT INT 1 2 3 4 5 6 Display Symbols 1 . ● ANTENNA : The ANTENNA symbol shows the handset is searching for radio connection. 2 . ● TALK: The TALK symbol appears when pressing the Talk ( 3 . EXT ● ) switch to initiate a call. EXTERNAL CALL: The EXT symbol is used for external calls. An external call set-up is displayed on all the subscribed handsets to indicate whether another external call might be set up. 4 .
USING YOUR PHONE MAKING EXTERNAL CALLS There are several ways to make an external call using your DECT 1811 phone. ] key on the handset. Enter the number you require and you 1. Press talk [ will be connected automatically. 2. Enter the number you require. The number will appear on the LCD but won't ] be dialled. You can edit the number by using the [clr] key. Press talk [ to dial the number entered. 3. Press [OK] to call a number stored in your phone book. 4.
POWER KEY Press and hold the power [ ] key to turn the handset power on or off. In most situations it is recommended to leave the power on the handset at all times so calls can be received. RANGE OUT If RANGE OUT appears on your LCD, your handset is out of range of the base unit and will not be functional until you move back into range. BATTERY A warning tone will sound and the low battery symbol will appear on the LCD if the battery is in a low state.
PHONE BOOK You can store up to 20 frequently called numbers in your handset's phone book. Each number can have up to 20 digits. To store a number: • in Standby Mode, enter the telephone number you wish to store and press [OK]. • NAME? will be displayed. • enter the name of the person with this number in the same way that you entered the letters of your user name (page 17). • press [OK] key. • ADDRESS:XX will be displayed. • press [OK] key. • the phone number is now stored in the memory.
CALL WAITING AND CALLER ID If you have subscribed to Call waiting and/or Caller ID through your local telephone company, the following special features are available on your DECT 1811 telephone. You must subscribe to Caller ID and Call Waiting through your telephone company. Flash (Call waiting) If the call waiting tone sounds while you are on a call: New Zealand • press [menu] to switch between callers. Australia • press [menu] and number 2 to switch between callers.
Delete all Caller ID numbers from the memory If you have stored a name and number in your phone book, when you receive a call from that number the name will be displayed on your LCD. • press [menu] key and CALLER ID will be displayed in the LCD. • press [OK] key to choose this menu item. • press [clr] and DELETE MEM? will be displayed. • press [menu] and DELETE ALL will be displayed. • press [OK] to clear the Caller ID memory.
PERSONALISING YOUR PHONE EARPIECE VOLUME 1. To change the earpiece volume during a call, press the power [ handset. 2. To change the earpiece volume in Standby Mode • press [menu] key until you reach the EAR VOLUME display on the LCD. • press [OK] key to choose this menu item. • press [menu] key to scroll between the three earpiece volume choices: VOL LOW; VOL MIDDLE; VOL HIGH. • press [OK] key to confirm your preferred volume. ].
USER NAME You can programme your handset to display your name (up to a maximum of 10 letters). Look at this example for the user name FRED first. • press [menu] key once and then press [*] three times to reach the USER NAME display on the LCD. • press [OK] key to choose this menu item. • NAME? will be displayed. • to key in the name FRED the following keys are pressed. • press [3] three times until [F] is displayed. • press [7] three times until [R] is displayed. • press [3] twice until [E] is displayed.
HANDSET INTERNAL RING MELODY AND VOLUME If you will be receiving internal calls from your an optional DECT1811 Handset, you can programme a different ring melody and volume to show that the call is an internal one. Simply press [menu] key until you reach the H-INT RING display on the LCD and then follow the instructions as for setting up volume and melody for external calls. KEY CLICK OPTION You can adjust the handset to click or not click when each key is pressed.
ADVANCED FUNCTIONS RESETTING YOUR BASE UNIT The base unit can be reset to default factory values. RESET ALL will desubscribe all connected handsets and put the base unit into subscription mode.
REGISTERING A HANDSET TO A BASE UNIT Each handset must be registered to a base unit in order to make and receive calls. The DECT 1811 is automatically registered to the first base unit for you. A handset can be registered to up to four base units. • press and hold the [PAGE] key on your base until ringing begins (5-10 seconds). You will then be ready to register another handset to your base unit. • press [menu] key until you reach the H-REGISTER display on the LCD. • press [OK] key to choose this menu item.
DEREGISTERING A HANDSET Handset 1 cannot desubscribe itself. You can delete a handset registration from a base unit using handset 1 only. • press [menu] key until you reach the BASE SETTING display on the LCD. • press [OK] key to choose this menu item. • press [menu] key until you reach the HANDY DESUB option. • press [OK] to choose this option. • press [menu] to choose the handset you wish to deregister. • press [OK] to deregister the handset. ].
HANDSET PIN NUMBER WARNING! Uniden does not recommend changing the PIN number. If you forget your PIN number there is no way to reset the telephone. Your handset will be set to the default PIN number setting of 1590. You can also choose your own PIN number. • press [menu] key until you reach the H-CHANGE PIN display on the LCD. • press [OK] key to choose this menu item. • PP PIN: will be displayed. • enter 1590 and press [OK]. • NEW PIN: will be displayed.
Reset your handset as follows: • press [menu] key until you reach the H-RESET display on the LCD. • press [OK] key to choose this menu item. • PP PIN: will be displayed. • enter your 4 digit PIN number and press [OK]. • press [menu] key to scroll between RESET ALL and INITIALIZE options. • press [OK] when you have chosen your preferred reset option. ]. • press talk [ H-RESET RESET ALL BASE UNIT PIN NUMBER WARNING! Uniden does not recommend changing the PIN number.
YOUR NEW PHONE TROUBLESHOOTING TROUBLE SHOOTING If your phone is not performing to your expectations, please try these simple steps first before calling Uniden customer service. PROBLEM The charge light won’t come on when the handset is placed on the base. SUGGESTION ● ● ● ● The audio sounds weak and/or scratchy. ● ● ● ● Can’t make or receive calls. ● ● ● ● ● The handset doesn’t ring or receive a page.
SPECIFICATIONS YOUR NEW PHONE GENERAL 22 Operating Technology TDMA (Time Division Multiple Access) ADOCM (Adaptive Differential Pulse Code Modulation) DCA (Dynamic Channel Allocation) BASE UNIT Frequency: 1881.792 to 1897.344 MHz (10 channels) Power requirements: 9V DC 200mA, 9V AC 100ma Size: 78mm (W) x 119mm (H) x 156mm (D) Weight: Approx. 170g HANDSET Frequency: 1881.782 to 1897.
WARRANTY One Year Limited Warranty Important: Evidence of original purchase is required for warranty service. Warrantor: Uniden Australia Pty Limited ACN 001 865 498 Uniden New Zealand Limited ELEMENT OF WARRANTY: Uniden warrants to the original retail owner for the duration of this warranty, its DECT1811(herein after referred to as the Product), to be free from defects in materials and craftsmanship with only the limitations or exclusions set out below.
FOR PURCHASING A UNIDEN PHONE! THANK YOU © 2001 Uniden Australia Pty Limited Uniden New Zealand Limited