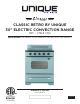
CLASSIC RETRO BY UNIQUE 30" ELECTRIC CONVECTION RANGE 30” - (76.
CLASSIC RETRO 30" ELECTRIC CONVECTION RANGE - (76.2 CM) Installation & Owner’s Manual This manual contains information for: • • • Important Safeguards Installation Use and Care Certain ranges come equipped with special features. Determine from a study of your range which of the instructions given in this booklet pertain to your range. This booklet gives valuable instructions covering the installation, adjustment and use of your range.
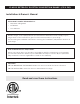
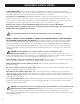
MANUFACTURED & CERTIFIED BY Unique Appliances Ltd WARNING To reduce the risk of tipping the appliance by abnormal usage or improper door loading, the appliance must be secured by properly installing the Anti-Tip device packed with the appliance. To check if the device is installed and engaged properly. Carefully tip the range forward. The Anti-Tip device should engage and prevent the range from tipping over. If this range is removed for any reason, service or cleaning, etc.
TABLE OF CONTENTS IMPORTANT SAFEGUARDS . . . . . . . . . . . . . . . . . . . . . . . . . . . . 6 HOW TO INSTALL THE BACKSPLASH . . . . . . . . . . . . . . . . . . . . . . . 11 INSTALLATION INSTRUCTIONS . . . . . . . . . . . . . . . . . . . . . . . . . . 12 WALL CLEARANCES & ANTI-TIP LOCATION . . . . . . . . . . . . . . . . . . 15 PARTS AND FEATURES . . . . . . . . . . . . . . . . . . . . .
WELCOME Congratulations on your purchase of a UNIQUE range! We are very proud of our product – and are completely committed to providing you with the best service possible. Your satisfaction is our #1 priority. Please read this manual very carefully. It contains valuable information on how to properly maintain your new Unique electric range. We know you will enjoy your new range and Thank You for choosing one of our Unique Appliances!. We hope you will consider us for future purchases.
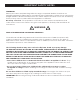
IMPORTANT SAFETY NOTES USER SERVICING: Do not repair or replace any part of the appliance unless specifically recommended in this owner’s guide. Only a qualified technician should do all other servicing. This will reduce the risk of personal injury and damage to the range. Storage in or on appliance: Flammable materials should not be stored in an oven, near surface elements or in the broiler section.
IMPORTANT SAFETY NOTES WARNINGS Destroy the carton and plastic bags after the range is unpacked. Children should not use packaging material for play. Cartons covered with rugs, bedspreads, or plastic sheets can become airtight chambers. Remove all staples from the carton. Staples can cause severe cuts and destroy finishes if they come in contact with other appliances or furniture. Be safety conscious. The preparation of food in an oven requires temperatures that could cause severe burns.
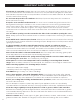
IMPORTANT SAFETY NOTES Placement of oven racks: Always place an oven rack in the desired location while the oven is cool. If a rack must be moved when the oven is hot, use potholders and grasp the rack with both hands to reposition. Do not let potholders contact hot oven walls. Remove all cookware from the rack before moving. Do not heat unopened food containers. Build-up of pressure may cause the container to burst and result in injury. Keep the oven vent duct unobstructed.
IMPORTANT SAFETY NOTES change in temperature. Check the manufacturer’s recommendations for rangetop use. WARNING: Do not place lids on top of glass cooking surface when hot. Shattered cooktops could happen when heat is trapped between the lid and the glass stovetop, creating a strong vacuum seal. The air is forcefully sucked out and shatters the glass (This is not covered by your warranty). Do not place plastic salt and pepper shakers, spoon holders or plastic wrappings on top of the range.
IMPORTANT SAFETY NOTES IMPORTANT: Save for the local electrical inspectors use. To eliminate the rist of burns or fire by reaching over heated surface units, cabinet storage space located above the surface units should be avoided. If cabinet storage is to be provided the risk can be reduced by installing range hood that projects horizontally a minimum of 5 inches beyond the bottom of the cabinets. WARNING 1. 2. 3. 4. 5. 6. 7.
IMPORTANT SAFETY NOTES 19. Glazed cooking utensils - Only certain types of glass, glass/ceramic, ceramic earth ware or other glazed utensils are suitable for range-top service without breaking due to the sudden change in temperature 20.
BEFORE USING YOUR RANGE WARNING HAVE THIS RANGE INSTALLED BY A QUALIFIED INSTALLER. Improper installation, adjustment, alteration or maintenance can cause injury or property damage. Consult a qualified installer or service agency. It must be properly positioned and installed as described in this manual, so read the manual carefully.
HOW TO INSTALL THE BACKSPLASH 1. Align the backsplash to the rear part of the cooktop as shown in the diagram. 2. Secure the backsplash to the cooktop from the back using the 4 Phillips head screws provided as shown in the diagram.
INSTALLATION INSTRUCTIONS WARNING LEVELLING A FREE-STANDING RANGE All free-standing ranges must be level to obtain proper cooking results. The leveling legs should be screwed into the corner brackets. Place pan or measuring cup partially filled with water or a level on the oven rack. Adjust the leveling legs until the range is level. The top of the side panels should be level with the counter top. WARNING A child or adult can tip the range and be killed.
WALL CLEARANCES & ANTI-TIP LOCATION All units must be installed in accordance to minimum rear and side wall clearance and clearances extended vertically above cooking top which are stated on the serial plate located at the back of the range. ANY OPENINGS IN THE WALL BEHIND THE UNIT AND IN THE FLOOR UNDER THE UNIT MUST BE SEALED. Note: Due to potential hazards it is recommended that storage cabinets NOT be installed above the cooking surface.
WALL CLEARANCES & ANTI-TIP LOCATION BACK OF THE APPLIANCE FOR PLUG PLACEMENT 16
WALL CLEARANCES & ANTI-TIP LOCATION (continued) Anti-Tip Bracket Location 17
PARTS & FEATURES 1 2 3 4 5 6 7 8 9 1. Backsplash with integrated oven vents 2. Cooktop 3. Hot surface indicator 4. Control panel 5. Oven Handle 6. Oven Door 7. Storage Drawer Handle 8. Storage Drawer 9.
OPERATION OF RANGE Oven on/off indicator light Convection Fan Warmer position on/off Light Oven Oven Cooktop on/off indicator light Broiler HOT SURFACE INDICATOR LIGHT WILL TURN ON WHEN THE COOKTOP IS BEING USED AND WILL REMAIN LIT UNTIL THE SURFACE TEMPERATURE OF THE GLASS COOKTOP RETURNS TO A SAFE TEMPERATURE USING THE SURFACE UNITS Hot Surface • Use care when touching the cooktop. The glass surface of the cooktop will retain heat after the controls have been turned off.
OPERATION OF OVEN When the element is energized, the indicator light will be lit regardless of the setting when one or more of the elements are turned on. The control has a variable of power output from lo to hi with a number of positions. The range of heat is increased by turning the knob to hi, decreased by turning the knob to lo. Important: to switch on, always lightly press the control knob inwards then turn.
OPERATION OF OVEN (continued) USING THE OVEN Switch the broil/oven rocker switch to “oven” mode Turn the oven temperature knob clockwise to select the desired temperature, up to 500F max To switch the oven off the oven temperature knob too the “Off” position. You can use your range for Broil and Oven, for that reason the oven has two different heating elements which are: Broil – 3400W (upper heating element) Oven – 3400W (lower heating element) CAUTION: The oven door becomes very hot during operation.
OPERATION OF OVEN (continued) • Place the broiling pan in the oven, The broiling pan should be placed above the shelf and it should be centered with the broil element.
CARE & MAINTENANCE GENERAL RECOMMENDATION WARNING WARNING Electrical Shock Hazard • Plug into a grounded 4-prong outlet. Insure proper ground exists before using the range. Electrical Shock Hazard Plug into a grounded 4-prong outlet. • Do not remove ground prong. Do not remove ground prong. • Do not use an adapter or extension cord. Do not use an adapter. • Failure to follow these instructions can result in death, fire, or electrical shock.
CARE & MAINTENANCE (continued) REMOVING THE OVEN DOOR FOR CLEANING To facilitate oven cleaning, it is possible to remove the door. Please follow the instructions carefully: The oven door can easily be removed as follows: • Open the door to fully. • Lift the left and right hooks on the hinge figure (A,B). • Hold the door as shown in figure (C) on a 45 degree angle. • Gently close the door until the hooks touch the door, then lift at a 45 degree angle • Set the door on a soft flat surface.
CARE & MAINTENANCE (continued) DO NOT STORE FLAMMABLE MATERIAL IN THE OVEN OR IN THE BOTTOM DRAWER Only store heat resistance pots, pans and trays in the drawer as it gets very hot when the oven is on. NOTE: Do not store plastic items (or pots and pans with plastic handles) in your drawer REMOVING THE KICKPLATE FOR CLEANING It is possible to remove the magnetic kickplate at the bottom of the range to aid in cleaning underneath the range.
CLEANING THE RANGE Important: Before any operation of cleaning and maintenance disconnect the appliance from the electrical supply. It is advisable to clean when the appliance is cold and especially for cleaning the enameled parts. Avoid leaving alkaline or acidic substances (lemon juice, vinegar, etc.) on the surfaces. Avoid using cleaning products with a chlorine or acidic base.
CLEANING THE RANGE (continued) Never cover a rack completely. A piece of foil slightly larger than the cookware can be placed on the rack beneath the cookware. Remove and discard aluminum foil after each use. This will help prevent grease and spilled food from accumulating and becoming a fire hazard. Cleaners and Cleaning Materials Do not use harsh cleaners or de greasers on or around functional parts (valves, controls, etc., or aluminum tubing). This will damage or drastically reduce the life of the part.
TROUBLESHOOTING You can solve many common appliance problems saving you the cost of a possible service call.
WIRING DIAGRAM 29
RATING LABEL NOTE: Serial Number can be found in the oven drawer or the front of this manual.
WARRANTY Unique Appliances Ltd. (hereafter “Unique”) warrants that this UNIQUE appliance is free from manufacturer’s defects in material and workmanship under normal usage and service under the following terms. Parts Warranty This appliance has been designed for domestic household use. If properly installed, adjusted and operated under normal conditions in accordance with printed instructions, it will satisfactorily perform the functions that are generally expected of this type of appliance.
APPLIANCE INFORMATION APPLIANCE INFORMATION (manual copy - keep with your records) To make care and servicing of your fridge easy and efficient, please record the following information for future reference: Model: Serial Number: Purchased From: Date Purchased: PRODUCT REGISTRATION Scan the QR Code or Visit our website at https://uniqueappliances.com/product-registration/ to register your product.
©2022 Unique Appliances Ltd., 2245 Wyecroft Road #5, Oakville, Ontario, Canada, L6L 5L7 www.UniqueAppliances.