UNIQUE UGP 3 PORTABLE CAMPING REFRIGERATOR Installation and Owners Manual WARNING: Improper installation, adjustment, alteration, service or maintenance can cause injury or property damage. Refer to this manual. For assistance or additional information consult a qualified installer, service agency or the gas supplier. !SAVE THESE INSTRUCTIONS! FOR YOUR SAFETY IF YOU SMELL GAS Open windows. Do not touch electrical switches.
CERTIFIED AND DISTRIBUTED BY Unique Gas Products Ltd ““PPeerrssoonnaall SSeerrvviiccee & & KKnnoow maakkeess uuss U wlleeddggee m Unniiqquuee”” 2245 Wyecroft Road #5 Oakville, Ontario Canada L6L 5L7 Ph: 905-827-6154 Toll Free: 1-877-427-2266 Fax: 905-827-2027 www.UniqueOffGrid.com E-mail: info@propanefridge.
Table of Contents Chapters Welcome 1 Safety and Warnings 1 Appliances Installation/ Operating Instructions 2 Maintenance & Service 3 Troubleshooting & Suggested Spares 4 Door Removal and Reversal 5 Temperature Controls & Food Storage and Cleaning 6 Wiring Diagram 7 Parts & Warranty 8
U N I Q U E U G P 1 Chapter 3 Welcome & Congratulations C ongratulations on your purchase of a UNIQUE refrigerator!. We are very proud of our product and we are completely committed to providing you with the best service possible. Your satisfaction is our #1 priority. Please read this manual very carefully. It contains valuable information on how to properly maintain your new gas refrigerator. We know you will enjoy your new refrigerator and Thank You for choosing one of our Unique Gas Products.
U N I Q U E U G P 3 Safety and Warnings If you smell gas Open Windows Don’t touch electrical switches Extinguish any open flame Immediately call your gas supplier For you Safety Do not store or use gasoline or other flammable vapors and liquids in the vicinity of this unit or any other appliance Warning Improper installation, adjustment, alteration, service or maintenance can cause injury or property damage. Refer to this manual.
U N I Q U E U G P 2 Chapter 3 Installation and Operating Instructions Installation For best performance at high ambient temperatures, there must be free air circulation over the cooling unit at the rear of the refrigerator. Ensure that there is a free air space above the refrigerator and that the flue (chimney) on top of the cabinet is not covered in any way. Do not place the refrigerator in a space where air circulation is restricted. Follow “clearance” instructions.
U N I Q U E U G P 3 Note: DO NOT install the appliance directly on carpeting. Carpeting must be removed or protected by a metal or wood panel beneath the appliance, which extends at least the full width and depth of the appliance. Keep appliance area clear and free from combustible materials, gasoline and other liquids with flammable vapors.
U N I Q U E U G P 3 Note: The gas supply system must incorporate a pressure regulator to maintain a supply pressure of not more than 12” water column and no less than 11” water column. (Max setting) General Operating Instructions Importance of Leveling a Refrigerator The refrigerator must be adjusted to a vertical position in both directions. In an absorption refrigeration system, ammonia is liquefied in the finned condenser coil at the top rear of the refrigerator.
U N I Q U E U G P 3 7. Adjust the thermostat knob (D) to desired temperature setting after 4 to 8 hours of operation. 8. To terminate gas operation, turn selector switch (E) to either AC, DC or OFF position. Shut Down Procedure – LP Gas A. Turn selector knob “E” to the “AC, DC or OFF” position B. Shut the gas off at the LP-gas supply cylinder when the appliance is not in use. C.
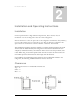
U N I Q U E U G P 3 Figure #1 A B C D E Thermostat The refrigerator cooling temperature is controlled by a combination thermostat that can be adjusted by turning knob D to different settings to maintain the desired refrigerator temperature when operating on either gas or 110V. Knob C also incorporates a safety device which automatically shuts off the supply of gas if the flame goes out. The piezo electric igniter discharges sparks onto the burner when the button is pushed. See Figure #1 1.
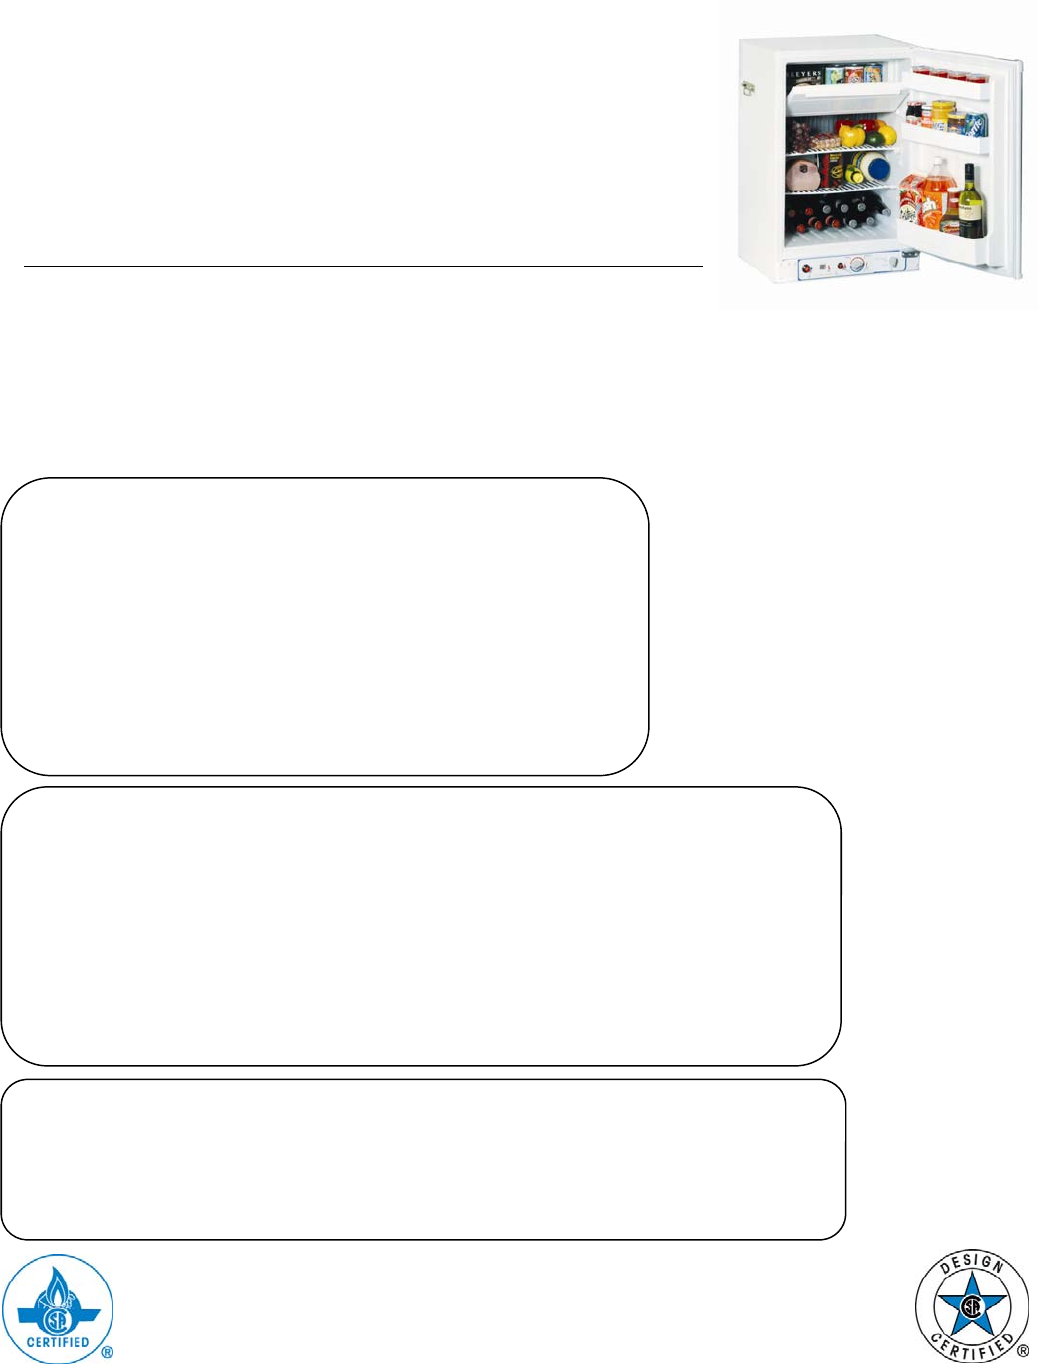
U N I Q U E U G P 3 How to Use the Refrigerator FOOD STORAGE COMPARTMENT The food storage compartment is completely closed and unventilated, this is necessary to maintain the required low temperature for food storage. The coldest areas in the refrigerator are under the cooling fins and at the bottom of the refrigerator. The warmer areas are on the upper door shelves. This should be considered when placing different types of food in the refrigerator.
U N I Q U E U G P 3 creating a lot of defrost water, your water reservoir may overflow, we suggest you inspect reservoir before/after cycle. FREEZER SECTION This area must be wiped down with cloths to remove water after defrosting; there is no catch tray for this compartment When all frost is melted in the freezer compartment & interior of the refrigerator it should be wiped up with a clean cloth. Replace all food and set the thermostat to its normal position.
U N I Q U E U G P 3 Chapter 3 Maintenance & Service The user should be aware of service that must be done on a regular schedule to keep the refrigerator operating properly. Installation must be by a licensed gas fitter in accordance with local codes or must comply with Propane Installation Code CAN/CGA-B149.2 (latest edition) Keep appliance area clear and free from combustible materials, gasoline and other liquids with flammable vapors.
U N I Q U E U G P 3 Check all connectors in the complete refrigerator LP gas system for gas leaks. The LP gas supply must be turned on. Apply a non corrosive bubble solution to all LP connections. The appearance of bubbles indicates a leak and should be repaired immediately by a qualified serviceman. WARNING – DO NOT USE FLAME TO CHECK FOR GAS LEAKS PROCEDURE FOR CLEANING THE COOLING SYSTEM FLUE WARNING: Carbon Monoxide can be hazardous to your health.
U N I Q U E U G P 3 4. Before removing burner orifice, clean burner area of any soot, scale or dirt Remove the orifice and soak it in alcohol (isopropyl alcohol or thinners) and blow it out with compressed air. Do not use thin objects to either clean or unblock the injector. Re-install and tighten burner orifice. 5. Replace burner Warning - DO NOT use a pin or wire when cleaning the burner orifice as damage can occur to the precision opening.
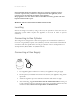
U N I Q U E U G P 3 VIEW OF BACK OF THE APPLIANCE WARNING – Button (C) Fig#1, page 7, must be manually depressed to allow gas pressure to flow to the burner orifice. Be sure to apply the leak check solution before depressing this button. DO NOT allow any open flame, sparks, smoking, etc. in the area of the test. DO NOT depress (C) for over 30 seconds.
U N I Q U E U G P 4 Chapter 3 TROUBLESHOOTING INSTRUCTIONS & SUGGESTED SPARE PARTS TO KEEP ON HAND REFRIGERATOR DOES NOT COOL, CHECK LIKELY CAUSES: 1. Burner orifice clogged. Clean. See section MAINTENANCE & SERVICE, CHAPTER 3 2. Check to ensure refrigerator is level – (left to right and front to back) 3. Restriction on air flow across cooling unit. 4. Heavy frost build up on evaporator fins. Defrost. 5. Flue baffle not inserted properly in flue tube. 6. Improperly set thermostat.
U N I Q U E U G P 3 Suggested Spare Parts The following is a list of commonly used parts which are available: Burner orifice Burner Electrode Thermocouple Piezo Igniter (push button) Baffle Contact your dealer or an authorized service center for parts and repairs as needed. Quote Model & Serial # - See CSA rating/serial plate on inside left wall.
U N I Q U E U G P 5 Chapter 3 Door Removal & Reversal Instructions This appliance has the capability of either opening the door from the left or right side. The unit is delivered to you with the door opening from the left side, to the right. Should you desire to reverse the opening direction, please follow the following instructions. NOTE: All parts removed must be saved to do the re- install the door. How to reverse the door: Figure #3. 1.
U N I Q U E U G P 3 Figure#3 17
U N I Q U E U G P 6 Chapter 3 Looking Inside SHELF ADJUSTMENT Refrigerator shelves are easily adjusted to suit individual needs. Before adjusting the shelves, remove all food. Food Storage Ideas FRESH FOOD STORAGE The fresh food compartment should be kept between 38° F and 40° F (3.3° C and 4.4° C) with an optimum temperature of 38° F (3.3°C). Avoid overcrowding the refrigerator shelves. This reduces the circulation of air around the food and results in uneven cooling.
U N I Q U E U G P 3 Force as much air out of the packages as possible and seal them tightly. Trapped air can cause food to dry out, change color, and develop an off-flavor (freezer burn). Wrap fresh meats and poultry with suitable freezer wrap prior to freezing. Do not refreeze meat that has thawed. LOADING THE FREEZER Avoid adding too much warm food into the freezer at one time. This overloads the freezer, slows the rate of freezing, and can raise the temperature of frozen foods.
U N I Q U E U G P 7 Chapter 3 Wiring Diagram 20
U N I Q U E U G P 8 Chapter 3 Parts Diagram and List UNIQUE UGP 3 - EXPLODED DIAGRAM 21
U N I Q U E U G P 3 UNIQUE UGP 3 – Parts List NO 1 2 3 4 5 6 7 8 9 10 11 12 13 14 15 16 17 18 19 20 20-1 20-2 20-3 21 22 23 24 25 26 27 Item Cabinet M5 Screw cover Flat head stainless steel bolt Cassette Heat sink Drip tray Drainage hose Drainage box Washer Bolt Inlet nipple holder Inlet nipple Left top hinge Right top hinge Screw Cooling unit Insulation cover Baffle holder Baffle Burner assembly Burner holder Burner box Burner Gas pipe Nut for jet Burner gas pipe Jet Flame indicator Flame indicator ho
U N I Q U E NO 28 29 30 31 32 33 34 35 36 37 38 39 40 41 42 43 44 45 46 47 48 49 50 51 52 53 54 55 56 57 58 59 60 61 62 63 U G P 3 Item Ignition pin Thermocouple Push button Spring Safety valve Thermostat gas inlet connector Thermostat Safety valve gas inlet connector Clip Thermostat holder Thermostat knob Control panel Control panel label Freezer door Freezer door gasket Freezer door hinge Shelf cap spring spring Top shelf Shelf clamp Bottom shelf Top balcony Bottom balcony Egg tray Ice cube Fridge doo
U N I Q U E NO 64 66 67 68 69 70 71 72 73 74 75 76 77 78 79 80 81 82 83 84 85 86 87 88 U G P 3 Item Nut for jet Bottom plate Insulation cap Check point body Check point connector Check point plug G1/8 nut Washer Thermocouple connector Rotary Switch Rotary Switch holder Rotary Switch small holder power Cord connection wire connection wire connection wire connection wire 12V terminal block indicator lamp indicator lamp Heater Heater handle connection wire 24 Code UGP-DL18301172 UGP-DL10001197 UGP-DL1000
Warranty UNIQUE UGP-3 PROPANE FREEZER - 3 YEAR LIMITED WARRANTY (1 year parts – 3 year cooling system) Unique Gas Products Ltd. warrants that this Unique-3 freezer is free from defects in material and workmanship under normal usage and service under the following terms: 1. This Warranty is made only to the first purchaser (”original purchaser”) who acquires this freezer for his/her own use and will be honored by Unique Gas Products Ltd. and by the Seller. 2.