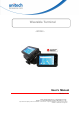
Wearable Terminal - WD200 - User's Manual Version 1.3 © 2021 unitech Electronics Co., Ltd. All rights reserved. unitech is a registered trademark of unitech Electronics Co., Ltd. All product and company names are trademarks, service marks, or registered trademarks of their respective owners Android is a trademark of Google LLC.
Revision History Date Change Description Version 20210308 first published version 1.0 20210315 Update WWANLTE 1.1 20210317 Add tumble testing result 1.2 20210318 Update 1.4 Getting started 1.3 © 2021 unitech Electronics Co., Ltd. All rights reserved. unitech is a registered trademark of unitech Electronics Co., Ltd. All product and company names are trademarks, service marks, or registered trademarks of their respective owners Android is a trademark of Google LLC.
Preface About This Manual Thank you for purchasing the unitech product. This manual explains how to install, operate and maintain our product. No part of this publication may be reproduced or used in any form, or by any electrical or mechanical means, such as photocopying, recording, or information storage and retrieval systems, without permission in writing from the manufacturer. The material in this manual is subject to change without notice.
1. which the receiver is connected. –Consult the dealer or an experienced radio/TV technician for help. This transmitter must not be co-located or operating in conjunction with any other antenna or transmitter. 2. This device complies with FCC RF radiation exposure limits set forth for an uncontrolled environment. To maintain compliance with FCC RF exposure requirements, avoid direct contact to the transmitting antenna during transmitting. 3.
https://portal.unitech.eu/public/Safetyregulatorystatement CE RF Exposure Compliance For body-worn operation, this device has been tested and meets the ICNIRP guidelines and the European Standard EN 62209-2, for use with dedicated accessories, SAR is measured with this device at a separation of 0.5 cm to the body, while transmitting at the highest certified output power level in all frequency bands of this device.
RoHS Statement This device conforms to RoHS (Restriction Of Hazardous Substances) European Union regulations that set maximum concentration limits on hazardous materials used in electrical and electronic equipment. Waste electrical and electronic equipment (WEEE) unitech has set up a policy and process to meet the 2012/19/EU concerning electronic waste disposal.
Taiwan NCC Warning Statement 低功率電波輻射性電機管理辦法 第十二條:經型式認證合格之低功率射頻電機,非經許可,公司、商號或使用者 均不得擅自變更頻率、加大功率或變更原設計之特性及功能。 第十四條:低功率射頻電機之使用不得影響飛航安全及干擾合法通信;經發現有 干擾現象時,應立即停用,並改善至無干擾時方得繼續使用。 前項合法通信,指依電信法規定作業之無線電通信。 低功率射頻電機需忍受合法通信或工業、科學及醫療用電波輻射性電機設備 之干擾。 SAR標準值2.0W/KG, 送測產品實測值為: 1.3 (W/KG) 注意事項: 1. 使用過度恐傷害視力。 2. 使用30分鐘請休息10分鐘;未滿2歲幼兒不看螢幕,2歲以上每天看螢幕不要超過 1小時。 3. 減少電磁波影響,請妥適使用。 4. 因應各地區/國家開放頻道不同,請依據當地主管機關與電信業者實際公告資訊 為主,如服務細則有所變更,請自行洽詢電信業者,恕不另通知。 5. 無線資訊傳輸設備避免影響附近雷達系統之操作 Note: Within the 5.25-5.
Laser Information The unitech product is certified in the U.S. to conform to the requirements of DHHS/CDRH 21CFR Subchapter J and to the requirements of IEC 60825-1. Class II and Class 2 products are not considered to be hazardous. The unitech product contains internally a Visible Laser Diode (VLD) whose emissions do not exceed the maximum limits as set forth in the above regulations.
Battery Notice 1. To guarantee optimal performance, it is recommended that rechargeable batteries be replaced every year, or after 500 charging cycles are completed. It is normal for the battery to balloon or expand after one year or 500 cycles. Although it does not cause damage, it cannot be used again and must be disposed of according to the location's safe battery disposal procedures. 2. If a battery performance decreases more than 20%, the battery is at the end of its life cycle.
4. 5. 6. 7. Do not leave the battery uncharged and unused for an extended period of time, the battery will wear out and the longevity of the battery will be at least half of one with frequent charges. Protect battery life by not over or under charging the battery. Please do not leave battery unused for long time without charging it. Despite unitech’s safety precautions, the battery pack may begin to change shape. If so, stop using it immediately.
CAUTION! Do not charge batteries at a temperature lower than 0°C. This will make the batteries unstable and dangerous. Please use a battery temperature detecting device for a charger to ensure a safe charging temperature range. CAUTION! To ensure the unit working properly, please keep all connectors away from the contaminants staying inside of them such as dust, grease, mud, and water. The negligence may cause the unit with no communication, short circuited, overheated and so on.
Adapter Notice 1. Please do not leave the power adapter in the socket when it is not 2. 3. connected to your unitech product for charging. Please remove the power adapter when the battery is fully recharged. The bundled power adapter that comes with your unitech product is not meant to be used outdoors. An adapter exposed to water or rain, or a very 4. humid environment can cause damage to both the adapter and the product.
Hearing Damage Warning To prevent possible hearing damage, do not listen at high volume levels for long periods. xi © 2021 unitech Electronics Co., Ltd. All rights reserved. unitech is a registered trademark of unitech Electronics Co., Ltd. All product and company names are trademarks, service marks, or registered trademarks of their respective owners Android is a trademark of Google LLC.
Worldwide Support unitech’s professional support team is available to quickly answer questions or assist with technical-related issues. Should an equipment problem occur, please contact the nearest unitech regional service representative. For complete contact information please visit the Web sites listed below: Taipei, Taiwan – Headquarters Europe Tel: +886-2-89121122 Tel: +31-13-4609292 E-mail: info@hq.ute.com E-mail: info@eu.ute.com Address: 5F, No.
Warranty Policy The following items covered under the unitech Limited Warranty are free from defects during normal use: The warranty period is varied from each country. Please consult with your supplier or unitech local office for actual length of warranty period to your purchased product. Warranty becomes void if equipment is modified, improperly installed or used, damaged by accident or neglect, or if any parts are improperly installed or replaced by the user. xiii © 2021 unitech Electronics Co., Ltd.
Table of Contents Preface ............................................................................................................. i Regulatory Compliance Statements .............................................................. i Laser Information ........................................................................................ vi LED Information .......................................................................................... vi Battery Notice .........................................
3.2 Software Update ................................................................................... 32 3.3 StageGO............................................................................................... 33 3.4 MoboLink .............................................................................................. 35 xv © 2021 unitech Electronics Co., Ltd. All rights reserved. unitech is a registered trademark of unitech Electronics Co., Ltd.
WD200 User’s Manual Chapter 1 - Overview 1.1 Package Please make sure the following contents are in the WD200 gift box. If something is missing or damaged, please contact your unitech representative. The basic package contents WD200 USB 3.0 Type C Cable Quick Start Guide Regulatory Compliance Statements Optional accessories 4-slot cradle Ring Scanner EZ Lock arm strap Holder Wrist Holder Necklace Holder Belt Holder 1 © 2021 unitech Electronics Co., Ltd. All rights reserved.
WD200 User’s Manual 1.2 Product Detail 10 10 8 5 3 4 2 1 9 6 6 7 1 Power Key 6 Pogo pin 2 Camera & LED Flash Light 7 USB Type C Port 3 Camera button / 8 Touch Panel 9 Δ :Back Button Programmable button 4 LED Light О: Home Button : Recent Button 5 Speaker 10 Microphone Holes 2 © 2021 unitech Electronics Co., Ltd. All rights reserved. unitech is a registered trademark of unitech Electronics Co., Ltd.
WD200 User’s Manual 1.3 Specifications System Features CPU Qualcomm Snapdragon™ 660 Octa-Core, 2.2 GHz , 64bits Memory 3GB RAM, 32GB Flash OS AndroidTM 10 Languages support English, Simplified Chinese, Traditional Chinese, Japanese, Spanish, German, French, Italian, Portuguese, Korean and multiple languages Display 3.1” Color TFT-LCD (800 X 480) High Resolution Display Screen Size Touch Panel Ultra sensitive capacitive touch screen, compatible with gloves and support wet resistance.
WD200 User’s Manual Communication Camera 13MP camera with flash light Bluetooth® Bluetooth® 5 supported WLAN IEEE 802.11 a/b/g/n/ac/d/h/i/k/r/v, IPv4, IPv6 Security of WLAN : WEP, WPA/WPA2 PSK, 802.1x EAP, OWE, SAE Fast Roaming : PMKID caching, 802.11r, OKC 2x2 MU-MIMO Gyroscope, G-sensor, E-compass, Light Sensor Sensor RFID Frequency 13.56Mhz ISO14443A/B, ISO15693 standard HF NFC, MIFARE, Felica Power Source Standard Battery Power Supply Input 3.
WD200 User’s Manual Note: The device is restricted to indoor use only when operating in the 5150 to 5350 MHz frequency range. AT BE BG EE FI FR IT LV LT PT RO SK LI NO CH HR CY CZ DK DE EL HU IE LU MT NL PL SI ES SE IS TR 5 © 2021 unitech Electronics Co., Ltd. All rights reserved. unitech is a registered trademark of unitech Electronics Co., Ltd. All product and company names are trademarks, service marks, or registered trademarks of their respective owners Android is a trademark of Google LLC.
WD200 User’s Manual 1.4 Getting Started 1.4.1 Charging the Battery Connect the USB cable to the USB port on WD200 and connect the other end to an AC power adapter. We recommend only the USB cable that comes with the WD200, or a unitech designed cradle, to charge the WD200. The LED indicator on WD200 is red when charging and is green when fully charged.
WD200 User’s Manual 1.4.3 Turning on the terminal for the first time It is recommended to fully charge WD200 before first use. You can now start up your device to set up the languages, WLAN setting, and date and time. Power Button Turn ON your device by pressing the power button on the terminal. ❷ 1.4.
WD200 User’s Manual 8 © 2021 unitech Electronics Co., Ltd. All rights reserved. unitech is a registered trademark of unitech Electronics Co., Ltd. All product and company names are trademarks, service marks, or registered trademarks of their respective owners Android is a trademark of Google LLC.
WD200 User’s Manual Chapter 2 – Installation & Operation 2.1 HF Setting 1. On the main screen, scroll the screen from down to top to reach the APPS, and tap 2. Settings and then tap Connected devices. Tap Connection Preferences and enable NFC 9 © 2021 unitech Electronics Co., Ltd. All rights reserved. unitech is a registered trademark of unitech Electronics Co., Ltd.
WD200 User’s Manual 3. Make sure that both devices are unlocked and have NFC turned on. Also make sure that the NFC antenna area of WD200 and the other devices' NFC area are close to one another. Slightly moving the device until a connection is made. 10 © 2021 unitech Electronics Co., Ltd. All rights reserved. unitech is a registered trademark of unitech Electronics Co., Ltd.
WD200 User’s Manual 2.2 WLAN Setting 1. On the main screen, scroll the screen from down to top to reach the APPS, and tap Settings and then tap Network & internet. 2. To see available networks, turn WLAN ON. And tap to choose the available networks. 3. Choose the available networks, and enter the Password and tap Connect. 4. If the wireless network that you want is not listed, tap + Add network to manually add it. 5. When enabled, the icon is displayed on the status bar.
WD200 User’s Manual 2.2.1 WLAN Advanced WLAN advanced can enhance the roaming behavior when the device is in areas of particularly low coverage or losing its connection to the network infrastructure and provides the power save mode to control the power consumption setting. WLAN advanced will help users to manage the seamless roaming. 1. On the main screen, scroll the screen from down to top to reach the APPS, and tap Settings and then tap WLAN Advanced. Always tap “Apply” to finish the setting.
WD200 User’s Manual ● Power Save Mode Tap to enable the power save mode to set the WLAN module to its optimum power consumption setting. ● Roaming Trigger (Default : -67 dBm, Range : -10 dBm ~ - 120 dBm) Roaming trigger will help users to look for a better and stronger signal strength (in dBm) by scanning many access points. When the signal strength is lower than roaming trigger value, roaming trigger will start to look for better access points.
WD200 User’s Manual 2.2.1.1 Other options Tap for more options to import / export the current data from the device. Initialize is able to restore the default settings. 14 © 2021 unitech Electronics Co., Ltd. All rights reserved. unitech is a registered trademark of unitech Electronics Co., Ltd.
WD200 User’s Manual 2.3 PAN Setting 1. On the main screen, scroll the screen from down to top to reach the APPS, and tap 2. Settings and then tap Connected devices. Tap Connection Preferences to enable Bluetooth 15 © 2021 unitech Electronics Co., Ltd. All rights reserved. unitech is a registered trademark of unitech Electronics Co., Ltd.
WD200 User’s Manual 3. Tap ON / OFF to enable / disable Bluetooth® . To pair the available device, turn Bluetooth® ON to choose the available device. 16 © 2021 unitech Electronics Co., Ltd. All rights reserved. unitech is a registered trademark of unitech Electronics Co., Ltd.
WD200 User’s Manual 2.4 PC Setting 1. Connect WD200 to your computer with the USB type C cable. Your computer will recognize it is USB charging. 2. Slide down from top, the system will show as follow picture, then you can select File transfers. 17 © 2021 unitech Electronics Co., Ltd. All rights reserved. unitech is a registered trademark of unitech Electronics Co., Ltd.
WD200 User’s Manual 2.5 Camera Setting 1. Scroll the screen from down to top to reach the APPS, and tap Camera. 13MP Camera & LED Flash Light 2.5.1 Camera Settings For the first time turn on, the screen will show a brief introduction about camera settings. 18 © 2021 unitech Electronics Co., Ltd. All rights reserved. unitech is a registered trademark of unitech Electronics Co., Ltd.
WD200 User’s Manual 2.5.2 Scene Mode Setting 2.5.3 Camera Filter Effects 19 © 2021 unitech Electronics Co., Ltd. All rights reserved. unitech is a registered trademark of unitech Electronics Co., Ltd.
WD200 User’s Manual 2.5.4 Settings Please tap to enter the settings section. 20 © 2021 unitech Electronics Co., Ltd. All rights reserved. unitech is a registered trademark of unitech Electronics Co., Ltd.
WD200 User’s Manual 2.5.5 Record Videos Once tap the record button, it will start recording. 21 © 2021 unitech Electronics Co., Ltd. All rights reserved. unitech is a registered trademark of unitech Electronics Co., Ltd.
WD200 User’s Manual 2.6 Performing a Hardware Reset You may have to perform a reset if the device freezes (i.e., the terminal no longer responds to the buttons or tapping on the screen). Long press and hold the Power button around 15 seconds to shut down the system and then press the Power button again to turn on the device. 22 © 2021 unitech Electronics Co., Ltd. All rights reserved. unitech is a registered trademark of unitech Electronics Co., Ltd.
WD200 User’s Manual 2.7 Performing Factory Data Reset 1. On the main screen, scroll the screen from down to top to reach the APPS, and tap Settings and then tap System. 2. Tap Advanced for more options, and then tap Reset options. 23 © 2021 unitech Electronics Co., Ltd. All rights reserved. unitech is a registered trademark of unitech Electronics Co., Ltd.
WD200 User’s Manual 3. You can reset the system on Reset options. When you select Erase all data (factory reset), it will erase all folders. 24 © 2021 unitech Electronics Co., Ltd. All rights reserved. unitech is a registered trademark of unitech Electronics Co., Ltd.
WD200 User’s Manual 2.8 KeyRemap The WD200’s keys can be programmed for users to be able to perform different functions or applications. Two options to use key remap functions : CAMERA and RECENT. Camera Recent Virtual Button 2.8.1 Remap a key On the main screen, scroll the screen from down to top to reach the APPS, and tap KeyRemap. Select the keys to remap and enable key. After remapping the key, remember to enable the key remap. 25 © 2021 unitech Electronics Co., Ltd. All rights reserved.
WD200 User’s Manual 2.8.2 Export / Import a remap Key Configuration file ■ Export file 1. Tap 2. Select Export The remap Key configuration can be exported to a text file or imported into WD200. Note: The configuration file (keys_config.txt) is saved in File Manager. (For File Manager setting, please refer to 3.1 File Manager ) 26 © 2021 unitech Electronics Co., Ltd. All rights reserved. unitech is a registered trademark of unitech Electronics Co., Ltd.
WD200 User’s Manual ■ Import file Before importing the file, please make sure the configuration file (keys_config.txt) is in File Manager. 1. Tap 2. Select Import ■ Reset all settings 1. Tap 2. Select Reset all settings 27 © 2021 unitech Electronics Co., Ltd. All rights reserved. unitech is a registered trademark of unitech Electronics Co., Ltd.
WD200 User’s Manual 2.9 Split Screen Split screen function allows you to have two apps work side by side on the same screen. Please follow the steps to enable split screen multitasking. Note: Some apps may not work with split-screen. 1. Tap Recent Virtual Button until you see those background apps on the screen. Recent Virtual Button 2. Tap and hold the thumbnail and then select “Split screen.” First APP “Split screen” will be on top of the screen.
WD200 User’s Manual 3. To cancel split screen, simply drag up or down the black bar in the middle of the two APPs to expand the app that you would like to keep in full screen. 29 © 2021 unitech Electronics Co., Ltd. All rights reserved. unitech is a registered trademark of unitech Electronics Co., Ltd.
WD200 User’s Manual 2.10 Network Time Protocol (NTP) Server The Network Time Protocol is used to synchronize the clocks over the Internet. Allow the users to set the clock by using NTP Server. 1. On the main screen, scroll the screen from down to top to reach the APPS, and tap Settings and then tap NTP (Network Time Protocol) Server. 2. On NTP Server, choose the system preferences to set up network time. 30 © 2021 unitech Electronics Co., Ltd. All rights reserved.
WD200 User’s Manual Chapter 3 – Introduction to Applications 3.1 File Manager On the main screen, scroll the screen from down to top to reach the APPS, and tap File Manager. : Settings : Return to the previous page : Main page : Refresh : Folder arrangement : Folder Information : Flash Storage 31 © 2021 unitech Electronics Co., Ltd. All rights reserved. unitech is a registered trademark of unitech Electronics Co., Ltd.
WD200 User’s Manual 3.2 Software Update 1. On the main screen, scroll the screen from down to top to reach the APPS, 2. and tap Software Update. To update or check the latest version of each application, please tap CHECK UPDATE. 3. Tap for more settings on Software Update. 32 © 2021 unitech Electronics Co., Ltd. All rights reserved. unitech is a registered trademark of unitech Electronics Co., Ltd.
WD200 User’s Manual 3.3 StageGO StageGO is a configuration staging solution for unitech mobile devices. StageGO helps IT admins to use the 1-click auto configure feature to set up and initialize a device quickly. Devices configure themselves by using configuration scripts and barcodes prepared by the IT admins, the StageGO app, currently available for Android devices, uses unitech devices’ barcode scanning capabilities to load the script barcode into the device and start the self-configuration process.
WD200 User’s Manual barcodes on the printouts (or load the script file). When all barcodes are scanned, StageGO is ready to begin self-configuration. StageGO can also be configured for 1-click auto configuration. On the main screen, scroll the screen from down to top to reach the APPS, and tap StageGO. Please visit the StageGo website for more information : https://apps.ute.com/StageGO2/ 34 © 2021 unitech Electronics Co., Ltd. All rights reserved.
WD200 User’s Manual 3.4 MoboLink MoboLink is a software platform that helps unitech customers to remote manage their purchased devices and applications. The core of the MoboLink platform provides functionalities in the MDM (Mobile Device Management) and MAM (Mobile Application Management) domains, and then further extends into other management functions such as alert notification management and account management. On the main screen, scroll the screen from down to top to reach the APPS, and tap MoboLink.