
Instruction manual
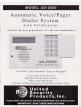


Programming
And Recording
Your
Outgoing
Messages
Follow
these steps to
program
and record your
outgoing
messages.
Skip this
portion
if
you
have
programmed
in only
numeric
pagers,
which rely on coded DTMF
messages. As with
all
AD-2000 programming,
the unit need not
be connected to
a
phone
line when information
is
programmed
in. Remember
that
"OPT"
on the LCD
stands
for
option:
"OGM"
stands
for
outgoing
message.
NOTE: IF
YOU
ENTER THE WRONG
CHOICE, PRESS
"M"
KEY
REPEATEDLY AND RETURN TO
THE
"PROGRAM
MODE", THEN
SELECT
THE
SECTION TO CHANGE
C'1"
ACCEPT
SECTION,
*2"
FOR
NEXT SECTION). THEN ENTER CORRECT INFORMATION.
STEP L
Decide which
of the eight options
you prefer.
STEP
2 Before
programming
in
this option, write down all
your
messages. Time them
carefully, changing them if
necessary to fit the alotted time frame. Practice
saying them,
clearly enunciating each message for maximum
clarity in case
of
an emergency. Keep
a
final
recording script.
STBP 3 Program
your
option.
A)
The
LCD will read: PROGRAM:
OGMS
l(YES) 2(NO)
B) Press
"1"
to
program your
OGMs.
Press
"2"
to scroll to the
next section.
C)
Press
"l"
to select the option
(#l-
#8) displayed or
press
"2"
to
scroll
to
the
desired option.
STBP
4 After selecting
your
option as explained above. record
your message.
A) The word RECORD will
appear in the upper left corner of
the LCD, above the instruction:
PRESS R.
The
option
selected will
appear
in the
upper
right
corner. For instance,
if
you
selected option #2, the LCD will read:
RECORD OGMI
PRESS R
B) Speak 6-12 inches away from the microphone. Referring
to
your
script
and speaking in a
normal
voice,
press
and
hold
R
(the
word RECORDING will
be displayed), releasing the
key after
you
have completed enunciating
your
messages.
The
word DONE will appear
on
the LCD when the
maximum
allotted time
has
been reached.
C)
The LCD will read:
PLAY
OGM(S)
1(YES) 2(NO)
Press
"1"
to
play
back
your
recording
D) The LCD will read:
ACCEPT
1(YES) 2(NO)
Press
"
l
"
to accept the recorded
OGM(s).
Press
"2"
if
you
wish
to
re-record
the messages, beginning with
Step 4.
Changing
The
OGMs
After
your
system is
up and operating,
you
may change
one
or
more
of
the recorded
OGMs and/or choose a completely
diff'erent option. To do so, simply scroll to
the
programming
section on
your
display:
PROGRAM:
OGMS
l(YES) 2(NO)
Select the option, then begin again from
Step 3 above to record
your
new
message(s).
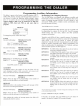
Programming
The
Channels
The AD-2000
is designed
to be adaptable to
a complete range
of
personalized
applications. Each
of the four input
channels can
be
programmed
individually for
full system
customization. ln
addition to setting enable/disable
options, entry/exit
delays and
type of
activation
(N.O.,
N.C.,
& momentary or
continuous), each
user can specify which
emergency messages will
be delivered
and
which numbers will be
dialed. The first
channel activated will be
the
priority
channel. Numbers programmed
to that channel will
be
completed before the dialer moves
on to the next
channel(s).
Although comprehensive in
scope, the system is
easy to
program.
Just fbllow these
simole steos.
NOTE: IF YOU
ENTER THE WRONG
CHOICE, PRESS
"M"
KEY
REPEATEDLY
AND RETURN TO THE
"PROGRAM
MODE'" THEN
SELECT THE SECTION TO CIIANGE
('T"
ACCEPT
SECTION,
"2"
FOR NEXT SECTION). THEN ENTER
CORRECT INFORMATION.
STEP 1 ttre LCI
will
read: PROGRAM:
CHANNELS
1(YES) 2(NO)
Press
"1"
to
begin
programming
the channels.
STEP
2 The LCD will
read:
SELECT:
l-4
O(DONE)
Enter the channel
you
wish to
program
(1-4).
Enable/Disable
STEP
3 tne r-Cn will
read:
CH
X: ENABLE
I(YES) 2(NO)
("CH
)C'being the channel
selected)
Press
"l"
to enable the channel. Press
"2"
to disable the channel.
Exit/Entry
Delays
Capable of
programming
up to a maximum of
3
minutes
and 20
seconds each.
STEP
4 The LCo will
read:
CH
X: EXIT DELAY
1(YES)
2(NO)
Proceed
with A) if
you
wish
to
program
an exit delay.
Proceed
with B) if
you
do not.
A)
To program
exit delay,
press "1".
The
LCD will read: ENTER
0-199 THEN
PRESS
*
Enter
the digits corresponding
to the number of seconds
you
wish
to
install.
(For
example,
press
"l20"
then
press
"*",
if
you
wish
to install a 120-second exit
delay).
B) Ifyou
do not wish to
program
an exit delay,
press
"2".
STEP 5 ttre LCO will read:
CH
X:
ENTRY DELAY
1(YES) 2(NO)
Proceed with
A) if
you
wish
to
program
an entry delay.
Proceed with
B)
if
you
do not.
A) To program
an entry delay,
press
"1".
The LCD will
read: ENTER 0-199 THEN
PRESS
*
Press
"l"
to
program
a
delay. Then enter the digits
corresponding
to the number of seconds
you
wish to install.
(For
example,
press "90"
then
press
"*",
if
you
wish to install
a 90-second delay).
B) If
you
do
not wish
to
program
an entry
delay,
press "2".
10