
User Manual
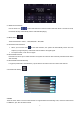
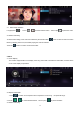

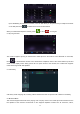
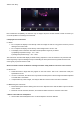
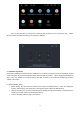
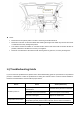
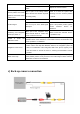
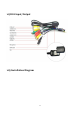

Table Of Contents
- Disclaimer
- For your safety, it is advisable to not watch vide
- i) Basic Operation Setting
- ii) Settings
- iii) Application
- 1. Navigation
- 1.1 Navigation Map Data
- 1.3 Installation of APK Navigation Application
- 1.4 Navigation Activation
- 1.5 Navigation Application Operation
- 2. Radio
- 3. Video
- 4. Music
- 5. Bluetooth
- 6. Display Screen Instructions
- 7. Mirror Link Feature for smartphone.
- After you open the APP, you will go to the selecti
- 8.Installation of Antenna
- Recommend installing the GPS antenna on dashboard
- iv) Troubleshooting Guide
- v) Back-up camera connection
- vi) RCA Input/Output
- vii) Installation Diagram

9
2.1 Radio Channel Search
Use the arrow icon
,
” at the radio interface to search for band channels. When a channel is found,
the search will stop automatically and the radio will start playing.
2.4 Band Search
Touch band search to select :FM1,FM2,FM3;AM1,AM2
2.5 Automatic Channel Search
When you touch this icon“ ”at the radio interface, the system will automatically search from low
frequency to high frequency until it finds channel with the strongest signal.
To stop the search, touch the icon again.
2.8 Preset Radio Channel
Each band can store up to 6 radio channels. The system can store 24 radio channels (18 FM channels and 6
AM channels).
2.9 Preset Radio Channel Manually
Long press preset radio channel button (1-6) for about 2 seconds to save the current radio channel.
2.10 Radio state setting
3. Video
Touch the music video icon at the main interface. It supports flash internal storage card, music and video stored
in USB drive, ape, flac and other formats.