Digital Receiver U4103- U4104 Please, read this manual carefully, before installing the digital receiver. It contains important informations concerning your safety and the correct installation and use of your new receiver.
0 English Foreword FOREWORD Important notes and informations of interest are labelled with the following icon: ! Menu options in the receiver software, as well as keys and connections descriptions are written in italic. 2 Version 1.
0 English Foreword CONTENTS FOREWORD ...................................................................................................................2 CONTENTS .....................................................................................................................3 FOR YOUR SAFETY... ....................................................................................................4 PACKAGE CONTENTS..........................................................................................
1 English For your Safety FOR YOUR SAFETY... Please read the manual carefully before installing the receiver. Caution, never open the device by yourself. Dangerously high voltages are present inside the unit. Refer servicing to qualified staff only. When installing the receiver, always unplug the receiver from the mains voltage.
1 English For your Safety Before you start operating the receiver, make sure that the satellite antenna is properly built up, optimally connected and aligned. The correct place to install the receiver is, of course, near your TV set and any other A/V signal sources (DVD, VCR, CD, game console, etc.). Choose a stable support, in which you can easily lay the necessary connecting cables without stumbling-danger. The receiver should be installed near an easily accessible outlet.
2 English Package Contents PACKAGE CONTENTS Manual: Remote Control (Batteries included): Do not forget to install the batteries! 6 Version 1.
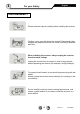
3 English Connections and controls CONNECTIONS AND CONTROLS ! This manual makes reference to the U4103-U4104 receivers 1 2 3 4 5 6 1. POWER: Switches the receiver on, or enters standby mode. To completely switch off the receiver, you have to use the switch on the back of the receiver. 2. POWER LED: Indicates that the mains voltage (90-230 VAC) is available. 3. SIGNAL LED: Indicates a sufficient signal level at the IF IN input 4. DISPLAY: 4 Digits to display the program numbers. 5.
3 English Connections and controls SAT VCR 1 3 2 5 4 6 7 9 10 11 12 8 HiFi PC TV SAT analog 1. LNC IN: Satellite input 2. LNC OUT: Satellite output for cascading to other devices Caution: Please note that you can only operate one receiver at a time 3. 5 VDC 4. RS-232: Serial Port allowing software upgrades 5. ANT IN: Antenna input for the terrestrial antenna 6. TO TV: Modulator output for the connection to a TV set 7. TV SCART: Output SCART for the connection to a TV set 8.
3 English Connections and controls You can control the following functions with the remote control: 1. POWER: Switches the receiver on or enters stand by mode. 2. MUTE: 1 The Audio will be muted 3. INFO: Shows information about the current reception In the EPG: Shows detailed information 4. TV/RADIO: Switches between TV or Radio channels 5. FAV: Opens the favourite channel list 6. CH: 18 Changes the program, and On / Off inside a menu 7. VOL: Volume level 8. PAUSE: Freezes the picture 9.
4 English Installation The following steps assume, that ... ... the receiver is properly set up and the satellite antenna is correctly installed and aligned. In case of eventual problems with the direction of the SAT-antenna, please read the page 42 about the antenna direction menu. Important: Unplug the receiver if you wish to carry out connection tasks. Connection ... ...
4 English Installation a) Use a scart cable A single Scart-cable is enough for the connection to the TV set. b) RCA connectors The Video and audio signals are also available through the RCA connectors. It can be interesting to connect an additional monitor or stereo set. Make the appropriate connections: The 7 RCA -video with the corresponding input at your monitor and the 7 RCA -audio with the input at your stereo set.
4 English Installation Connection to the 90-230V mains The power cord is built into the receiver. Be careful when working with the power cord and please, pay attention to the following guidelines: ... never put objects over the power cord ... never use the power cord over sharp objects ...
4 English Installation Installation Wizard The receiver includes a setup wizard that will help you configure the different parameters.
4 English Installation Installation wizard: Audio output Language With the CH press buttons you can choose your favourite audio language for TV and Radio channels. With the VOL button you can change between BACK and NEXT. Choose NEXT and press OK to go into the next menu.
4 English Installation Installation wizard: Set up DiSEqC If you receive more than one satellite through a DISEqC switch, you will need to assign every satellite to the corresponding DISEqC output. BACK A typical setup for Spain is: DiSEqC A = HOTBIRD DiSEqC B = ASTRA With the CH and VOL press buttons you can change between the individual satellite and the LNC settings. To change a selection, press the OK button. If you only need one satellite, change the others to Deactivated in the DISEqC column.
4 English Installation Installation wizard: Search or Load Search or Load There are three possibilities to complete the installation of your receiver. Load saved program 1. 2. 3. Load saved program. Choose this menu item, to load the saved programs. Search DiSEqC Cancel With Search DiSEqC you can make an individual search for the selected satellites in the previous menu. BACK NEXT The Cancel item will allow you to reach the receiver’s main menu.
5 English Basic operations BASIC OPERATIONS Selecting a Program You have three different ways to select a program: All TV Channel 1. The OK button will open the program list. You can choose with the CH buttons the program you want to watch and, in about two seconds, the program will be automatically displayed. With the PGUP / PGDN buttons you can browse page by page through the programme listing. If you wish to leave the program list, you can press the OK button with your selection and then EXIT.
5 English Basic operations SAT Button To get a better view of your stored programs, you can view the programs on a satellite per satellite basis. The advantage of this method is that the existing sorting is maintained. Press the SAT button on the remote control and the following window will be shown: With the VOL buttons you can make selections on the left or right side.
5 English Basic operations EPG button You can access the EPG menu ( Electronic Program Guide ) if you are outside all other menus and press the EPG button on the remote control. EPG List 02/12 Tue 14:19 Arabella TV program 13:55 – 14:57 NO. CH Name 0002 ZDF 0003 ProSieben 0004 RTL 0005 RTL2 0006 SAT.1 0007 Viva Help Set Timer 13:00 F◄ F◄ F◄ F◄ F◄ F◄ --02/12 Di-- 14:30 ► SAM No EPG Arabella ► ► ► ► ► View EPG If you want to change the programs, use the CH buttons.
5 English Basic operations ZOOM button Press the Zoom button on the remote control to get a picture zooming-function. When you press the Zoom button, a magnifier icon will show up in the centre of the screen. You can move the magnifier position on the screen using the CH and VOL buttons. The first zooming-stage (2x) is activated by pressing the OK button. One further zooming stage (4x) can be achieved by pressing a second time the OK button.
5 English Basic operations AUDIO button Press the AUDIO button on the remote control to change the audio mode for a program. The following window will appear: Audio menu: Audio If the program provides different languages you can change these with the VOL buttons. Audio menu: Mode You can choose the audio mode available.
6 English Menus and OSD MAIN MENU To display the main menu press the MENU button on the remote control. The receiver’s menu system is organized in a tree fashion. With the Main menu you can reach the following items: TV Channels menu Main Menu This menu allows you to access, edit, move, delete or lock a program. It also lets you add favourite channels to one of the favourite channels lists.
6 English Menus and OSD System Setting RF-System, TV-Screen format, TV-System, Time zone. Timer Record timer configuration. Calendar Displays a perpetual calendar. Factory Default System reset with the factory default values. User Save & Load Load and store from the user settings and program list. About IRD Information about the currently loaded software version. Parental Control menu Activation of the password protection for menus and programs. OSD Changes colours and language in the menus.
6 English Menus and OSD TV Channels If you wish to edit the stored TV or Radio programs, select TV Channels entry in the main menu. The TV channels and Radio channels menu entries in the main menu are identical. Choose, with the VOL buttons, between the different functions, which are: Select With the CH buttons you select a program, and the receiver automatically switches to it. TV Channel Select NO.
6 English Menus and OSD The program to be deleted will include a cross symbol (8). You can mark several programs to be deleted. They will be deleted as soon as you leave the TV programs menu. Move In order to move a program within the program list, choose the program to be moved with the CH buttons and press the OK button. [ 7 ProSieben ] Move to Select the new location for the program in the pop up window and press the OK button. Press EXIT to cancel.
6 English Menus and OSD Sort If you want to sort your programs according to various criteria, select the wished sorting method with the CH buttons and press OK. The program list will be newly built up. Sort Menu Sort by FTA Sort by Satellite Sort by Transponder Sort by Favourite Sort by Alphabet ! Caution: You can not undo the sorting, except if you load the pre-installed programs. (The Sorting Menu is a good possibility after a complete search for a satellite).
6 English Menus and OSD Installation Menu The receiver is equipped with a factory pre-installed program list: ASTRA 19,2°East on DiSEqC position A Hotbird 13°East on DiSEqC position B Hispasat 30°West on DiSEqC position C Tuerk/Eurasiasat 42°East on DiSEqC position D Select the Installation menu entry in the Main menu which has the following entries: Antenna Config LNB, Satellite, search programs. Installation menu TP-List All transponder information stored.
6 English Menus and OSD Installation Menu > Antenna Config If you have chosen the Antenna Config menu item, the following menu appears: Antenna Config Setup Search Select Easy Tuning Add Delete Rename 01 HotBird Universal On 02 Astra LNB(Low) 09750 MHz 03 Eutelsat W2 LNB(High) 10600 MHz LNB Power 13/18V 04 Eutelsat W1 05 Eutelsat W3 06 Sirius2 07 Intelsat707 DiSEqC DiSEqC A Positioner Disable Setup the satellite parameters Key: ▲ ▼ ◄ ► EXIT OK PGUP PGDN Setup In order to change a sate
6 English Menus and OSD DiSEqC With the DiSEqC, the receiver has the possibility to use up to four universal LNB. The following possibilities are available: DiSEqC 1.0: Tone burst: A, B, C, D Burst A , Burst B What you need depends on your installation and your multi switches. Example of usual installation: The ASTRA = DiSEqC B and HOTBIRD = DiSEqC A VOL press buttons will allow you to switch from one to another. Positioner With selected (with the VOL buttons), the DiSEqC 1.
6 English Menus and OSD ! If you decide to eliminate all existing programs, the sorting you have made will be lost. This menu appears only when there are already some programs stored for a given satellite. To change your selection, use the If you want to cancel, press EXIT. VOL press buttons and press OK. The following message asks you if you want the receiver to store only the free programs (FTA) or every program found.
6 English Menus and OSD Search: TV 0025 Searching New Channels Here the receiver indicates that 25 TV-programs have been found. Search: Satellite Here the receiver indicates which entry from the transponder list (TP list) has just been processed. Search: Progress, upper display bar Here you are informed about the progress of the search. In this same example, the TP-list has 62 entries and no. 34 has just been processed.
6 English Menus and OSD Select and Easy Tuning You can mark with the Select menu item all satellites that the receiver is supposed to search during the search process. In order to mark a satellite, choose it with the VOL press buttons, Select and CH. When you press OK, the satellite number will be replaced by a hook (9).
6 English Menus and OSD Add In order to add a satellite, choose, with the The last entry: ???????? of the list of satellites will now be displayed (the question marks indicate that this is the entry to be added) Here you will need to enter all the necessary Information. If you want any program to be assigned to the new satellite, it is also necessary to enter the transponder values. VOL buttons, the entry Add and press OK.
6 English Menus and OSD Rename If you want to change the name of a satellite or to name the entry ????????, select, with VOL buttons, the option Rename and press OK. the The current name of the program stands on the upper line. In the second line you can change the existing name.
6 English Menus and OSD Installation Menu > TP List TP-list data is stored in the satellite’s transponder. This information is necessary for the receiver to find programs. ASTRA satellite remains quite regular with respect to its broadcasted programs and a change is seldom necessary in this case. In the case of other satellites, it may be necessary to do modifications or to add new entries if the programs usually change.
6 English Menus and OSD Search The option Search follows the same process as described in the chapter on Installation Menu>Antenna Config>Search. The search will be carried out in the selected satellite. Add This function allows you to add an entry to the transponder list if you know the values. Add Transponder In order to add some information to the TP List, choose the Add option with the VOL press buttons and press OK. Enter now all the necessary information with the remote control.
6 English Menus and OSD You will also need to tell the receiver if you wish to store only the FTA (Free to Air) programs or not. Make your selection with VOL and press OK. If you want to cancel, press EXIT. Only FTA channels search? Yes No The receiver starts the search for new programs. At the end of the search, press EXIT. Take the following example: TV 0025 The receiver indicates that 25 TV-programs were found.
6 English Menus and OSD Edit The Edit function provides you with the possibility to change an entry from the transponder list. Choose the Edit entry with VOL press button and open the menu by pressing OK. The following submenu appears on the screen: Enter now all necessary information with the remote control’s buttons. In the lower half you will see the currently LNB- / antenna values. When you finish press OK and the new data will be stored. If you want to cancel, press EXIT.
6 English Menus and OSD Signal The signal function allows you to see the signal level of a transponder. TP List Satellite Search Add Edit Delete TP Network PID Signal No. Satellite No.
6 English Menus and OSD The following submenu appears: Add PID Enter now all necessary information with the remote control buttons. Video PID Audio PID PCR PID Tele PID 8191 8191 8191 8191 (0—8191) (0—8191) (0—8191) (0—8191) Once you finish, press OK for the data to be stored. The new entry will be added at the end of the program list with the indication: TV CH. In order to change the program name, please refer to the chapter Rename in the TV Channel menu.
6 English Menus and OSD Installation Menu > Antenna Direction The menu Antenna Direction offers a valuable aid to you during the installation of your satellite antenna. Please, refer to the instructions manual of your antenna. To open the Antenna Direction function, press the MENU button and choose, with the CH buttons, the Installation menu entry in the Main menu. And press OK. Select now the entry Antenna Direction and press OK again.
6 English Menus and OSD Longitude Angle Enter the longitude degrees corresponding to your position with the number keys. Longitude Direction Indicate here whether you are in the east or west directions with respect to the 0 ° meridian. Degrees labelled with a “+” indicate EAST, and those with a “-“ indicate WEST. (Barcelona = east ). Change with the VOL press buttons. Latitude Angle Enter the degrees corresponding to your latitude with the number keys.
6 English Menus and OSD Installation Menu > Motorised System In some cases you may want to adapt your receiver to a DiSEqC 1.2 engine; Although today many products’ advertising read "Compatible to DiSEqC 1.0 and 1. 2", this is not always the case. In the Motorised System menu you can carry out the configuration for a DiSEqC 1.2 engine. Please, refer first of all to the engine’s instructions manual. Please, ensure that the engine is correctly installed and that the reflector can move freely.
6 English Menus and OSD Select now the 00 Ref Position entry with the CH buttons and press OK again. The receiver will then send a command to the engine to go to the “0 degree” position. Both devices will be thus adjusted to each other. Satellite name VOL press buttons, the satellite you wish. Select, with the Once the satellite has been found, you can start a search run directly from this entry, by pressing OK. Transponder Select a transponder with the VOL buttons.
6 English Menus and OSD ! If you have problems during the search of a satellite, go into the Installation Menu>Antenna Direction menu and make the engine turn until it reaches the value calculated on the scale of the engine. Limit Set In the case that an engine installed in a DiSEqC 1.2 Sat antenna is not able to turn properly due to the antenna’s size, you have the possibility to increment the turn field above the software limits.
6 English Menus and OSD System Menu To open the System menu press the MENU press button and choose the System menu entry with the CH buttons in the Main menu. Press the OK button. System Menu System Setting Timer Calendar Factory Default User Save&Load The following window will be displayed: About IRD If you want to go backwards, press EXIT.
6 English Menus and OSD RF System In the case that you have combined your TV or video device through an antenna cable with the receiver, please indicate which TV system employ your device. Selection: M, B/G, I, D/K . As in the previous example, for Great Britain you will usually select: PAL B/G Change with the VOL buttons. Time Zone The receiver needs to know the precise time for the EPG (Electronic Program Guide).
6 English Menus and OSD System > Timer Timer The receiver provides you with two possibilities to activate the recording timer: The most convenient way is through the EPG. Start the EPG and choose a program. Then, press the RECALL button. The following window will appear: ProgName Start Date Start Time Stop Date Stop Time RepeatStyle CANAL CANARIAS 01/12 (DD/MM) 17:00 (HH/MM) 01/12 (DD/MM) 17:59 (HH/MM) 1x With the VOL buttons you can select the repeat style.
6 With the English Menus and OSD VOL buttons you can select among Add, Edit and Delete. Timer: Add Select Add with the VOL buttons and press OK. Source Channel Start Date Start Time Stop Date Stop Time Rpt TV ProSieben 01/12 (DD/MM) 17:00 (HH/MM) 01/12 (DD/MM) 17:59 (HH/MM) 1x Only one Time Use the CH buttons to navigate through the fields and change the values with the VOL buttons or with the number keys 0-9 in the remote control. Press the OK button to store, and the EXIT button to leave.
6 English Menus and OSD System > Calendar Calendar The receiver includes a "perpetual" calendar. In order to open the calendar, press the MENU button and choose System with the CH buttons in the Main menu. Choose now the Calendar menu item and press again the OK button. The following window will appear: Month: Dezember With the CH buttons you can change the desired year and with the month.
6 English Menus and OSD System > Factory Default The Factory Default function in the System Menu offers the possibility to eliminate, at the same time, all preferences and data, including the stored programs. You should only carry out this step if no function works properly anymore! All data will be deleted permanently ! To carry out the factory reset press the MENU button and choose the System menu option with the CH buttons. Choose now the Factory default option and press OK.
6 English Menus and OSD System > User Save & Load In order to get the stored programs list, press the MENU button and choose the System menu entry with the CH buttons. When you press OK, the system menu will be displayed. Choose now the User Save&Load option and press OK again. User Save&Load Save Prog & Config Load Prog & Config User Guide Key: ▲ ▼ ◄ ► EXIT OK The User Save&Load menu option from the System menu is very important, because here is where the security of your data lies.
6 English Menus and OSD System > About IRD If you wish to know which software has been installed in your receiver, you can get the information you need in the About IRD option from the System menu. In order to open the System menu, press the MENU press button and choose the System menu entry in the Main menu with the CH press buttons. System Menu System Setting Timer Calendar Press the OK button. Next, select About IRD with the press buttons and press OK.
6 English Menus and OSD Parental Control If you want to block the access to certain fields or programs of the receiver, you have the possibility to activate the password protection in the Parental Control menu. To open the Parental Control menu, press the MENU press button and choose the Parental Control option with the CH buttons in the Main menu. And press OK.
6 English Menus and OSD Insert new password Now that all fields are visible for the password input you can enter the new password as a four-digit numeric code with the number keys. Parental Control Password Lock Off Installation Lock Off Change password Confirm password Please enter your password a second time, in order to test whether it was correctly entered. Employ the number keys on the remote control.
6 English Menus and OSD OSD If you want to change the language, colour or transparency factor of the OSD display, select the OSD option from the Main menu. Press the MENU press button and choose the OSD option from the Main menu with the CH buttons and press OK. OSD Setting Menu Language ►English◄ Audio Language English Menu Color C-01 Transparency 08 Background Enable Key: ▲ ▼ ◄ ► EXIT OK Menu Language Select your menu language with the VOL press buttons.
7 English Troubleshooting TROUBLESHOOTING In case of problems with the receiver, and before further search, check first that ... ... the receiver’s set up has been carried out accordingly to the instructions of this manual and that the connections are accurate. ... the satellite antenna conforms to the requirements of the installation, is well mounted and aligned. Without these two requisites, the following troubleshooting guide cannot lead to success.
7 d) e) f) English Troubleshooting Did you turn on the voltage supply for the LNB? Please, refer to the chapter Installation Menu >Antenna Config. Have you pressed the MUTE button? Please, press this same button in order to restore the audio. Does the picture flicker or colour is gone? Please, refer to chapter System Menu>System Setting and check the values corresponding to TV System, RF System and Scart output. The remote control does not work or works badly, the receiver turns on randomly...
8 English Technical specification TECHNICAL SPECIFICATION VIDEO Decoding Bit rate Output Aspect ratio Active pixel Output connector MPEG-2 & MEPG-1 Max 15Mbps NTSC/PAL 4:3 / 16:9 / Auto 720X480 @ 30fps; 720X576 @ 25fps Péritel y RCA AUDIO Decoding Mode Bit rate MPEG-2/MEPG-1 layer I & II Mono, Dual, Stereo, Joint stereo Max 384Kbps DEMODULATION Demodulation Symbol rate Outer code Inner Coding rate QPSK SCPC / MCPC RS (204,188,t=8) Tous les supportés par la norme DVB INPUT SIGNAL Frequency Input lev