
User Manual


UAD‑2 Live Rack Manual Chapter 4: Live Rack Application 83
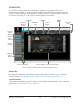
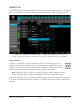
Insert Buttons
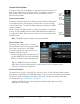
The Insert Buttons are located in the Main Column. Each Insert
Button represents one of the eight insert slots for available for UAD
plug‑in processing within a single channel.
Populated inserts contain the plug‑in name and empty inserts
contain the plus “+” symbol.
Note: In SAFE mode, all plus “+” symbols are hidden and plug-
ins cannot be assigned to the channel.
Insert Button Behavior
Insert buttons can be controlled with the mouse or the keyboard, as
described below.
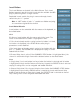
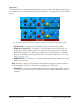
Click
Clicking an Insert button with the mouse selects the insert. The
insert is selected when its button is highlighted in blue.
If if the insert already contains a plug‑in when its button is clicked,
its interface is displayed in the PLUG‑IN tab so the plug‑in
parameters can be modified.
If the insert does not already contain a plug‑in (any button with the
plus “+” symbol), the ASSIGN tab is displayed so a plug‑in can be
loaded into the insert.
If Channel Strip view is active (if the CHANNEL STRIP button is highlighted blue), the
channel is switched to Single view and the buttons behave as described above.
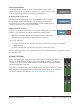
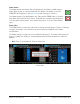
Focus
In Single view, if an Insert button has focus (when the button is selected and its button
is highlighted in blue) and the Return or Enter key is typed, the PRESETS tab is selected
so plug‑in settings files can be navigated and loaded from disk.
In Channel Strip view, if the channel strip has focus (when the CHANNEL STRIP button
is highlighted in blue and the FOCUS outline is around the Insert and Channel Strip
buttons) and the Return or Enter key is typed, the PRESETS tab is selected so channel
strip settings files can be navigated and loaded from disk.