
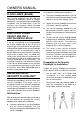
User's Manual


CAUTION
Never allow sunlight to shine
directly into the security floodlight
sensor prior to, during or after
installation. Direct sunlight could
damage the sensor.
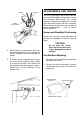
2. Remove the preassembled security
floodlight from the box.
Locate shield slots and push down over four
retainer pins.
Turn to lock in place.
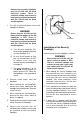
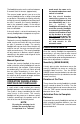
3. Observe three controls on the sensor.
Rotate SENS/RANGE (sensitivity) control
fully clockwise. Rotate DAYLIGHT/TEST-
ON control fully counterclockwise. Rotate
TIME (Time Delay) control fully
counterclockwise.
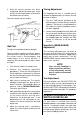
4. Place all wires of the security floodlight
through the gasket. Locate the gasket
against the back side of the cover. The
security floodlight is ready for outdoor
installation.
Removing an Old Floodlight
Assembly (if there is one)
Remove an old floodlight assembly as follows:
WARNING
The old floodlight should only be
removed and the new security
floodlight installed by persons
experienced and licensed in
household electrical wiring.
ADJUST
RANGE TEST-ON TIME
WHITE
GREEN
(IF SUPPLIED)
SENS DAYLIGHT TIME
BLACK
GASKET