
Operation Manual


23
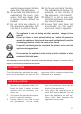
1. Comply with all safety instruc-
tions and safety regulations.
2. Ensure that you have selected a
safe location.
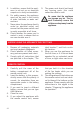
3. Plug the mains plug of the appli-
ance into an electrical outlet
(230V ~ 50 Hz).
4. Switch on the appliance via the
ON/OFF switch on the top of the
appliance.
5. The appliance can be adjusted via
the remote control unit or directly
on the control panel. The button
designations are identical in each
case.
6. Press the On/Off button on the
control panel.
7. The fan heater starts to heat at
level 1 (1,000 watt). In the dis-
play the symbol of half of a sun is
illuminated.
8. If the room temperature exceeds
the selected temperature, after
approx. 10 seconds hot air will no
longer be generated, the sun sym-
bol will be grey and the appliance
will generate cool air.
9. The following information is
shown in the display.
Current room temperature
Sun symbol - heating element
with low power or high power
Arrow symbol - flashes when the
oscillation function is switched
on.
Tree symbol - anion function. Fla-
shes when the anion function is
active to clean the heating air.
10. Select the desired function by
pressing the “Mode” button once.
11. The preset temperature of 17°C is
shown on the display.
12. Now use the “+” and “-” buttons
to select the desired temperature
within a range from 15°C to 35°C.
13. The selected temperature remains
intact, even if the appliance is
switched off and back on again.
14. Press the “Mode” button again.
15. In the display the number for the
timer setting is illuminated.
16. Now use the “+” and “-” buttons
to select the desired runtime of
the appliance within a range from
1 to 23 hours.
17. Press the “Mode” button again.
18. The numbers of the temperature
and timer settings are no longer
flashing.
19. Select the desired heating capa-
city via the “High/Low” button.
The following heating levels are
available:
- Level “I” for less heat
(approx. 1,000 watt)
- Level “II” for more heat
(approx. 2,000 watt)
Use the “High/Low” button to
change between the levels.
20. If you want the appliance to swing
back and forth, press the “Swing”
button.
21. The arrow symbol appears in the
display and the appliance swings
back and forth in a radius of 86°.
22. To switch off the swing function,
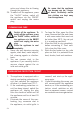
press the “Swing” button again.
23. As soon as all settings have been
made and the appliance is wor-
king, the anion function is also
PREPARING THE APPLIANCE FOR OPERATION