TM TM Underlayment and Tile Backerboard Installation Guide Interior Floors, Walls and Countertops
USG Fiberock Brand Underlayment and Tile Backerboard ® USG Fiberock Brand underlayment and tile backerboard are all purpose substrates engineered to meet floor underlayment and wall tile-backing needs throughout a home. Under resilient flooring, USG Fiberock underlayment provides a hard surface that’s smooth and flat with no bumps or ridges to show through or affect finished floor covering.
Introduction tape and setting-type joint compound. – Fasteners Wall Application: For steel stud applications (20 ga. or equivalent), use 1-1/4" or 1-5/8" USG Durock screws for steel framing (or equivalent). For wood stud applications, use 1/4", 1-5/8" or 2-1/4" USG Durock screws for wood framing (or equivalent) or 1-1/2" hot-dipped galvanized ring shank roofing nails.
Handling – Protect panels from the elements with adequate covering during delivery and storage. – Store panels flat on an even, dry surface. Allow panels to acclimate to temperature and humidity at job site prior to installation. – Handle panels in an upright position to prevent breakage. tongue and groove or back blocked at the unsupported edges. Wall Applications: Maximum stud spacing: 16" o.c. for tile installation. 24" o.c. for non-tile installations.
Preparation Crawl-Space Requirements Crawl-space requirements may vary based on geographic location. Consult local building codes for more specific information regarding vapor barriers and their uses. Ensure that subfloor and structure are within tolerances specified by floor covering manufacturer. Inspect subfloor for even, flat surface before installing underlayment. Uneven end edge joints and variations in subfloor panel thickness may telegraph through underlayment in vinyl applications.
Cutting and Laying Out Panels Cutting Panels Maintain temperature and humidity in space approximate to that of normal occupancy prior to, during and after installation. Install underlayment, with fastener marks up. Panels may be cut by scoring and snapping with a utility knife and straight edge, or by sawing, working from the face side. With scoreand-snap method, score panel twice and snap away from cut face, then snap panel in reverse direction to break the back.
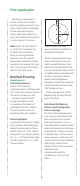
Floor Application Ceramic Tile Finishing Joints Underlayment or Tile Backerboard Panel Application Apply Type 1 organic adhesive with 5/32" v-notched trowel, latex-fortified mortar with 1/4" square-notched trowel. Comb out adhesive or mortar in straight, parallel rows (as shown below) and immediately cover with panel. Adhere panels to subfloor, one panel at a time.
Floor Application Working a small area at a time, set tile with a slight twisting motion and press into place. Avoid adhesive buildup on tile edge and in grout space. Keep tiles aligned so joints are straight and uniform. Use tile spacers if desired. 1/4 inch Note: Refer to ANSI A108.4 or A108.5 for complete tile installation instructions. Refer to setting material manufacturer for specific information related to trowel type and size, proper tile type and size, mixing instructions, and set and cure times.
Correcting Joint Imperfections Use USG Durock patching compound or equivalent sparingly to fill wide joints, repair any surface voids and correct joint lippage (panel edge sitting above or below the floor plane). Carefully fill joints wider than 1/32" and any surface imperfections with only enough material to infill void – do not feather. Correct joint lippage by applying patching compound to low side only and feathering to level. Allow compound to dry completely (90 min.
Wall and Ceiling Application Shim Place a 1/4" spacer strip or shim around lip of bathtub or shower pan to hold bottom edge of panel off the fixture. Glued-Down Wood Flooring Installation of engineered or solid hardwood glued-down flooring must strictly follow manufacturer's instructions. Follow recommendations above for underlayment installation. Joint Finishing In areas that will be tiled, finish joints with USG Durock tile backer tape and latex-fortified mortar or Type I mastic.
Countertop Application Cover plywood base with USG Durock tile membrane, 15 lb. felt or 4 mil polyethylene and attach with 1/4" galvanized staple. Determine whether floor is level by measuring distance to desired tile height on both sides of area to be tiled. If there is a difference (i.e., the floor is lower on one side), lay one vertical row of tile from desired tile height to low point of floor. Affix tiles with tilesetting materials.
Trademarks The trademarks USG, DURABOND, DUROCK, FIBEROCK, MIDWEIGHT, PLUS 3, SHEETROCK, the USG logo, the design elements and colors, and related marks are trademarks of USG Corporation or its affiliates. Note Products described here may not be available in all geographic markets. Consult your United States Gypsum Company sales office or representative for information.