
User guide


4
Purpose of the RTP Technician Configuration Manual
The RTP Tech Configuration interface is designed help the certified technician accomplish an “onsite” RTM
installation. Most RTP units are pre-setup using the USL RTM online system; however, some locations do not know
the IP configuration information until after the equipment is required at the location. Therefore USL provides
technician access to all the RTP settings via laptop wireless connection directly to the RTP unit. The interface is a
web application. This is served to the technicians PC using a browser such as Fire Fox, Internet Explorer, and
Safari. The Technician Tool will run on other non-PC platforms like iOS on iPad devices.
This manual will take you through the steps to properly set up your RTP by providing more information and
settings for an entire theatre system.
Note: The RTP units are fully configurable via the handhelds, but we recommend using this utility for the initial
setup if NOT pre-configured.
To access the RTP Technician Configuration webpage, the laptop PC or iPad must be connected to the RTP via the
secured Wi-Fi interface. The user must first connect and power the RTP, using the RTH to obtain Wi-Fi interface
settings, and then configure the laptop or iPad.
Establishing a Connection to the RTP-100
Connecting and Powering Up the RTP-100
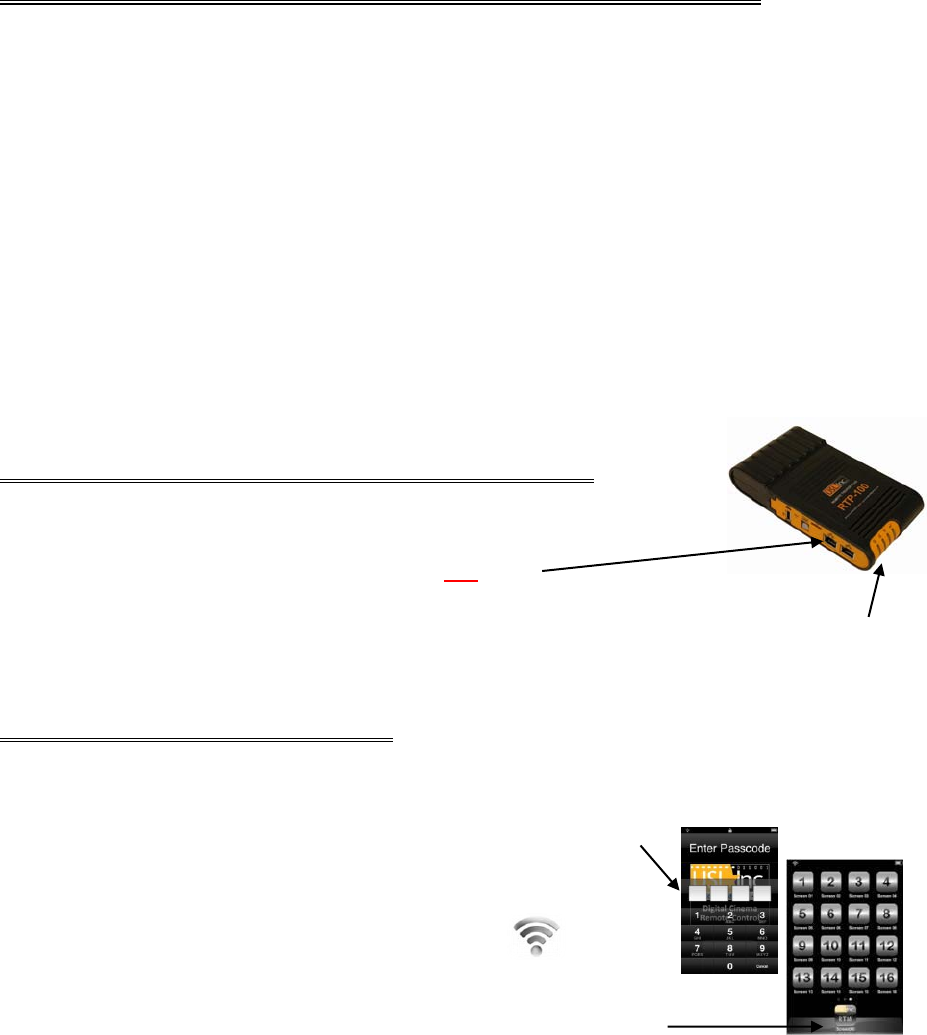
1. Connect one end of the Ethernet cable to the TOP port.
2. Connect the other end to the cinema “Control” network.
3. Plug in the RTP or use the provided power cable.
4. Wait approximately five minutes for Wireless to become active. Three lights on indicate unit is active.
if you cannot connect the RTP after 15 minutes, unplug and re-plug in the unit.
Using the RTH to View SSID
1. Turn on or wakeup the RTH.
2. Slide from left to right to unlock. If applicable do Step 4 if the unit is unlocked and doesn’t require a passcode.
3. Enter the passcode to unlock the unit. The default passcode is “0000”.
( if applicable )
4. Verify a wireless connection. The wireless connection
icon is located in upper left corner or the RTH-100. It
is important that you confirm a wireless connection
before touching any of the Screen and Setup buttons.
5. Touch the RTM Setup icon located at the bottom of the handheld unit.
This button displays a screen that contains the current settings for the RTP that the RTH is communicating with
via the wireless interface.
6. View the current settings displayed at bottom. Use the Wi-Fi SSID in the next section and touch the RTP logo
to Login.