CD 1325 INSTRUCTION HANDBOOK DIGITAL MULTIFUNCTIONAL SYSTEM ADVANCED
Introduction Thank you for your purchase of CD 1325. This Advanced Operation Guide is intended to help you operate the machine correctly, perform routine maintenance and take a simple troubleshooting action as necessary, so that you can always use the machine in good condition. Please read this Advanced Operation Guide before you start using the machine, and keep it close to the machine for easy reference.
Legal and Safety Information Please read this information before using your machine. This chapter provides information on the following topics. • • ADVANCED OPERATION GUIDE Legal Information..............................................................ii Regarding Trade Names .................................................
Legal Information Copying or other reproduction of all or part of this guide without the prior written consent of UTAX GmbH is prohibited. Legal Restriction on Copying/Scanning ii • It may be prohibited to copy/scan copyrighted material without permission of the copyright owner. • It is prohibited under any circumstances to copy/scan domestic or foreign currencies. • Local laws and regulations may prohibit or restrict copying/scanning of other items not mentioned above.
Regarding Trade Names ADVANCED OPERATION GUIDE • KPDL is a trademark of Kyocera Corporation. • Microsoft, MS-DOS, Windows, Windows NT and Internet Explorer are registered trademarks of Microsoft Corporation in the U.S.A. and/or other countries. • Windows Me, Window XP and Windows Vista are trademarks of Microsoft Corporation. • PCL is a trademark of Hewlett-Packard Company. • Adobe Acrobat, Adobe Reader and PostScript are trademarks of Adobe Systems, Incorporated.
• This machine contains the software having modules developed by Independent JPEG Group. All other brands and product names are registered trademarks or trademarks of their respective companies. The designations ™ and ® will not be used in this Operation Guide. GPL Firmware of this machine is using in part the GPL applied codes (www.fsf.org/copyleft/gpl.html). Please access “http://www.kyoceramita.com/gpl” for more information on how to make GPL applied codes available.
About this Operation Guide This Operation Guide contains the following chapters. 1 Copying Functions Describes the functions you can use when copying. 2 Sending Functions Describes the functions you can use when sending originals. 3 Printer Explains how to connect to a computer and how to specify the settings for using the machine's printer function. 4 Using Document Box Describes some typical ways of using the Document Box.
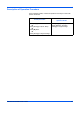
Included Guides The following guides are supplied with the machine. Refer to them as necessary. Operation Guide Describes how to load paper, basic copy, print and scan operations, and troubleshooting. Advanced Operation Guide (This Guide) Explains copying, printing and scanning features in depth, as well as default settings. Conventions in This Guide The following conventions are used depending on the nature of the description.
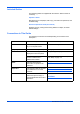
Description of Operation Procedure In this Operation Guide, continuous operation of the keys on the touch panel is as follows: Actual procedure Press [Copy]. T Press [Change] of Quick Setup. T Press [T] twice. T Press [Change] of Original Image. ADVANCED OPERATION GUIDE Description in this Operation Guide Press [Copy], [Change] of Quick Setup, [T] twice, and then [Change] of Original Image.
Originals and Paper Sizes This section explains the notation used in this guide when referring to sizes of originals or paper sizes. As in A4, B5 and Letter, which may be used either in the horizontal or vertical direction, horizontal direction is indicated by an additional R character in order to indicate the orientation of the original/paper.
Contents Contents Legal and Safety Information . . . . . . . . . . . . . . . . . . . . . . . . . . . . . . . . . . . . . . . . . . . . . . . . . . . . . i About this Operation Guide. . . . . . . . . . . . . . . . . . . . . . . . . . . . . . . . . . . . . . . . . . . . . . . . . . . . . . . v 1 Copying Functions Original Size . . . . . . . . . . . . . . . . . . . . . . . . . . . . . . . . . . . . . . . . . . . . . . . . . . . . . . . . . . . . . . . . 1-2 Paper Selection. . . . . . . . . . . . . . . . . .
Contents Background Density Adjustment . . . . . . . . . . . . . . . . . . . . . . . . . . . . . . . . . . . . . . . . . . . . . . . . 2-24 Color / Grayscale / Monochrome Selection. . . . . . . . . . . . . . . . . . . . . . . . . . . . . . . . . . . . . . . . 2-25 Continuous Scan. . . . . . . . . . . . . . . . . . . . . . . . . . . . . . . . . . . . . . . . . . . . . . . . . . . . . . . . . . . . 2-26 Border Erase . . . . . . . . . . . . . . . . . . . . . . . . . . . . . . . . . . . . . . . . . . . . . . .
Contents 8 Security Security Kit Functions . . . . . . . . . . . . . . . . . . . . . . . . . . . . . . . . . . . . . . . . . . . . . . . . . . . . . . . . . 8-2 Touch Panel Display after the Security Kit is Installed . . . . . . . . . . . . . . . . . . . . . . . . . . . . . . . . 8-4 Installing the Security Kit. . . . . . . . . . . . . . . . . . . . . . . . . . . . . . . . . . . . . . . . . . . . . . . . . . . . . . . 8-5 Changing Security Functions . . . . . . . . . . . . . . . . . . . . . . . . . . . . .
Contents xii ADVANCED OPERATION GUIDE
1 Copying Functions This chapter explains the functions available for copying. • • • • • • • • • • • • • • • • • • • • • • • • • • • • • • ADVANCED OPERATION GUIDE Original Size ................................................................. 1-2 Paper Selection ............................................................ 1-4 Mixed Sized Originals................................................... 1-7 Original Orientation .................................................... 1-10 Collate/Offset Copying ..
Copying Functions Original Size Specify the size of originals being scanned. Be sure to specify the original size when copying non-standard sizes. The following options are available. Item How to Select Sizes Have the size of original detected automatically, or select from the standard sizes. Inch models: Auto, Ledger, Legal, Letter, Letter-R, Statement, Statement-R, 8.5×13.5", Oficio II and 11×15" Select from the standard sizes not included in the Standard Sizes 1 .
Copying Functions 3 Press [Org./Paper/Finishing] and then [Original Size]. 4 Press [Standard Sizes 1 ], [Standard Sizes 2 ], [Others] or [Size Entry] to select the original size. 1 Ready to copy. Copies 1 Original Size Press [OK] to display the image. Standard Sizes 1 Auto Ledger Standard Sizes 2 Letter Legal Statement Executive 11x15" 8.5x13.
Copying Functions Paper Selection Select the paper source that contains the required paper size. NOTE: Specify in advance the size and type of the paper loaded in the cassette (refer to Original/Paper Setup on page 6-6). Selecting the Cassette Use the procedure below to select the paper supply cassette. 1 Place the originals on the platen. 2 Press the Copy key. 3 Press [Org./Paper/Finishing] and then [Paper Selection]. 4 Press the key of the paper source corresponding to the required paper size.
Copying Functions Reserving the Multi Purpose Tray 1 Change the paper size and media type. The available paper sizes and media types are shown in the table below. Category Paper Size Item Standard Sizes 1 How to Select Choose from the standard size. Sizes Inch models: Ledger, Legal, Letter, Letter-R, Statement, 8.5×13.
Copying Functions NOTE: You can conveniently select in advance the size and type of paper that will be used often and set them as default (refer to Paper Size and Media Type Setup for Multi Purpose Tray on page 6-9). Use the procedure below to select the paper size and media type. 1 Place the originals on the platen. 2 Press the Copy key. 3 Press [Org./Paper/Finishing], [Paper Selection] and then [MP Tray Reservation].
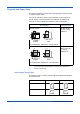
Copying Functions Mixed Sized Originals Using the optional document processor, the originals of different sizes can be loaded in a batch and copied. In this operation, up to 30 originals of different sizes can be placed in the document processor at the same time. Supported Combinations of Originals Originals of the Same Width The supported combinations of originals are as follows.
Copying Functions A3, B4, A4 and B5 B4, A4-R and B5 Folio, A4-R and B5-R Selecting How to Copy Originals Select whether you wish to create individual copies on different size papers matching the original sizes or to produce all copies on the same size papers. NOTE: This function is available regardless of whether originals have the same width or not.
Copying Functions The table below shows the finished document sizes for the different original size options. Option 1 Description Mixed Sized Copies Originals are detected individually for size and copied to the same size papers as originals. Same Size Copies Originals are all copied to the same size papers. Use the procedure below to copy mixed sized originals. 1 Place originals on the document processor.
Copying Functions Original Orientation Select the original orientation to use the following functions. • Duplex • Margin/Centering originals • Border erase • Combine mode • Memo mode • Page numbering • Booklets • Stapling (optional feature) * If [On] is selected as the Orientation Confirmation setting in the System Menu, the selection screen for original orientation appears when you select any of the above functions.
Copying Functions Use the procedure below to select the orientation when placing the originals on the platen. 1 Place the originals on the platen. 2 Press the Copy key. 3 Press [Org./Paper/Finishing] and then [Original Orientation]. 4 Select [Top Edge Top] or [Top Edge Left] as the way the original is oriented. Ready to copy. 1 Copies 1 Original Orientation Enter the orientation of the original document 's top edge. Press [ OK] to display the image.
Copying Functions Collate/Offset Copying The machine can collate and offset at the same time as it copies. You can use the Collate/Offset copy function for tasks such as those shown below. Collate Scan multiple originals and deliver complete sets of copies as required according to page number. 3 2 1 3 3 2 2 1 1 3 2 1 Original Copy Offset Use offset to produce copies after rotating each set (or page) by 90º.
Copying Functions 2 To use collate copying, press [On] of Collate. Ready to copy. Copies 1 Collate/Offset Collate To use offset copying, press [Each Set] of Offset. Press [OK] to display Off On Off Each Set the image. Offset Press [OK]. Add Shortcut Cancel Status If [Off] is selected for Collate, press [Off] or [Each Page] in Offset. OK 10/10/2007 Ready to copy. Copies 10:10 1 Collate/Offset Collate Press [ OK] to display Off On Off Each Page the image.
Copying Functions Staple Use this feature to staple your finished copies. NOTE: Stapling requires the optional document finisher or built-in finisher. The following stapling options and orientations are available. Original Copy Document finisher Orientation of Original Platen Document processor Built-in finisher Document finisher Built-in finisher Use the procedure below to produce stapled copies. 1-14 1 Press the Copy key. 2 Press [Org./Paper/Finishing] and then [Staple].
Copying Functions 3 To staple, select the staple position, [1 staple] under Staple. Ready to copy. Copies 1 Staple/Punch Staple Press [OK] to display Off Upper Left 1 staple Upper Right the image. Top Edge Top Original Orientation Add Shortcut Status Cancel OK 10/10/2007 10:10 4 Press [Original Orientation] to choose orientation of the originals, either [Top Edge Top] or [Top Edge Left]. Then press [OK]. 5 Press [OK]. 6 Place the originals on the platen and press the Start key.
Copying Functions Output Destination You can use the procedure below to select an output destination such as the optional document finisher for your copies. NOTE: Optional output destinations include the job separator, document finisher and the built-in finisher. The table below shows the available output destinations.
Copying Functions Zoom Mode Original image can be reduced or enlarged for copying. The following zoom modes are available. Auto Zoom Automatically reduces or enlarges the original image suited to the selected paper size. Ledger: 129 % Letter-R A4 A3: 141 % Statement-R: 64 % A5: 70 % Manual Zoom Enter desired magnification in 1% increments between 25% and 400%. 25 % 400 % Preset Zoom Reduces or enlarges at preset magnifications.
Copying Functions XY Zoom Adjust vertical and horizontal magnifications independently. Enter desired magnification in 1% increments between 25% and 400%. * When using the document processor, enter the desired magnification in 1% increments between 25% and 200%. Y X The procedure for using zoom copying is explained below. 1 Place the originals in the document processor or on the platen. 2 Press the Copy key. 3 Press [Layout/Edit] and then [Zoom]. 4 Press [Auto] to use Auto Zoom.
Copying Functions To use XY Zoom, press [XY Zoom]. Ready to copy. Copies 1 Zoom Press [+] or [–] to change the displayed magnifications of X (horizontal) and Y (vertical). You can also enter the magnification directly using the numeric keys by pressing [# Keys]. Standard Zoom Press [ OK] to display X (25 - 400) % XY Zoom the image.
Copying Functions Combine Mode This mode allows you to copy 2 or 4 originals combined onto a single page. 2-in-1 mode or 4-in-1 mode. The page boundary of each original can be indicated. NOTE: Combine mode is available for the copy paper sizes of A3, B4, Folio, A4, A4-R, B5, B5-R, A5-R, Ledger, Legal, Oficio II, 8.5×13.5", Letter, Letter-R, Statement-R, 8K, 16K and 16K-R. 2-in-1 Mode For copying two originals onto a single sheet.
Copying Functions The following 4-in-1 options and output orientations are available. Original Copy 1 Orientation of Original Platen Document processor NOTE: When placing the original on the platen, be sure to copy the originals in page order. Types of Page Boundary Lines The following types of the boundary lines are available. None Solid Dotted Borders (Cropmark) The procedure for using Combine mode copying is explained below. 1 Press the Copy key. 2 Press [Layout/Edit] and then [Combine].
Copying Functions 3 Press [2 in 1] or [4 in 1], and choose the page layout of Layout. Ready to copy. Copies 1 Combine Layout Off Press [ OK] to display the image. 2 in 1 Right then Down 4 in 1 Left then Down None Border Line Down then Right Add Shortcut Down then Left Cancel Status Top Edge Top Original Orientation OK 10/10/2007 10:10 4 Press [Border Line] to choose the type of the lines to indicate page boundaries. Press [OK].
Copying Functions Margin/Centering Mode Shift the original image to make space on the copy for binding on the left (right) or top (bottom) side. When you copy onto paper different from the original size, you can center the original image on the paper. The following margin widths are available. Input units Margin Width Inch Models -0.75 to 0.75" (in 0.
Copying Functions 4 Press [Margin] to select the copy with margin. Use [+] or [–] to enter the margins for Left/Right and Top/Bottom. Press [# Keys] to use the numeric keys for entry. For duplex copying, press [Back Page Margin] and select [Auto] or [Manual]. Ready to copy. Copies 1 Margin/Centering Left/Right Off (-0.75 - +0.75) 0.00 " Margin Press [ OK] to display the image. Centering Auto # Keys Top/Bottom (-0.75 - +0.75) 0.
Copying Functions Border Erase Use Border Erase to remove black shadows that appear around the outside of the original when making copies. The following options can be selected. Border Erase Sheet Erases black borders around the single sheet original. Original Copy Border Erase Book Erases black borders around the edges and in the middle of the original such as a thick book. You can specify the widths individually to erase the borders around the edges and in the center of the book.
Copying Functions In each option, the available ranges are as below. Input units Border Erase Range Inch Models 0 to 2"(in 0.01" increments) Metric Models 0 mm to 50 mm (in 1-mm increments) NOTE: To specify the default width value of Border Erase, refer to Border Erase Default on page 6-28 for details. Use the procedure below to erase borders when copying. 1 Place the originals on the platen. 2 Press the Copy key. 3 Press [Layout/Edit] and then [Border Erase].
Copying Functions 6 ADVANCED OPERATION GUIDE Press the Start key to start copying.
Copying Functions Booklet from Sheets The Booklet copying option allows you to copy sheet originals and produce booklets such as small brochures or pamphlets. A booklet, such as a magazine, is made by folding at the center. You can copy the cover page onto colored paper or thick paper. Paper for the cover is supplied from the Multi Purpose tray. To feed the cover paper from the cassette, refer to Paper Source for Cover Paper on page 6-15. The supported original and paper sizes are as follows.
Copying Functions For binding on the right side 1 The folded copies can be read from right to left. Original Copy For top binding The folded copies can be read from top to bottom. Original Copy The procedure for using Booklet copying is explained below. 1 Press the Copy key. 2 Press [Layout/Edit] and then [Booklet]. 3 Press [1-sided>>Booklet] to produce a booklet from single-sided originals. Press [2-sided>>Booklet] to produce a booklet from two-sided originals.
Copying Functions If you selected [1-sided>>Booklet], choose the binding orientation in Finishing. 5 If you choose [1-sided>>Booklet] or [2-sided>>Booklet], you can add the cover. Press [Cover], select [Cover] and press [OK]. 6 Press [Original Orientation] to choose orientation of the originals, either [Top Edge Top] or [Top Edge Left]. Then press [OK]. 7 Press [OK]. 8 Place the originals in the document processor or on the platen and press the Start key.
Copying Functions Duplex 1 Use Duplex to create two-sided copies. You can also create single-sided copies from two-sided originals or originals with facing pages such as books. The following modes are available. NOTE: To scan 2-sided originals in color using the optional document processor, expansion of the memory in the machine is required. Call service. One-sided to Two-sided Produces two-sided copies from one-sided originals.
Copying Functions Two-sided to One-sided Copies each side of a two-sided original onto two individual sheets. Optional document processor is required. 1 2 1 2 Original Copy The following binding options are available. Left/Right Binding: Images are copied onto the back side without being rotated. Top Binding: Images are copied onto the back side after being rotated 180°. Two-sided to Two-sided Produces two-sided copies from two-sided originals. Optional document processor is required.
Copying Functions Book to One-sided Copies each page of originals with facing pages onto two individual sheets. 1 2 2 1 Original Copy The following binding options are available. Left Binding: Originals with facing pages are copied from left to right. Right Binding: Originals with facing pages are copied from right to left. NOTE: The following sizes of originals and paper are supported in Book to One-sided mode. Original: Ledger, Letter-R, A3, B4, A4-R, B5-R, A5-R and 8K. Paper: Letter, A4 and B5.
Copying Functions 3 Select the desired Duplex mode. Ready to copy. Copies 1 Duplex 1-sided >>1-sided Press [ OK] to display the image. 1-sided >>2-sided 2-sided >>1-sided 2-sided >>2-sided Finishing Book >>1-sided Binding Left/Right Book >>2-sided Add Shortcut Binding Top Cancel Top Edge Top Original Orientation OK 10/10/2007 Status 10:10 4 If you choose [1-sided>>2-sided], [2-sided>>2-sided] or [Book>>2-sided], select the binding edge of the finished copies in Finishing.
Copying Functions Cover Mode Add a cover to the finished copies. You can copy the first page and/or the last page onto colored paper or thick paper fed from the different paper source than the regular one. The following two options are available. Paper for the cover is supplied from the Multi Purpose tray. To feed the cover paper from the cassette, refer to Paper Source for Cover Paper on page 6-15. Type of Cover Description Front Cover First page of the originals is copied on a different paper.
Copying Functions Form Overlay Copy the original images onto the form. Once you scan and register the form, the form is overlaid onto the original. You can also use a form that is already registered in the machine's memory. Forms Original Copy NOTE: To register a form in advance, refer to Image Overlay Form (Copy) Box on page 4-28 for details. Follow the steps as below for form overlay. 1 Press the Copy key. 2 Press [Layout/Edit] and then [Form Overlay].
Copying Functions 1 NOTE: Press [Detail] to view the selected form data. 4 Press [OK]. 5 Place the originals. Place the original for the form on top of the other originals. When using the optional document processor, the first page of the originals should be placed on the top. 6 ADVANCED OPERATION GUIDE Press the Start key to start copying.
Copying Functions Page Numbering Number multiple pages of originals in sequential order. The formats for numbering are [-1-], [P.1] or [1/n]. The format [1/n] prints the total number of pages in the place of n. The page number is centered at the bottom of the page. Original [ – 1 –] [P.1] [1/n] Use the procedure below to insert page numbers on your copies. 1 Place the originals in the document processor or on the platen. 2 Press the Copy key. 3 Press [Layout/Edit] and then [Page #].
Copying Functions 7 To specify the page to end numbering, press [Last Page] and select [Manual]. Press [+] or [–] to enter the ending page and press [OK]. You can also enter the number with the numeric keys after pressing [# Keys]. 8 The total number of pages n in the format [1/n] can be changed manually. Press [Denominator #] and select [Manual]. Press [+] or [–] to enter the total number of pages and press [OK]. You can also enter the number with the numeric keys after pressing [# Keys].
Copying Functions Memo Mode Delivers copies with a space for adding notes. You can also copy two originals onto the same sheet with a space or add lines to indicate page boundaries. NOTE: Memo mode is available for the copy paper sizes of Ledger, Legal, Oficio II, 8.5×13.5", Letter, Letter-R, Statement-R, A3, B4, Folio, A4, A4-R, B5, B5-R, A5-R, 8K, 16K and 16K-R. Layout A Reduces images of each original page for printing onto half of a page, leaving the other half blank for notes.
Copying Functions Types of Page Boundary Lines 1 The following boundary lines are available. None Solid Dotted Borders (Cropmark) Use the procedure below to insert page boundary lines on your copies. 1 Place the originals on the platen. 2 Press the Copy key. 3 Press [Layout/Edit] and then [Memo Page]. 4 Press [Layout A] or [Layout B]. Select the page layout from Layout. Ready to copy. Copies 1 Memo Page Layout Off Press [ OK] to display the image.
Copying Functions Density Adjustment Copy density is adjustable. The table below shows the available settings. Mode Description Manual Density is adjustable to either 7 or 13 different levels. Auto Optimum density is selected depending on density of original. NOTE: You may choose Auto mode as the default setting (refer to Density on page 6-26). Follow the steps as below for density adjustment. 1 Place the originals on the platen. 2 Press the Copy key. 3 Press [Image Quality] and then [Density].
Copying Functions Image Quality 1 Select the image quality to suit the type of original. The table below shows the quality options. Image Quality Mode Description Text+Photo Text and photos together. Text Only text, no photos. Photo Only photos, no text. Use the procedure below to select the quality of your copies. 1 Place the originals on the platen. 2 Press the Copy key. 3 Press [Image Quality] and then [Original Image]. 4 Select the image quality. Ready to copy.
Copying Functions EcoPrint Use EcoPrint to save toner when printing. Use this function for test copies or any other occasion where high quality print is unnecessary. The procedure for making copies using EcoPrint is explained below. 1 Place the originals on the platen. 2 Press the Copy key. 3 Press [Image Quality] and then [EcoPrint]. 4 Press [On]. Ready to copy. Copies 1 EcoPrint Press [OK] to display Conserve toner when printing .
Copying Functions Continuous Scan When a large number of originals cannot be placed in the document processor at one time, the originals can be scanned in separate batches and then copied as one job. With this function, originals are scanned until you press [Scan Finish]. Any of the following settings can be changed during scanning.
Copying Functions If [Job Build] is selected, the next page can be changed. Press [Sheet Insertion] to insert a blank paper. Press [Next_Copy: On_Back] in duplex copying to print the next page on back page. Copies Scan next original (s). Place the originals and press Start key. Press Scan Finish to start copying. Job No.
Copying Functions Auto Image Rotation Automatically rotates the image when the sizes of the original and the loaded paper matches but the orientations are different. The images will be rotated 90° counter-clockwise prior to copying. NOTE: To set Auto Image Rotation as the default mode, refer to Auto Image Rotation on page 6-31. The procedure for making copies using Auto Image Rotation is explained below. 1 Place the originals on the platen. 2 Press the Copy key.
Copying Functions Negative Image Inverts black and white portions of the image for printing. Use the procedure below to make negative image copies. 1 Place the originals on the platen. 2 Press the Copy key. 3 Press [Advanced Setup] and then [Negative Image]. 4 Press [On] to select Negative Image. Ready to copy. Copies 1 Negative Image Invert black and white in image to print "negative" copies. Press [OK] to display the image. Off Add Shortcut Status 1-48 5 Press [OK].
Copying Functions Mirror Image 1 Copies the mirrored image of the original. Use the procedure below to make mirror image copies. 1 Place the originals on the platen. 2 Press the Copy key. 3 Press [Advanced Setup] and then [Mirror Image]. 4 Press [On] to select Mirror Image. Ready to copy. Copies 1 Mirror Image Print left-right mirrored copies of original. Press [OK] to display the image. Off Add Shortcut Status 5 Press [OK]. 6 Press the Start key to start copying.
Copying Functions Job Finish Notice Sends a notice by E-mail when a copy job is complete. User can be notified of the completion of a copy job while working at a remote desk, saving the time spent waiting beside the machine for copying to finish. NOTE: PC should be configured in advance so that E-mail can be used. Example of Job Finish Notice To: h_pttr@owl-net.net Subject: 1234 Job end report mail Job No.
Copying Functions 4 To select the Ready to copy. address to be Job Finish Notice notified from the Off address book, press Destination Detail Address Book User A abc@def.com [Address Book] on Address the left of the screen Entry and then press [Address Book] in Detail Address Book the next screen. Press [Address Add Shortcut Cancel Book], select desired E-mail address and press [OK]. Press [Detail] to view the data of the selected destination.
Copying Functions File Name Names a copy job. Add other information such as date and time or job number as necessary. You can check a job history or job status using the job name, date and time, or job number specified here. Use the procedure below to assign a name to your copy job. 1 Place the originals on the platen. 2 Press the Copy key. 3 Press [Advanced Setup] and then [File Name Entry]. 4 Press [File Name], enter the name for a copy job, and press [OK].
Copying Functions Priority Override Suspends a current job and gives the selected job priority for copying. The suspended job resumes after Priority Override copying is finished. NOTE: The current job that is selected as Priority Override cannot be suspended. The procedure for using Priority Override is explained below. 1 Place the originals on the platen. 2 Press the Copy key. 3 Press [Advanced Setup] and then [Priority Override]. 4 Press [On] to select Priority Override. Ready to copy.
Copying Functions Repeat Copy Enable additional copies in the desired quantity as necessary after a copy job is completed. For confidential documents, you can set up a pass code for the use of Repeat Copy. In such a case, the correct pass code must be entered when using Repeat Copy or copies will not be delivered. IMPORTANT: A Repeat Copy job is cleared when the main power switch is turned off. Repeat Copy is not available when the machine is equipped with the optional Security Kit.
Copying Functions 5 Place the originals in the document processor or on the platen. Press the Start key to start copying and register this job as a Repeat Copy job. Outputting Repeat Copy Jobs The Repeat Copy jobs are stored in the Document Box. Refer to Job Box on page 4-2 to print out the Repeat Copy jobs. Maximum Number of Repeat Copy Jobs Retained You can use the procedure below to change the maximum number of copy jobs that can be retained in the document box.
Copying Functions Programm (Copying and Sending) After registering sets of frequently used functions as a single program, you can simply press the program number as needed to recall those functions. You can also name the programs for easy identification when recalling. NOTE: Sending operation can be registered in the program as well. Up to 50 functions combining copying and sending can be registered in the program.
Copying Functions NOTE: If the program cannot be recalled, the Document Box or the form overlay specified in the program might have been deleted. Check the Document Box. 3 Place the originals and press the Start key. Copying is performed according to the registered program. Editing and Deleting Programs You can change program number and program name, or delete program. Use the procedure below to edit or delete a program. 1 Press the Program key.
Copying Functions Registering Shortcuts (Copying and Sending) Add shortcuts in the Quick Setup screen for easy access to the frequently used functions. A function name linked to a registered shortcut can be changed as necessary. You can register shortcuts for up to 5 copying functions and up to 6 sending functions. NOTE: In the default settings, [Interrupt Copy] is registered to the shortcut key number 01 of the copy function.
Copying Functions Editing and Deleting Shortcuts 1 Follow the steps as below to change shortcut number/name or delete shortcut. 1 In the setup screen of each function, press [Add Shortcut] in the bottom of the screen. Ready to copy. Copies 1 Memo Page Layout Off Press [ OK] to display the image.
Copying Functions 1-60 ADVANCED OPERATION GUIDE
2 Sending Functions This chapter explains the functions available for sending originals. • • • • • • • • • • • • • • • • • • • • • • • ADVANCED OPERATION GUIDE Original Size Selection ................................................. 2-2 Sending Size Selection ................................................ 2-4 Zoom ............................................................................ 2-6 Centering...................................................................... 2-7 Mixed Sized Originals.....
Sending Functions Original Size Selection Select the size of originals that will serve as the basis for scanning. Be sure to select the original size when using originals of nonstandard sizes. Choose the original size from the following groups of original size. Item Detail Standard Sizes 1 Select from automatic detection and standard sizes. Size Inch models: Auto, Ledger, Legal, Letter, Letter-R, Statement, Statement-R, 8.5×13.
Sending Functions 4 Press [Standard Sizes 1], [Standard Sizes 2], [Others], or [Size Entry] to select original size. Ready to send. Destination Place original . 1 Original Size Press [OK] to display the image. Standard Sizes 1 Auto Ledger Letter Standard Sizes 2 Letter Legal Statement Statement 11x15" 8.5x13.5" Others 2 OficioII Size Entry Add Shortcut Cancel OK Status When you have selected [Size Entry], press [+] or [-] to set the sizes of X (horizontal) and Y (vertical).
Sending Functions Sending Size Selection Select the sending size (the size of image to be sent). The table below lists the sizes. Item Detail Size Standard Sizes 1 Select from Same as Original Size or Standard Size. Inch models: Same as Original Size, Ledger, Legal, Letter, Statement, 8.5×13.5", Oficio II, 11×15" Metric models: Same as Original Size, A3, B4, A4, B5, A5, B6, A6, Folio Standard Sizes 2 Others Select from standard size except Standard Sizes 1.
Sending Functions 4 Press [Standard Sizes 1], [Standard Sizes 2], or [Others] to select the sending size. Ready to send. Destination Place original . Press [OK] to display the image. Standard Sizes 1 Same as Original Ledger Letter Standard Sizes 2 Legal Statement 11x15" 8.5x13.5" OficioII Others Add Shortcut Cancel Status 5 Press [OK]. 6 Specify the destination, and press the Start key to start sending.
Sending Functions Zoom Scans the original by automatically zooming it depending on the sending size. The table below lists the available options. Item Detail 100% No Zoom (to be scanned at actual size) Auto Zoomed automatically according to the specified sending size. NOTE: When zooming in or out, see Sending Size Selection on page 2-4 when selecting the sending size. When Custom Size or Size Entry is selected as the original size, the originals are sent at normal size and zooming cannot be used.
Sending Functions Centering When you have scanned the original after specifying the original size and sending size, depending on these sizes, a margin is created at the bottom, left, or right side of paper. By using the centering, the image is placed with a margin equally created at each of the page Top/Bottom and Left/Right. Use the procedure below to center then image when sending a scanned image. 1 Place the originals on the platen. 2 Press the Send key.
Sending Functions Mixed Sized Originals Using the optional document processor, the originals of different sizes can be placed in a batch and sent. In this operation, up to 30 originals of different sizes can be placed in the document processor at the same time. Originals of the Same Width When the original widths are the same, the combinations of originals that can be placed are as follows.
Sending Functions • A3, B4, A4, B5 2 • B4, A4-R, B5 • Folio, A4-R, B5-R Use the procedure below to send mixed sized originals as a batch. 1 Place the original into the document processor. IMPORTANT: When you place originals of different width, place the top edge of originals to align with the width guide at the backside. If the originals are placed unevenly, they may not be scanned correctly. 2 Press the Send key. 3 Press [Type of Original/Transmission] and then [Mixed Sized Originals].
Sending Functions 4 Select the combination of originals from [Same Width] and [Diff Width]. Ready to send. Destination 1 Mixed SizedOriginals Scan all sheets in documentprocessor, even if differentlysized, then send. *Up to 30 sheets can be placedin documentprocessor. Press [OK] to display the image. Off Add Shortcut Same Width Diff Width Cancel Status 2-10 OK 10/10/2007 5 Press [OK]. 6 Specify the destination, and press the Start key to start sending.
Sending Functions 1-sided/2-sided Selection Select the type and binding of original depending on the original. 2 The table below lists the binding directions for each original type. Original Type Binding 1-sided Sheet Original 1-sided — 2-sided Sheet Original 2-sided* Binding Left/Right, Binding Top Open Book Original such as magazine and book Book Binding Left, Binding Right * Only when the optional document processor is used.
Sending Functions Original Orientation To send the document in the orientation that can be read properly, specify the upper orientation of original. To use the functions below, select the orientation in which the original is set on the platen. • 1-sided / 2-sided Selection • Border Erase * If [On] is selected as the Orientation Confirmation setting in the System Menu, the selection screen for original orientation appears when you select any of the above functions.
Sending Functions 4 Select original orientation from [Top Edge Top] and [Top Edge Left]. Ready to send. Destination Place original . 1 Original Orientation Enter the orientation of the original document 's top edge. 2 Press [OK] to display the image. Top Edge Top Add Shortcut Top Edge Left Cancel Status 5 Press [OK]. 6 Specify the destination, and press the Start key to start sending.
Sending Functions File Format Select the file format of the image to send. The table below lists the file formats and their details. Adjustable range of image quality Color mode PDF 1 Low Quality (High Comp.) to 5 High Quality (Low Comp.) Full Color, Grayscale, Monochrome TIFF 1 Low Quality (High Comp.) to 5 High Quality (Low Comp.) Full Color, Grayscale, Monochrome JPEG 1 Low Quality (High Comp.) to 5 High Quality (Low Comp.) Full Color, Grayscale High Comp.
Sending Functions 5 Press [OK]. 6 Specify the destination, and press the Start key to start sending.
Sending Functions PDF Encryption Functions If you have selected PDF or High Comp. PDF for file format, you can restrict the access level for displaying, printing, and editing PDF's by assigning a secure password. NOTE: You need to use the optional PDF upgrade kit. The items you can restrict the access level with are as follows. Item Value Detail Compatibility Acrobat4.0 or later, Acrobat5.0 or later Select the version that is compatible with the PDF file.
Sending Functions 6 Press [Password], enter a password (up to 255 characters) and then press [OK]. NOTE: For the character entry method, refer to the Operation Guide. 7 Press [Confirmation] and enter the password again for confirmation. Then press [OK]. 8 When you enter the password to edit the PDF file, select [On] of Password to edit/print document.. 9 In the same way as the entry of Password to open document., enter the password to change the PDF file. 10 Press [Detail].
Sending Functions The table below shows the available settings. Item Detail Not Allowed Cannot change the PDF file Commenting Can only add commenting Inserting/Deleting/ Rotating Pages* Can only insert, delete, and rotate the pages of the PDF file Page Layout except extracting Pages** Can change the page layout except extracting the pages of the PDF file Any except extracting Pages Can conduct all operations except extracting the pages of the PDF file * Only displayed when [Acrobat5.
Sending Functions File Separation Create several files by dividing scanned original data page by page, and send the files. Use the procedure below to split scanned original data into separate files when sending scanned originals. 1 Place the originals on the platen. 2 Press the Send key. 3 Press [Type of Original/Transmission] and then [File Separation]. 4 Press [Each Page] to set File Separation. Ready to send. Destination Place original .
Sending Functions Image Quality Select image quality suitable to the type of original. The table below shows the quality options. Item Detail Text+Photo Text and photos together. Text Only text, no photos. Photo Only photos, no text. for OCR For documents to be read by OCR. Use the procedure below to select the quality when sending scanned originals. 1 Place the originals on the platen. 2 Press the Send key. 3 Press [Color/Image] and then [Original Image]. 4 Select Image Quality.
Sending Functions Scan Density Use the procedure below to adjust the scanning density when sending scanned originals. You can adjust the scan density either automatically or manually. The table below shows the available settings. Item Detail Manual density adjustment Can set density using 7 or 13 levels. Auto density adjustment Can set the optimal scan density according to the density of original. The procedure for adjusting the scanning density when sending a scanned image is explained below.
Sending Functions Scan Resolution Select the fineness of scanning resolution. The finer the scanning becomes (the larger the number becomes), the better the image quality becomes. However, better resolution also results in larger file size (file capacity) and longer scanning and sending times. The selectable resolution is 200x100dpi Normal, 200x200dpi Fine, 200x400dpi Super Fine, 300x300dpi, 400x400dpi Ultra Fine, or 600x600dpi.
Sending Functions Sharpness Select the sharpness of the image outline. 2 The table below shows the available settings. Item Detail Sharpen Emphasize the image outline. Make letters and lines appear sharper. Unsharpen Blur the image outline. Can weaken a Moire effect (grids appearing as wavelike patterns when scanning printed photos). NOTE: You cannot specify the sharpness if you selected [Monochrome] in Color Selection (see page 2-25).
Sending Functions Background Density Adjustment Lightens the background of the colored original when it is too dark. NOTE: You cannot adjust the background density if you selected [Monochrome] in Color Selection (see page 2-25). Use the procedure below to set the background density when sending scanned images. 1 Place the originals on the platen. 2 Press the Send key. 3 Press [Color/Image] and then [Background Density Adj.].
Sending Functions Color / Grayscale / Monochrome Selection This feature allows you to select the select the color mode used for scanning when sending images. You can select from Full Color, Grayscale or Monochrome. NOTE: To scan colored 2-sided originals using the optional document processor, you need to add memory to the machine. Contact your service representative. Use the procedure below to select the color mode when sending scanned images. 1 Place the originals on the platen. 2 Press the Send key.
Sending Functions Continuous Scan When the multi-page originals cannot be placed in the document processor at one time, the originals can be scanned in separate batches and then sent as one job. With this function, originals can be scanned one after another until you press [Scan Finish]. Any of the following settings can be changed during scanning.
Sending Functions Border Erase Use Border Erase to remove black shadows that appear around the outside of the original when scanning and sending originals. The following options can be selected. Border Erase Sheet Erases black borders around the single sheet original. Original Copy Border Erase Book Erases black borders around the edges and in the middle of the original such as a thick books. You can specify the widths individually to erase the borders around the edges and in the center of the book.
Sending Functions Individual Border Erase Specify border erase widths individually for all edges. Original Copy In each option, the available ranges are as below. Input units Border Erase Range Inch models 0 to 2" (in 0.01" increments) Metric models 0 mm to 50 mm (in 1-mm increments) Use the procedure below to erase borders when sending scanned originals. 1 Place the originals on the platen. 2 Press the Send key. 3 Press [Advanced Setup] and then [Border Erase].
Sending Functions Press [Original Orientation] to select the original orientation from either [Top Edge Top] or [Top Edge Left], and press [OK]. Ready to send. Destination Border Erase (0.00 - 2.00) Off Press [OK] to display the image. Border Erase Sheet Border Erase Book Individual Border Erase Top 0.00 " Bottom 0.00 " Left 0.00 " Right 0.00 " Add Shortcut 2 Top Edge Top Original Orientation # Keys Cancel Status 5 Press [OK].
Sending Functions Enter Document Name/File Name This setting allows you to assign a document name to scanned images. You can specify a default for the document name. Use the procedure below to assign names to scanned documents that you are sending. 1 Place the originals on the platen. 2 Press the Send key. 3 Press [Advanced Setup] and then [File Name Entry]. 4 Press [File Name]. Ready to send. Destination Enter Destination. 1 File Name Entry Add a file name.
Sending Functions Enter E-mail Subject and Body When sending E-mail, enter the subject and body of the E-mail. 2 Use the procedure below to enter the subject and body for an E-mail message and then send the E-mail. 1 Press the Send key. 2 Press [Advanced Setup] and then [E-mail Subject/Body]. 3 Press [Subject]. Ready to send. Destination Enter Destination. 1 E-mail Subject/Body Subject Press [OK] to display Body the image.
Sending Functions Finish Notice This feature sends an e-mail providing notification that transmission has been completed. Use the procedure below to specify the Finish Notice settings. 1 Place the originals on the platen. 2 Press the Send key. 3 Press [Advanced Setup] and then [Job Finish Notice] 4 To select the destination from the address book, press [Address Book] on the left of the screen and then press [Address Book] in the next screen. Select the destination to be notified, then press [OK].
Sending Functions 9 Specify the destination, and press the Start key to start sending. When the sending is completed, the finish notice is sent to the specified Email address.
Sending Functions Send and Print When you send originals, this feature allows you to print a copy of the document being sent. The procedure for using Send and Print is explained below. 1 Place the originals on the platen. 2 Press the Send key. 3 Press [Advanced Setup] and then [Send and Print]. 4 Press [On]. Ready to send. Destination Enter Destination. 0 Send and Print Print a copy of documents to be sent. Press [OK] to display the image.
Sending Functions Send and Store When you send originals, this feature allows you to store a copy of the document being sent in a Document Box. 2 The procedure for using Send and Store is explained below. 1 Place the originals on the platen. 2 Press the Send key. 3 Press [Advanced Setup], [T], and then [Send and Store]. 4 Press [On]. Ready to send. Destination Enter Destination. 0 Send and Store Off Store a copy of documents to be sent in the document box .
Sending Functions 7 2-36 Specify the destination and press the Start key. Transmission begins and a copy of the transmitted document is stored in the specified Document Box.
3 Printer This chapter explains the settings for using printer functions of this machine. • • ADVANCED OPERATION GUIDE Emulation ..................................................................... 3-2 Setting of Other Printers...............................................
Printer Emulation Select the emulation for operating this machine by commands oriented to other types of printers. Selection of emulation The printer can emulate Line Printer, IBM Proprinter, DIABLO 630, EPSON LQ-850, PCL 6, KC-GL, KPDL and KPDL(Auto). Use the procedure below to select the emulation. 1 Press the System Menu Key. 2 Press [Printer] > [Change] in Emulation. 3 Select the desired emulation. Printer - Emulation Set emulation options.
Printer Setting of Alternative Emulation When you have selected [KPDL(Auto)] as emulation mode, you can switch between KPDL and another emulation mode (alternative emulation) automatically according to the data to print. The alternative emulation you can set is [Line Printer], [IBM Proprinter], [DIABLO 630], [EPSON LQ-850], [PCL6]* and [KC-GL] (*: Default setting). 3 Use the procedure below to select the alternative emulation. 1 Press the System Menu Key.
Printer 3 Press [On] or [Off]. Printer - KPDL Error Report Print an error report when a KPDL error occurs. Off On Cancel Status 3-4 OK 10/10/2007 10:10 4 Press [OK]. 5 Press the Power key, and after confirming that the Power key/indicator and memory indicator have turned off, turn the main power off and on.
Printer Setting of page size and pen When you have selected KC-GL as emulation mode, you can set the page size, one of eight kinds of pens, and thickness of each pen. The table below shows the available settings. *: Default setting Setting item Set value Page Set B0, B1, B2, B3, A0, A1, A2, Special Size* Pen Adjust Pen 1 to Pen 8 1 to 99 dot(s) NOTE: The default setting of thickness of pen is Pen 1:1 dot(s), Pen 2:2 dot(s), Pen 3:3 dot(s)...Pen 8:8 dot(s).
Printer 6 Press [+] or [-] to set the pen thickness (1 to 99 dots). Printer - Pen 1 Set the thickness of the pen to use for KC-GL jobs . Use [-]/[+] or the numeric keys to select thickness. (1 - 99) dot (s) Cancel Status 3-6 OK 10/10/2007 10:10 7 You can also enter a value from the number keypad. 8 Press [OK]. 9 Press the Power key, and after confirming that the Power key/indicator and memory indicator have turned off, turn the main power off and on.
Printer Setting of Other Printers Regarding the setting of other printers, refer to Printer Settings on page 6-48.
Printer 3-8 ADVANCED OPERATION GUIDE
4 Using Document Box This chapter explains the typical procedure for utilizing Document Box. • • • ADVANCED OPERATION GUIDE What is Document Box?............................................... 4-2 Basic Operation for Document Box .............................. 4-5 Using a Job Box .........................................................
Using Document Box What is Document Box? Document Box is an area in the hard disk in which you can save documents for later retrieval or sharing among multiple users. Different Types of Document Box Components Document Box contains four types of component boxes which provide the following functions. Custom Box Custom Box is a component box which you can create within the Document Box and store data for later retrieval.
Using Document Box Quick Copy/Proof and Hold Box...page 4-23 Quick Copy feature facilitates additional prints of a document already printed. Activating Quick Copy and printing a document using the printer driver allow the print data to be stored in the Quick Copy Job Box. When additional copies are required, you can reprint the required number of copies from the operation panel. 4 By default, up to 32 documents can be stored. When power is turned off, all stored jobs will be deleted.
Using Document Box Removable Memory Box A USB memory inserted into the USB memory slot of the machine is also recognizable as a Job Box. This allows printing of the PDF data stored in the USB memory. You can print PDF data directly from the USB memory without a PC. Saving data into the USB memory is not possible. For details, refer to the Operation Guide. Fax Box Fax Box stores the fax data received. For details, refer to the Operation Guide supplied with the fax kit.
Using Document Box Basic Operation for Document Box Using Custom Box This section explains how to create a Custom Box, and how to store a document in the Custom Box and print it. NOTE: In the following explanation, it is assumed that User Login is not activated. For details on User Logon privileges, refer to User Privileges on page 4-18. Creating a New Custom Box Use the procedure below to create a new box in the user box. 1 Press the Document Box key. 2 Press [Custom Box], [Edit Box] and then [Add].
Using Document Box 4 Enter the box number by pressing [-, +] or number keys. The box number can be from 0001 to 1000. A Custom Box should have a unique number. If you enter 0000, the smallest number available will be automatically assigned. Box:** - Box No. Set box number . Use [-]/[+] or the numeric keys to enter a number. Enter 0000 to assign a number automatically. (0001 - 1000 ) 0001 Cancel OK Status 10/10/2007 10:10 5 Press [OK]. 6 To name the Custom Box, press [Change] of Box Name.
Using Document Box 14 To activate automatic file deletion, press [Change] of Auto File Deletion. 15 This feature Box:** - Auto File Deletion automatically deletes Delete stored documents after a set period of time. Please set how long to store documents before deleting them. an unnecessary file after a period of time Off specified. To activate Storing Period(1 - 31) On automatic file deletion, 30 day (s) press [On].
Using Document Box 2 Select the Custom Box to store the document. Custom Box. No. Box Name 001 SALES Owner Use(%) Anonymous - -- - 001/001 Store File Custom Box Job Box Detail Open Removable Memory Status 3 Press [Store File]. Edit Box 10/10/2007 10:10 Custom Box. No.
Using Document Box Printing a Document Stored in the Custom Box Use the procedure below to select the interface. 1 Press the document box key and select the custom box containing the document you want to print. Custom Box. No. Box Name 001 SALES Owner Use(%) Anonymous - -- - 001/001 Edit Box 4 Store File Custom Box Job Box Detail Open Removable Memory Status 2 Press [Open]. 10/10/2007 10:10 Custom Box. No.
Using Document Box 5 Change paper selection, duplex printing, etc., as desired. Ready to print from Box. Press Start to start printing. Printing Image Auto Original : Letter Zoom : 100% Paper : Letter Change Setting Quick Setup Off Paper Selection Delete after Printed 1-sided >>1-sided Collate Duplex Collate/ Offset Functions Cancel Status 6 10/10/2007 10:10 Press the Start key to start printing.
Using Document Box 2 Press [Open]. Custom Box. No. Box Name 001 SALES Owner Use(%) Anonymous - -- - 001/001 Store File Custom Box Job Box Detail Edit Box Open Removable Memory Status 10/10/2007 10:10 NOTE: If a password has been registered for a Custom Box, enter the password and then press [OK]. 3 Select a document Custom Box to be printed by pressing a checkbox SALES Name in the list. A tick 001 2007040410574501 appears in the checkbox for the selected document.
Using Document Box 7 Press [OK]. 8 Press [OK] again to return to the Functions screen. 9 Press the Start key. Printing begins. Custom Box List The Custom Box List is a list of the Custom Boxes you can view on the display. It lists the boxes by number in ascending or descending order, or by name in alphabetical order. This allows you to check the list of custom boxes on screen. The custom boxes can be listed by box number or by box name. To view the custom box list, press the document box key.
Using Document Box Document List The document list is a list of the documents stored in the custom box. To view the contents of a custom box, select the box from the list and press [Open]. You can manipulate the list in a range of ways, as shown below. List Listing the documents by name in alphabetical order. Selecting more than one document at a time. Listing the documents by time of update in ascending/ descending order. Listing the documents by size in ascending/ descending order.
Using Document Box 3 Select the box you wish to delete in the list and press [Delete]. The delete confirmation screen appears. Document Box /Removable Memory - Custom Box No. 001 Name SALES Owner Use(%) Anonymous - --- 001/001 Detail/ Edit Add Delete Close Status 10/10/2007 10:10 NOTE: If a password has been registered for a custom box, enter the password and then press [OK]. 4 The box is deleted. 5 Press [Close]. The display returns to the default Document Box screen.
Using Document Box 4 The details of the selected box are displayed. To edit details, press [Change] of the detail you wish to edit. Edit the detail as desired and press [OK]. Box:** Box No.: Change 001 Box Name: Change SALES Box Password: Change ******** Usage Restriction: Auto File Deletion: Change 21 MB Change 30 day(s) Cancel Register Status 10/10/2007 5 Press [Register]. 6 Press [Yes] in the deletion confirmation screen. 10:10 The information is changed. 7 Press [Close].
Using Document Box 2 Press [Open]. Custom Box. No. Box Name 001 SALES Owner Use(%) Anonymous - -- - 001/001 Store File Custom Box Job Box Detail Edit Box Open Removable Memory Status 10/10/2007 10:10 NOTE: If a password has been registered for a Custom Box, enter the password and then press [OK]. 3 Select (highlight) a document to preview and then press [Preview].
Using Document Box Moving/Joining/Deleting Documents Moving a Document The documents in a Custom Box can be moved to any other box. Refer to the Operation Guide for details. Joining Documents The documents in a Custom Box can be joined in one document. Refer to the Operation Guide for details. Deleting a Document You can delete the documents stored in a custom box. Use the procedure below. 1 Press the Document Box key.
Using Document Box 4 Select the document you wish to delete by checking the checkbox. The document is marked with a checkmark. Custom Box SALES Name Date and Time Size 001 2007040411301701 04/04/ 2007 11:30 21 MB 002 2007040411301702 04/04/ 2007 11:30 30 MB 003 2007040411301703 04/04/ 2007 11:30 36 MB 001/001 Edit Box Preview Print Send Join Move Delete Store File Close Status 10/10/2007 10:10 NOTE: [Delete] is disabled until a document is selected.
Using Document Box Access level Administrator User Others Yes No Owner Yes Yes Changing how a box is shared Others Yes No Owner Yes Yes Changing the password to a box Others No No Owner Yes Yes Overwriting the password to a box Others Yes No Owner Yes No Adjusting the box capacity Others Yes No Owner Yes No Changing the period of using a box Others Yes No Owner Yes Yes Accessibility Renaming a box Box information Restricting the Accessibility to a Box The acces
Using Document Box Creating new Custom Boxes when user login administration is enabled If you create a new Custom Box when user login administration is enabled, the screen shown below appears and you can change the owner and permission settings. Only administrators can create new Custom Boxes. Box:** Box No.
Using Document Box Using a Job Box Private Print/Stored Job Box Private Print/Stored Job Box stores the print data which is printed by using the printer driver as a Private Print/Stored Job. Refer to the KX Driver User Guide on how to print a job as Private Print or Stored Job using the printer driver. 4 Printing a Document in Private Print/Stored Job Box You can print documents stored in a Private Print/Stored Job box. Use the procedure below. 1 Press the Document Box key. 2 Press [Job Box].
Using Document Box 8 Press [Start Print] to start printing. Upon completion of printing, the Private Print job is automatically deleted. Viewing a Document You can check the details of documents stored in a Private Print/Stored Job box. Use the procedure below. 1 Press the Document Box key. 2 Press [Job Box]. 3 Select [Private Print/Stored Job] and press [Open]. 4 Select the creator of the document and press [Open].
Using Document Box 1 Press the Document Box key. 2 Press [Job Box]. 3 Select [Private Print/Stored Job] and press [Open]. 4 Select the creator of the document and press [Open]. Job Box Private Print/Stored Job User Name 4 Files User 1 5 User 2 2 User 3 1 User 4 1 User 5 001/002 1 Open Close Status 5 To delete the document, select the document and press [Delete]. When the delete confirmation screen appears, press [Yes].
Using Document Box 3 Press [+] or [–] to enter the maximum number of stored jobs. You can enter any number between 0 and 50. Document Box /Removable Memory - Quick Copy Job Retention Set the maximum number of quick copy/ proof print jobs to retain. Use [-]/[+] or the numeric keys to enter a number. *Set this number to 0 to not retain any quick copy/proof print jobs . (0 - 50) 10 job(s) You can also enter the number from the number keypad.
Using Document Box 5 Select the document to print, and press [Print]. Private Print/Stored Job Name Date and Time Size Document 0.pdf 10/10/2007 09 :40 21 MB Document 1.pdf 10/10/2007 09 :45 30 MB Document 2.pdf 10/10/2007 09 :50 36 MB Document 3.pdf 10/10/2007 10 :55 21 MB Document 4.pdf 10/10/2007 10 :00 30 MB Print 001/001 Detail Delete Close Status 10/10/2007 6 Specify the number of prints as desired. 7 Press [Start Print] to start printing.
Using Document Box 5 Press [Close] to end viewing. Deleting a Document You can delete documents stored in the Quick Copy/Proof and Hold box. Use the procedure below. 1 Press the Document Box key. 2 Press [Job Box], [Quick Copy/Proof and Hold], then [Open]. 3 Select the creator of the document and press [Open]. Job Box Quick Copy/Proof and Hold User Name Files User 1 5 User 2 4 User 3 3 User 4 2 User 5 001/002 1 Open Close Status 4 Select the document to delete and press [Delete].
Using Document Box Repeat Copy Box Setting the Number of Stored Jobs To maintain free space on the hard disk, you can set the maximum number of stored jobs. Use the procedure below. 1 Press the System Menu key. 2 Press [Document Box/Removable Memory] > [Next] in Job Box > [Change] in Repeat Copy Retention Number. 3 Use the [+] and [–] keys or the numeric keys to enter the maximum number of stored jobs.
Using Document Box 4 Select the document to print and press [Print]. Job Box Repeat Copy Name 2007060600531002 Date and Time 06/06/2007 10 :10 Size 21 MB 001/001 Detail Delete Print Close Status 10/10/2007 10:10 5 If the document is protected by a password, enter the password using the numeric keys. 6 Press [Start Print] to start printing. The Repeat Copy Box job will be erased when the main power switch is turned off.
Using Document Box 3 Select [Form for Form Overlay(Copy)] and press [Open]. Job Box Box Name Files User 21 Quick Copy/Proof and Hold 21 Repeat Copy 21 Form for Form Overlay(Copy) 21 001/001 Open Custom Box Job Box Removable Memory Status 4 Press [Store File].
Using Document Box 3 Select [Form for Form Overlay(Copy)] box, and press [Open]. 4 Select the form to view and press [Detail]. Job Box Form for Form Overlay(Copy ) Name You can use this screen to check the content of the form. Date and Time 2007040410575501 Size 04/04/2007 10:57 21 MB 2007040410585501 04/04/2007 10:58 30 MB 2007040410594501 04/04/2007 10:59 36 MB 001 /001 Detail Preview Delete Print Store File Close Status 5 10/10/2007 10:10 Press [Close].
5 Status / Job Cancel This chapter explains how to check the status and history of jobs and cancel the jobs being processed or waiting to be printed. This chapter also explains how to check the remaining amount of toner and paper and the status of devices, and how to cancel the fax communication. • • • • • • • • ADVANCED OPERATION GUIDE Checking Job Status..................................................... 5-2 Checking Job History .................................................
Status / Job Cancel Checking Job Status Check the status of jobs being processed or waiting to be printed. Available Status Screens The processing and waiting statuses of jobs are displayed as a list on the touch panel in four different screens - Printing Jobs, Sending Jobs, Sending Jobs - Timer waiting, and Storing Jobs. The following job statuses are available.
Status / Job Cancel 2 Press either of [Printing Jobs], [Sending Jobs], or [Storing Jobs] to check the status. To check the scheduled transmission job, press [Sending Jobs] and then [Scheduled Job]. Status Status Job Type Scheduled Job Log All Job No. Accepted Time Type 438 14:47 Destination User Name Status abc@def.com InProcess 001/001 Cancel Detail Printing Jobs Status Sending Jobs Storing Jobs Device/ Communication Paper /Supplies Pausing Scanner.
Status / Job Cancel The table below lists the items displayed in the Printing Jobs Status screen. No. Item / Key Detail 1 Job No. Acceptance No.
Status / Job Cancel No. Item / Key Detail 11 [Move Up] In the list, select the job that you want to move up the job queue and press this key. (Refer to Reordering Print Jobs on page 5-15) 12 [Detail] Select the job for displaying detailed information from the list, and press this key. (Refer to Checking the Detailed Information of Histories on page 5-11) Sending Jobs Status screen 5 Status Status Job Type Job No.
Status / Job Cancel No. Item / Key Detail 5 User Name User Name for the executed job or Login User Name. 6 Status Status of job InProcess: The status before starting sending such as during scanning originals Sending: Sending Waiting: Sending Waiting Canceling: Canceling the job Pause: Pausing the job 7 [T] of Job Type Only selected type of jobs are displayed. 8 [Cancel] Select the job you want to cancel from the list, and press this key.
Status / Job Cancel No. 3 Display / Key Type Details Icons that indicate the job type Storing Job Scan Storing Job Printer Storing Job FAX Storing Job i-FAX 4 Job Name Job name or file name is displayed. 5 User Name User Name for the executed job or Login User Name. 6 Status Status of job InProcess: The status before starting to save such as during scanning originals Storing: Storing Data Canceling: Canceling the job 7 [T] of Job Type Only selected type of jobs are displayed.
Status / Job Cancel Detailed information of the selected job is displayed. Status Status Job No. Log All Job Type Accepted Time Type 438 14:44 Job Name User Name Status doc 20070225144435 Waiting 001/001 Pause All Print Jobs Cancel Printing Jobs Priority Override Sending Jobs Move Up Storing Jobs Detail Device/ Communication Paper /Supplies Status 10/10/2007 10:10 Detailed information on the selected job is displayed.
Status / Job Cancel NOTE: Press [T] or [S], select a destination and press [Detail]. Information on the selected job is displayed for checking. 4 To exit from the detailed information, press [Close].
Status / Job Cancel Checking Job History Check the history of completed jobs. NOTE: Job history is also available by COMMAND CENTER or Network Print Monitor from the computer. Available Job History Screens The job histories are displayed separately in three screens - Printing Jobs, Sending Jobs, and Storing Jobs. The following job histories are available.
Status / Job Cancel 2 Press either of [Printing Jobs], [Sending Jobs], or [Storing Jobs] to check the log, and press [Log]. Status Status Log All Job Type Job No.
Status / Job Cancel NOTE: To check the information of the next/previous page, press [T] or [S]. 4 5-12 To exit from the detailed information, press [Close].
Status / Job Cancel Pause and Resumption of Jobs Pause /resume all printing jobs in printing/waiting. The procedure for pausing and resuming jobs is explained below. 1 Press the Status/Job Cancel key. 2 Press [Pause All Print Jobs] on the Printing Jobs Status screen. Printing is paused. Status Status Log All Job Type Job No.
Status / Job Cancel Canceling of Jobs For more information on cancelling jobs, refer to the Operation Guide. Priority Override for Waiting Jobs Priority Override function suspends the current job and prints the job in waiting first. NOTE: A current job that is designated as Priority Override cannot be suspended. After the current Priority Override job is completed, the next Priority Override job is printed. The procedure for using Priority Override is explained below. 1 Press the Status/Job Cancel key.
Status / Job Cancel Reordering Print Jobs This function allows you to select a queued print job and raise its output priority. NOTE: You cannot assign a higher priority than the job currently being printed or jobs that have been queued due to an interruption. Nor can you assign a priority higher than a job being processed. You cannot lower a job's priority. The procedure for reordering print jobs is explained below. 1 Press the Status/Cancel key. 2 Press the [Printing Jobs].
Status / Job Cancel Checking the Remaining Amount of Toner and Paper Check the remaining amount of toner, paper, and staples on the touch panel. Use the procedure below to select the interface. 1 Press the Status/Job Cancel key. 2 Press [Paper/ Supplies] to check the remaining amount of toner, paper, and staples.
Status / Job Cancel Device/Communication Configure the devices/lines installed or connected to this machine or check their status. You can also control devices depending on their status. Displaying Device/Communication Screen The procedure for using the Device/Communication screen is explained below. 1 Press the Status/Job Cancel key. 2 Press [Device/Communication] 5 The screen to check the status or configure the devices is displayed. Check of Device Status Detail Hard Disk Scanner Ready .
Status / Job Cancel Configuring the Devices Detail Hard Disk Scanner Ready . Error has occurred. Printer Ready . FAX Backup Memory Removable Memory Memory Card Safely removable . Format Remove Printing Jobs Log Not connected. Display Error Sending Jobs Storing Jobs Format Device/ Communication Executing TX job**. Printing list Paper / Supplies 10/10/2007 10:10 Detailed information on controlling devices is given below.
Status / Job Cancel 2 Press [Device/ Communication] > [Remove] in Removable Memory. Detail Hard Disk Scanner Ready . Error has occurred. Printer Ready . FAX Backup Memory Removable Memory Format Not connected. Remove Printing Jobs Log 3 Memory Card Safely removable . Sending Jobs Display Error Storing Jobs Format Device/ Communication Executing TX job**. Printing list Paper / Supplies 10/10/2007 10:10 When Device can be removed safely is displayed, remove the USB memory.
Status / Job Cancel 2 Press [Device/ Communication] > [Printing list] in Memory Card. Detail Hard Disk Scanner Ready . Error has occurred. Printer Ready . FAX Backup Memory Removable Memory Memory Card Safely removable . Format Remove Printing Jobs Log 3 Not connected. Display Error Sending Jobs Storing Jobs Format Device/ Communication Executing TX job**. Printing list Paper / Supplies 10/10/2007 10:10 Press [Yes] in the confirmation screen. List printing begins.
6 System Menu This chapter explains how to configure various settings of the machine using the menus on the operation panel. • • • • • • • • • • • • • • ADVANCED OPERATION GUIDE Common Settings......................................................... 6-2 Copy Settings ............................................................. 6-38 Sending Settings ........................................................ 6-44 Document Box/Removable Memory Settings............. 6-46 Printer Settings......................
System Menu Return to Top on the System Menu [Return to Top] appears in the screen during System Menu operation. Press [Return to Top] to return to the System Menu default screen. Return to the System Menu default screen before operating other functions during System Menu operation.
System Menu 3 Press the key for the language you want to use. Common Settings - Language Set the language to use for the touch panel display . English Deutsch Português Nederlands Français Español Italiano Cancel Status OK 10/10/2007 10:10 4 Press [OK]. 5 A message instructing you to turn the power off and on appears. Press [OK]. 6 Press the Power key on the operation panel. Check that the Power key and the memory indicator are off. After this, turn on the main power switch again.
System Menu Item Description Accessibility Send The Accessibility Send screen (the screen shown when the Accessibility Display key is pressed in the Send screen) appears. Use the procedure below to select the default startup screen. 1 Press the System Menu key. 2 Press [Common Settings] and then [Change] of Default Screen. 3 Select the screen to be displayed as the default screen. Common Settings - Default Screen Set the default screen to be displayed when main power switch is turned on.
System Menu Sound Set options for buzzer sound during the machine operations. The table below lists the buzzer types and their settings and details. Item Value Description Volume 0 (Mute), 1 (Minimum) to 5 (Maximum) Set the buzzer volume level. Key Confirmation Off, On Emit a sound when the control panel and touch panel keys are pressed. Job Finish Off, On Emit a sound when a print job is normally completed. Ready Off, On Emit a sound when the warm-up is completed.
System Menu Original/Paper Setup Register additional types and sizes of originals and paper. Custom Original Size Setup Set up frequently-used custom original sizes. The custom size options are displayed on the screen to select original size. The dimensions available are as follows. The table below lists the sizes that can be registered. Input units Dimensions Inch models X: 2 to 17" (in 0.01" increments) Y: 2 to 11.69" (in 0.
System Menu The table below lists the sizes that can be registered. Input units Dimensions Inch models H: 5.83 to 17" (in 0.01" increments) V: 5.86 to 11.69" (in 0.01" increments) Metric models H: 148 to 432 mm (in 1 mm increments) V: 98 to 297 mm (in 1 mm increments) Up to four custom paper sizes can be added. Select media type for each paper size.
System Menu Paper Size and Media Type Setup for Cassettes Select paper size and media type for Cassette 1, 2 and optional paper feeders (Cassette 3 and 4). The available paper sizes and media types are shown in the table below. Item Paper Size Description Auto Automatically detect paper size. Select Metric or Inch for paper size. Standard Sizes 1 Available options are as follows: Inch models: Ledger, Legal, Letter, Letter-R, Statement-R, 8.5×13.
System Menu 4 Press [OK]. The previous screen reappears. 5 Press [Change] of Media Type to select media type and press [OK]. Paper Size and Media Type Setup for Multi Purpose Tray Select size and media type for Multi Purpose Tray. Set up frequently-used size and media type before use. The available paper sizes and media types are shown in the table below. Item Paper Size Auto Automatically detect paper size. Select Metric or Inch for paper size.
System Menu 1 Press the System Menu key. 2 Press [Common Settings], [Next] of Original / Paper Setup, [Next] of MP Tray Setting and then [Change] of Paper Size. 3 To detect paper size automatically, press [Auto] and select Metric or Inch for Paper Size. To select paper size, press [Standard Sizes 1], [Standard Sizes 2], [Others] or [Size Entry] for Paper Size. Common Settings – Paper Size Set the multi-purpose tray paper size .
System Menu Paper types and weights z: Available ×: Not available Paper Weight Weight (g/m2), Media type Light 64g/m2 or less Normal 1 Normal 2 Normal 3 Heavy 1 Heavy 2 Heavy 3 Extra Heavy 60g/m2 to 75g/m2 76g/m2 to 90g/m2 91g/m2 to 105g/m2 106g/m2 to 135g/m2 136g/m2 to 170g/m2 171g/m2 and more Transparencies Plain z z z z × × × × Transparency × × × × z z z z Vellum z z z z × × × × Labels z z z z z z z z Recycled z z z z × × × × Preprinted z z
System Menu 1 Press the System Menu key. 2 Press [Common Settings], [Next] of Original / Paper Setup and then [Next] of Media Type Setting. 3 Press [Next] for the media type whose weight you want to change. 4 Press [Change] of Media Weight. 5 Select the weight and press [OK]. The previous screen reappears. Common Settings - Media Weight Select weight of paper. Please refer to the manual for details.
System Menu Default Paper Source Select the default paper source from Cassette 1-4 and Multi Purpose Tray. NOTE: [Cassette 3] and [Cassette 4] are displayed when the optional side feeder installed. Use the procedure below to select the default paper source. 1 Press the System Menu key. 2 Press [Common Settings], [Next] of Original / Paper Setup and then [Change] of Default Paper Source. 3 Select a paper cassette for the default setting.
System Menu 3 Select [A6] or [Hagaki] of A6/Hagaki. Select [Off] to disable automatic detection or [On] to enable automatic detection of Folio and 11x15" respectively. Common Settings - Original Auto Detect Setup Automatically detect originals of special or non-standard size . A6/Hagaki A6 Hagaki Folio Off On 11x15" Off On Cancel OK Status 4 10/10/2007 10:10 Press [OK].
System Menu Paper Source for Cover Paper Select paper source for cover paper from Cassette 1-4 or Multi Purpose Tray. Cover is used for Booklet (see page 1-35) and Cover (see page 128) modes. NOTE: [Cassette 3] and [Cassette 4] are displayed when the optional side feeder installed. Use the procedure below to select the paper source for the cover. 1 Press the System Menu key. 2 Press [Common Settings], [Next] of Original / Paper Setup and then [Change] of Paper Source for Cover.
System Menu If you select [Adjust Print Direction], load paper according to the steps below. Example: copying on Letterhead Original Paper Finished Cassette Multi Purpose tray Original Paper Finished Cassette Multi Purpose tray NOTE: When loading cover paper in a cassette or Multi Purpose tray, load the face, on which printing is supposed to be done, upward. Use the procedure below to specify the actions performed for special paper types. 1 Press the System Menu key.
System Menu Switching Unit of Measurement Select inch or metric for the unit for paper dimensions. Use the procedure below to change the input units. 1 Press the System Menu key. 2 Press [Common Settings] and then [Change] of Measurement. 3 Select [mm] for metric or [inch] for inch. Common Settings - Measurement Select the units of measurement for length. English mm inch 6 Cancel Status 4 OK 10/10/2007 10:10 Press [OK].
System Menu Finishing Paper Error Select alternative actions when finishing (stapling, offsetting or auto image rotating) is not available for the selected paper size or media type. Processing Description Ignore The setting is ignored and the job is printed. Display Error Error message to cancel printing is displayed. No Staple Error Select what to do when staples run out during printing. Item Description Ignore Printing continues without stapling.
System Menu Use the procedure below to specify the settings for error handling. 1 Press the System Menu key. 2 Press [Common Settings] and then [Change] of Error Handling. 3 Press [Change] at the error you wish to change the handling.
System Menu Output Tray Select output tray respectively for copy jobs, print jobs from Custom Box, computers, and FAX RX data. The options are as follows. Output Tray Descriptions Top Tray Delivery on Top Tray of the machine. Finisher Tray* Delivery on Tray set to the optional document finisher or built-in finisher. Job Separator Delivery on the optional job separator. * Select [Face Up] (print surface up) or [Face Down] (print surface down) for paper orientation at output.
System Menu Function Defaults Defaults are the values automatically set after the warm-up is completed or the Reset key is pressed. Set the defaults for available settings such as copying and sending. Setting the frequently-used values as defaults makes subsequent jobs easier. Original Orientation Set the original orientation defaults. The available default settings are shown below. Item Description Top Edge Top Select the original's top edge at the top.
System Menu Refer to page 1-10 for Original Orientation. Use the procedure below to select the default settings for continuous scanning. 1 Press the System Menu key. 2 Press [Common Settings], [Next] of Function Defaults and then [Change] of Continuous Scan. 3 Select [Off] or [On] for the default. Common Settings - Continuous Scan Select the default Continuous Scan setting. Off On Cancel Status OK 10/10/2007 10:10 Use the procedure below to select the default quality setting for originals.
System Menu 3 Select the default for [Text+Photo], [Text] or [Photo]. Common Settings - Original Image Set the default original document type. Text+Photo Text Photo Cancel OK Status 4 10/10/2007 10:10 Press [OK]. Scan Resolution Select the default scanning resolution. The options are 600x600dpi, 400x400dpi Ultra Fine, 300x300dpi, 200x400dpi Super Fine, 200x200dpi Fine, 200x100dpi Normal. Use the procedure below to select the default resolution setting. 1 Press the System Menu key.
System Menu Color mode Description Monochrome Scan document in black and white. File size is smaller than Full Color or Grayscale. Use the procedure below to select the default color setting. 1 Press the System Menu key. 2 Press [Common Settings], [Next] of Function Defaults and then [Change] of Color Selection. 3 Select the default color setting. Common Settings - Color Selection Select default color. Full Color Grayscale Monochrome Cancel Status 4 OK 10/10/2007 10:10 Press [OK].
System Menu 3 Select the default file format. Common Settings - File Format Set default file type . PDF TIFF High Comp. PDF JPEG Cancel Status 4 OK 10/10/2007 10:10 Press [OK]. File Separation Select the default file separation setting. The available default settings are shown below. File Format Description Off No file separation performed (all the pages are compiled in one file). Each Page Each scanned page is created into a separate file. NOTE: Refer to page 2-19 for file separation.
System Menu Density Set the default density. The available default settings are shown below. NOTE: You cannot specify the density if you have selected [Full Color] in Color Selection. Item Description Manual (Normal 0) Set to (Normal 0) in the Manual density. Auto Set to Auto density. Use the procedure below to select the default zoom setting. 1 Press the System Menu key. 2 Press [Common Settings], [Next] of Function Defaults and then [Change] of Density. 3 Select the default density.
System Menu 2 Press [Common Settings], [Next] of Function Defaults and then [Change] of Zoom. 3 Select the default zoom setting. Common Settings - Zoom Select the default Zoom level. 100% Auto Cancel Status 4 OK 10/10/2007 10:10 Press [OK]. 6 File Name Entry Set an automatically entered name (default) for jobs. Additional information such as Date and Time and Job No. can also be set. NOTE: Refer to page 1-52 and page 2-30 for name entry. Use the procedure below to set the default file name.
System Menu 6 Press [OK]. E-mail Subject/Body Set the subject and body automatically entered (default subject and body) when sending the scanned originals by E-mail. NOTE: Refer to the Operation Guide for sending E-mail. Use the procedure below to set the default e-mail subject and message body. 1 Press the System Menu key. 2 Press [Common Settings], [Next] of Function Defaults, [T], and then [Change] of E-mail Subject/Body. 3 Press [Subject] to enter an E-mail subject not more than 60 characters.
System Menu NOTE: Refer to page 1-25 and page 2-27 for Border Erase. Use the procedure below to set the default border erase width. 1 Press the System Menu key. 2 Press [Common Settings], [Next] of Function Defaults, [T] and then [Change] of Border Erase Default. 3 Press [+] or [–] for the Border and Gutter width to erase. Common Settings - Border Erase Default Select the default border erase width. Use [ -]/[+] or the numeric keys to enter a number. Border(0.00 - 2.00) 0.
System Menu 3 Use the [+] or [-] key to enter the margin widths for L/R and T/ B(-0.75 - +0.75). Common Settings - Margin Default Select the default margin width. Use [-]/[+] or the numeric keys to enter a number. L/R(-0.75 - +0.75) 0.23 You can use the number keypad to enter the number directly. T/B(-0.75 - +0.75) " 0.47 # Keys # Keys Cancel Status 4 " Paper is remaining in Document Processor. OK 10/10/2007 10:10 Press [OK]. Collate/Offset Set the defaults for Collate/Offset.
System Menu Auto Image Rotation Select the default Auto Image Rotation setting. The table below shows the available settings. Item Description Off No Auto Image Rotation performed. On Auto Image Rotation performed. NOTE: Refer to page 1-47 for Auto Image Rotation. Use the procedure below to set the default Auto Image Rotation settings. 1 Press the System Menu key. 2 Press [Common Settings], [Next] of Function Defaults, [T] and then [Change] of Auto Image Rotation.
System Menu 4 Press [+] or [–] to enter the form density. Common Settings - Form Overlay(Copy ) Set the default form overlay for copies. Density(10 - 100) Off 100 Select Stored Form % None Select Form Cancel OK Status 5 Press [Select Form]. 6 Select the form that you want to use and press [OK]. 10/10/2007 10:10 Common Settings - Select Form Select a form. Form for Form Overlay(Copy) Name Date and Time Size Document1 05/05/2007 09 :10 1.1MB Document2 05/05/2007 09 :20 1.
System Menu 4 Press [+] or [–] to enter the form density. Common Settings - Form Overlay(Box) Set the default form overlay for box print jobs. Density(10 - 100) Off 100 % Select Stored Form None Select Form Cancel OK Status 10/10/2007 5 Press [Select Form]. 6 Select the Box where the Form is stored and press [Open]. 10:10 NOTE: Press [Detail] to check Box No., Box Name, Usage Restriction, Owner, Permission and Auto File Deletion. 7 Select the Form that you want to use and press [OK].
System Menu Use the procedure below to set the default EcoPrint setting. 1 Press the System Menu key. 2 Press [Common Settings], [Next] of Function Defaults, [T] and then [Change] of EcoPrint. 3 Select [Off] or [On] for the default. Common Settings - EcoPrint Select the default EcoPrint setting. On Off Cancel Status 4 OK 10/10/2007 10:10 Press [OK]. PDF/TIFF/JPEG Image Select the default PDF/TIFF/JPEG file quality. Five options are available from 1 Low Quality (High Comp.
System Menu High Comp. PDF Image Select the default High Comp. This setting is only displayed when the optional PDF upgrade kit has been used. The table below shows the available settings. Item Description Compression Ratio Priority Compression Ratio is given priority with smaller file size. Standard Standard quality Quality Priority Image quality is given priority with larger file size. Use the procedure below to select the default quality setting for highly compressed PDF files.
System Menu NOTE: This setting is not displayed when the optional Security Kit is installed or the Repeat Copy job is set to 0. Refer to page 1-54 for Repeat Copy. Use the procedure below to set the default Repeat Copy setting. 1 Press the System Menu key. 2 Press [Common Settings] and [Next] of Function Defaults. Press [T] twice and [Change] of Repeat Copy. 3 Select the default for [Off] or [On]. Common Settings - Repeat Copy Select the default repeat copy settings.
System Menu Orientation Confirmation Setting Use the procedure below to select the default Orientation Confirmation setting. 1 Press the System Menu key. 2 Press [Common Settings] and [Change] of Orientation Confirmation. 3 Select the default for [Off] or [On]. 4 Press [OK].
System Menu Copy Settings The following settings are available for copying functions. • Border Erase for Back Page …6-38 • Paper Selection …6-39 • Auto Paper Selection …6-40 • Auto % Priority …6-40 • Preset Limit …6-41 • Quick Setup Registration …6-41 • Reserve Next Priority Setting …6-43 NOTE: If user login is enabled, you can only change the settings by logging in with administrator privileges. Border Erase for Back Page Select the Border Erase Method for Back Page of a sheet.
System Menu 3 Press [Same as Front Page] or [Do Not Erase]. Copy - Border Erase to Back Page Select the border erase method for back of page . Same as Front Page Do Not Erase Cancel Status 4 OK 10/10/2007 10:10 Press [OK]. Paper Selection 6 Set the default paper selection. The table below shows the available settings. Item Description Auto Automatically select the cassette containing paper in the same size as originals.
System Menu Auto Paper Selection If [Auto] is selected for Paper Selection, set the paper size selection method when the zoom changes. The table below shows the available settings. Item Description Most Suitable Size Select paper based on the current zoom and the size of the original. Same as Original Size Select paper that matches the size of the original, regardless the zoom. Use the procedure below to specify the action performed for Auto Paper Selection. 1 Press the System Menu key.
System Menu 2 Press [Copy] and [Change] of Auto % Priority. 3 Select the default for [Off] or [On]. Copy - Auto % Priority When a specific paper source is selected, adjust the zoom level as appropriate. On Off Cancel Status 4 OK 10/10/2007 10:10 Press [OK]. 6 Preset Limit Restrict the number of copies that can be made at one time. Options are 1-999 copies. Use the procedure below to set the limit on the number of copies. 1 Press the System Menu key.
System Menu • Density • Duplex • Combine • Collate/Offset • Original Image • Original Size NOTE: Refer to the Operation Guide for the Quick Setup steps. Use the procedure below to register the Quick Setup functions. 1 Press the System Menu key. 2 Press [Copy] and [Next] of Quick Setup Registration. 3 Press [Change] of the function to be registered in Quick Setup.
System Menu Reserve Next Priority Setting Select the operation of the reserve copy and interrupt copy functions and for canceling jobs. Use the procedure below to select the default Reserve Next Priority setting. 1 Press the System Menu key. 2 Press [Copy] and [Change] of Reserve Next Priority. 3 Select the default for [Off] or [On]. Common Settings - Auto Image Rotation Select the default Auto Image Rotation setting.
System Menu Sending Settings The sending settings allow you to specify the following sending function options. • Quick Setup Registration • High Comp. PDF Auto Color NOTE: If user login is enabled, you can only change the settings by logging in with administrator privileges. Quick Setup Registration Select the sending functions to be registered for Quick Setup. Six keys of the Quick Setup screen are allocated to typical functions but can be changed as necessary.
System Menu 4 Select a key (1-6) allocated on the Quick Setup Registration screen. Press [Off] to delete a key from the Quick Setup. Send Setting - Original Size Register Original Size function on the Quick Setup screen. Off Key 1 Key 2 Key 3 Key 4 Key 5 Key 6 Cancel Status 5 OK 10/10/2007 10:10 Press [OK]. A confirmation screen appears. Press [Yes].
System Menu Document Box/Removable Memory Settings The following settings are available for Document Box and removable USB memory. • Registering / Editing Box …6-46 • Job Box …6-46 • Quick Setup Registration …6-46 Registering / Editing Box Creates a new box, edits a box, or checks details of a box in the custom box, or deletes a box from the custom box. For details, refer to Using Custom Box on page 4-5. Job Box The following two operations can be done. For details, refer to each page shown below.
System Menu Sending from Box Quick Setup • File Format • Delete after Transmitted Use the procedure below to register the Quick Setup functions. 1 Press the System Menu key. 2 Press [Document Box/Removable Memory] and [Next] of Quick Setup Registration. 3 Press [Next] of Store File, Send, or Print. 4 Press [Change] of the function to be registered in Quick Setup.
System Menu Printer Settings Printing from computers, settings are generally made on the application software screen. However, the following settings are available for configuring the defaults to customize the machine.
System Menu 3 Press [300dpi], [600dpi], or [Fast1200]. Printer - Resolution Select default resolution. 300dpi Fast1200 600dpi Cancel Status 4 OK 10/10/2007 10:10 Press [OK]. EcoPrint 6 EcoPrint conserves toner when printing. This is recommended for test copies where faded printing is not a problem. Use the procedure below to specify the EcoPrint setting. 1 Press the System Menu key. 2 Press [Printer] and [Change] of EcoPrint. 3 Press [Off] or [On].
System Menu 3 Press [On] or [Off]. Printer - KIR Select the default KIR (smoothing) setting. Off On Cancel Status 4 OK 10/10/2007 10:10 Press [OK]. Override A4/Letter Select whether to treat A4 size and Letter, which are similar in size, as the same size when printing. The table below shows the available settings. Item Description On A4 and Letter are regarded as the same in size. Off A4 and Letter are not regarded as the same in size. Use the procedure below to select the interface.
System Menu Duplex Select binding orientation for duplex mode. The table below shows the available settings. Item Description Finish 1-sided No duplex mode 2-sided Bind ShortEdge Shorter edge bound 2-sided Bind LongEdge Longer edge bound 6 Use the procedure below to select the interface. 1 Press the System Menu key. 2 Press [Printer] and [Change] of Duplex. 3 Press [1-sided], [2-sided Bind LongEdge], or [2-sided Bind ShortEdge]. Printer - Duplex Set the default duplex mode .
System Menu 3 Press [+]/[–] or the numeric keys to set the default number of copies. Printer - Copies Set the default number of copies. Use [-]/[+] or the numeric keys to enter a number. (1 - 999) 1 copy(s) Cancel Status 4 OK 10/10/2007 10:10 Press [OK]. Orientation Set the default orientation, Portrait or Landscape. Portrait Landscape Printer Printer Use the procedure below to set the default orientation for printing. 1 Press the System Menu key.
System Menu Wide A4 Increase the number of characters per line for A4 paper. Use the procedure below to specify the Wide A4 setting. 1 Press the System Menu key. 2 Press [Printer] and [Change] of Wide A4. 3 Press [Off] or [On]. Printer - Wide A4 Enlarge the print area for A4 paper . On Off 6 Cancel Status 4 OK 10/10/2007 10:10 Press [OK].
System Menu LF Action Set the line feed action when the machine receives the line feed code (character code 0AH). The table below shows the available settings. Item Description LF Only Only line feed performed. LF and CR Line feed and character return performed. Ignore LF No line feed performed. Use the procedure below to select the interface. 1 Press the System Menu key. 2 Press [Printer], [T] and [Change] of LF Action. 3 Press [LF Only], [LF and CR] or [Ignore LF].
System Menu 2 Press [Printer], [T] and [Change] of CR Action. 3 Press [CR Only], [LF and CR] or [Ignore CR]. Printer - CR Action Set the character return action. CR Only LF and CR Ignore CR Cancel Status 4 OK 10/10/2007 10:10 Press [OK].
System Menu Network Setup The machine is equipped with network interface, which is compatible with network protocols such as TCP/IP, IPX/SPX, NetBEUI, and AppleTalk. It enables network printing on the Windows, Macintosh, UNIX, NetWare and other platforms. TCP/IP Setup (by Entering IP Addresses) Set up TCP/IP to connect to the Windows network. Set the IP addresses, subnet masks, and gateway addresses. NOTE: Prior to the IP address entries, obtain permission from the network administrator.
System Menu 8 Check if all the address entries are correct and press [OK]. 9 Press the Power key and confirm that the Power key/indicator and the memory indicator are off. After that, turn the main power switch off and on. TCP/IP Setup (Equipped with DHCP Server) Set up TCP/IP when the network is equipped with the DHCP server. The machine works as the DHCP client. Use the procedure below to select the interface. 1 Press the System Menu key.
System Menu 3 Press [On]. System - NetWare Use NetWare. Frame Type Off Ether-II Auto On 802.2 802.3 IP Address SNAP Cancel Status OK 10/10/2007 10:10 4 Press the key for the frame type you want to use. 5 Press [OK]. 6 Press the Power key and confirm that the Power key/indicator and the memory indicator are off. After that, turn the main power switch off and on. AppleTalk Setup Select the Apple Talk network connection. Use the procedure below to select the interface.
System Menu Printing Reports/Sending Notice Print reports to check the machine settings and status. Default settings for printing the result reports can also be configured. Printing Reports Printable reports are as follows. Status Page Check the information including current settings, available memory space, and optional equipment installed. Status Page 6 CD 1325_DC 2325 Firmware Version Font List Check the font samples installed in the machine.
System Menu Network Status Page Check the information including network interface firmware version, network address and protocol.
System Menu Service Status Page More detailed information is available than on the Status Page. Service personnel usually print the service status pages for maintenance purpose. Use the procedure below to print a report. 1 Press the System Menu key. 2 Press [Report] and [Next] of Report Print. 3 Press [Print] for the report you want to print. Printing starts. Report - Report Print Status Page: Print Font List: Print Network Status: Print Service Status: Print A confirmation screen appears.
System Menu 3 Press [Off], [On], or [Error Only]. If you selected [On] or [Error Only], a screen appears for you to specify whether or not transmitted images are attached. Press [Off] or [On] and then press [OK]. 4 6-62 Report - E-mail/Folder Print a report of E-mail/Folder transmission results. Off On Error Only Cancel Status OK 10/10/2007 10:10 Press [OK].
System Menu Adjustment/Maintenance Adjust printing quality and conduct machine maintenance. • Copy Density Adjustment …6-63 • Print Density …6-64 • Send/Box Density Adjust …6-64 • Auto Drum Refresh …6-65 • Drum Refresh …6-66 • Correcting Fine Black Lines …6-67 • Display Brightness …6-68 • Silent Mode …6-68 • Auto Color Correction...
System Menu Print Density Adjust print density. Adjustment can be made in 5 levels. Use the procedure below to adjust the print density. 1 Press the System Menu key. 2 Press [T], [Adjustment/Maintenance] and [Change] of Print Density. 3 Press [1] - [5] (Lighter-Darker) to adjust density. Adjustment /Maintenance - Print Density Adjust density for all printing jobs, including copies . Lighter 1 Darker 2 3 4 5 Cancel OK Status 4 10/10/2007 10:10 Press [OK].
System Menu Auto Drum Refresh Auto Drum Refresh may be executed when the machine is turned on the power or recovered from the low power mode or sleep mode. Auto Drum Refresh is executed automatically to keep the best image quality by monitoring its peripheral temperature and humidity. Set the duration of time to execute Auto Drum Refresh. The table below shows the available settings. Item Description Off No Auto Drum Refresh performed.
System Menu Drum Refresh Refresh the drum when image blur or white spots appear on images in copies. There are 2 drum refresh modes. Item Description Drum Refresh 1 Use this mode when images are blurred or smeared. Refreshing takes about 120 seconds. Drum Refresh 2 Use this mode when white spots appear on images. Refreshing takes about 160 seconds. CAUTION: Drum Refresh cannot be performed while printing. Execute Drum Refresh after the printing is done.
System Menu Correcting Fine Black Lines Correct fine black lines (black streaks caused by contamination), which may appear on the copies, when the optional document processor used. 6 The table below shows the available settings. Item Description Off No correction performed. On(High) Correction performed. Select this item if black streak remains after using On (Low). The reproduction of the image becomes lower when using On (Low). On(Low) Correction performed.
System Menu 3 Press [Off], [On(Low)] or [On(High)]. Adjustment /Maintenance - Correcting Fine Black Line Reduce the visibility of fine black lines if they appear in a scanned image . *Small characters will also become less visible. Off On( Low) On(High) Cancel OK Status 4 10/10/2007 10:10 Press [OK]. Display Brightness Set the brightness of the touch panel. Use the procedure below to adjust the display brightness. 1 Press the System Menu key.
System Menu 3 Press [Off] or [On]. Adjustment /Maintenance - Silent Mode Make after-printing process run more quietly. *This may increase the time need to prepare for the next job. On Off Cancel Status 4 OK 10/10/2007 10:10 Press [OK]. Auto Color Correction This setting allows you to adjust the detection level used by the machine to determine whether the original is color or monochrome during sending.
System Menu System Initialization Initialize the hard disk mounted on the machine to return to the default mode. Refer to System Initialization on page 6-87 about the initialization procedures. Clean the Main Charger Clean the Main Charger if black or white vertical streaks appear on images in printout. 1 Press the System Menu key. 2 Press [T] and then [Execute] of Clean the Main Charger. 3 Clean the Main Charger. For more information on cleaning the main charger, refer to the Operation Guide.
System Menu Date/Timer Date/Timer settings include: • Date/Time …6-71 • Time Zone …6-72 • Date Format …6-72 • Auto Panel Reset …6-73 • Auto Sleep …6-74 • Auto Error Clear …6-76 NOTE: If user login is enabled, you can only change the settings by logging in with administrator privileges. 6 Date/Time Set the date and time for the location where you use the machine. If you perform Send as E-mail, the date and time set here will be displayed on the header.
System Menu Time Zone Set the time difference in the location you are from GMT. Use the procedure below to set the time difference. 1 Press the System Menu key. 2 Press [T], [Date/Timer] and then [Change] of Time Zone. 3 Select the location and press [OK]. Date/Timer - Time Zone Set time zone. Please select the location nearest you.
System Menu Auto Panel Reset If no jobs are run for a certain period of time, automatically reset settings and return to the default setting. NOTE: Refer to page 6-21 for the default settings. Auto Panel Reset ON/OFF Select to use Auto Panel Reset or not. Use the procedure below to select the interface. 1 Press the System Menu key. 2 Press [T], [Date/Timer] and then [Change] of Auto Panel Reset. 3 Press [Off] or [On].
System Menu 3 Press [+] or [–] to enter the time until Auto Panel Reset is turned on. Date/Timer - Reset Timer Set the amount of time to wait before automatic panel reset. Use [-]/[+] to enter a number. (5 - 495) sec. You cannot use the number keypad to enter this value. Cancel Status 4 OK 10/10/2007 10:10 Press [OK]. Auto Low Power Mode You can specify the amount of time to wait before Auto Low Power Mode. Specify a value from 1 - 240 minutes (1 minute increments).
System Menu 3 Press [Off] or [On]. Date/Timer - Auto Sleep Automatically enter Sleep Mode. Off On Cancel Status 4 OK 10/10/2007 10:10 Press [OK]. Sleep Timer If you select [On] for Auto Sleep, set the amount of time to wait before Auto Sleep. Options are between 1 and 240 minutes (every one minute). NOTE: If you select [Off] for Auto Sleep, the time display does not appear. Use the procedure below to set the Auto Sleep time. 1 Press the System Menu key.
System Menu Auto Error Clear If an error occurs during printing, the print job stops to wait for the next step to be taken by the user. In the Auto Error Clear mode, automatically clear the error after a set amount of time elapses. The following errors are automatically cleared. Print overrun Memory is full Auto Error Clear ON/OFF Select whether to use Auto Error Clear or not. Use the procedure below to select the interface. 1 Press the System Menu key.
System Menu 2 Press [T], [Date/Timer] and then [Change] of Error Clear Timer. 3 Press [+] or [–] to enter the time until printing restarts. Date/Timer - Error Clear Timer Set the amount of time to wait before automatically clearing errors. Use [-]/[+] to enter a number. You cannot use the number keypad to enter this value. (5 - 495) sec. Cancel Status 4 OK 10/10/2007 10:10 Press [OK].
System Menu Editing Destination (Address Book/Adding One-Touch Keys) Save frequently used destinations to Address Book or One-touch Keys. The saved destinations can be changed. The destinations are available for Send as E-mail, Send to Folder, and Fax Transmission (optional). Adding a Destination Add a new destination to the Address Book. There are two registering methods, individuals and groups. When adding a group, enter the group name and select group members from the Address Book.
System Menu 5 Press [OK]. The screen shown in step 3 reappears. 6 Press [Change] of Name. 7 Enter the destination name (up to 32 characters) to be displayed on the Address Book and press [OK]. The screen shown in step 3 reappears. NOTE: Refer to the Operation Guide for entering characters. 8 Press [Address]. 9 Press [S] or [T] to select transmission method from E-mail, Folder (FTP) or Folder (SMB). Address:** Address Contact Name E-mail E-mail Address: Change 6 abcd@wxyz.com Change Dest .
System Menu The Folder (FTP) Address 1 Press [Host Name], [Path], [Login User Name], and [Login Password] to enter relevant information respectively and press [OK]. Item * ** Max. No. of Characters Description Host name* FTP server host name or IP address 62 chars Path** Path for the file to be stored E.g. “\User\ScanData” If no path is entered, the file is stored in the home directory.
System Menu The Folder (SMB) Address 1 Press [Host Name], [Path], [Login User Name], and [Login Password] to enter relevant information respectively and press [OK]. The table below explains the items to be entered. Item * Max. No. of Characters Description Host name* Host name or IP address of the sending computer 62 chars Path** Path to the folder used to save files E.g. “\User\ScanData” 126 chars Login user name User name for folder access For example, abcdnet\james.
System Menu Adding a Group Compile two or more individuals into a group. Designations in the group can be added at the same time. When adding a group, a maximum of 500 groups can be added in the Address Book. NOTE: Before adding a group in the Address Book, the individuals to be included in the group must be added first. Up to 100 destinations for the email, 500 destinations for the FAX, and the total of 10 destinations for the FTP and SMB can be registered per a group.
System Menu 10 Select a destination (individual) to add to the group. Edit Destination - Add Name Sort Dest No. Type Name Detail CCC 0003 ABC@DEF .com Search(Name) Search(No.) 0001 / 0001 Detail ABC DEF GHI E-mail JKL MNO PQRS TUV Folder WXYZ 0-9 FAX Cancel OK Status 10/10/2007 10:10 NOTE: Destinations can be sorted or searched by destination name or address number. Refer to the Operation Guide for Address List. 11 Press [OK].
System Menu Editing an Individual Destination Change Address Number, Name and destination type and address. Refer to Adding an individual on page 6-78 for the details. Editing a Group 1 Change Address Number and Name. Refer to Adding a Group on page 6-82 for the details. 2 Press [Group Member]. 3 To delete any destination from the group, select the destination and press [Delete]. Press [Yes] on the screen to confirm the deletion.
System Menu Pressing [Detail] shows the detailed information of the selected destination. Edit Destination - Register Name Sort No. Type Name 0003 CCC 0004 DDD 0005 EEE 0006 FFF 0007 GGG ABC DEF GHI E-mail Detail ABC@DEF .com Search(Name) Search(No.) 2/3 Detail qwe@rty.com JKL MNO PQRS TUV WXYZ 0-9 Group Folder Cancel OK Status 10/10/2007 10:10 NOTE: Destinations can be sorted or searched by destination name or address number. Refer to the Operation Guide for Address List.
System Menu 2 Select a new destination (individual or group). Pressing [Detail] shows the detailed information of the selected destination. Edit Destination - Register Name Sort No. Type Name 0003 CCC 0004 DDD 0005 EEE 0006 FFF 0007 GGG ABC DEF GHI E-mail Detail ABC@DEF .com Search(Name) Search(No.) 2/3 Detail qwe@rty.
System Menu System Initialization Initialize the hard disk mounted on the machine to return to the default mode. CAUTION: System initialization will erase Custom Document Boxes, data stored in Document Box, addresses in the Address Book, user property, account information, and settings. NOTE: This item will not be displayed if the optional Security Kit is installed. Refer to Security on page 8-1 about the functions added when the Security Kit is installed and related procedures.
System Menu Restarting the System Restart the CPU without turning the main power switch off. Use this to deal with any unstable operation by the machine. (Same as the computer restart.) Use the procedure below to select the interface. 1 Press the System Menu key. 2 Press [System] and [Execute] of Restart. System Network: Next Execute Restart: Network Security: Next Return to Top 3 Press [Yes] to restart the machine.
System Menu SSL Network Security This function allows you to use SSL network security for communication. Use the procedure below to specify the SSL settings. 1 Press the System Menu key. 2 Press [System], [Next] in Network Security, and then [Change] in SSL. NOTE: If user login is disabled, the user authentication screen appears. Enter your login user name and password and then press [Login]. For this, you need to log in with administrator privileges.
System Menu Accessibility (Enlarged Touch Panel Display) Touch panel characters and key displays can be enlarged. Use the numeric keys to select items and proceed to the next screen. NOTE: Accessibility can be used only with Copying and Sending registered on the Quick Setup screen. To set functions other than those displayed in the accessibility screens, you must return to the original display. Press the Accessibility Display key again. Press the Accessibility Display key when in the Copy or Send (i.e.
7 Management This chapter explains the following operations. • • • ADVANCED OPERATION GUIDE User Login Administration ............................................ 7-2 Job Accounting............................................................7-11 Security Kit Operations...............................................
Management User Login Administration User login administration specifies how the user access is administered on this machine. Enter correct login user name and password for user authentication to log in. Access privileges are in two types - User and Administrator. Certain items in System Menu can be modified only by administrators. First User Login Administration Follow these steps for the first user login administration. Enable user login administration. (page 7-2) T Add a user.(page 7-5) T Log out.
Management 4 Press [Next] of User Login Setting and then [Change] of User Login. 5 Select [Local Authentic.] or [Network Authentic.]. Select [Off] to disable user login administration. User Login/Job Accounting - User Login User login administration. Please select authentication method. Off Host Name Local Authentic. Domain Name Network Authentic. If you select NTLM (WinNT ) [Network NTLM Kerberos (WinNT ) (Win2000 /2003) Authentic.
Management 2 Enter the login user name and press [OK]. NOTE: Refer to the Operation Guide for details on entering characters. 3 Press [Login Password]. 4 Enter the login password and press [OK]. NOTE: When job accounting is enabled, you can use the [Counter Check] key after you enter your login user name and login password. Pressing [Counter Check] enables you to refer to the number of pages printed and the number of pages scanned.
Management Auto Logout Logout is automatically executed in the following cases: • When the Power key is pressed to enter the sleep mode • When auto sleep is activated • When auto reset is activated Adding a User This adds a new user. You can add Up to 1,000 users (including the default login user name). The table below explains the user information to be registered. Item Description User Name* Enter the name displayed on the user list (up to 32 characters).
Management 1 Log in as a user with administrator rights. 2 Press the System Menu key. 3 Press [User Login/Job Accounting]. 4 If user login is disabled, the user authentication screen appears. Enter your login user name and password and then press [Login]. For this, you need to log in with administrator privileges. The default login user name and password are both “3060”. 5 Press [Next] of User Login Setting, [Register/Edit] of Local User List, and then [Add]. 6 Press [Change] of User Name.
Management 14 Select the user access privilege and press [OK]. User:** - Access Level Set user access privileges. Landscape Administrator Cancel OK Status 10/10/2007 15 Press [Change] of Account Name. 16 Select the account and press [OK]. 10:10 User:** - Account Name Select account to which this user will be attached.
Management 4 Press [Next] of User Login Setting and [Register/Edit] of Local User List. 5 Select the user whose properties you wish to change. NOTE: Select [Name] and [Login Name] from the Sort pull-down menu to sort the user list. Press [Search(Name)] or [Search(Login)] to search by name or login user name. The procedure differs depending on the details to be edited. Changing user information 1 Press [Detail]. 2 Refer to steps 6 to 16 of Adding a User to change a user property.
Management 1 Press the System Menu key. 2 Press [User Property]. 3 Refer to steps 6 to 16 of Adding a User to change user properties. Press [Detail] of Login User Name or Account Name to check the present status. User:** User Name: Change User01 Login User Name: Detail 0123 Change ******** Access Level: Account Name: User E-mail Address: Login Password Detail Account01 Change kyo@efg.com Cancel 4 Register 10/10/2007 Status 10:10 Press [Register] to finalize changed user properties.
Management 5 Press [Reject] or [Permit]. User Login/Job Accounting - Unknown ID Job Select what to do with jobs from unknown user names or account IDs. Reject Permit Cancel Status 6 7-10 OK 10/10/2007 10:10 Press [OK].
Management Job Accounting Job accounting Manages the copy/print count accumulated by individual accounts by assigning an ID to each account. Job accounting helps the following activities in business organizations. • Manageability of up to 1,000 individual accounts. • Availability for account IDs with as many as eight digits (between 0 and 99999999) for security. • Integrated management of printing and scanning statistics through the use of an identical account ID.
Management 5 Press [On]. To disable job accounting, press [Off]. User Login/Job Accounting - Job Accounting Access the job accounting function. On Off Cancel Status 6 OK 10/10/2007 10:10 Press [OK]. NOTE: When the display returns to the System Menu default screen, logout is automatically executed and the screen to enter the Account ID appears. To continue the operation, enter the Account ID.
Management When the screen to enter the login user name and password appears If user login administration is enabled, the screen to enter the login user name and password appears. Enter a login user name and password to log in. (Refer to Login/Logout on page 7-3.) If the user has already registered the account information, the account ID entry would be skipped. (Refer to Adding a User on page 7-5.) 2 Proceed to complete the rest of the steps.
Management 5 Press [Change] of Account Name. Account:** Account Name: Change Account01 Account ID: Change 00001000 Print Restriction Copier: Change Off Scan Restriction Others: Print Restriction Printer: Change Off FAX TX Restriction: Change Off Cancel Register 10/10/2007 Status 6 Change Off 10:10 Enter the account name and press [OK]. The Account screen reappears. NOTE: Refer to the Operation Guide for details on entering characters.
Management 5 Select an account to change or delete. User Login/Job Accounting - Accounting List Register an account that is permitted to use this machine. (Up to 1000 can be registered.) Sort Account Name Name Account ID Account01 00001000 Account02 00002000 Account03 00003000 Account04 00004000 Account05 Search(Name) Search(ID) 1/2 Add 00005000 Detail Delete Close Status 10/10/2007 10:10 NOTE: Select [Name] or [Account ID] from the Sort pull-down menu to sort the account names.
Management of Pages Printed on page 7-18 and Printing an Accounting Report on page 7-22 for details. Use the procedure below to set the counting methods. 1 Press the System Menu key. 2 Press [User Login/Job Accounting]. 3 If user login is disabled, the user authentication screen appears. Enter your login user name and password and then press [Login]. For this, you need to log in with administrator privileges. The default login user name and password are both “3060”.
Management Scan Restriction Others The number of sheets scannable (except for copy) is restricted. Fax TX Restriction The number of sheets sendable by fax is restricted. This is displayed when the optional fax kit is installed. Applying Restriction Restriction can be applied in two modes as follows: Item Description Off No restriction given Counter Limit Restricts the print counter in one-page increments up to 999,999 copies. Reject Usage Restriction is applied.
Management Applying Limit of Restriction This specifies how the machine behaves when the counter has reached the limit of restriction. The table below describes the action taken. Item Description Immediately * Job stops when the counter reaches its limit. Subsequently Printing/scanning of the job continues but the subsequent job will be rejected. Alert Only Job continues while displaying an alert message. * The next job will be prohibited in sending or in storing in the box.
Management Types of the counts are as follows. Item Print Pages(by Function) Description • When Split is selected for Managing the Copy/ Print Count: Number of pages copied, printed, faxed*, and the total number of those pages are displayed. • When Total is selected for Managing the Copy/ Print Count: Number of pages printed (by copier and printer), number of pages faxed*, and the total number of those pages are displayed.
Management 5 Press [Check] at the function to check the count. The results will be displayed. User Login/Job Accounting - Total Job Accounting Print Pages(by Function): Check Print Pages (1 or 2 sided): Check User01 Scan Pages : Check Counter Reset: Execute Close 10/10/2007 Status 6 Confirm the count and press [Close]. 7 Press [Execute] of Counter Reset to reset the counter. 8 Press [Yes] on the screen to confirm the reset. The counter is reset.
Management NOTE: Select [Name] or [ID] from the Sort pull-down menu to sort the account names. Press [Search(Name)] or [Search(ID)] to search by account name or account ID. 6 Press [Detail]. 7 Press [Check] at the function to check the count. The results will be displayed. Account:** Print Pages(by Function): Check Print Pages (1 or 2 sided): Check User01 Scan Pages : Check Counter Reset: Execute Close Status 8 Confirm the count and press [Close].
Management 4 Press [Next] of Job Accounting Setting, [Next] of Default Setting, [Change] of Count by Paper Size, [Change] of Paper Size 1 to 5 and then [On]. 5 Select the paper size. User Login/Job Accounting - Paper Size 1 Select the paper sizes and types to count. Off On A3 A4 A5 B4 B5 Folio Ledger Legal Letter Statement All Media Types Plain Cancel Status OK 10/10/2007 6 Press [Media Type] to specify media type. 7 Select the media type and press [OK]. 8 Press [OK].
Management For the count by paper size, the report will be printed by size. Use the procedure below to print a job accounting report. 1 Check that Letter or A4 paper is loaded in the cassette. 2 Press the System Menu key. 3 Press [User Login/Job Accounting]. 4 If user login is disabled, the user authentication screen appears. Enter your login user name and password and then press [Login]. For this, you need to log in with administrator privileges.
Management Security Kit Operations Installing the optional Security Kit adds [Security] on the System Menu. Refer to Security on page 8-1 for the descriptions and operations related to the (Security) options.
8 Security This chapter explains the procedures and tips for installation and operation of the optional Data Security Kit (C) (Security Kit). Instructions for General Users (for Both General Users and Administrators) • • Security Kit Functions................................................... 8-2 Touch Panel Display after the Security Kit is Installed .
Security Instructions for General Users (for Both General Users and Administrators) Security Kit Functions The Security Kit enables overwriting and encryption. NOTE: If you install the Security Kit, the “Security functions running” message appears when the machine starts up and startup may take longer.
Security Encryption MFPs store the data of scanned originals and other data stored by users in the hard disk. It means the data could be possibly leaked or tampered with if the hard disk is stolen. The Security Kit encrypts data before storing it in the hard disk. It guarantees higher security because no data cannot be decoded by ordinary output or operations. Encryption is automatically performed and no special procedure is required. CAUTION: Encryption helps enhance security.
Security Touch Panel Display after the Security Kit is Installed Hard Disk Icon Display In Security Mode, the Security Kit has been properly installed and is running. The hard disk icon appears on the lower right side of the touch panel in Security Mode. Ready to copy. Copies 1 Copy Image Set Original. Auto Original Zoom Paper : -- : 100% : -- Preview Quick Setup Zoom 1-sided >>1-sided Duplex Org.
Security Instructions for Administrators (for Those in Charge of Installation and Operations of the Security Kit) Installing the Security Kit The Security Kit Contents The Security Kit package includes: • Security key • Installation manual (for service personnel) • The system will be initialized during installation of the Security Kit. This means that the data stored in the hard disk will be all erased. Special attention should be given if you install the Security Kit on the MFP currently used.
Security Changing Security Functions Changing Security Password Enter the security password to change security functions. You can customize the security password so that only the administrator can use the Security Kit. Use the procedure below to change the security password. 1 Press the System Menu key. 2 Press [T] and then [Security]. 3 If user login is disabled, the user authentication screen appears. Enter your login user name and password and then press [Login].
Security Use the procedure below to select the interface. 1 Press the System Menu key. 2 Press [T] and then [Security]. 3 If user login is disabled, the user authentication screen appears. Enter your login user name and password and then press [Login]. For this, you need to log in with administrator privileges. The default login user name and password are both “3060”. 4 Enter the security password. By default, the code is set 000000. 5 Press [Data Overwrite Method] of [Change].
Security System Initialization Erase the entire hard disk. Initialization should be performed while the machine is in standby. CAUTION: If you accidentally turn the main power switch off during initialization, the hard disk might possibly crash or initialization might fail. NOTE: If you accidentally turn the main power switch off during initialization, turn the main power switch on again. Initialization automatically restarts. Use the procedure below to initialize the system.
Security Warning Message If the encryption code information of the machine has been lost for some reason, the screen shown here appears when the power is turned on. Enter the encryption code. Encryption Code Follow the steps below. 1 OK Press [Encryption Code], and enter the encryption code that was entered during the installation of the Security Kit. CAUTION: Even though entering a different encryption code can also enable continuation of a job, this will erase all the data stored in the hard disk.
Security 8-10 ADVANCED OPERATION GUIDE
Appendix • • ADVANCED OPERATION GUIDE Paper............................................................... Appendix-2 Glossary ..........................................................
Paper Basic Paper Specifications This machine is designed to print on standard copy paper as used in regular ('dry') copiers and page printers such as laser printers. It also supports a variety of other types of paper that conform to the specifications given in this appendix. Be careful when choosing paper. Paper unsuitable for the machine may cause jams or may be wrinkled. Supported Paper Use standard copy paper for regular copiers or laser printers.
Choosing the Appropriate Paper This section describes guidelines for choosing paper. Condition Avoid using paper with bent corners or that is curled, dirty, or torn. Do not use paper that has a rough surface or paper fiber lint, or that is especially delicate. Use of paper in any of these conditions will not only deliver poor copies but may also cause jams and shorten the useful life of the machine.
Multi Purpose Tray Cassette or Multi Purpose Tray Youkei 2 (114 × 162 mm) Oficio II Youkei 4 (105 × 235 mm) 8.5 × 13.5" Size Entry (98 × 148 to 297 × 432 mm) 8K (273 × 394 mm) 16K (273 × 197 mm) 16K-R (197 × 273 mm) Smoothness The paper surface should be smooth, but it must be uncoated. With paper that is too smooth and slippery, several sheets may accidentally be supplied at once, causing jams.
To maintain the right level of moisture content, bear in mind the following considerations. • Store paper in a cool, well-ventilated place. • Store paper flat and unopened in the package. Once the package is opened, reseal it if the paper is not to be used for a while. • Store paper sealed in the original package and box. Put a pallet under the carton to keep it raised above the floor. Especially during rainy seasons keep the paper a sufficient distance away from wooden or concrete floors.
Special Paper This section describes printing onto special paper and print media. The following paper and media can be used.
Criteria Specifications Material Polyester Dimensional accuracy ±0.7 mm Squareness of corners 90° ±0.2° To avoid problems, use the Multi Purpose tray for transparencies and load transparencies with the long side facing the machine. If transparencies jam frequently at output, try pulling the leading edge of sheets gently as they are ejected. Hagaki Before loading Hagaki into the Multi Purpose tray, fan them and align the edges. If the Hagaki paper is curled, straighten it before loading.
If paper jams occur, load fewer envelopes at once. To prevent paper jams when printing onto multiple envelopes, do not allow more than ten envelopes remain in the output tray at once. Thick Paper Before loading thick paper in the Multi Purpose tray, fan it and align the edges. Some thick paper may still have rough edges developed by a paper cutter on the back side. Remove any such rough edges just as with Hagaki by placing the paper on a flat surface and rubbing the edges gently a few times with a ruler.
Glossary Accessibility The machine is designed featuring good accessibility even for the elderly and those who are physically challenged or visually impaired. Touch panel characters can be enlarged while the touch panel is adjustable in two angles. Additional Memory An additional memory (optional) is used for increasing the memory capacity of this machine as well as enabling to print more sophisticated data. The 128 MB, 256 MB, or 512 MB modules are available for this machine.
DHCP (Dynamic Host Configuration Protocol) Dynamic Host Configuration Protocol (DHCP) that automatically resolves IP addresses, subnet masks, and gateway addresses on a TCP/IP network. DHCP minimizes the load of network management employing a large number of client computers because it relieves individual clients including printers from the IP address being assigned. dpi(dots per inch) A unit for resolution, representing the number of dots printed per inch (25.4 mm).
Multi Purpose (MP) Tray The paper supply tray on the right side of the machine. Use this tray instead of the cassettes when printing onto envelopes, Hagaki, transparencies, or labels. NetBEUI (NetBIOS Extended User Interface) An interface, developed by IBM in 1985, as an update from NetBIOS. It enables more advanced functions on smaller networks than other protocols such as TCP/IP, etc. It is not suitable for larger networks due to lack of routing capabilities to choose the most appropriate routes.
SMTP (Simple Mail Transfer Protocol) A protocol for E-mail transmission over the Internet or an intranet. It is used for transferring mail between mail servers as well as for sending mail from clients to their servers. Status Page The page lists machine conditions, such as the memory capacity, total number of prints and scans, and paper source settings. Subnet Mask A 32-bit numerical value that defines how many bits of the IP address is specified for the network address to identify the network.
Index Index Numerics C 1-sided/2-sided Selection 2-11 Centering 2-7 Clean the Main Charger 6-70 Collate/Offset Copying 1-12 Color Background Density Adjustment 2-24 Color / Grayscale / Monochrome Selection 2-25 Combine Mode 1-20 2-in-1 Mode 1-20 4-in-1 Mode 1-20 Page Boundary Lines 1-21 Continuous Scan Copy 1-45 Send 2-26 Conventions in This Guide vi Copy Originals 1-2 Setup 6-38 Copy Settings 6-38 Auto % Priority 6-40 Auto Paper Selection 6-40 Border Erase for Back Page 6-38 Paper Selection 6-39 Preset
Index Custom Box List 4-12 Deleting 4-13 Document List 4-13 Moving/Joining/Deleting 4-17 Overlaying Images 4-10 Previewing 4-15 Printing a Document 4-9, 4-18 Sending a Document 4-18 Storing a Document 4-7 User Privileges 4-18 Viewing/Editing 4-14 D DHCP Appendix-10 Date/Timer 6-71 Auto Error Clear 6-76 Auto Panel Reset 6-73 Auto Sleep 6-74 Date Format 6-72 Date/Time 6-71 Time Zone 6-72 Default 6-21 Auto Image Rotation 6-31 Border Erase 6-28 Collate/Offset 6-30 Color 6-23 Continuous Scan 6-21 Density 6-26
Index G M Glossary Appendix-9 Grayscale Appendix-10 Management 7-1 Margin/Centering Mode 1-23 Memo 1-40 Mirror Image 1-49 Mixed Sized Originals 1-7 Combinations 1-7 Copy Size 1-8 Send 2-8 Multi Purpose (MP) Tray Appendix-11 I IP Address 6-56, Appendix-10 Image Quality Copy 1-43 J Job Available Status 5-2 Canceling 5-14 Checking History 5-10 Checking Status 5-2 Detailed Information 5-7 Detailed Information of Histories 5-11 Details of the Status Screens 5-3 Displaying History Screen 5-10 Displaying Sta
Index Size viii Size Selection 1-2, 2-2 Output Destination 1-16 Output Tray 6-20 P POP3 Appendix-11 PPM Appendix-11 Page Numbering 1-38 Paper Appendix-2 Appropriate Paper Appendix-3 Auto Selection 6-14 Cassette 6-8 Custom 6-6 Default Paper Source 6-13 Multi Purpose Tray 6-9 Paper Source for Cover Paper 6-15 Setup 6-6 Size viii Special Paper 6-15, Appendix-6 Specifications Appendix-2 Weight 6-10 Paper Selection 1-4 Cassette 1-4 Multi Purpose Tray 1-5 PostScript Appendix-11 Printer 3-1 Setup 6-48 Printer Dr
Index Sending Functions 2-1 Sending Settings 6-44 High-compression PDF Auto Color 6-45 Quick Setup Registration 6-44 Sending Size Selection 2-4 Setup AppleTalk 6-58 Copy 6-38 Date/Timer 6-71 NetWare 6-57 Network 6-56 Printer 6-48 Send 6-44 TCP/IP 6-56, 6-57 Sharpness 2-23 Shortcuts 1-58 Adding 1-58 Editing and Deleting 1-59 Staple 1-14 Status / Job Cancel 5-1 Status Page Appendix-12 Subnet Mask Appendix-12 Supplies Checking the Remaining Amount 5-16 Switching Unit of Measurement 6-17 Switching the Language
Index Index-6 ADVANCED OPERATION GUIDE
UTAX GmbH, Ohechaussee 235, 22848 Norderstedt, Germany