
Installation Guide


3500W/240V
Universal Element
Elemento universal
• Screw-in
• Gasket included
#
0362342
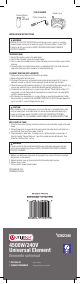
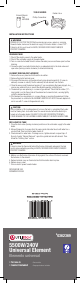
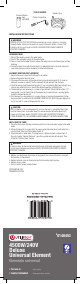
Element Wrench
Item
#0159985
TOOLS NEEDED:
Garden Hose
Phillips Screwdriver
DRAINING TANK
1. Shut off the electric power to the water heater.
2. Shut off the cold water supply to the water heater.
3. Turn on a remote hot water faucet to relieve the water pressure and leave open to allow
draining.
4. Connect a water hose (which terminates to an adequate drain) to the drain valve and
open valve (turning counter clockwise) to allow tank draining.
ELEMENT REMOVAL/REPLACEMENT
1. Remove the access panel and fold back the insulation.
2. Remove the plastic terminal cover.
3. Disconnect the two wires on the element and using element wrench kit (if screw-in
element) unscrew or unbolt (if bolt-in element) the old element from the tank.
4. Clean the area around the element opening. If you are replacing the lower element, also
remove any sediment from or around the element opening, inside the tank.
5. The element you are replacing is a screw-in type element. Check that the rubber (“O”-
ring) gasket is on the thread side of the element and screw into tank, securing tightly
using the element wrench kit.
6. If the element you are replacing is a square flange or round end type element, follow
the procedures as outlined in the ELEMENT ADAPTER KIT. NOTE: Element adapter kits
are for use with 1″screw-in flange elements only.
WARNING:
HAZARD OF ELECTRIC SHOCK! Before removing any access panels or servicing
the water heater, make sure the electrical supply to the water heater is turned “OFF”.
Failure to do this could result in DEATH, SERIOUS BODILY INJURY AND/OR
PROPERTY DAMAGE.
CAUTION:
After installation of this heating element, to insure the tank is completely filled, water
must be flowing from a hot water faucet for several minutes before the electricity is
turned on to the water heater. FAILURE TO FOLLOW THIS INSTRUCTION WILL
CAUSE DAMAGE TO THE HEATING ELEMENT AND/OR THE WATER HEATER TANK.
REFILLING THE TANK
1. Close the drain valve (turning clockwise) and turn on the cold water supply to the water
heater.
2. Allow all trapped air to escape from the open remote hot water faucet until water has a
constant flow. Then turn the hot water faucet off.
3. Check element for water leaks. If leakage occurs, tighten element or repeat steps 2
through 4 under “Element Removal”, reposition gasket and reinstall element. Then
follow the “Refilling Tank” section.
WARNING:
Failure to place the thermostat behind the thermostat bracket and against the tank
could cause overheating resulting in DEATH, SERIOUS BODILY INJURY, AND/OR
PROPERTY DAMAGE.
4. Making sure the thermostat remains firmly against the surface of the tank, reconnect
the two wires to the element.
5. Replace terminal cover on thermostat and fold insulation back in place.
6. Replace access panel.
7. Turn on electric power to water heater.
PACKAGED IN USA
ASSEMBLED IN USA
• Enroscable
• Empaquetadura incluida
Item/Artículo
#
0362342
Model/Modelo #9008067046
Part/Pieza
#
321879-000
INSTALLATION INSTRUCTIONS